Was ihr bauen könntWhat you can build

Bauen und RäumeBuilding and spaces

Gemeinschaftsküche, Werkstatt, Bauwagen, Jurte, Lehmbau, Trockenmauer. Die Hüllen, in denen das Leben stattfindet.

Ein Fachwerkhaus im Rohbau mit Strohballen und Lehmputz, ein Holzgerüst davor, Menschen bei der Arbeit
Schon heute realAlready real today

Die Villa Strohbunt in Sieben Linden war 2004 das erste Gebäude in Deutschland mit einer Baugenehmigung für Strohballen als Baustoff, komplett von Hand und nur aus regionalen und recycelten Materialien errichtet. Ein Jahr später folgte Strohpolis, dreigeschossig, 530 Quadratmeter, damals das größte Strohballenwohnhaus Europas. Aus den Nachweisen für dieses eine Haus entstand die offizielle Zulassung für Baustroh, mit der heute bundesweit bis in den dritten Stock gebaut werden darf.

AufwandEffort
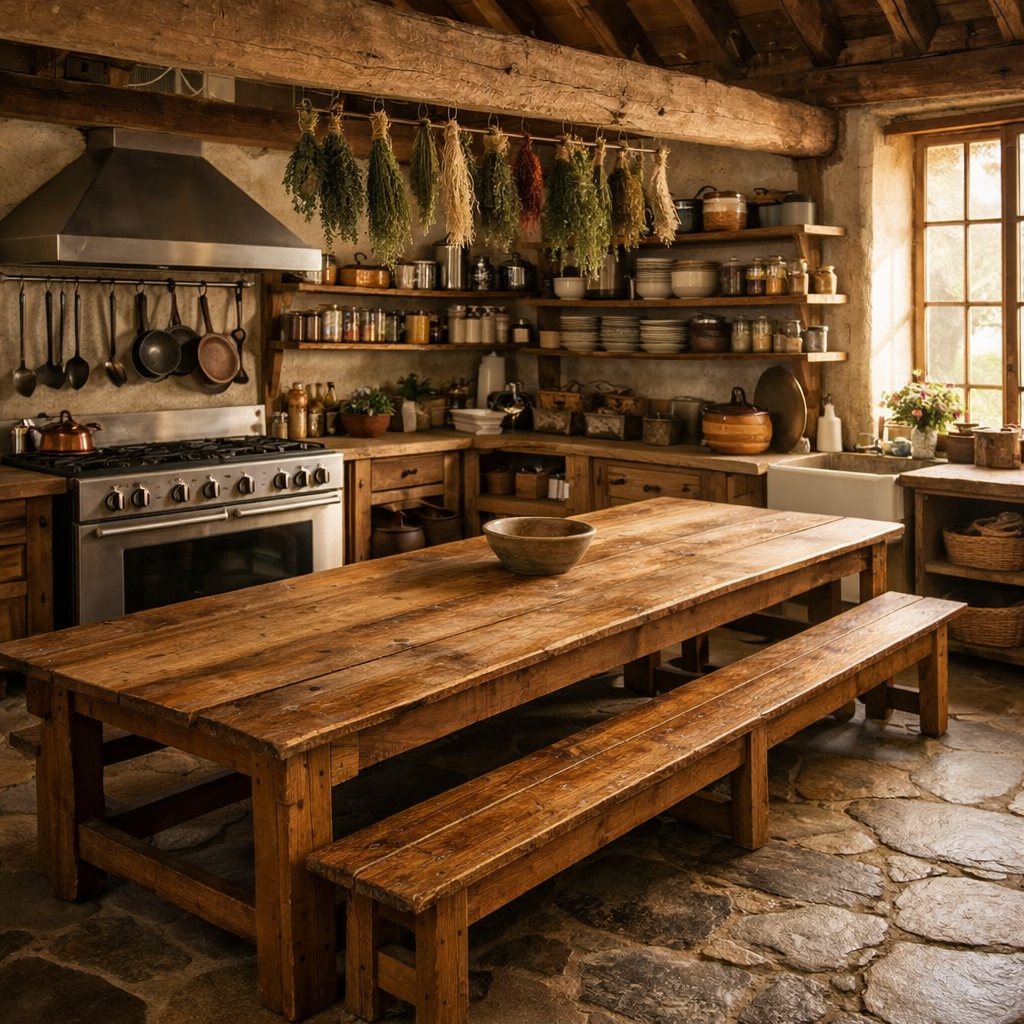
Gemeinschaftsküche, Communal kitchen
Längeres VorhabenA longer projectMit erfahrener HandNeeds an experienced hand

GemeinschaftskücheCommunal kitchen

3 Personen plus Elektriker und Installateur, schweres Heben3 people plus an electrician and a plumber, heavy lifting

Das eigentliche Herz jeder Gemeinschaft. Hier wird nicht nur gekocht, hier entstehen die Gespräche, die später zu Entscheidungen werden. Baut sie größer, als ihr denkt.The real heart of any community. This is not only where the cooking happens, it is where the conversations start that later turn into decisions. Build it bigger than you think you need.

So wird gebautHow it is built
Großer Herd, viel Arbeitsfläche, offene Regale statt Hängeschränke, ein Tisch, an dem gearbeitet und gegessen wird. Fußboden, den man wischen kann.A big range, plenty of worktop, open shelves instead of wall units, and a table people work at and eat at. A floor you can mop.
KostenCost
3.000 bis 25.000 Euro3,000 to 25,000 euros
Erster SchrittFirst step
Zürst klären, ob nur intern gekocht wird oder auch für Gäste. Das entscheidet über alles Weitere.First settle whether you only cook for yourselves or for guests as well. Everything else follows from that.
Schritt für SchrittStep by step
Gemeinschaftsküche, Grundriss Zeile 300 65 Gang 140 Tisch 300 660 1 2 3 4 5 6 7 8 1 Doppelspüle 100 x 60 cm 2 Handwaschbecken 40 x 30 cm 3 Gastroherd 6 Flammen, 100 x 70 cm 4 Dunstabzug 800 m³/h, Rohr 150 mm 5 Arbeitsplatte Buche, Höhe 92 cm 6 Arbeitsdreieck Spüle Herd Vorrat 7 Offene Regale ab 140 cm Höhe 8 Esstisch, Länge 300 cm Nicht maßstäblich, Maße in cm
Bauskizze Gemeinschaftsküche, am Handy seitlich wischenMeasured sketch of Communal kitchen, swipe sideways on a phone

Bevor du anfängst

Wird ein vorhandener Raum zur Küche, ist das eine Nutzungsänderung nach der Landesbauordnung, und dafür ist das Bauamt zuständig. Fragt dort, ob bei euch eine Anzeige reicht oder ein Antrag nötig ist, und bringt einen Grundriss mit. Sobald ihr gegen Geld bewirtet, kommt das Veterinäramt des Landkreises dazu, mit Anmeldung, einem Hygienekonzept nach HACCP und der Belehrung nach Paragraf 43 Infektionsschutzgesetz für alle, die mit offenen Lebensmitteln umgehen. Die reale Gefahr ist der Fettbrand. Niemals mit Wasser löschen, sondern eine Löschdecke und einen Fettbrandlöscher der Klasse F bereithalten. Meldet die Küche eurer Gebäudeversicherung, sonst zahlt sie im Brandfall nicht. Und halte den Unterschied auseinander: verfahrensfrei heißt nur, dass du keinen Antrag stellst. Zulässig ist das Vorhaben damit noch nicht, im Außenbereich liegt genau da die eigentliche Hürde.

Das brauchst du

  • 1 Gastroherd 6 Flammen mit Backofen, 100 x 70 cm gebraucht ab 600 Euro
  • 6 laufende Meter Arbeitsplatte Buche 4 cm, 65 cm tief durchgehende Arbeitsfläche
  • 1 Doppelspüle Edelstahl 100 x 60 cm für zwanzig Esser
  • 1 separates Handwaschbecken 40 x 30 cm Pflicht bei Bewirtung
  • 14 laufende Meter Regalbrett Fichte 30 x 3 cm offene Regale statt Hängeschränke
  • 28 Stahlkonsolen 30 cm, Traglast je 60 kg Abstand 80 cm
  • 25 m² Linoleum 3,2 mm oder Feinsteinzeug R10 wischbarer Boden
  • 12 laufende Meter Kantholz 6 x 8 cm Unterkonstruktion der Platte
  • 1 Dunstabzug 800 m³/h, Abluftrohr 150 mm plus Zuluftgitter 20 x 20 cm
  • 1 Zuleitung 400 V, 5 x 4 mm², abgesichert 3 x 16 A für Herd und Spülmaschine

Werkzeug

Akkuschrauber, Handkreissäge mit Führungsschiene, Stichsäge, Lochsäge 35 mm, Schlagbohrmaschine, Wasserwaage 120 cm, Fliesenschneider, Silikonspritze, Schraubzwingen

Schritt für Schritt

  1. Nutzung festlegen. Klärt zuerst: intern kochen oder bewirten. Bei Bewirtung braucht ihr ein zweites Handwaschbecken, abwaschbare Wände bis 200 cm Höhe und einen Fettabscheider.
  2. Grundriss mit Kreide aufzeichnen. Gang zwischen zwei Zeilen mindestens 120 cm, besser 140 cm, Arbeitshöhe 92 cm, dazu 3 laufende Meter freie Fläche je kochender Person.
  3. Leitungen legen. Abwasser DN 50 zur Spüle, DN 40 zum Handwaschbecken, Gefälle 2 cm je Meter. Starkstrom zieht ihr selbst ein, anschließen darf nur eine Elektrofachkraft.
  4. Boden verlegen. Linoleum vollflächig kleben oder Feinsteinzeug im Dünnbett setzen, Hohlkehlsockel 10 cm hochziehen, sonst zieht Wischwasser in die Wandfuge.
  5. Unterkonstruktion stellen. Rahmen aus Kantholz 6 x 8 cm, Querriegel alle 60 cm, Sockel 12 cm zurückgesetzt für die Zehen, mit Winkelverbindern und je vier 5 x 60 Schrauben fixieren.
  6. Arbeitsplatte auflegen. Spülenausschnitt mit der Stichsäge, alle Schnittkanten zweimal satt mit Leinölfirnis streichen, sonst quillt die Buche. Von unten mit 4 x 30 Schrauben anziehen.
  7. Regale montieren. Konsolen alle 80 cm, in Massivwand mit 10er Dübel und 8 x 80 Schrauben, unterstes Brett auf 140 cm Höhe.
  8. Spüle, Abzug und Licht. Eckventile und Siphon setzen, Abluft mit höchstens zwei Bögen nach außen führen, Leuchten so hängen, dass niemand im eigenen Schatten schneidet.

Zeit und Kosten

Drei Personen brauchen 12 bis 20 Arbeitstage über etwa acht Wochen, dazu je einen Tag Elektriker und Installateur. Material 3.000 Euro mit gebrauchter Gastrotechnik, bis 25.000 Euro bei neuer Ausstattung.

Die drei häufigsten Fehler

  • Zu klein geplant. Eine Küche für zehn Leute versorgt nach zwei Jahren fünfundzwanzig. Plant Herd und Arbeitsfläche gleich für die doppelte Zahl, der Aufpreis liegt bei etwa 15 Prozent.
  • Hängeschränke eingebaut. Niemand findet darin etwas, alle stoßen sich den Kopf. Offene Regale ab 140 cm halten die Küche in Ordnung.
  • Handwaschbecken vergessen. Wer später Gäste bewirtet, muss Wand aufstemmen und Abwasser neu verlegen. Der zweite Anschluss kostet im Rohbau 150 Euro, nachträglich 1.500 Euro.

Before you start

Turning an existing room into a kitchen counts as a change of use under the Landesbauordnung (the building code of your federal state), and the Bauamt (the local building authority) handles that. Ask them whether a notification is enough where you are or whether you have to file an application, and take a floor plan with you. As soon as you serve food for money the Veterinäramt (the district veterinary office, which oversees food hygiene) comes into it too, with registration, a hygiene plan to HACCP and the briefing under Section 43 of the Infektionsschutzgesetz (the German infection protection act) for everyone who handles open food. The real danger is a fat fire. Never put water on it. Keep a fire blanket and a class F extinguisher for fat fires within reach. Tell your buildings insurer about the kitchen, or it will not pay out after a fire. And keep the two things apart: verfahrensfrei (exempt from the approval procedure) only means that you file no application. It does not make the project permissible, and in the Außenbereich (the open land outside the built-up area) that is exactly where the real hurdle sits.

What you need

  • 1 commercial range, 6 burners with oven, 100 x 70 cm from 600 euros second hand
  • 6 linear metres of beech worktop, 4 cm thick, 65 cm deep one continuous run
  • 1 stainless steel double sink, 100 x 60 cm for twenty people at the table
  • 1 separate hand basin, 40 x 30 cm required once you serve guests
  • 14 linear metres of spruce shelf board, 30 x 3 cm open shelves instead of wall units
  • 28 steel shelf brackets, 30 cm, 60 kg each spaced 80 cm apart
  • 25 m² of linoleum 3.2 mm or porcelain stoneware, slip rating R10 a floor you can mop
  • 12 linear metres of squared timber, 6 x 8 cm the frame under the worktop
  • 1 extractor hood, 800 m³/h, 150 mm duct plus an air inlet grille 20 x 20 cm
  • 1 supply cable, 400 V, 5 x 4 mm², fused at 3 x 16 A for the range and the dishwasher

Tools

Cordless drill driver, circular saw with a guide rail, jigsaw, 35 mm hole saw, hammer drill, 120 cm spirit level, tile cutter, silicone gun, clamps

Step by step

  1. Decide how it will be used. Settle this first: cooking for yourselves or serving guests. If you serve guests, you need one more hand basin, washable walls up to 200 cm and a grease trap.
  2. Chalk the layout on the floor. The aisle between two runs is at least 120 cm, better 140 cm, working height 92 cm, and allow 3 linear metres of clear worktop for every person cooking.
  3. Run the services. DN 50 waste to the sink, DN 40 to the hand basin, fall of 2 cm per metre. You can pull the three phase cable yourselves, but only a qualified electrician may connect it.
  4. Lay the floor. Glue the linoleum down over the whole area or set the stoneware in thin bed adhesive, then take a coved skirting 10 cm up the wall, otherwise mop water works its way into the joint.
  5. Build the base frame. A frame of squared timber 6 x 8 cm, cross rails every 60 cm, the plinth set back 12 cm so your toes fit, fixed with angle brackets and four 5 x 60 screws each.
  6. Fit the worktop. Cut the sink opening with the jigsaw, then coat every cut edge twice, generously, with boiled linseed oil, or the beech will swell. Pull it down from underneath with 4 x 30 screws.
  7. Put up the shelves. Brackets every 80 cm, into solid walls with 10 mm plugs and 8 x 80 screws, the lowest board at 140 cm.
  8. Sink, extractor and light. Fit the isolating valves and the trap, take the extract duct outside with no more than two bends, and hang the lights so that nobody chops in their own shadow.

Time and cost

Three people need 12 to 20 working days spread over about eight weeks, plus one day each from an electrician and a plumber. Materials come to 3,000 euros with second hand commercial kit, up to 25,000 euros with everything new.

The three most common mistakes

  • Planned too small. A kitchen built for ten people is feeding twenty five two years later. Size the range and the worktop for double from the start, it adds about 15 per cent to the bill.
  • Wall units fitted. Nobody ever finds anything in them and everyone bangs their head. Open shelves from 140 cm up keep the kitchen tidy.
  • Hand basin forgotten. Serve guests later and you will be chasing out the wall and rerouting the waste pipe. The second connection costs 150 euros while the shell is open, 1,500 euros afterwards.

Worauf es ankommtWhat matters hereSobald ihr gegen Geld bewirtet, greift das Lebensmittelrecht: Anmeldung beim Veterinäramt, Hygieneschulung, getrennte Handwaschbecken. Das nachträglich einzubauen ist teuer.As soon as you serve food for money, food law applies: registration with the Veterinäramt (the district veterinary office, which oversees food hygiene), hygiene training and a separate hand basin. Fitting that in afterwards costs real money.

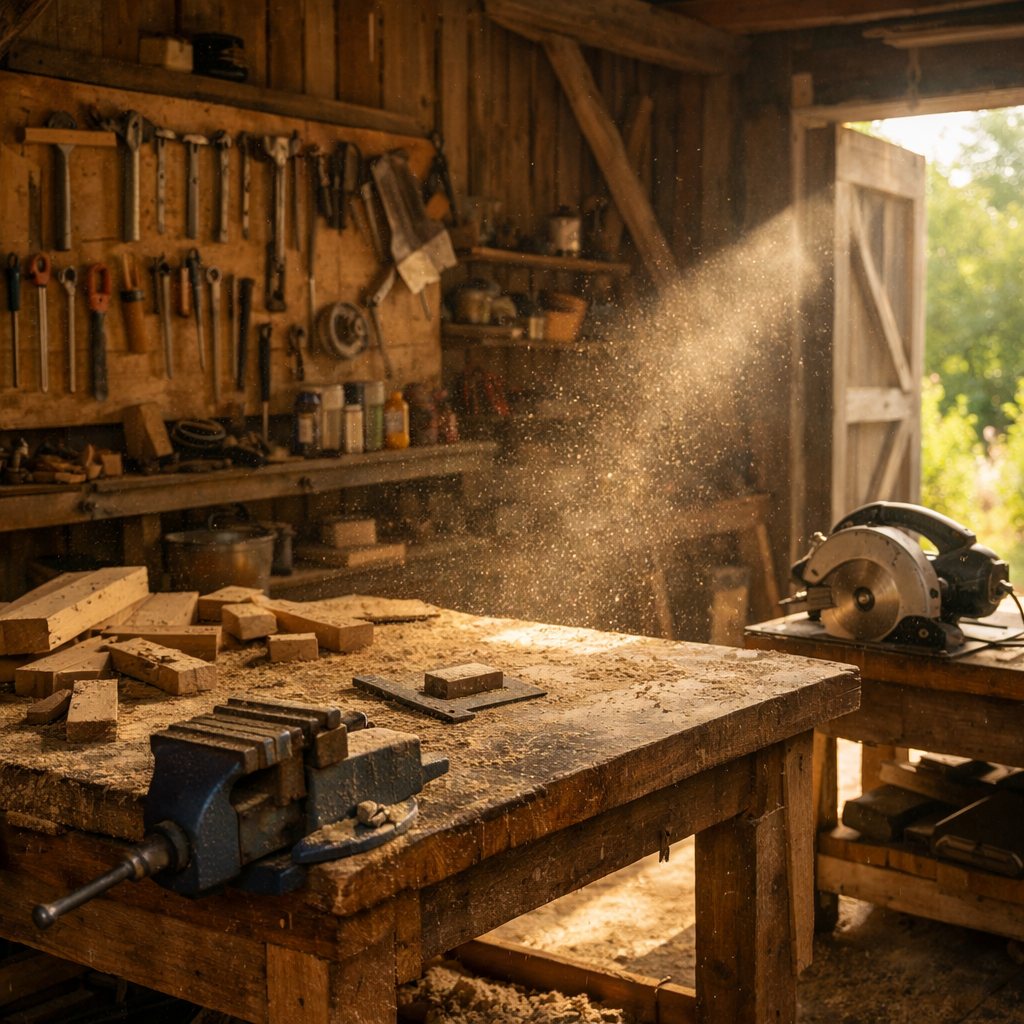
Offene Werkstatt, Open workshop
Wochen bis MonateWeeks to monthsMit erfahrener HandNeeds an experienced hand

Offene WerkstattOpen workshop

2 bis 3 Personen plus Elektrofachkraft, schweres Heben2 to 3 people plus a qualified electrician, heavy lifting

Alles, was ihr selbst reparieren könnt, müsst ihr nicht bezahlen. Eine gemeinsame Werkstatt spart nicht nur Geld, sie ist auch der Ort, an dem Fähigkeiten von einem zum nächsten wandern.Anything you can mend yourselves is something you do not have to pay for. A shared workshop saves money, and it is also the place where skills pass from one person to the next.

So wird gebautHow it is built
Feste Hobelbank, gutes Licht von zwei Seiten, Absaugung, Werkzeugwand mit aufgemalten Umrissen. Getrennte Bereiche für Holz und Metall.A solid joiner's bench, good light from two sides, dust extraction and a tool wall with the outlines painted on. Separate areas for wood and metal.
KostenCost
1.500 bis 10.000 Euro1,500 to 10,000 euros
Erster SchrittFirst step
Eine Werkzeugwand mit Schattenrissen anlegen. Nichts hält eine Gemeinschaftswerkstatt so zuverlässig in Ordnung.Set up a tool wall with painted outlines. Nothing keeps a shared workshop tidy as reliably.
Schritt für SchrittStep by step
Offene Werkstatt, Grundriss Tor 200 80 300 250 700 1 2 3 4 5 6 7 8 9 1 Hobelbank 200 x 60 cm 2 Umlauf 80 cm ringsum 3 Werkzeugwand mit Schattenrissen 4 Kreissäge, Auslauf 250 cm 5 Absauganlage 1000 m³/h 6 Absaugrohr 100 mm mit Schieber 7 Trennwand Gipsfaser 12,5 mm 8 Metallbereich, 3 m Abstand 9 Not-Aus und Unterverteilung Nicht maßstäblich, Maße in cm
Bauskizze Offene Werkstatt, am Handy seitlich wischenMeasured sketch of Open workshop, swipe sideways on a phone

Bevor du anfängst

Wird eine Scheune zur Werkstatt, ist das eine Nutzungsänderung, und die klärt ihr beim Bauamt. Fragt dort, ob eine Anzeige reicht, und bringt einen Grundriss mit den geplanten Maschinenplätzen mit. Solange nur Mitglieder für den eigenen Bedarf arbeiten, braucht ihr kein Gewerbe, sobald ihr gegen Geld für Dritte arbeitet, schon. Die Elektroinstallation macht eine Fachkraft, ortsveränderliche Geräte werden nach DGUV Vorschrift 3 wiederkehrend geprüft. Gefährlich sind die stationären Maschinen. Kreissäge und Hobel laufen nur mit Schutzhaube und Spaltkeil, und niemand arbeitet allein an ihnen. Der zweite Punkt ist der Lärm, von 22 bis 6 Uhr und sonntags ist Ruhe, auch auf dem eigenen Hof. Und halte den Unterschied auseinander: verfahrensfrei heißt nur, dass du keinen Antrag stellst. Zulässig ist das Vorhaben damit noch nicht, im Außenbereich liegt genau da die eigentliche Hürde.

Das brauchst du

  • 1 Hobelbank Buche 200 x 60 cm mit zwei Zangen fester Arbeitsplatz
  • 1 Werkzeugwand Multiplex 18 mm, 240 x 120 cm für aufgemalte Schattenrisse
  • 1 Absauganlage 750 W, 1000 m³/h für Säge, Hobel und Schleifer
  • 8 LED-Wannenleuchten 150 cm, je 5000 Lumen ergibt 500 Lux ohne Schlagschatten
  • 1 Unterverteilung mit 2 CEE-Dosen 16 A und FI-Schutzschalter 30 mA Pflicht in jeder Werkstatt
  • 1 Not-Aus-Taster neben der Tür wirft alle Maschinenstromkreise ab
  • 20 m² OSB 25 mm auf Lagerhölzern 6 x 8 cm ebener, kehrbarer Boden
  • 1 Feuerlöscher 6 kg Schaum ABF und 1 Löschdecke sichtbar am Ausgang
  • 1 Metalleimer mit Deckel für ölige Lappen, die sich sonst selbst entzünden

Werkzeug

Akkuschrauber, Handkreissäge, Kappsäge, Stichsäge, Schlagbohrmaschine, Wasserwaage 120 cm, Kreidesprühdose, Zollstock, Anschlagwinkel 40 cm

Schritt für Schritt

  1. Raum wählen. Mindestens 25 m² für vier gleichzeitig Arbeitende, lichte Höhe 250 cm, Tor mindestens 200 cm breit, damit ein Türblatt oder eine Palette durchpasst.
  2. Boden herrichten. OSB 25 mm auf Lagerhölzern 6 x 8 cm im Abstand von 50 cm, alle 25 cm mit 4,5 x 60 Schrauben befestigt. Auf schiefem Boden wandern Maschinen.
  3. Strom legen. Unterverteilung neben der Tür, FI-Schutzschalter 30 mA für alle Kreise, jede große Maschine auf eigenem Automaten, Steckdosen auf 120 cm Höhe alle 150 cm.
  4. Licht hängen. Wannenleuchten quer zur Werkbank, Abstand 150 cm, Unterkante 250 cm, über der Hobelbank zusätzlich eine Schwenkleuchte.
  5. Hobelbank aufstellen. Frei im Raum mit 80 cm Umlauf ringsum, an vier Punkten mit Winkeln und 8 x 80 Schrauben im Boden verankern.
  6. Werkzeugwand bauen. Multiplex 18 mm auf Lattung 4 x 6 cm im Abstand von 60 cm, mit 5 x 80 Schrauben in die Wand. Werkzeug auflegen, umfahren, Umrisse weiß ausmalen.
  7. Maschinen stellen. Kreissäge mit 250 cm freiem Auslauf nach vorn und hinten, Absaugrohr 100 mm mit Schieber an jeder Maschine, Erdungsdraht gegen statische Aufladung.
  8. Bereiche trennen. Metall und Holz mindestens 3 m auseinander, dazwischen eine Wand aus Gipsfaserplatte 12,5 mm.
  9. Regeln aufhängen. Liste an der Tür mit Namen, Maschine, Datum und Unterschrift. Wer nicht draufsteht, fährt nicht.

Zeit und Kosten

Zwei bis drei Personen brauchen 6 bis 12 Arbeitstage plus einen halben Tag Elektrofachkraft. Ausstattung ab 1.500 Euro mit gebrauchten Maschinen, bis 10.000 Euro mit Abrichte, Bandsäge, Absaugung und neuer Verteilung.

Die drei häufigsten Fehler

  • Kein FI-Schutzschalter. Feuchte Hände an einem alten Kabel mit Metallgehäuse genügen. Der Schutzschalter mit 30 mA kostet 40 Euro und ist vorgeschrieben.
  • Werkzeug in Kisten. Was man nicht sieht, sucht man zwanzig Minuten und kauft es dann doppelt. Schattenrisse an der Wand halten Ordnung zuverlässiger als jede Absprache.
  • Funken neben Spänen. Ein Funke vom Winkelschleifer glimmt stundenlang im Sägemehl und zündet nachts. Vor dem Schweißen kehren, danach eine Stunde Brandwache.

Before you start

Turning a barn into a workshop is a change of use, and you sort that out with the Bauamt (the local building authority). Ask whether a notification is enough and take a floor plan showing where the machines will stand. As long as only members work there for their own needs you do not need to register a trade, but the moment you work for third parties for money you do. A qualified electrician does the wiring, and portable equipment is retested at regular intervals under DGUV Vorschrift 3 (the German accident insurers' rule on electrical equipment). The dangerous part is the stationary machines. The table saw and the planer only run with the guard and the riving knife in place, and nobody works on them alone. The second point is noise: from 22.00 to 6.00 and on Sundays it stays quiet, even on your own yard. And keep the two things apart: verfahrensfrei (exempt from the approval procedure) only means that you file no application. It does not make the project permissible, and in the Außenbereich (the open land outside the built-up area) that is exactly where the real hurdle sits.

What you need

  • 1 beech joiner's bench, 200 x 60 cm, with two vices a fixed place to work
  • 1 tool wall of 18 mm Multiplex plywood, 240 x 120 cm for the painted outlines
  • 1 dust extractor, 750 W, 1,000 m³/h for the saw, the planer and the sander
  • 8 LED batten lights, 150 cm, 5,000 lumens each gives 500 lux with no hard shadows
  • 1 sub distribution board with 2 CEE sockets, 16 A, and a 30 mA RCD required in every workshop
  • 1 emergency stop button beside the door drops every machine circuit at once
  • 20 m² of OSB 25 mm on bearers of 6 x 8 cm a level floor you can sweep
  • 1 fire extinguisher, 6 kg ABF foam, and 1 fire blanket in plain sight by the door
  • 1 metal bin with a lid for oily rags, which otherwise catch fire on their own

Tools

Cordless drill driver, circular saw, mitre saw, jigsaw, hammer drill, 120 cm spirit level, chalk spray, folding rule, 40 cm try square

Step by step

  1. Pick the room. At least 25 m² for four people working at once, 250 cm clear height, and a door at least 200 cm wide so a door leaf or a pallet fits through.
  2. Sort out the floor. OSB 25 mm on bearers of 6 x 8 cm at 50 cm centres, screwed down every 25 cm with 4.5 x 60 screws. On an uneven floor the machines walk.
  3. Run the power. The sub board beside the door, a 30 mA RCD on every circuit, each large machine on its own breaker, sockets at 120 cm height every 150 cm.
  4. Hang the lights. The batten lights run across the bench, 150 cm apart, bottom edge at 250 cm, plus one swing arm lamp over the joiner's bench.
  5. Set up the bench. Free standing in the room with 80 cm clear all round, anchored to the floor at four points with brackets and 8 x 80 screws.
  6. Build the tool wall. Multiplex plywood 18 mm on battens of 4 x 6 cm at 60 cm centres, fixed to the wall with 5 x 80 screws. Lay each tool on it, draw round it, fill the outline in white.
  7. Place the machines. The table saw needs 250 cm of clear run in front and behind, a 100 mm extraction pipe with a blast gate at every machine, and an earth wire against static.
  8. Keep the areas apart. Metal and wood at least 3 m apart, with a wall of 12.5 mm gypsum fibreboard in between.
  9. Put the rules on the wall. A list by the door with name, machine, date and signature. If your name is not on it, you do not switch it on.

Time and cost

Two to three people need 6 to 12 working days plus half a day from a qualified electrician. Kitting it out starts at 1,500 euros with second hand machines and runs to 10,000 euros with a surface planer, a bandsaw, extraction and a new distribution board.

The three most common mistakes

  • No RCD. Damp hands on an old cable with a metal housing are enough. A 30 mA device costs 40 euros and is required by law.
  • Tools in boxes. What you cannot see you hunt for twenty minutes and then buy twice. Painted outlines on the wall keep order more reliably than any agreement.
  • Sparks next to shavings. A spark off the angle grinder smoulders in sawdust for hours and flares up at night. Sweep before welding, then keep watch for an hour afterwards.

Worauf es ankommtWhat matters hereFür Maschinen braucht es eine klare Einweisungsregel. Wer nicht eingewiesen ist, fährt nicht. Das rettet Finger und Freundschaften.Machines need a clear rule about training. Anyone who has not been shown how does not switch it on. That saves fingers and friendships.

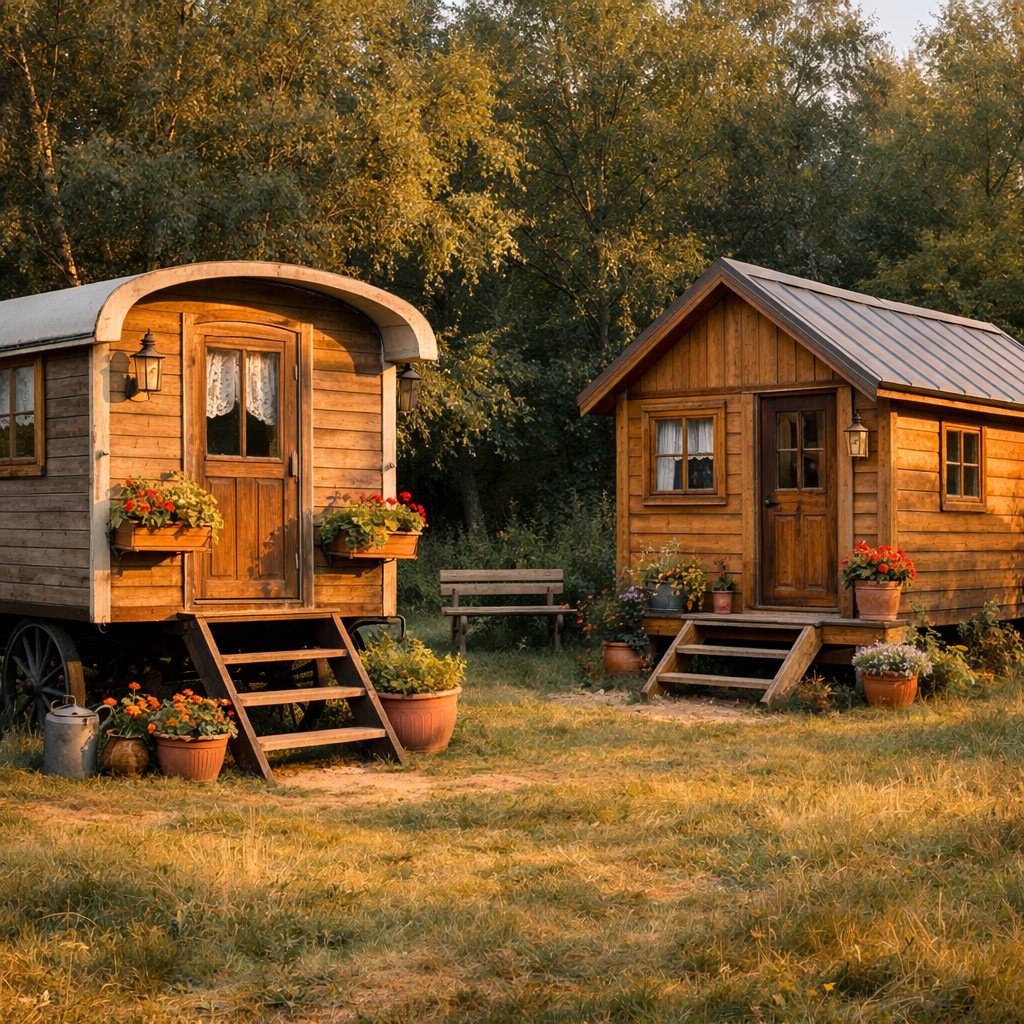
Bauwagen und Tiny House, Bauwagen and tiny house
Wochen bis MonateWeeks to monthsMit erfahrener HandNeeds an experienced hand

Bauwagen und Tiny HouseBauwagen and tiny house

2 Personen, schweres Heben2 people, heavy lifting

Der schnellste Weg zu eigenem Raum. Ein ausgebauter Bauwagen ist in wenigen Monaten bewohnbar und kostet einen Bruchteil eines Anbaus. Für die Anfangsjahre einer Gemeinschaft oft die realistischste Lösung.The quickest way to a room of your own. A converted Bauwagen (an old builder's site wagon) is habitable within a few months and costs a fraction of an extension. In the first years of a community it is often the most realistic answer.

So wird gebautHow it is built
Dach zürst dicht machen, dann dämmen, dann innen ausbauen. Diffusionsoffener Aufbau mit Holzfaserdämmung, sonst schimmelt es hinter der Verkleidung.Make the roof watertight first, then insulate, then fit out the inside. A vapour open build up with wood fibre insulation, otherwise mould grows behind the lining.
KostenCost
5.000 bis 40.000 Euro5,000 to 40,000 euros
Erster SchrittFirst step
Bauamt fragen, bevor der Wagen steht. Sobald er dauerhaft zum Wohnen dient, ist er baurechtlich ein Gebäude, egal ob er Räder hat.Ask the Bauamt (the local building authority) before the wagon arrives. Once it is lived in permanently, building law treats it as a building, wheels or no wheels.
Schritt für SchrittStep by step
Bauwagen und Tiny House, Schnitt Breite 250 40 100 10 40 1 2 7 3 4 5 6 8 9 1 Stahlrahmen, Bodenfreiheit 40 cm 2 Holzfaserdämmung 100 mm 3 Dampfbremse, Stöße verklebt 4 Unterdeckbahn diffusionsoffen 5 Luftspalt 30 mm, Konterlattung 6 Lärchenschalung 20 mm 7 EPDM-Dach 1,5 mm, 2 Prozent 8 Fenster 80 x 100 cm, Zweifachglas 9 Werkstattofen 4 kW, Schornstein Nicht maßstäblich, Maße in cm
Bauskizze Bauwagen und Tiny House, am Handy seitlich wischenMeasured sketch of Bauwagen and tiny house, swipe sideways on a phone

Bevor du anfängst

Der erste Weg führt zum Bauamt, nicht zum Händler. Räder ändern nichts, sobald ein Wagen ortsfest zum Aufenthalt dient, ist er nach der Landesbauordnung eine bauliche Anlage. Frag dort, welchen Rauminhalt eure Landesbauordnung ohne Verfahren zulässt und ob eure Fläche zum Innenbereich oder zum Außenbereich zählt, und bring Lageplan, Maße und die geplante Nutzung mit. Verfahrensfrei heißt nur, dass niemand vorher prüft. Wohnen im Außenbereich scheitert nach Paragraf 35 Baugesetzbuch fast immer, weil es als Splittersiedlung gilt, und die Bauaufsicht kann Jahre später den Rückbau verlangen. Ofen und Schornstein nimmt der Bezirksschornsteinfeger vor der ersten Inbetriebnahme ab. In den Schlafbereich gehört ein Rauchwarnmelder, neben den Ofen ein Kohlenmonoxidmelder nach EN 50291. Und halte den Unterschied auseinander: verfahrensfrei heißt nur, dass du keinen Antrag stellst. Zulässig ist das Vorhaben damit noch nicht, im Außenbereich liegt genau da die eigentliche Hürde.

Das brauchst du

  • 1 Bauwagen 7 x 2,5 m mit Stahlrahmen gebraucht 1.500 bis 6.000 Euro
  • 85 m² Holzfaserdämmung, Wärmeleitgruppe 040 46 m² mit 160 mm für die Wände, 19 m² mit 140 mm für den Boden, 20 m² mit 240 mm als druckfeste Aufdachdämmung, Verschnitt eingerechnet
  • 85 m² feuchtevariable Dampfbremse, sd-Wert 0,25 bis 10 m an Wand und Boden raumseitig, am Dach oben auf der alten Schalung unter der Aufdachdämmung, Stöße verklebt
  • 46 m² diffusionsoffene Unterdeckbahn, sd-Wert 0,05 m unter die Außenschalung der Wand
  • 60 laufende Meter Konterlattung 30 x 50 mm für 30 mm Luftspalt
  • 50 m² Lärchenschalung 20 mm, Boden-Deckel Außenhaut ohne Anstrich, 42 m² Wandfläche plus Überdeckung und Verschnitt
  • 20 m² EPDM-Folie 1,5 mm, einteilig Dach ohne Naht, sie liegt auf dem Rauspund über der Aufdachdämmung
  • 20 m² Rauspund 22 mm Untergrund für die EPDM-Bahn, darunter die Aufdachdämmung
  • 2 Holzfenster 80 x 100 cm mit Zweifachglas über Eck für Querlüftung
  • 1 Werkstattofen 2 bis 3 kW, raumluftunabhängig mit DIBt-Zulassung Edelstahlschornstein 130 mm, Zuluftrohr DN 100 nach draußen, Funkenschutzplatte 100 x 120 cm
  • 1 Kohlenmonoxidmelder nach EN 50291, 1 Feuerlöscher 6 kg Melder in Kopfhöhe im Schlafbereich

Werkzeug

Akkuschrauber, Handkreissäge, Tacker, Cuttermesser, Wasserwaage 200 cm, Wagenheber 5 t, Schlagbohrmaschine, Kernbohrer 150 mm, Zimmermannshammer

Schritt für Schritt

  1. Bauamt fragen, bevor der Wagen kommt. Frag nach dauerhaftem Wohnen an diesem Standort in dieser Größe. Rückwärts ist das kaum zu heilen.
  2. Standplatz herrichten. Zehn Auflagerpunkte, fünf je Längsseite im Abstand von 1,75 m. Je Punkt ein Punktfundament oder Schalungsstein 30 x 30 cm, 80 cm tief und damit frostfrei, Oberkante 40 cm über Gelände, darauf eine Lastverteilungsplatte und ein Elastomerlager. Ein ausgebauter Wagen wiegt schnell 5 Tonnen, das sind 5 kN je Punkt, und dafür ist eine unbewehrte Gehwegplatte auf der Wiese nicht gemacht. So bleiben die 40 cm Luft zwischen Wagenboden und Erde, darunter Vlies und Schotter 16/32. Ohne frostfreie Gründung steht der Wagen nach dem ersten Winter schief und die Tür klemmt.
  3. Dach als Warmdach neu aufbauen. Alte Deckung runter, Bretterschalung prüfen, weiche Bretter ersetzen. Darauf die feuchtevariable Dampfbremse luftdicht verkleben, dann 240 mm druckfeste Holzfaserdämmung in zwei versetzten Lagen, darüber Rauspund 22 mm, und erst darauf die EPDM-Bahn einteilig auflegen. Ränder mit Klemmprofil und 4,5 x 40 Schrauben alle 15 cm fassen, Gefälle mindestens 2 Prozent. So liegt die Schalung warm und trocken. Dämmung auf Pressmaß zwischen den Sparren und die dampfdichte EPDM-Bahn direkt darüber geht nach DIN 68800-2 nicht auf, das ist der sichere Weg zur schwarzen Schalung nach drei Wintern. Wer trotzdem zwischen den Sparren dämmen will, baut ein belüftetes Dach: über der Dämmung 60 mm freier Querschnitt, Zuluft und Abluft an den beiden gegenüberliegenden Längsseiten, je laufendem Meter Traufe mindestens 200 cm² freier Lüftungsquerschnitt und insgesamt mindestens 2 Promille der Dachfläche nach DIN 4108-3.
  4. Substanz prüfen. Weiche Stellen mit dem Schraubendreher suchen, faules Holz ersetzen, den Stahlrahmen entrosten und mit Zweikomponenten-Epoxid streichen.
  5. Außenhaut aufbauen. Unterdeckbahn 10 cm überlappend tackern, Konterlattung senkrecht darüber, Lärchenschalung mit Edelstahlnägeln. Oben und unten Insektengitter in den Luftspalt.
  6. Dämmen. Holzfaserplatten 160 mm auf Pressmaß zwischen die Wandständer, fugenlos, jede Fehlstelle nachstopfen. Der Boden bekommt 140 mm, darunter eine winddichte, diffusionsoffene Unterspannbahn und ein Nagerschutzgitter aus Edelstahl, sonst bläst der Wind die Fasern aus und die Mäuse ziehen ein. Das Dach ist mit 240 mm über der Schalung bereits gedämmt. Damit kommt die Wand auf 0,24 W/m²K, das Dach auf 0,17 und der Boden auf 0,27, und die Werte aus Anlage 7 Gebäudeenergiegesetz sind eingehalten. Dach und Boden nie so dünn dämmen wie die Wand, das Dach verliert wegen der Abstrahlung gegen den Nachthimmel am meisten.
  7. Dampfbremse luftdicht anschließen. Bahnen 10 cm überlappen, jede Naht mit Systemklebeband, jeden Durchbruch mit Manschette. Darüber Traglattung 24 x 48 mm als Installationsebene, dann das Profilbrett.
  8. Ofen setzen. Abstand zu brennbaren Bauteilen nach Typenschild, meist 40 cm seitlich und 80 cm nach vorn. Ein Dach mit 2 Prozent Gefälle hat keinen First, also gilt die Flachdachregel: Mündung mindestens 1 m senkrecht über der Dachhaut. Für Festbrennstoffanlagen, die nach dem 31. Dezember 2021 errichtet wurden, verlangt Paragraf 19 der 1. BImSchV zusätzlich, dass die Mündung Fenster, Türen und Lüftungsöffnungen im Umkreis von 15 m um mindestens 1 m überragt. Auf einem Hof mit Scheune und Gaube ist das der Satz, der die Höhe bestimmt, und die legt ihr vor dem Kauf mit dem Bezirksschornsteinfeger fest, nicht hinterher mit dem Gerüst. Der Wagen ist luftdicht gebaut, deshalb entweder ein raumluftunabhängiger Ofen mit Zuluft von außen oder eine Verbrennungsluftöffnung von mindestens 150 cm² ins Freie. CO-Melder in Kopfhöhe aufhängen, Feuerlöscher an die Tür. Vor der ersten Befeuerung den Bezirksschornsteinfeger holen.

Zeit und Kosten

Zwei Personen brauchen 25 bis 60 Arbeitstage, also einen Sommer neben der Arbeit. Material 5.000 Euro beim einfachen Ausbau mit gebrauchtem Wagen, bis 40.000 Euro für ein Tiny House auf neuem Tandemanhänger.

Die drei häufigsten Fehler

  • Baufolie statt Dampfbremse. Reine PE-Folie lässt Feuchte weder raus noch zurück. Zwei Menschen und ein Ofen bringen täglich 5 bis 10 Liter Wasser in die Luft.
  • Zu wenig Lüftung. Ein Fenster auf Kipp reicht nicht. Zwei Fenster über Eck plus ein Zuluftgitter unten in der Tür ergeben eine Querlüftung, und die Verbrennungsluftöffnung für den Ofen bleibt immer frei. Kein Gitter durch die Dachhaut, das durchstößt Dampfbremse und Dachbahn.
  • Wagen direkt auf die Erde gestellt. Von unten steigt Feuchte, der Boden fault in drei Jahren durch. 40 cm Luft und ein Schotterbett halten ihn trocken.

Before you start

The first stop is the Bauamt (the local building authority), not the dealer. Wheels change nothing. As soon as a wagon stands in one place for people to stay in, the Landesbauordnung (the building code of your federal state) treats it as a structure. Ask what volume your Landesbauordnung allows without a procedure and whether your land counts as Innenbereich (inside the built-up area) or Außenbereich (the open land outside the built-up area), and take a site plan, the dimensions and the intended use with you. Verfahrensfrei only means that nobody checks beforehand. Living in the Außenbereich almost always fails under Section 35 of the Baugesetzbuch because it counts as scattered settlement, and the Bauaufsicht (the building inspectorate) can order removal years later. The Bezirksschornsteinfeger (the district chimney sweep, who has to sign off on stoves) inspects stove and flue before the first firing. A smoke alarm belongs in the sleeping area and a carbon monoxide alarm to EN 50291 next to the stove. And keep the two things apart: verfahrensfrei (exempt from the approval procedure) only means that you file no application. It does not make the project permissible, and in the Außenbereich that is exactly where the real hurdle sits.

What you need

  • 1 Bauwagen, 7 x 2.5 m, on a steel chassis 1,500 to 6,000 euros second hand
  • 85 m² of wood fibre insulation, thermal conductivity group 040 46 m² at 160 mm for the walls, 19 m² at 140 mm for the floor, 20 m² at 240 mm as load bearing insulation over the roof, offcuts included
  • 85 m² of humidity variable vapour control layer, sd value 0.25 to 10 m on the room side of wall and floor, and on the roof it goes on top of the old boarding under the over roof insulation, all joints taped
  • 46 m² of vapour open breather membrane, sd value 0.05 m behind the outer cladding of the wall
  • 60 linear metres of counter battens, 30 x 50 mm for a 30 mm air gap
  • 50 m² of larch cladding, 20 mm, board on board the outer skin, left unpainted, 42 m² of wall plus overlap and offcuts
  • 20 m² of EPDM membrane, 1.5 mm, in one piece a roof with no seam, laid on the Rauspund (tongue and groove boarding) above the over roof insulation
  • 20 m² of Rauspund 22 mm the base for the EPDM, with the over roof insulation underneath
  • 2 timber windows, 80 x 100 cm, double glazed set round a corner from each other for cross ventilation
  • 1 workshop stove, 2 to 3 kW, room sealed, with DIBt approval (from the German institute for building technology) stainless steel flue 130 mm, DN 100 air supply duct to the outside, hearth plate 100 x 120 cm
  • 1 carbon monoxide alarm to EN 50291, 1 fire extinguisher, 6 kg the alarm at head height in the sleeping area

Tools

Cordless drill driver, circular saw, staple gun, utility knife, 200 cm spirit level, 5 t bottle jack, hammer drill, 150 mm core drill, framing hammer

Step by step

  1. Ask the Bauamt before the wagon arrives. Ask about permanent living at this spot, at this size. Once it is standing there, the problem is almost impossible to undo.
  2. Prepare the standing. Ten bearing points, five per long side at 1.75 m centres. At each point a pad foundation or a Schalungsstein (a hollow concrete block filled with concrete) of 30 x 30 cm, taken 80 cm down and so below the frost line, top edge 40 cm above ground, with a load spreading plate and an elastomeric bearing pad on top. A finished wagon soon weighs 5 tonnes, which is 5 kN per point, and an unreinforced paving slab lying on the grass is not made for that. This keeps the 40 cm of air between the wagon floor and the soil, with geotextile and 16/32 gravel underneath. Without a frost free foundation the wagon sits crooked after the first winter and the door jams.
  3. Rebuild the roof as a warm roof. Strip the old covering, check the board decking, replace anything soft. Tape the humidity variable vapour control layer down on top of it, airtight, then 240 mm of load bearing wood fibre insulation in two staggered layers, then Rauspund 22 mm, and only then the EPDM in a single piece. Clamp the edges with a clamping profile and 4.5 x 40 screws every 15 cm, fall at least 2 per cent. That way the decking sits warm and dry. Insulation cut tight between the rafters with the vapour tight EPDM directly above it does not work under DIN 68800-2, and it is the reliable route to black decking after three winters. If you still want to insulate between the rafters, build a ventilated roof: 60 mm of clear space above the insulation, inlet and outlet on the two opposite long sides, at least 200 cm² of free ventilation area per linear metre of eaves and at least 2 parts per thousand of the roof area in total, as DIN 4108-3 requires.
  4. Check the fabric. Probe for soft spots with a screwdriver, replace rotten timber, take the rust off the steel chassis and paint it with two part epoxy.
  5. Build up the outer skin. Staple the breather membrane on with 10 cm overlaps, counter battens vertically over it, larch cladding with stainless steel nails. Insect mesh in the air gap at the top and the bottom.
  6. Insulate. Wood fibre boards 160 mm cut tight between the wall studs, no gaps, every hollow stuffed out. The floor gets 140 mm, with a windtight, vapour open membrane and a stainless steel rodent mesh underneath, otherwise the wind blows the fibres out and the mice move in. The roof is already insulated with the 240 mm above the decking. That brings the wall to 0.24 W/m²K, the roof to 0.17 and the floor to 0.27, which meets the figures in Annex 7 of the Gebäudeenergiegesetz (the German building energy act). Never insulate roof and floor as thinly as the wall, because the roof loses the most, radiating against the night sky.
  7. Seal the vapour control layer. Overlap the sheets by 10 cm, tape every seam with the tape from the same system, use a grommet at every penetration. Over that, battens of 24 x 48 mm as a service void, then the matchboard lining.
  8. Set the stove. Clearances to combustible parts as given on the data plate, usually 40 cm at the sides and 80 cm at the front. A roof with 2 per cent fall has no ridge, so the flat roof rule applies: the flue outlet at least 1 m vertically above the roof skin. For solid fuel appliances built after 31 December 2021, Section 19 of the 1. BImSchV also requires the outlet to stand at least 1 m above any window, door or ventilation opening within 15 m. On a yard with a barn and a dormer that is the sentence that sets the height, and you settle it with the Bezirksschornsteinfeger (the district chimney sweep, who has to sign off on stoves) before you buy, not afterwards with the scaffolding up. The wagon is built airtight, so either a room sealed stove with its air from outside or a combustion air opening of at least 150 cm² to the open air. Hang the CO alarm at head height, put the extinguisher by the door. Call the Bezirksschornsteinfeger in before the first fire.

Time and cost

Two people need 25 to 60 working days, so one summer alongside a job. Materials come to 5,000 euros for a simple fit out in a second hand wagon, up to 40,000 euros for a tiny house on a new twin axle trailer.

The three most common mistakes

  • Builders' polythene instead of a vapour control layer. Plain PE film lets moisture neither out nor back. Two people and a stove put 5 to 10 litres of water into the air every day.
  • Too little ventilation. One window on the latch is not enough. Two windows round a corner from each other plus an inlet grille low down in the door give you cross ventilation, and the combustion air opening for the stove stays clear at all times. No grille through the roof skin, that punctures both the vapour control layer and the membrane.
  • Wagon set straight on the soil. Damp rises from below and the floor rots through in three years. 40 cm of air and a bed of gravel keep it dry.

Worauf es ankommtWhat matters hereIm Außenbereich nach Paragraf 35 Baugesetzbuch ist dauerhaftes Wohnen im Bauwagen fast nie ohne Weiteres zulässig. Das im Voraus zu klären ist wichtiger als jeder Ausbaudetail.In the Außenbereich (the open land outside the built-up area), Section 35 of the Baugesetzbuch almost never allows permanent living in a Bauwagen as a matter of course. Settling that in advance matters more than any detail of the fit out.

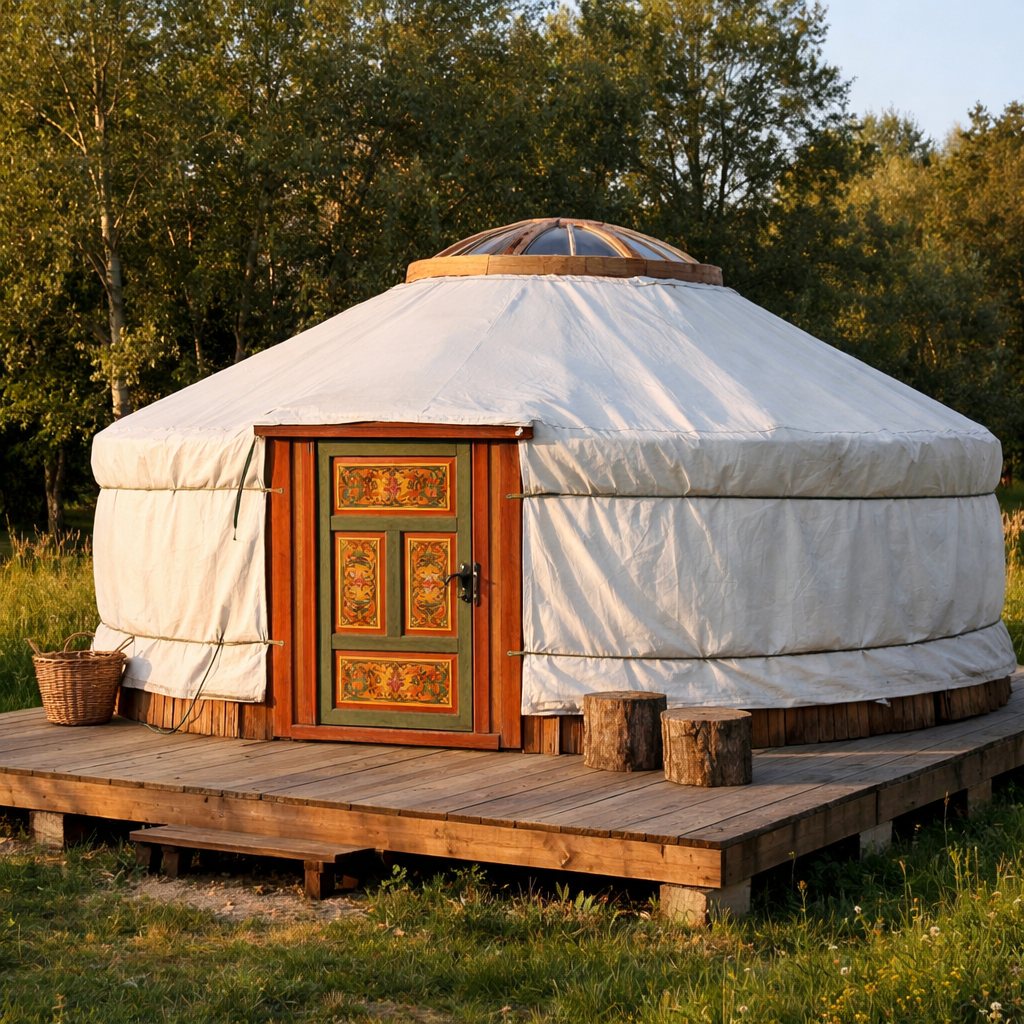
Jurte oder Rundzelt, Yurt or round tent
Wochen bis MonateWeeks to monthsEtwas ÜbungSome practice helps

Jurte oder RundzeltYurt or round tent

4 Personen, schweres Heben4 people, heavy lifting

Runder Raum ohne Ecken, in dem sich Gruppen anders verhalten als in Rechtecken. Aufbau an einem Tag, abbaubar ohne Spur, und mit Ofen ganzjährig nutzbar.A round room with no corners, where groups behave differently than they do in rectangles. Up in a day, down without a trace, and with a stove you can use it all year.

So wird gebautHow it is built
Scherengitterwand, Dachstangen zum Kronenring, Filz- oder Zeltbahndeckung. Wichtig ist die Plattform darunter: trocken, eben, hinterlüftet.A concertina lattice wall, roof poles running to the crown ring, a covering of felt or canvas. What matters is the platform underneath: dry, level, with air moving below it.
KostenCost
3.000 bis 12.000 Euro3,000 to 12,000 euros
Erster SchrittFirst step
Zürst die Plattform bauen. Eine Jurte auf feuchtem Boden ist nach zwei Jahren verrottet.Build the platform first. A yurt on damp ground has rotted within two years.
Schritt für SchrittStep by step
Jurte oder Rundzelt, Schnitt Durchmesser 600 150 250 25 Stange 320 1 2 3 4 5 6 7 8 9 1 Scherengitter, Höhe 150 cm 2 Zugband, 2 Gurte je 2000 kg 3 Dachstange 320 cm, 60 Stück 4 Kronenring 120 cm, Höhe 250 cm 5 Schafwollfilz 8 mm 6 Zeltbahn 380 g/m² 7 Dielung auf Rost 6 x 16 cm 8 Schraubfundament, 25 cm Luft 9 Ofen 5 kW, Rohr 40 cm frei Nicht maßstäblich, Maße in cm
Bauskizze Jurte oder Rundzelt, am Handy seitlich wischenMeasured sketch of Yurt or round tent, swipe sideways on a phone

Bevor du anfängst

Frag beim Bauamt nach, wie es eure Jurte einordnet. Ein Fliegender Bau ist sie nur, wenn sie wirklich wiederholt aufgebaut und wieder abgebaut wird. Steht sie dauerhaft und wird bewohnt, ist sie eine bauliche Anlage nach der Landesbauordnung. Frag nach dem Rauminhalt, der bei euch ohne Verfahren zulässig ist, und danach, was der Ofen daran ändert. Verfahrensfrei heißt nur, dass niemand vorher prüft, im Außenbereich ist dauerhaftes Wohnen nach Paragraf 35 Baugesetzbuch praktisch nie zulässig. Lebensgefährlich ist der Holzofen im geschlossenen Textilbau. Kohlenmonoxid riecht nach nichts und wirkt im Schlaf. In die Jurte gehören ein Melder nach EN 50291, ein Rauchwarnmelder und eine dauerhaft offene Zuluft nahe am Boden. Und halte den Unterschied auseinander: verfahrensfrei heißt nur, dass du keinen Antrag stellst. Zulässig ist das Vorhaben damit noch nicht, im Außenbereich liegt genau da die eigentliche Hürde.

Das brauchst du

  • 1 Scherengitterwand aus 4 Segmenten, Höhe 150 cm, Länge 19 m ergibt 6 m Innendurchmesser
  • 60 Dachstangen Fichte rund 32 mm, 295 cm lang vom Gitterkopf zum Kronenring, Achsmaß 283 cm plus Zugabe für Zapfen und Auflager
  • 1 Kronenring Esche, 120 cm außen, 60 Bohrungen 33 mm das Auge der Jurte
  • 2 UV-stabile Spanngurte 50 mm mit je 5.000 daN Bruchlast Zugring auf der Wandoberkante, alternativ ein Stahlseil 6 mm mit Spannschloss
  • 65 m² Zeltbahn Baumwolle-Polyester 380 g/m² 32 m² Dach bei 32 Grad Neigung, 29 m² Wand, dazu Überlappung und Verschnitt
  • 65 m² Schafwollfilz 8 mm Isolierlage unter der Bahn, gleiche Fläche wie die Zeltbahn
  • 85 laufende Meter Konstruktionsvollholz 6 x 16 cm 65 lfm Querbalken im Abstand von 50 cm auf 32 m² Plattform, dazu 20 lfm segmentierter Randbalken
  • 26 Balkenschuhe 60 x 160 mm feuerverzinkt dazu rund 450 Ankernägel 4,0 x 60, jedes Loch wird besetzt
  • 32 m² Rauspund Fichte 28 mm Dielung, Durchmesser 640 cm
  • 1 Werkstattofen 5 kW mit Edelstahlschornstein 130 mm für den Winterbetrieb
  • 1 Dachdurchführung für Textilhaut doppelwandiges Isolierrohr oder zugelassenes Wandfutter, Blechkragen aus nichtbrennbarem Material mit Silikonmanschette, Funkenschutz auf der Mündung
  • 1 Kohlenmonoxidmelder nach EN 50291, 1 Feuerlöscher 6 kg gehören in jede Jurte mit Ofen

Werkzeug

Akkuschrauber, Handkreissäge, Bohrmaschine mit Forstnerbohrer 33 mm, Wasserwaage 200 cm, Schlauchwaage, Leiter 3 m

Schritt für Schritt

  1. Platz wählen. Nicht in die Senke und nicht unter alte Buchen. Norden abschirmen, Süden offen lassen.
  2. Plattform abstecken. Pflock in die Mitte, Schnur auf 320 cm, Kreis anreißen. Damit kein Balken über 150 cm frei spannt, braucht es ein Raster von 1,5 x 1,5 m über die ganze Kreisfläche, das sind 21 Punkte. Zwölf Punkte auf einem Ring lassen die Mitte frei, dort spannt ein Balken dann über 4 m.
  3. Fundamente setzen. Schraubfundamente mindestens 80 cm tief eindrehen oder Punktfundamente 80 cm tief betonieren, so tief liegt in Niedersachsen die Frostgrenze. 15 cm verdichteter Schotter unter einer Betonplatte sind keine frostfreie Gründung. Alle Oberkanten mit der Schlauchwaage auf eine Ebene, mindestens 25 cm Bodenfreiheit. Wer die Frosthebung bewusst zulassen will, schreibt das hin und waagt die Plattform jedes Frühjahr neu aus.
  4. Rost bauen und dielen. Balken 6 x 16 cm im Abstand von 50 cm. Jeden Balkenschuh vollständig nageln, also jedes Loch mit einem Ankernagel 4,0 x 60 besetzen, je nach Hersteller sind das 12 bis 20 Stück. Die Traglast im Zulassungsdokument gilt nur bei voller Nagelung, vier Nägel sind rund ein Viertel davon, und das ist der Punkt, an dem der Rost mit zwanzig Leuten darauf durchgeht. Keine Spanplattenschrauben, keine Teilbelegung. Rauspund verlegen, dann den Kreis mit 640 cm Durchmesser aussägen.
  5. Gitterwand aufstellen. Segmente zum Kreis ziehen, Enden am Türrahmen mit lichter Öffnung 80 x 170 cm einbinden, Höhe auf 150 cm einstellen.
  6. Zugband spannen. Beide Gurte rundum auf die Gitteroberkante legen und straff ziehen. Ohne dieses Band drückt das Dach die Wand nach außen.
  7. Kronenring einsetzen. Ring mittig auf 300 cm hochhalten, vier Stangen über Kreuz einsetzen, danach steht er allein. Die übrigen 56 Stangen folgen reihum. Auf 300 cm hat das Dach 32 Grad Neigung, damit rutscht nasser Schnee ab, und die Stangen messen 295 cm.
  8. Hülle auflegen und abspannen. Erst Filz, dann Zeltbahn, Dachbahn immer über die Wandbahn. Acht Erdnägel im Winkel von 45 Grad. Das Ofenrohr geht nie einwandig durch die Bahn: Durch das Textil führt ein doppelwandiges Isolierrohr oder ein zugelassenes Wandfutter, darum kommt ein Blechkragen aus nichtbrennbarem Material mit Silikonmanschette. Im Innenraum bleiben 40 cm Abstand zwischen einwandigem Rohr und Filz oder Bahn, das Rohr wird gegen Wind abgespannt, auf die Mündung kommt ein Funkenschutz, und die Mündung steht 40 cm über dem Kronenring. Filz und Baumwolle glimmen ab rund 200 Grad, ein einwandiges Rohr wird über 300 Grad heiß.

Zeit und Kosten

Die Plattform kostet zwei Personen 3 bis 5 Tage, die Jurte selbst stellen vier geübte Leute an einem Tag auf. Material 3.000 Euro im Selbstbau, bis 12.000 Euro für eine gekaufte Jurte mit Filz und Ofen.

Die drei häufigsten Fehler

  • Direkt auf die Wiese gestellt. Von unten steigt Feuchte in Filz und Gitter, nach zwei Wintern ist beides schwarz. Eine hinterlüftete Plattform mit 25 cm Bodenfreiheit verhindert das.
  • Zugband zu schwach. Wäscheleine oder dünner Draht reißen beim ersten nassen Schnee. Rechnet die Ringzugkraft aus, hier sind es rund 13 kN, und legt das Band mit Sicherheit aus: 33 kN Bruchlast, also zwei UV-stabile Gurte mit je 5.000 daN oder ein Stahlseil 6 mm. Zweimal im Jahr nachspannen, Termin in den Hofkalender.
  • Dach zu flach. Unter 30 Grad Neigung steht Wasser auf der Bahn, und nasser Schnee rutscht auf beschichteter Baumwolle nicht ab. Niedersachsen liegt in Schneelastzone 1 bis 2 mit 0,65 bis 0,85 kN/m², auf 28 m² hängen dann bis zu 24 kN in Bahn und Stangen. Kronenring bei 6 m Durchmesser auf 300 cm setzen, und im Winter täglich den Schnee von innen mit dem Besen hochstoßen.

Before you start

Ask the Bauamt (the local building authority) how it classes your yurt. It only counts as a Fliegender Bau (a temporary structure genuinely put up and taken down again and again) if that is really what happens. If it stands permanently and people live in it, the Landesbauordnung (the building code of your federal state) treats it as a structure. Ask what volume is allowed without a procedure where you are, and what difference the stove makes. Verfahrensfrei only means that nobody checks beforehand, and in the Außenbereich (the open land outside the built-up area) permanent living is practically never allowed under Section 35 of the Baugesetzbuch. The wood stove in a closed fabric building is the part that can kill you. Carbon monoxide has no smell and does its work while you sleep. A yurt needs an alarm to EN 50291, a smoke alarm and a permanently open air inlet low down. And keep the two things apart: verfahrensfrei (exempt from the approval procedure) only means that you file no application. It does not make the project permissible, and in the Außenbereich that is exactly where the real hurdle sits.

What you need

  • 1 concertina lattice wall in 4 sections, 150 cm high, 19 m long gives an internal diameter of 6 m
  • 60 spruce roof poles, 32 mm round, 295 cm long from the head of the lattice to the crown ring, 283 cm centre to centre plus an allowance for the tenon and the bearing
  • 1 ash crown ring, 120 cm outside diameter, 60 holes of 33 mm the eye of the yurt
  • 2 UV stable webbing straps, 50 mm, each with a breaking load of 5,000 daN the tension ring on top of the wall, or a 6 mm steel cable with a turnbuckle instead
  • 65 m² of cotton polyester canvas, 380 g/m² 32 m² for the roof at 32 degrees pitch, 29 m² for the wall, plus overlap and offcuts
  • 65 m² of sheep wool felt, 8 mm the insulating layer under the canvas, the same area as the canvas
  • 85 linear metres of Konstruktionsvollholz (graded structural timber), 6 x 16 cm 65 linear metres of joists at 50 cm centres over a 32 m² platform, plus 20 linear metres of segmented rim beam
  • 26 hot dip galvanised joist hangers, 60 x 160 mm plus roughly 450 connector nails of 4.0 x 60, because every hole gets filled
  • 32 m² of spruce Rauspund (tongue and groove boarding), 28 mm the deck, 640 cm across
  • 1 workshop stove, 5 kW, with a 130 mm stainless steel flue for use in winter
  • 1 roof penetration kit for a fabric skin a twin wall insulated pipe or an approved Wandfutter (a certified sleeve for the flue), a metal collar of non-combustible material with a silicone gasket, and a spark arrestor on the outlet
  • 1 carbon monoxide alarm to EN 50291, 1 fire extinguisher, 6 kg both belong in any yurt with a stove

Tools

Cordless drill driver, circular saw, drill with a 33 mm Forstner bit, 200 cm spirit level, water level, 3 m ladder

Step by step

  1. Choose the spot. Not in a hollow and not under old beeches. Shelter the north side, leave the south open.
  2. Set out the platform. A peg in the middle, string at 320 cm, scribe the circle. So that no joist spans more than 150 cm unsupported, you need a grid of 1.5 x 1.5 m across the whole circle, which comes to 21 points. Twelve points on a ring leave the middle empty, and there a joist ends up spanning over 4 m.
  3. Put in the foundations. Wind ground screws at least 80 cm down or concrete pad foundations 80 cm deep, because that is where the frost line sits in Lower Saxony. 15 cm of compacted gravel under a concrete slab is not a frost free foundation. Bring all the top edges to one level with the water level and keep at least 25 cm of clearance to the ground. If you decide to live with frost heave instead, write that down and relevel the platform every spring.
  4. Build the frame and lay the deck. Joists of 6 x 16 cm at 50 cm centres. Nail every joist hanger out in full, which means a 4.0 x 60 connector nail in every hole, 12 to 20 of them depending on the maker. The load figure in the approval document only holds with full nailing, four nails give you about a quarter of it, and that is the point at which the frame gives way with twenty people standing on it. No chipboard screws, no half filled hangers. Lay the Rauspund, then cut out the circle of 640 cm diameter.
  5. Stand the lattice wall. Pull the sections out into a circle, tie the ends into the door frame with a clear opening of 80 x 170 cm, and set the height to 150 cm.
  6. Tension the band. Lay both straps right round the top edge of the lattice and pull them tight. Without that band the roof pushes the wall outwards.
  7. Fit the crown ring. Hold the ring up in the centre at 300 cm, put four poles in crosswise, and after that it stands on its own. The other 56 poles follow round. At 300 cm the roof sits at 32 degrees, wet snow slides off, and the poles measure 295 cm.
  8. Lay the cover on and guy it down. Felt first, then canvas, and the roof sheet always over the wall sheet. Eight ground pegs at 45 degrees. The flue never passes through the fabric as a single wall pipe: through the textile goes a twin wall insulated pipe or an approved Wandfutter (a certified sleeve for the flue), and around it a metal collar of non-combustible material with a silicone gasket. Inside, keep 40 cm between a single wall pipe and any felt or canvas, guy the pipe against the wind, fit a spark arrestor on the outlet, and let the outlet stand 40 cm above the crown ring. Felt and cotton start to smoulder at around 200 degrees, and a single wall pipe gets hotter than 300.

Time and cost

The platform takes two people 3 to 5 days, and four practised hands put the yurt itself up in a day. Materials come to 3,000 euros if you build it yourselves, up to 12,000 euros for a bought yurt with felt and a stove.

The three most common mistakes

  • Put straight on the grass. Damp rises into the felt and the lattice, and after two winters both are black. A platform with 25 cm of clearance and air moving underneath stops that.
  • Tension band too weak. Washing line or thin wire snaps with the first wet snow. Work out the ring tension, here about 13 kN, and size the band with a margin: 33 kN breaking load, so two UV stable straps of 5,000 daN each or a 6 mm steel cable. Retension it twice a year and put the date in the farm calendar.
  • Roof too shallow. Below 30 degrees water stands on the canvas, and wet snow will not slide off coated cotton. Lower Saxony sits in snow load zone 1 to 2 at 0.65 to 0.85 kN/m², so on 28 m² up to 24 kN hangs in the canvas and the poles. With a 6 m diameter, set the crown ring at 300 cm, and in winter push the snow up daily from inside with a broom.

Worauf es ankommtWhat matters hereAuch eine Jurte kann baurechtlich als bauliche Anlage gelten, wenn sie länger steht. Vorher fragen.A yurt too can count as a structure under building law once it stays up for longer. Ask before you start.

Lehm und Strohballen, Clay and straw bales
Längeres VorhabenA longer projectMit erfahrener HandNeeds an experienced hand

Lehm und StrohballenClay and straw bales

6 bis 10 Personen, Ballen je 20 kg, schweres Heben6 to 10 people, bales of 20 kg each, heavy lifting

Baustoffe, die auf dem Grundstück liegen oder vom Nachbarbauern kommen. Lehmputz reguliert die Feuchte im Raum besser als jedes technische System, und Strohballen dämmen hervorragend.Building materials that either lie on your own land or come from the farmer next door. Clay plaster handles the moisture in a room better than any piece of kit, and straw bales insulate very well.

So wird gebautHow it is built
Strohballen in Holzständerwerk gesetzt, beidseitig Lehmputz in mehreren Lagen, außen Kalk als Schlagregenschutz. Großer Dachüberstand ist Pflicht.Straw bales set into a timber frame, clay plaster in several coats on both sides, lime on the outside against driving rain. A generous roof overhang is not optional.
KostenCost
stark abhängig, oft die Hälfte konventioneller Bauweise bei viel Eigenleistungvaries a lot, often half the cost of conventional building if you do much of the work yourselves
Erster SchrittFirst step
Auf einem Baukurs mitmachen, bevor ihr am eigenen Haus anfangt. Ein Wochenende spart euch ein Jahr Fehler.Join a building course before you start on your own house. One weekend saves you a year of mistakes.
Schritt für SchrittStep by step
Lehm und Strohballen, Wandschnitt 56 92 40 50 80 3,0 1 2 3 4 5 6 7 8 9 1 Schaumglasschotter 40 cm 2 Sockel, 50 cm über Gelände 3 Ständer 8 x 16 cm, Raster 92 cm 4 Strohballen 90 x 50 x 40 cm 5 Haselnussstab 120 cm, 3. Lage 6 Gurtband 25 mm zum Vorspannen 7 Lehmputz innen 2,5 cm plus 5 mm 8 Kalkputz NHL 3,5 außen 9 Dachüberstand mindestens 80 cm Nicht maßstäblich, Maße in cm
Bauskizze Lehm und Strohballen, am Handy seitlich wischenMeasured sketch of Clay and straw bales, swipe sideways on a phone

Bevor du anfängst

Ein Strohballenhaus als Wohngebäude ist immer genehmigungspflichtig, der Weg führt also ohnehin zum Bauamt, und dass es verfahrensfreie Größen gibt, hilft hier nicht. Zieht früh eine Tragwerksplanerin hinzu, die Strohbau kennt, und klärt mit ihr, welchen Nachweis der Prüfstatiker für das Baustroh sehen will. Heute läuft das über die Europäische Technische Bewertung ETA 17/0247, die alte Zulassung des Deutschen Instituts für Bautechnik ist seit Februar 2019 abgelaufen. Wer damit argumentiert, bekommt keine Genehmigung. Für lasttragende Konstruktionen braucht ihr eine Zustimmung im Einzelfall. Beim Brandschutz gilt: mit mindestens 8 Millimetern Lehmputz weist die Strohbaurichtlinie F 30 aus, die höhere Klasse nur mit Kalkputz. Fragt die Gebäudeversicherung vorher schriftlich. Und halte den Unterschied auseinander: verfahrensfrei heißt nur, dass du keinen Antrag stellst. Zulässig ist das Vorhaben damit noch nicht, im Außenbereich liegt genau da die eigentliche Hürde.

Das brauchst du

  • 180 Kleinballen Weizenstroh 90 x 50 x 40 cm, Dichte ab 90 kg/m³ für 60 m² Wand
  • 130 laufende Meter Konstruktionsvollholz 8 x 16 cm Ständerwerk im Raster 92 cm: 27 Ständer à 2,5 m sind 68 lfm, Schwellriegel und Rähm durchlaufend 48 lfm, dazu Diagonalen und Auswechslungen an den Öffnungen
  • 6.200 kg Lehmunterputz als Trockenmischung 45 kg je m² und Seite für 2,5 cm Dicke, 120 m² Putzfläche, dazu 15 Prozent Verlust beim Anwerfen auf Stroh
  • 800 kg Lehmoberputz fein, Körnung 0 bis 1 mm letzte Lage 5 mm
  • 1.200 kg Kalkputz NHL 3,5 Schlagregenschutz auf rund 30 m² Wetterseite, 25 bis 30 mm in drei Lagen, dazu Spritzbewurf als Haftgrund und Gewebearmierung in der zweiten Lage
  • 60 m² Jutegewebe 200 g/m² Armierung über den Holz-Stroh-Übergängen
  • 12 m³ Schaumglasschotter kapillarbrechender Sockel, 40 cm hoch
  • 90 Haselnussstäbe 120 cm, 20 mm zum Vernadeln der Ballenlagen
  • 40 laufende Meter Gurtband 25 mm mit Spannern zum Vorspannen der Wände
  • 1 Feuchtemessgerät mit Einstechsonde 40 cm misst jeden Ballen vor dem Einbau

Werkzeug

Ballennadel, Heckenschere, Motorsense zum Scheren der Wand, Kelle, Reibebrett, Mörtelquirl, Wasserwaage 200 cm, Schnurgerüst, Kappsäge

Schritt für Schritt

  1. Auf einen Baukurs gehen. Ein Wochenende beim Fachverband Strohballenbau kostet 150 bis 300 Euro und spart euch ein Jahr Fehler.
  2. Ballen prüfen. Restfeuchte unter 15 Prozent, Dichte 90 bis 120 kg/m³, Bindfäden straff. Ballen aus einem Meter fallen lassen, wenn er aufplatzt, taugt er nicht.
  3. Sockel bauen. Oberkante mindestens 50 cm über Gelände, darunter 40 cm Schaumglasschotter als kapillarbrechende Schicht. Kein Ballen darf Spritzwasser abbekommen.
  4. Ständerwerk stellen. Achsmaß 92 cm, also Ballenlänge plus 2 cm Luft. Für 24 m Wandlänge sind das 27 Ständer, dazu Schwellriegel und Rähm durchlaufend und Diagonalen in den Ecken. Rechnet die Länge vorher zusammen, hier sind es rund 130 lfm Holz. Den Querschnitt gibt die Tragwerksplanerin vor, 8 x 16 cm sagt ohne Spannweite, Dachlast und Schneelastzone nichts aus.
  5. Dach zuerst schließen. Dachüberstand rundum mindestens 80 cm. Erst wenn oben alles dicht ist, kommt der erste Ballen in die Wand.
  6. Ballen setzen. Im Verband mit versetzten Stößen, jede dritte Lage mit Haselnussstäben 120 cm vernadeln, Fugen mit losem Stroh und Lehmschlämme stopfen.
  7. Wand vorspannen und scheren. Gurte alle 100 cm über die Wand ziehen und nachspannen, Oberfläche mit der Motorsense glattschneiden. Eine ebene Wand spart die Hälfte des Putzes.
  8. Putzen. Erst Lehmschlämme einreiben, Jutegewebe über alle Holz-Stroh-Übergänge, dann 2,5 cm Unterputz in zwei Lagen, zuletzt 5 mm Oberputz. Die 3 cm Gesamtdicke sind kein Schönheitswert, sie sind die Bedingung dafür, dass die Wand überhaupt einen Feuerwiderstand erreicht. Welche Klasse dein Aufbau erreicht, steht im Verwendbarkeitsnachweis des gekauften Baustrohs und im Prüfzeugnis des Putzsystems, nicht in einer allgemeinen Regel. Wer 8 mm aufträgt, hat gar keinen Nachweis mehr. Außen 25 bis 30 mm Kalk in drei Lagen mit Spritzbewurf und Armierung, innen Lehm offen lassen.

Zeit und Kosten

Für 60 m² Wandfläche rechnet sechs bis zehn Leute und 20 bis 40 Arbeitstage, davon die Hälfte Putzarbeit. Stroh kostet 3 bis 6 Euro je Ballen ab Feld, Lehmputz 0,20 bis 0,40 Euro je Kilo. Mit viel Eigenleistung landet ihr oft bei der Hälfte konventioneller Baukosten.

Die drei häufigsten Fehler

  • Feuchte Ballen eingebaut. Über 15 Masseprozent Restfeuchte verrottet Stroh in der Wand, und ihr merkt es erst am Geruch. Die Zulassung für Baustroh lässt höchstens 15 Prozent zu, Schimmel fängt bei etwa 18 Prozent an. Jeden Ballen einzeln mit der Einstechsonde in der Ballenmitte messen, Protokoll führen, nasse aussortieren, egal wie voll der Terminplan ist.
  • Zementputz oder Folie außen. Beide sperren die Feuchte im Stroh ein. Außen Kalkputz, innen diffusionsoffener Lehm.
  • Sockel zu niedrig. Spritzwasser vom Boden steigt bis 40 cm hoch. Oberkante Sockel mindestens 50 cm über Gelände, dazu ein Kiesstreifen 40 cm breit rund ums Haus.

Before you start

A straw bale house used as a dwelling always needs approval, so the road leads to the Bauamt (the local building authority) in any case, and the fact that some sizes are exempt from the procedure does not help here. Bring in a structural engineer who knows straw building early on, and settle with her which proof the Prüfstatiker (the independent checking engineer) wants to see for the construction straw. These days that runs through European Technical Assessment ETA 17/0247, because the old approval from the Deutsches Institut für Bautechnik (the German institute for building technology) ran out in February 2019. Argue on the basis of that one and you will not get approval. Load bearing construction needs a Zustimmung im Einzelfall (a case by case consent from the state authority). On fire protection: with at least 8 millimetres of clay plaster the Strohbaurichtlinie (the German straw building guideline) certifies F 30, and the higher class only with lime plaster. Ask your buildings insurer in writing beforehand. And keep the two things apart: verfahrensfrei (exempt from the approval procedure) only means that you file no application. It does not make the project permissible, and in the Außenbereich (the open land outside the built-up area) that is exactly where the real hurdle sits.

What you need

  • 180 small bales of wheat straw, 90 x 50 x 40 cm, density from 90 kg/m³ for 60 m² of wall
  • 130 linear metres of Konstruktionsvollholz (graded structural timber), 8 x 16 cm a frame at 92 cm centres: 27 studs of 2.5 m come to 68 linear metres, the continuous sole plate and top plate another 48, plus diagonals and trimmers around the openings
  • 6,200 kg of clay base plaster as a dry mix 45 kg per m² per side for a thickness of 2.5 cm, 120 m² of plastered surface, plus 15 per cent loss when throwing it onto straw
  • 800 kg of fine clay finish plaster, grain 0 to 1 mm the last coat, 5 mm
  • 1,200 kg of lime plaster, NHL 3.5 protection against driving rain on roughly 30 m² of weather side, 25 to 30 mm in three coats, plus a thrown on key coat and mesh reinforcement in the second coat
  • 60 m² of jute mesh, 200 g/m² reinforcement over the joints between timber and straw
  • 12 m³ of Schaumglasschotter (foamed glass gravel) a capillary break under the plinth, 40 cm deep
  • 90 hazel rods, 120 cm long, 20 mm thick for pinning the courses of bales together
  • 40 linear metres of 25 mm webbing with ratchets for pre tensioning the walls
  • 1 moisture meter with a 40 cm probe for testing every bale before it goes in

Tools

Bale needle, hedge shears, brushcutter for shaving the wall flat, trowel, float, mortar paddle, 200 cm spirit level, profile boards and string lines, mitre saw

Step by step

  1. Go on a building course. A weekend with the Fachverband Strohballenbau (the German straw bale building association) costs 150 to 300 euros and saves you a year of mistakes.
  2. Test the bales. Residual moisture under 15 per cent, density 90 to 120 kg/m³, strings tight. Drop a bale from a metre, and if it bursts open it is no good.
  3. Build the plinth. Top edge at least 50 cm above ground, with 40 cm of foamed glass gravel below it as a capillary break. No bale may ever catch splashing water.
  4. Stand the frame. Studs at 92 cm centres, which is the bale length plus 2 cm of play. Over 24 m of wall that is 27 studs, with a continuous sole plate and top plate and diagonals in the corners. Add the lengths up beforehand, here it comes to about 130 linear metres of timber. The section is set by your structural engineer, because 8 x 16 cm tells you nothing without the span, the roof load and the snow load zone.
  5. Close the roof first. An overhang of at least 80 cm all round. Only once everything above is watertight does the first bale go into the wall.
  6. Lay the bales. In bond with staggered joints, every third course pinned with 120 cm hazel rods, and the gaps stuffed with loose straw and clay slip.
  7. Pre tension the wall and shave it. Run the straps over the wall every 100 cm and tighten them again, then cut the surface flat with the brushcutter. A flat wall saves you half the plaster.
  8. Plaster. Rub clay slip in first, jute mesh over every joint between timber and straw, then 2.5 cm of base coat in two layers, and 5 mm of finish coat last. The 3 cm total thickness is not there for looks, it is the condition for the wall reaching any fire resistance at all. Which class your build up reaches is written in the Verwendbarkeitsnachweis (the proof of usability supplied with the product) for the construction straw you bought and in the test certificate for the plaster system, not in some general rule. Put on 8 mm and you have no proof left at all. Outside, 25 to 30 mm of lime in three coats with a key coat and reinforcement, inside leave the clay open.

Time and cost

For 60 m² of wall, allow six to ten people and 20 to 40 working days, half of that plastering. Straw costs 3 to 6 euros a bale from the field, clay plaster 0.20 to 0.40 euros a kilo. With plenty of your own labour you often end up at half of conventional building costs.

The three most common mistakes

  • Damp bales built in. Above 15 per cent residual moisture by mass, straw rots inside the wall, and the smell is how you find out. The approval for construction straw allows 15 per cent at most, and mould starts at around 18. Measure every single bale with the probe in the middle of the bale, keep a written record, sort the wet ones out, however tight the schedule is.
  • Cement render or a membrane on the outside. Both trap the moisture in the straw. Lime plaster outside, vapour open clay inside.
  • Plinth too low. Splashing water off the ground reaches 40 cm up. Top of the plinth at least 50 cm above ground, plus a gravel strip 40 cm wide right round the house.

Worauf es ankommtWhat matters hereFeuchte ist der einzige echte Feind. Guter Schuh unten, guter Hut oben, dann hält so ein Bau Jahrhunderte.Moisture is the only real enemy. Good boots at the bottom, a good hat on top, and a build like this lasts for centuries.

Unterstand aus Rundholz, Round timber shelter
Wochen bis MonateWeeks to monthsMit erfahrener HandNeeds an experienced hand

Unterstand aus RundholzRound timber shelter

3 Personen, Längsstämme etwa 200 kg, schweres Heben3 people, the long purlins weigh about 200 kg, heavy lifting

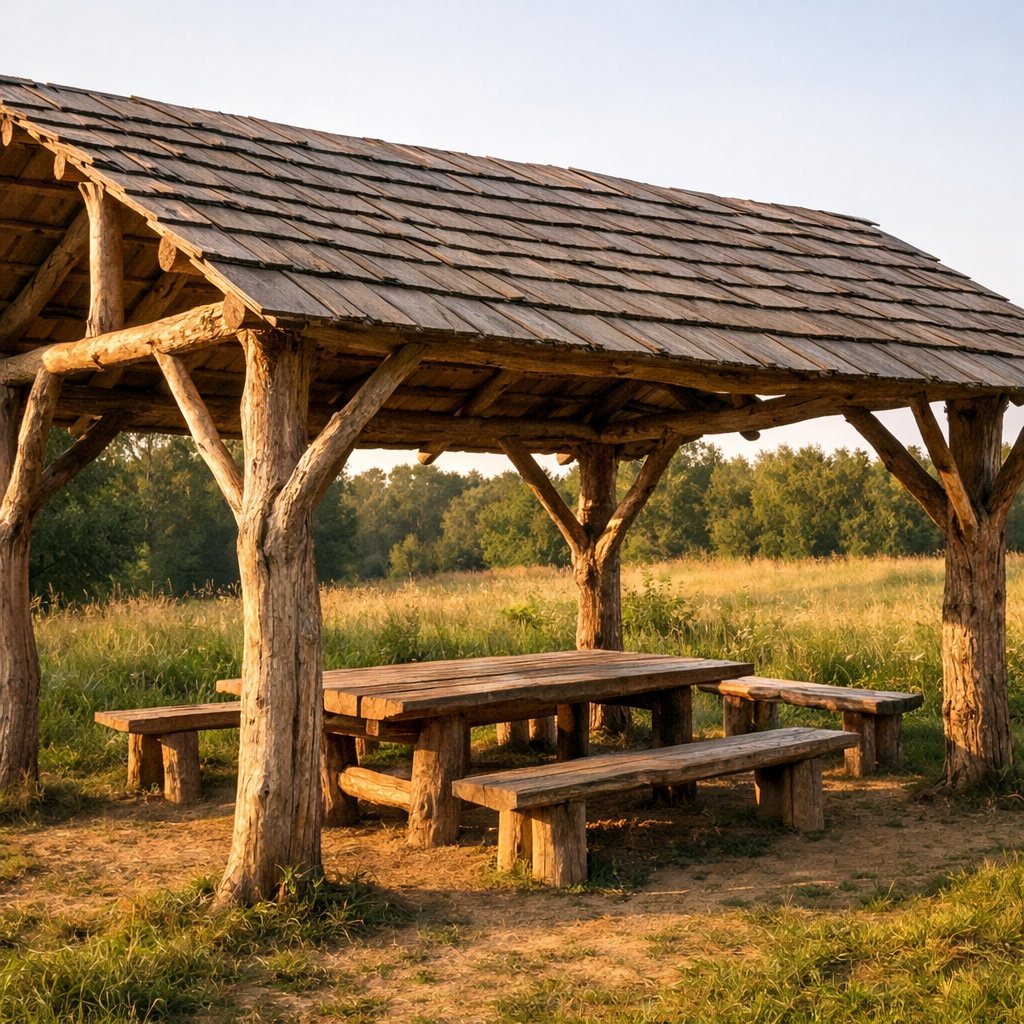
Ein Dach ohne Wände ist der meistgenutzte Bau auf jedem Gelände: Regenschutz beim Essen, Trockenplatz für Werkzeug, Schatten im Sommer, Bühne bei Festen.A roof without walls gets more use than anything else on a site: shelter from the rain while you eat, a dry place for tools, shade in summer, a stage when there is a party.

So wird gebautHow it is built
Rundstämme mit Kopfbändern, Betonpunktfundamente oder Stahlschuhe, damit kein Holz im Boden steht. Dachdeckung aus Wellbitum oder Schindeln.Round poles with knee braces, concrete pad foundations and steel post bases so that no timber sits in the ground. A roof of corrugated bitumen sheets or shingles.
KostenCost
500 bis 3.000 Euro500 to 3,000 euros
Erster SchrittFirst step
Holzständer nie einbetonieren, immer auf Stahlschuhe stellen. Sonst fault der Fuß in fünf Jahren durch.Never concrete a timber post in, always set it on a steel base. Otherwise the foot rots through in five years.
Schritt für SchrittStep by step
Unterstand aus Rundholz, Ansicht 400 40 250 350 80 15 Grad 1 2 3 4 5 6 7 8 9 1 Rundstamm Douglasie 20 bis 24 cm 2 Punktfundament 40 x 40 x 80 cm 3 Stahlschuh, Holz 15 cm über Beton 4 Längspfette 24 cm, 620 cm lang 5 Kerve 3 cm im Stützenkopf 6 Kopfband 45 Grad, 100 cm 7 Sparren 8 x 16 cm, Abstand 90 cm 8 Wellbitum, Überlappung 20 cm 9 Dachneigung mindestens 15 Grad Nicht maßstäblich, Maße in cm
Bauskizze Unterstand aus Rundholz, am Handy seitlich wischenMeasured sketch of Round timber shelter, swipe sideways on a phone

Bevor du anfängst

Ruf beim Bauamt an und frag, bis zu welchem Rauminhalt ein offener Unterstand bei euch ohne Verfahren steht und was im Außenbereich gilt. Eine bundesweite Faustzahl gibt es nicht, und die oft genannten zehn Kubikmeter stehen in keiner Landesbauordnung. Bring die Maße und einen Lageplan mit dem Abstand zur Grenze mit. Ein Unterstand von sechs mal vier Metern bei drei Metern Höhe hat rund 60 Kubikmeter und liegt fast überall darüber. Verfahrensfrei heißt ohnehin nur, dass niemand vorher prüft. Im Außenbereich muss das Vorhaben nach Paragraf 35 Baugesetzbuch auch inhaltlich zulässig sein, und ohne Privilegierung ist es das fast nie. Ein Statiker rechnet Schneelast und Windlast für 300 bis 800 Euro. Und halte den Unterschied auseinander: verfahrensfrei heißt nur, dass du keinen Antrag stellst. Zulässig ist das Vorhaben damit noch nicht, im Außenbereich liegt genau da die eigentliche Hürde.

Das brauchst du

  • 6 Rundstämme Douglasie 20 bis 24 cm Zopf, 350 cm lang als Stützen
  • 2 Rundstämme 24 cm, 620 cm lang als Längspfetten
  • 24 Kopfbänder Halbrund 12 cm, 100 cm lang sechs Stützen mal zwei Richtungen mal zwei Stück, also 12 längs und 12 quer
  • 8 Sparren Konstruktionsvollholz 8 x 16 cm, 490 cm Abstand 90 cm über 6 m Gebäudelänge, 414 cm Sparrenlänge in der Schräge plus zweimal 40 cm Überstand
  • 6 Stützenfüße mit 240 mm lichter Weite, feuerverzinkt, mit Ankerstab kein Holz im Boden, in einen Schuh mit 100 mm passt kein Stamm mit 20 bis 24 cm Zopf
  • 6 Punktfundamente Beton C25/30, 40 x 40 x 80 cm frostfrei gegründet
  • 38 m² Wellbitumplatten 2000 x 950 mm für 32,6 m² Dachfläche einschließlich der Überlappungen
  • 70 laufende Meter Traglattung 40 x 60 mm quer auf die Sparren, Abstand nach Herstellerangabe, bei 15 Grad höchstens 61 cm
  • 36 Vollgewindeschrauben 8 x 260 mm Sparren auf Pfette
  • 80 Stabdübel 12 mm für Stützenfüße, Kopfbänder und Stützenköpfe, allein die sechs Stützenfüße brauchen 24 Stück

Werkzeug

Motorsäge, Zugmesser, Kettenzug, Bohrmaschine mit Schlangenbohrer 12 mm, Wasserwaage 200 cm, Schnurgerüst, Erdbohrer, Schaufel, Schlagschrauber

Schritt für Schritt

  1. Grundfläche abstecken. 6 x 4 m mit Schnurgerüst, die Diagonale muss 7,21 m messen, Abweichung höchstens 1 cm.
  2. Fundamente gießen. 40 x 40 cm, 80 cm tief und damit frostfrei, unten 10 cm Schotter, Beton C25/30, Ankerstab der Stahlschuhe lotrecht einbetonieren, Oberkante 15 cm über Gelände.
  3. Stämme schälen. Rinde restlos mit dem Zugmesser abnehmen. Darunter sitzen Borkenkäfer, und die Feuchte bleibt im Holz.
  4. Stützen stellen. In die Stützenfüße setzen, je vier Stabdübel 12 mm durchtreiben, mit Schrägstreben lotrecht sichern, dann alle Köpfe auf eine Höhe abnehmen. Der Fuß muss zum Stamm passen: Bei 20 bis 24 cm Zopf braucht es 240 mm lichte Weite oder einen Stützenfuß mit Schlitzblech und einen sauber abgesetzten Zapfen am Stammfuß. Wangen abschneiden, damit der Stamm in einen zu kleinen Schuh passt, nimmt ihm genau dort 40 Prozent des Querschnitts, wo die Last am größten ist.
  5. Pfetten auflegen. In jeden Stützenkopf eine Kerve von 3 cm einschneiden, Pfette einlegen, mit je zwei Vollgewindeschrauben 8 x 260 von oben verschrauben.
  6. Kopfbänder setzen. 45 Grad, 100 cm Schenkellänge, an jedem Stützenkopf zwei Stück in Längsrichtung und zwei in Querrichtung, zusammen 24 Stück. Nur längs ausgesteift bleibt der Bau quer ein Gelenkviereck: Die Sparren liegen gelenkig auf den Pfetten, die Stützen stehen gelenkig im Schuh, und beim ersten Seitenwind rackt alles. Wer quer keine Kopfbänder will, setzt einen Zangenriegel zwischen die gegenüberliegenden Stützen und eine Windrispe ins Dach.
  7. Sparren und Deckung. Acht Sparren alle 90 cm, Neigung mindestens 15 Grad, Überstand 40 cm auf jeder Seite. Auf die Sparren kommt zuerst eine Traglattung 40 x 60 mm, denn Wellbitum darf nicht über 90 cm frei spannen: Die Hersteller lassen bei 10 bis 15 Grad höchstens 45 cm Auflagerabstand zu, ab 15 Grad 61 cm. Ohne Lattung hängt die Platte zwischen den Sparren durch, das Wasser steht in der Welle und läuft unter die Überlappung. Wer keine Lattung will, setzt die Sparren auf 60 cm, dann sind es 11 statt 8 Stück. Wellbitum im Wellenberg nageln, seitlich eine Welle und längs 20 cm überlappen.
  8. Konstruktiv schützen statt streichen. Leinölfirnis ist kein Holzschutzmittel, es wirkt nicht gegen Pilze und ist nach zwei Jahren Bewitterung weg. Douglasienkernholz ist nach DIN EN 350 nur mäßig dauerhaft, das Splintholz gar nicht, und ein Unterstand ohne Wandanschluss liegt in Gebrauchsklasse 3.2. Also entscheidet der konstruktive Holzschutz nach DIN 68800-2: Stützenkopf schräg absetzen oder mit einer Blechkappe abdecken, die Kerve so schneiden, dass Wasser nach außen läuft, den Dachüberstand von 40 cm wirklich bauen, den Stammfuß 15 cm über den Beton setzen und rundum belüften. Wenn chemisch, dann ein Mittel mit Wirknachweis nach DIN 68800-3. Frisches Rundholz schwindet tangential 8 bis 10 Prozent, deshalb nach dem ersten Sommer alle Verbindungen nachziehen.
  9. Boden und Wasser. Rinne mit 1 Prozent Gefälle in eine Sickermulde, darunter 15 cm Schotter 0/32 verdichtet.

Zeit und Kosten

Drei Personen brauchen 5 bis 8 Arbeitstage, dazu eine Woche Wartezeit für den Beton. Material 500 Euro mit Stämmen aus dem eigenen Wald, bis 3.000 Euro mit gekauftem Holz, Stahlschuhen und neuer Deckung.

Die drei häufigsten Fehler

  • Holz einbetoniert. Im Beton steht der Stammfuß dauerhaft nass und ist nach fünf Jahren durch. Immer auf Stahlschuhe stellen, mit 15 cm Abstand zur Betonoberkante.
  • Kopfbänder weggelassen. Ein Dach ohne Wände hat nichts, was den Wind aufnimmt. Ohne Diagonalen kippt der ganze Rahmen in sich zusammen.
  • Rinde drangelassen. Rinde hält Nässe fest, darunter sitzen Borkenkäfer. Schälen kostet zwei Stunden je Stamm und verdoppelt die Lebensdauer.

Before you start

Ring the Bauamt (the local building authority) and ask up to what volume an open shelter may stand without a procedure where you are, and what applies in the Außenbereich (the open land outside the built-up area). There is no nationwide rule of thumb, and the ten cubic metres people often quote appear in no Landesbauordnung (the building code of your federal state). Take the dimensions and a site plan showing the distance to the boundary. A shelter of six by four metres at three metres high holds around 60 cubic metres and sits above the limit almost everywhere. In any case, verfahrensfrei only means that nobody checks beforehand. In the Außenbereich the project also has to be permissible in substance under Section 35 of the Baugesetzbuch, and without a privileged use it hardly ever is. A structural engineer will calculate snow and wind load for 300 to 800 euros. And keep the two things apart: verfahrensfrei (exempt from the approval procedure) only means that you file no application. It does not make the project permissible, and in the Außenbereich that is exactly where the real hurdle sits.

What you need

  • 6 Douglas fir poles, 20 to 24 cm top diameter, 350 cm long as the posts
  • 2 round poles, 24 cm, 620 cm long as the long purlins
  • 24 half round knee braces, 12 cm, 100 cm long six posts times two directions times two braces, so 12 along and 12 across
  • 8 rafters of Konstruktionsvollholz (graded structural timber), 8 x 16 cm, 490 cm at 90 cm centres over 6 m of length, 414 cm of rafter on the slope plus 40 cm of overhang at each end
  • 6 hot dip galvanised post bases with 240 mm internal width and an anchor rod no timber in the ground, and a pole with a 20 to 24 cm top diameter will not fit a 100 mm base
  • 6 pad foundations of C25/30 concrete, 40 x 40 x 80 cm founded below the frost line
  • 38 m² of corrugated bitumen sheets, 2000 x 950 mm for 32.6 m² of roof, overlaps included
  • 70 linear metres of load bearing battens, 40 x 60 mm across the rafters, spacing as the maker states, at 15 degrees no more than 61 cm
  • 36 fully threaded screws, 8 x 260 mm rafter to purlin
  • 80 dowel pins, 12 mm for post bases, knee braces and post heads, and the six post bases alone take 24 of them

Tools

Chainsaw, drawknife, chain hoist, drill with a 12 mm auger bit, 200 cm spirit level, profile boards and string lines, post hole auger, shovel, impact wrench

Step by step

  1. Set out the footprint. 6 x 4 m with profile boards and string lines, and the diagonal has to measure 7.21 m, out by no more than 1 cm.
  2. Pour the foundations. 40 x 40 cm, 80 cm deep and so below the frost line, 10 cm of gravel at the bottom, C25/30 concrete, the anchor rod of each steel base cast in plumb, top edge 15 cm above ground.
  3. Peel the poles. Take every last bit of bark off with the drawknife. Bark beetles sit underneath it, and the damp stays in the timber.
  4. Stand the posts. Set them into the bases, drive four 12 mm dowel pins through each, brace them plumb with raking struts, then cut all the heads to one height. The base has to suit the pole: with a top diameter of 20 to 24 cm you need 240 mm of internal width, or a post base with a slotted plate and a cleanly cut tenon on the foot of the pole. Slabbing the sides off so the pole fits a base that is too small takes 40 per cent of the section away exactly where the load is greatest.
  5. Lay the purlins. Cut a saddle notch 3 cm deep into each post head, drop the purlin in, and fix it from above with two fully threaded screws of 8 x 260 each.
  6. Fit the knee braces. At 45 degrees, 100 cm on each leg, two braces along and two across at every post head, 24 in all. Braced only in the long direction, the frame stays a pin jointed rectangle across it: the rafters simply rest on the purlins, the posts simply sit in their bases, and the first side wind sets the whole thing racking. If you want no braces across, put a collar tie between opposite posts and a Windrispe (a diagonal wind brace) into the roof.
  7. Rafters and covering. Eight rafters every 90 cm, pitch at least 15 degrees, 40 cm of overhang on each side. Load bearing battens of 40 x 60 mm go on the rafters first, because corrugated bitumen must not span more than 90 cm free: the makers allow 45 cm between supports at 10 to 15 degrees and 61 cm from 15 degrees up. Without battens the sheet sags between the rafters, water stands in the corrugation and runs in under the overlap. If you want no battens, bring the rafters to 60 cm, which makes 11 instead of 8. Nail the sheets through the crown of the corrugation, overlap one corrugation at the sides and 20 cm up the slope.
  8. Protect by design, not by painting. Boiled linseed oil is not a wood preservative, it does nothing against fungi, and two years of weather takes it off. Under DIN EN 350 Douglas fir heartwood is only moderately durable and the sapwood not at all, and a shelter with no wall around it sits in use class 3.2. So it comes down to protection by design under DIN 68800-2: cut the post head to a slope or cap it with sheet metal, cut the notch so water runs outwards, actually build the 40 cm of overhang, set the foot of the pole 15 cm above the concrete and let air get round it. If you do go chemical, use a product with proven efficacy under DIN 68800-3. Fresh round timber shrinks 8 to 10 per cent tangentially, so tighten every connection again after the first summer.
  9. Ground and water. A gutter with 1 per cent fall running into a soakaway, and 15 cm of compacted 0/32 gravel underneath.

Time and cost

Three people need 5 to 8 working days, plus a week of waiting for the concrete. Materials come to 500 euros with poles from your own woodland, up to 3,000 euros with bought timber, steel bases and a new covering.

The three most common mistakes

  • Timber concreted in. In concrete the foot of the pole stays permanently wet and is gone in five years. Always set it on a steel base, 15 cm clear of the top of the concrete.
  • Knee braces left out. A roof without walls has nothing to take the wind. Without diagonals the whole frame folds over on itself.
  • Bark left on. Bark holds wet, and bark beetles sit underneath it. Peeling costs two hours a pole and doubles the life of the building.

Worauf es ankommtWhat matters hereAuch ein offener Unterstand zählt ab einer bestimmten Größe als bauliche Anlage. Die Grenzen stehen in der Landesbauordnung.Above a certain size, even an open shelter counts as a structure. The limits are in the Landesbauordnung (the building code of your federal state).

Bauen mit Paletten, Building with pallets
Wochen bis MonateWeeks to monthsEtwas ÜbungSome practice helps

Bauen mit PalettenBuilding with pallets

3 bis 4 Personen, Paletten je 25 kg, schweres Heben3 to 4 people, pallets of 25 kg each, heavy lifting

Europaletten sind genormt, tragfähig und liegen hinter jedem Baumarkt. Aus ihnen werden Wände, Hochbeete, Regale, Zäune und ganze Hütten. Der billigste Weg zu Raum, den es gibt, wenn man Zeit statt Geld hat.Euro pallets are a standard size, they carry a load, and they lie about behind every builders' merchant. They turn into walls, raised beds, shelves, fences and whole huts. If you have time rather than money, this is the cheapest route to a room there is.

So wird gebautHow it is built
Nur Paletten mit dem Stempel HT nehmen, die sind hitzebehandelt und nicht chemisch begast. Für Wände hochkant stellen, verschrauben, Zwischenräume mit Stroh oder Holzfaser füllen und beidseitig verkleiden.Only take pallets stamped HT, which are heat treated rather than chemically fumigated. For walls, stand them on edge, screw them together, fill the voids with straw or wood fibre and line both sides.
KostenCost
oft nur das Werkzeug und die Schraubenoften no more than the tools and the screws
Erster SchrittFirst step
Bei Baumärkten, Speditionen und Landhändlern nach Einwegpaletten fragen. Viele geben sie kostenlos ab, weil die Entsorgung sie sonst Geld kostet.Ask builders' merchants, haulage firms and agricultural merchants for one way pallets. Many hand them over for nothing, because getting rid of them otherwise costs money.
Schritt für SchrittStep by step
Bauen mit Paletten, Wandschnitt 21 14,4 3 120 16 1 2 3 4 5 6 7 8 9 außen innen 1 Ringanker Bohle 4 x 16 cm 2 Europalette hochkant, 120 x 80 cm 3 Klotz 10 cm, Klötze nach innen 4 Strohhäcksel als Füllung 5 OSB 15 mm, innen als Scheibe 6 Fassadenbahn, sd-Wert 0,05 m 7 Konterlattung 30 mm, Luftspalt 8 Lärchenbrett 20 mm, hinterlüftet 9 Feuchtesperre auf Betonplatte Nicht maßstäblich, Maße in cm
Bauskizze Bauen mit Paletten, am Handy seitlich wischenMeasured sketch of Building with pallets, swipe sideways on a phone

Bevor du anfängst

Das Bauamt sagt euch, bis zu welchem Rauminhalt eine kleine Hütte bei euch ohne Verfahren steht. Fragt genau danach und nennt dabei die geplante Nutzung, denn in den meisten Ländern gilt die Freiheit nur ohne Aufenthaltsraum, ohne Toilette und ohne Feuerstätte. Eine Palettenhütte von drei mal vier Metern bei 2,5 Metern Höhe hat rund 30 Kubikmeter und liegt je nach Land knapp darunter oder darüber. Ein Geräteschuppen geht oft ohne Antrag durch, ein Schlafraum nie. Verfahrensfrei heißt nur, dass niemand vorher prüft. Bebauungsplan und Abstandsflächen gelten weiter, und im Außenbereich ist Wohnen ohne Privilegierung nicht zulässig. Nehmt nur Paletten mit dem Stempel HT, niemals solche mit MB. Und halte den Unterschied auseinander: verfahrensfrei heißt nur, dass du keinen Antrag stellst. Zulässig ist das Vorhaben damit noch nicht, im Außenbereich liegt genau da die eigentliche Hürde.

Das brauchst du

  • 60 Europaletten 120 x 80 cm, Typ EPAL, Stempel HT Wände einer Hütte 3 x 4 m
  • 9 Betonplatten 40 x 40 cm als Punktauflager
  • 18 laufende Meter Kantholz 10 x 10 cm Schwelle und Bodenrahmen
  • 200 Vollgewindeschrauben 6 x 120 mm Palette an Palette
  • 120 Winkelverbinder 90 x 90 x 65 mm mit Ankernägeln 4 x 60 für alle Anschlüsse
  • 10 m³ Strohhäcksel oder Holzfaserflocken Füllung der Hohlräume
  • 30 m² OSB 15 mm Innenbeplankung und Aussteifung
  • 36 m² Fassadenbahn diffusionsoffen, sd-Wert 0,05 m Wetterschutz
  • 32 m² Lärchenbrett 20 mm auf Konterlattung 30 mm hinterlüftete Außenhaut

Werkzeug

Akkuschrauber, Handkreissäge, Multitool mit Bimetallblatt, Nageleisen 90 cm, Wasserwaage 120 cm, Schnurgerüst, Bandschleifer, Schlagbohrmaschine

Schritt für Schritt

  1. Stempel lesen. Auf dem Eckklotz stehen die IPPC-Ähre, das Länderkürzel DE und die Behandlung. HT heißt hitzebehandelt und ist unbedenklich, MB heißt Methylbromid und bleibt liegen.
  2. Sammeln und trocknen. Bei Baumärkten, Speditionen und Landhändlern nach Einwegpaletten fragen. Vier Wochen hochkant unter Dach lagern, nasse Paletten schwinden und reißen die Schrauben auf.
  3. Grundfläche abstecken. 3 x 4 m mit Schnurgerüst, die Diagonale muss 5,00 m messen, Abweichung höchstens 1 cm.
  4. Bodenrahmen legen. Kantholz 10 x 10 cm auf 9 Betonplatten 40 x 40 cm, Auflagerabstand höchstens 120 cm, mit Winkelverbindern und je vier 5 x 60 Schrauben sichern.
  5. Boden aus Paletten. Flach auf den Rahmen legen, Klötze nach unten, jede Palette mit vier Winkeln fassen, Fugen mit Sperrholz 15 mm überdecken.
  6. Wände stellen. Paletten hochkant, Klötze nach innen, je drei Vollgewindeschrauben 6 x 120 pro Stoß. Ecken über Eck verzahnen, nicht stumpf gegeneinander stoßen.
  7. Ringanker und Aussteifung. Bohle 4 x 16 cm umlaufend auf die Wandkrone schrauben, dazu OSB-Platten in zwei gegenüberliegenden Wandfeldern als Scheibe. Erst damit steht der Bau gegen Wind.
  8. Dämmen und verkleiden. Hohlräume mit Strohhäcksel stopfen, innen OSB, außen Fassadenbahn, Konterlattung 30 mm und Lärchenschalung. Der Luftspalt trocknet die Wand nach jedem Regen.

Zeit und Kosten

Drei bis vier Personen brauchen 10 bis 18 Arbeitstage, dazu einige Wochenenden fürs Sammeln. Wer die Paletten geschenkt bekommt, zahlt 400 bis 900 Euro für Schrauben, Beschläge und Fassadenholz, mit gekaufter Dämmung bis 2.500 Euro.

Die drei häufigsten Fehler

  • MB-Paletten verbaut. Methylbromid ist ein Nervengift und dünstet jahrelang aus. Für Wohnraum, Hochbeete und Kinder taugen nur Paletten mit dem Stempel HT.
  • Wand ohne Aussteifung. Paletten tragen Druck von oben, Wind von der Seite kippt sie. Ohne Ringanker und Plattenscheibe schiebt sich die Wand beim ersten Sturm schief.
  • Nasse Paletten verbaut. Frisch gesammeltes Holz hat 25 Prozent Feuchte und schwindet beim Trocknen um mehrere Millimeter. Sonst klappert der ganze Bau.

Before you start

The Bauamt (the local building authority) will tell you up to what volume a small hut may stand without a procedure where you are. Ask exactly that, and name the intended use while you are at it, because in most federal states the exemption only holds without a habitable room, without a toilet and without a fireplace. A pallet hut of three by four metres at 2.5 metres high holds around 30 cubic metres and lands just under or just over the line depending on the state. A tool shed often goes through without an application, a bedroom never. Verfahrensfrei only means that nobody checks beforehand. The Bebauungsplan (the local development plan) and the Abstandsflächen (the minimum setbacks to the boundary) still apply, and in the Außenbereich (the open land outside the built-up area) living is not permitted without a privileged use. Take only pallets stamped HT, never ones marked MB. And keep the two things apart: verfahrensfrei (exempt from the approval procedure) only means that you file no application. It does not make the project permissible, and in the Außenbereich that is exactly where the real hurdle sits.

What you need

  • 60 Euro pallets, 120 x 80 cm, type EPAL, stamped HT the walls of a hut 3 x 4 m
  • 9 concrete slabs, 40 x 40 cm as point supports
  • 18 linear metres of squared timber, 10 x 10 cm the sole plate and the floor frame
  • 200 fully threaded screws, 6 x 120 mm pallet to pallet
  • 120 angle brackets, 90 x 90 x 65 mm, with 4 x 60 connector nails for every junction
  • 10 m³ of chopped straw or loose wood fibre to fill the voids
  • 30 m² of OSB, 15 mm inner lining and racking
  • 36 m² of vapour open facade membrane, sd value 0.05 m weather protection
  • 32 m² of larch board, 20 mm, on 30 mm counter battens a ventilated outer skin

Tools

Cordless drill driver, circular saw, oscillating multi tool with a bimetal blade, 90 cm wrecking bar, 120 cm spirit level, profile boards and string lines, belt sander, hammer drill

Step by step

  1. Read the stamp. The corner block carries the IPPC wheat ear, the country code DE and the treatment. HT means heat treated and is harmless, MB means methyl bromide and stays where it is.
  2. Collect and dry. Ask builders' merchants, haulage firms and agricultural merchants for one way pallets. Store them on edge under cover for four weeks, because wet pallets shrink and tear the screws loose.
  3. Set out the footprint. 3 x 4 m with profile boards and string lines, and the diagonal has to measure 5.00 m, out by no more than 1 cm.
  4. Lay the floor frame. Squared timber 10 x 10 cm on 9 concrete slabs of 40 x 40 cm, no more than 120 cm between supports, fixed with angle brackets and four 5 x 60 screws each.
  5. A floor of pallets. Lay them flat on the frame with the blocks facing down, hold each pallet with four brackets, and cover the joints with 15 mm plywood.
  6. Stand the walls. Pallets on edge, blocks facing inwards, three fully threaded 6 x 120 screws at every joint. Interlock the corners, do not just butt them together.
  7. Ring beam and racking. Screw a plank of 4 x 16 cm right round the top of the wall, and add OSB panels in two opposite wall bays as racking panels. Only then does the building stand up to wind.
  8. Insulate and clad. Stuff the voids with chopped straw, OSB inside, facade membrane outside, 30 mm counter battens and larch cladding. The air gap dries the wall out after every shower.

Time and cost

Three to four people need 10 to 18 working days, plus a few weekends of collecting. If the pallets come free, you pay 400 to 900 euros for screws, brackets and cladding timber, and up to 2,500 euros with bought insulation.

The three most common mistakes

  • MB pallets built in. Methyl bromide is a nerve poison and it gases out for years. For living space, raised beds and children, only pallets stamped HT will do.
  • Wall without racking. Pallets carry pressure from above, and wind from the side knocks them over. Without a ring beam and a panel acting as racking, the first gale pushes the wall out of true.
  • Wet pallets built in. Freshly collected timber holds 25 per cent moisture and shrinks by several millimetres as it dries. Dry them first, or the whole building rattles.

Worauf es ankommtWhat matters herePaletten mit dem Kürzel MB sind mit Methylbromid begast und gehören weder in Wohnraum noch an Beete. Und nichts Tragendes ohne Rückfrage bauen: Paletten sind für Druck von oben gemacht, nicht für Wind von der Seite.Pallets marked MB have been fumigated with methyl bromide and belong neither in living space nor beside a vegetable bed. And build nothing load bearing without asking first: pallets are made for pressure from above, not for wind from the side.

Bänke, Tische und Betten aus Paletten, Benches, tables and beds from pallets
Ein WochenendeOne weekendOhne VorkenntnisseNo experience needed

Bänke, Tische und Betten aus PalettenBenches, tables and beds from pallets

2 Personen, Paletten je 25 kg, schweres Heben2 people, pallets of 25 kg each, heavy lifting

Vier Paletten sind ein Bettgestell, zwei übereinander eine Bank, sechs im Kreis ein Sitzplatz für zwölf Leute. Für ein junges Projekt, in dem sich noch alles ändert, ist das genau die richtige Art von Möbel: schnell da, schnell anders.Four pallets make a bed frame, two stacked make a bench, six in a circle seat twelve. For a young project where everything is still shifting, this is exactly the right kind of furniture: quick to build, quick to change.

So wird gebautHow it is built
Abschleifen, entgraten, verschrauben, mit Leinöl oder Hartwachs behandeln. Sitzflächen mit Sperrholz auflegen, sonst rutschen Polster in die Ritzen.Sand, take the sharp edges off, screw together, then finish with linseed oil or hard wax. Put plywood over the seats, or the cushions slip down into the gaps.
KostenCost
unter 100 Euro pro Möbelunder 100 euros per piece
Erster SchrittFirst step
Erst eine Bank bauen und einen Monat benutzen. Danach wisst ihr, welche Höhe und Tiefe für euch stimmt.Build one bench first and use it for a month. After that you know which height and depth suit you.
Schritt für SchrittStep by step
Bänke, Tische und Betten aus Paletten, Ansichten Bank Tisch Bett 44,5 74 59,6 240 160 10 Grad 1 2 3 4 5 6 7 8 9 1 Bank aus 3 Paletten, 43 cm 2 Sperrholz 15 mm, Sitzhöhe 44,5 cm 3 Lehne 10 Grad nach hinten 4 Flachverbinder 100 x 35 mm 5 Tischplatte aus einer Palette 6 Rahmen Kantholz 4 x 6 cm 7 Beine 10 x 10 cm, 59,6 cm lang 8 Bett aus 4 Paletten, 240 x 160 cm 9 Matratze 200 x 140 cm mittig Nicht maßstäblich, Maße in cm
Bauskizze Bänke, Tische und Betten aus Paletten, am Handy seitlich wischenMeasured sketch of Benches, tables and beds from pallets, swipe sideways on a phone

Bevor du anfängst

Für Möbel braucht ihr keine Baugenehmigung, mit eurer Haftpflichtversicherung solltet ihr trotzdem sprechen. Fragt schriftlich nach, ob Schäden gedeckt sind, wenn Gäste, Seminarteilnehmer oder fremde Kinder eure Möbel nutzen, denn dann greift die Verkehrssicherungspflicht. Wollt ihr verkaufen, gilt seit Dezember 2024 die europäische Produktsicherheitsverordnung, und die nimmt auch Kleinsthersteller in die Pflicht, mit Risikobetrachtung, technischen Unterlagen und Kontaktangabe auf dem Möbel. Beim Material zählt der Stempel. HT bedeutet hitzebehandelt, MB steht für Methylbromid, ein Begasungsmittel, das in der EU seit 2010 verboten ist und auf Importpaletten weiter auftaucht. Solche Paletten gehören weder ins Schlafzimmer noch ans Gemüsebeet.

Das brauchst du

  • 10 Europaletten 120 x 80 x 14,4 cm, Typ EPAL, Stempel HT für Bett, Bank und Tisch
  • 1 Platte Sperrholz Birke 15 mm, 125 x 250 cm Auflage auf den Sitzflächen
  • 60 Vollgewindeschrauben 6 x 120 mm verbinden Palette mit Palette
  • 80 Spanplattenschrauben 4,5 x 50 mm für Auflagen und Leisten
  • 16 laufende Meter Kantholz 4 x 6 cm Rahmen unter Tischplatte und Lehne
  • 4 Kantholzbeine 10 x 10 cm, 59,6 cm lang ergeben Tischhöhe 74 cm
  • 8 Flachverbinder 100 x 35 mm verzinkt für die Rückenlehne
  • 1 Liter Leinölfirnis oder 0,75 Liter Hartwachsöl reicht für zwei Anstriche
  • Schleifpapier Körnung 60, 100 und 150, je 10 Blatt

Werkzeug

Exzenterschleifer, Akkuschrauber, Handkreissäge, Stichsäge, Multitool mit Bimetallblatt, Nageleisen, Wasserwaage 60 cm, Schraubzwingen, Staubmaske FFP2

Schritt für Schritt

  1. Paletten aussuchen. Nur Stempel HT, keine Ölflecken, keine gebrochenen Klötze. Eine EPAL-Palette misst 120 x 80 x 14,4 cm, wiegt 25 kg und trägt 1.500 kg.
  2. Zerlegen, wo nötig. Mit dem Multitool und Bimetallblatt zwischen Brett und Klotz die Nägel durchsägen. So bleiben die Bretter ganz, mit dem Nageleisen splittern sie.
  3. Schleifen. Körnung 60, dann 100, dann 150. Alle Kanten mit 2 mm Fase brechen. Rechnet 20 Minuten je Palette und tragt eine Staubmaske.
  4. Bank bauen. Drei Paletten gestapelt ergeben 43 cm, mit 15 mm Sperrholz obendrauf 44,5 cm Sitzhöhe. Die Lagen mit je sechs Schrauben 6 x 120 verbinden.
  5. Lehne anschrauben. Eine Palette hochkant hinter den Sitz, um 10 Grad nach hinten gekippt, mit vier Flachverbindern und 4,5 x 50 Schrauben.
  6. Tisch bauen. Eine Palette als Platte auf einen Rahmen aus Kantholz 4 x 6 cm legen, vier Beine 10 x 10 cm mit 59,6 cm Länge ergeben Tischhöhe 74 cm.
  7. Bett bauen. Vier Paletten zum Rechteck 160 x 240 cm verschrauben, Matratze 140 x 200 cm mittig, ringsum 10 cm Rand als Ablage.
  8. Ölen. Leinölfirnis satt auftragen, 20 Minuten ziehen lassen, Überschuss abwischen, nach 24 Stunden den zweiten Anstrich. Ölige Lappen sofort in einen Eimer Wasser werfen.

Zeit und Kosten

Zwei Personen schaffen Bank, Tisch und Bett an einem Wochenende, wenn die Paletten trocken bereitliegen. Material unter 100 Euro je Möbel, bei geschenkten Paletten nur Schrauben, Öl und Schleifpapier.

Die drei häufigsten Fehler

  • Nicht geschliffen. Rohe Palettenkanten hinterlassen Splitter, zuverlässig zuerst bei den Kindern. Zwanzig Minuten Schleifen je Palette gehören dazu.
  • Ölige Lappen liegen gelassen. Leinöl erwärmt sich beim Trocknen und entzündet sich von selbst. Lappen in Wasser tauchen oder draußen einzeln aufhängen.
  • Sperrholz unter die Matratze gelegt. Dann kann die Nachtfeuchte nicht weg und die Matratze schimmelt von unten. Lattenrost verwenden oder die Palettenfläche offen lassen.

Before you start

Furniture needs no building approval, but you should still talk to your Haftpflichtversicherung (your private liability insurer). Ask in writing whether damage is covered when guests, course participants or other people's children use your furniture, because at that point the Verkehrssicherungspflicht (the duty to keep your premises safe for others) applies. If you want to sell, the European product safety regulation has applied since December 2024, and it puts obligations on the smallest maker too, with a risk assessment, technical documentation and contact details on the piece itself. With the material, the stamp is what counts. HT means heat treated. MB stands for methyl bromide, a fumigant banned in the EU since 2010 that still turns up on imported pallets. Pallets like that belong neither in the bedroom nor beside the vegetable bed.

What you need

  • 10 Euro pallets, 120 x 80 x 14.4 cm, type EPAL, stamped HT for the bed, the bench and the table
  • 1 sheet of birch plywood, 15 mm, 125 x 250 cm to go over the seats
  • 60 fully threaded screws, 6 x 120 mm join pallet to pallet
  • 80 chipboard screws, 4.5 x 50 mm for the tops and the battens
  • 16 linear metres of squared timber, 4 x 6 cm the frame under the table top and the backrest
  • 4 legs of squared timber, 10 x 10 cm, 59.6 cm long give a table height of 74 cm
  • 8 galvanised flat connector plates, 100 x 35 mm for the backrest
  • 1 litre of boiled linseed oil or 0.75 litres of hard wax oil enough for two coats
  • Abrasive paper in grits 60, 100 and 150, 10 sheets of each

Tools

Random orbit sander, cordless drill driver, circular saw, jigsaw, oscillating multi tool with a bimetal blade, wrecking bar, 60 cm spirit level, clamps, FFP2 dust mask

Step by step

  1. Pick the pallets. Stamped HT only, no oil stains, no broken blocks. An EPAL pallet measures 120 x 80 x 14.4 cm, weighs 25 kg and carries 1,500 kg.
  2. Take them apart where you have to. Saw the nails through between board and block with the multi tool and a bimetal blade. That way the boards stay whole, while a wrecking bar splits them.
  3. Sand. Grit 60, then 100, then 150. Take a 2 mm chamfer off every edge. Allow 20 minutes per pallet and wear a dust mask.
  4. Build the bench. Three pallets stacked come to 43 cm, and with 15 mm plywood on top the seat sits at 44.5 cm. Join the layers with six 6 x 120 screws each.
  5. Screw the backrest on. One pallet on edge behind the seat, tilted back by 10 degrees, held with four flat connector plates and 4.5 x 50 screws.
  6. Build the table. Lay one pallet as the top on a frame of squared timber 4 x 6 cm, and four legs of 10 x 10 cm at 59.6 cm long give a table height of 74 cm.
  7. Build the bed. Screw four pallets into a rectangle of 160 x 240 cm, put a mattress of 140 x 200 cm in the middle, and the 10 cm border all round serves as a shelf.
  8. Oil. Put the boiled linseed oil on generously, let it soak for 20 minutes, wipe the surplus off, and give it a second coat after 24 hours. Throw oily rags straight into a bucket of water.

Time and cost

Two people manage the bench, the table and the bed over one weekend, as long as the pallets are dry and ready. Materials come to under 100 euros per piece, and with pallets given to you, only screws, oil and abrasive paper.

The three most common mistakes

  • Not sanded. Raw pallet edges leave splinters, reliably in the children first. Twenty minutes of sanding per pallet is part of the work.
  • Oily rags left lying around. Linseed oil warms up as it dries and catches fire on its own. Dunk the rags in water or hang them outside, one by one.
  • Plywood laid under the mattress. Then the moisture from the night cannot escape and the mattress goes mouldy from below. Use a slatted base or leave the pallet surface open.

Worauf es ankommtWhat matters hereSchleifen ist keine Kür, sondern Pflicht. Unbehandelte Palettenkanten hinterlassen Splitter, und zwar zuverlässig bei den Kindern zürst.Sanding is not a nice extra, it is part of the job. Untreated pallet edges leave splinters, and reliably in the children first.

Geodätische Kuppel, Geodesic dome
Wochen bis MonateWeeks to monthsEtwas ÜbungSome practice helps

Geodätische KuppelGeodesic dome

3 Personen3 people

Dreiecke, die sich zur Halbkugel schließen. Eine Kuppel trägt sich ohne einen einzigen Innenpfosten, braucht wenig Material für viel Raum und hält Wind und Schnee besser aus als fast jede andere Leichtbauweise. Als Gewächshaus, Versammlungsraum oder Wohnkuppel.Triangles that close into a half sphere. A dome carries itself without a single post inside, needs little material for a lot of room, and stands up to wind and snow better than almost any other lightweight construction. As a greenhouse, a meeting room or a place to live.

So wird gebautHow it is built
Stab- oder Lattenkonstruktion nach einem Frequenzmodell, meist 2V oder 3V, an den Knoten verschraubt oder mit Stahlkonnektoren gefasst. Bespannung aus Folie, Zeltplane oder Holzschindeln.A frame of struts or battens built to a frequency model, usually 2V or 3V, bolted at the nodes or held in steel connectors. Covered with film, canvas or wooden shingles.
KostenCost
800 bis 6.000 Euro je nach Größe und Hülle800 to 6,000 euros depending on size and covering
Erster SchrittFirst step
Einen Kuppelrechner nutzen und die Stablängen ausdrucken, bevor gesägt wird. Eine falsche Länge zieht sich durch die ganze Kuppel.Use a dome calculator and print the strut lengths out before anything gets cut. One wrong length carries through the whole dome.
Schritt für SchrittStep by step
Geodätische Kuppel, Ansicht Durchmesser 600 300 80 A 164 B 185 1 2 3 4 5 6 7 8 9 1 Bodenring Zehneck 8 x 16 cm 2 Punktfundament 30 x 30 x 80 cm 3 Strebe A 164 cm, 30 Stück 4 Strebe B 185 cm, 35 Stück 5 Knotenblech Stahl 3 mm 6 Schlossschraube M8 x 90 mm 7 Gewebeplane 650 g/m² 8 Kederschiene mit Keder 8 mm 9 Dachluke gegen Kondenswasser Nicht maßstäblich, Maße in cm
Bauskizze Geodätische Kuppel, am Handy seitlich wischenMeasured sketch of Geodesic dome, swipe sideways on a phone

Bevor du anfängst

Frag beim Bauamt nach, bevor du den ersten Stab zuschneidest. Eine Kuppel mit sechs Metern Durchmesser hat rund 28 Quadratmeter Grundfläche und etwa 60 Kubikmeter Rauminhalt und liegt damit je nach Land und Nutzung über der verfahrensfreien Grenze. Nenne im Gespräch die Nutzung, denn als Gewächshaus wird sie anders beurteilt als ein Raum, in dem sich Menschen aufhalten. Verfahrensfrei heißt nur, dass niemand vorher prüft, im Außenbereich scheitert so ein Bau nach Paragraf 35 Baugesetzbuch fast immer. Lass die Statik auch dann rechnen, wenn niemand sie verlangt. Die Schneelast liegt je nach Zone bei 0,65 bis über 2 Kilonewton je Quadratmeter, und an den Knoten versagt eine Kuppel zuerst. Und halte den Unterschied auseinander: verfahrensfrei heißt nur, dass du keinen Antrag stellst. Zulässig ist das Vorhaben damit noch nicht, im Außenbereich liegt genau da die eigentliche Hürde.

Das brauchst du

  • 65 Latten Fichte gehobelt 4 x 6 cm 30 Streben A mit 174 cm, 35 Streben B mit 195 cm, das sind die Achsmaße 164 und 185 cm plus je 5 cm Holz hinter dem Bolzen an beiden Enden
  • 26 Knotenbleche Stahl 3 mm feuerverzinkt alternativ Sperrholz 18 mm
  • 260 Sechskantschrauben M8 x 60 mm nach DIN 933 verzinkt, mit Sicherungsmutter zwei je Strebenende, die Klemmlänge beträgt nur 43 bis 46 mm
  • 520 Unterlegscheiben DIN 9021, 24 mm Außendurchmesser unter jeden Kopf und jede Mutter, sonst walkt sich M8 in die Fichte ein
  • 19 laufende Meter Kantholz 8 x 16 cm Bodenring als Zehneck
  • 10 Punktfundamente Beton 40 x 40 x 80 cm mit eingelassenem Stahlwinkel, zusammen 31 kN Eigengewicht gegen rund 24 kN Windsog
  • 40 Bolzen M12 mit zugfesten Winkeln vier je Fundament, sie binden den Bodenring zugfest an die Fundamente
  • 60 m² Gewebeplane 650 g/m² oder UV-feste Folie als Hülle
  • 40 laufende Meter Kederschiene mit Keder 8 mm Befestigung der Plane

Werkzeug

Kappsäge, Akkuschrauber, Bohrmaschine mit Holzbohrer 9 mm, selbstgebaute Bohrschablone, Ratschenkasten SW13, Wasserwaage 120 cm, Schnurgerüst

Schritt für Schritt

  1. Frequenz und Radius festlegen. Eine 2V-Kuppel mit Radius 300 cm hat 6 m Durchmesser, 28 m² Grundfläche und 3 m Scheitelhöhe. Strebe A ist Radius mal 0,5465 gleich 164 cm, Strebe B mal 0,6180 gleich 185 cm. Das sind die Achsmaße von Bolzen zu Bolzen. Zugeschnitten wird jede Latte 10 cm länger, also 174 und 195 cm, weil hinter jedem Bolzen 8 cm Holz stehen bleiben müssen.
  2. Stückliste ausdrucken. 30 Streben A mit 174 cm, 35 Streben B mit 195 cm, 26 Knoten. A rot markieren, B blau. Eine falsche Länge zieht sich durch die ganze Kuppel.
  3. Bohrschablone bauen. Ein Sperrholzstück mit zwei Löchern 9 mm, 8 cm und 13 cm vom Strebenende entfernt. Weniger geht nicht: DIN EN 1995-1-1 verlangt am belasteten Hirnholzende mindestens sieben mal Bolzendurchmesser, mindestens aber 80 mm, das zweite Loch folgt mit fünf mal Durchmesser Abstand. Ein Bolzen 3 cm vom Hirnholzende reißt unter Zug als Scherkeil aus dem Holz aus, bei Fichte ohne Vorwarnung, und bei Windsog zieht jede zweite Strebe. Alle 130 Enden damit bohren, dann passt jeder Knoten. Jedes Ende zusätzlich mit einer Sperrholzlasche oder einem Lochblech gegen Aufspalten sichern.
  4. Fundamente setzen. Zehneck mit 185 cm Seitenlänge abstecken, an jeder Ecke ein Punktfundament 40 x 40 x 80 cm, Oberkante 15 cm über Gelände. Die Größe kommt vom Wind, nicht vom Schnee: 28 m² bespannte Kuppel sind ein Fallschirm, in Windzone 2 im Binnenland ziehen rund 24 kN nach oben. Zehn Fundamente 40 x 40 x 80 cm wiegen zusammen 31 kN und halten dagegen, 30 x 30 x 80 cm nur 17 kN und damit zu wenig. Den Bodenring mit zugfesten Winkeln und je vier Bolzen M12 an den Stahlwinkel binden. Wer stattdessen Erdnägel oder Schraubfundamente setzt, braucht einen nachgewiesenen Auszugswiderstand.
  5. Bodenring montieren. Kantholz 8 x 16 cm auf die Stahlwinkel schrauben, Gehrung 18 Grad an jedem Stoß, Ring durchgehend verschrauben.
  6. Erste Reihe stellen. Von unten nach oben arbeiten, alle Muttern zunächst nur handfest anziehen. Die Kuppel muss sich beim Aufbau setzen können.
  7. Nach oben schließen. Zweite Reihe, dann das Fünfeck im Scheitel. Ab 2 m Höhe mit Rollgerüst arbeiten, nie auf der Kuppel stehen.
  8. Muttern über Kreuz anziehen. Danach Diagonalen im Grundring messen, Abweichungen über 2 cm nachjustieren.
  9. Bespannen. Von oben nach unten, Bahnen wie Dachziegel überlappen, Kederschiene an jeder unteren Kante. Dachluke einsetzen, sonst tropft Kondenswasser von innen.

Zeit und Kosten

Drei Personen brauchen 6 bis 10 Arbeitstage, davon zwei allein fürs Zuschneiden und Bohren. Material 800 Euro bei Fichtenlatten und Folie, bis 6.000 Euro mit Stahlknoten, Gewebeplane, Tür und gedämmtem Boden.

Die drei häufigsten Fehler

  • Strebenlängen nicht geprüft. Zwei Zentimeter Abweichung summieren sich über fünf Ringe zu einer Kuppel, die sich oben nicht schließt. Baut ein Fünfeck als Muster, bevor ihr in Serie sägt.
  • Knoten nicht abgedichtet. An jedem Knoten trifft Wasser auf einen Schraubenkopf und läuft ins Holz. Die Bespannung immer außen durchlaufen lassen.
  • Fuß im Wasser. Steht der Bodenring auf der Erde, saugt er sich voll und fault. Punktfundamente mit 15 cm Überstand und ein Kiesstreifen ringsum lösen das.

Before you start

Ask the Bauamt (the local building authority) before you cut the first strut. A dome six metres across has around 28 square metres of floor and about 60 cubic metres of volume, which puts it over the exempt limit in most states and for most uses. Name the intended use in the conversation, because a greenhouse is judged differently from a room where people spend time. Verfahrensfrei only means that nobody checks beforehand, and in the Außenbereich (the open land outside the built-up area) a build like this almost always fails under Section 35 of the Baugesetzbuch. Have the structure calculated even if nobody asks for it. Snow load runs from 0.65 to over 2 kilonewtons per square metre depending on the zone, and a dome fails at the nodes first. And keep the two things apart: verfahrensfrei (exempt from the approval procedure) only means that you file no application. It does not make the project permissible, and in the Außenbereich that is exactly where the real hurdle sits.

What you need

  • 65 planed spruce battens, 4 x 6 cm 30 A struts at 174 cm, 35 B struts at 195 cm, which is the bolt to bolt lengths of 164 and 185 cm plus 5 cm of timber behind the bolt at each end
  • 26 gusset plates, 3 mm hot dip galvanised steel or 18 mm plywood instead
  • 260 galvanised hex bolts, M8 x 60 mm to DIN 933, with lock nuts two per strut end, and the grip length is only 43 to 46 mm
  • 520 washers to DIN 9021, 24 mm outside diameter under every head and every nut, otherwise an M8 works its way into the spruce
  • 19 linear metres of squared timber, 8 x 16 cm the ground ring as a decagon
  • 10 concrete pad foundations, 40 x 40 x 80 cm with a steel bracket cast in, 31 kN of dead weight in total against roughly 24 kN of wind uplift
  • 40 M12 bolts with tension resistant brackets four per foundation, tying the ground ring down to the foundations against uplift
  • 60 m² of woven tarpaulin, 650 g/m² or UV resistant film as the skin
  • 40 linear metres of keder rail with 8 mm keder to hold the cover down

Tools

Mitre saw, cordless drill driver, drill with a 9 mm wood bit, a drilling jig you make yourself, socket set with a 13 mm spanner, 120 cm spirit level, profile boards and string lines

Step by step

  1. Settle the frequency and the radius. A 2V dome with a radius of 300 cm gives 6 m across, 28 m² of floor and 3 m at the crown. Strut A is the radius times 0.5465, so 164 cm, strut B times 0.6180, so 185 cm. Those are the bolt to bolt lengths. Every batten is cut 10 cm longer, so 174 and 195 cm, because 8 cm of timber has to stay behind each bolt.
  2. Print the cutting list. 30 A struts at 174 cm, 35 B struts at 195 cm, 26 nodes. Mark A in red and B in blue. One wrong length carries through the whole dome.
  3. Make a drilling jig. A piece of plywood with two 9 mm holes, 8 cm and 13 cm from the end of the strut. Any less does not work: at a loaded end grain DIN EN 1995-1-1 asks for at least seven times the bolt diameter and never less than 80 mm, with the second hole five diameters further along. A bolt 3 cm from the end grain tears out of the timber under tension like a wedge, in spruce without warning, and under wind uplift every second strut goes into tension. Drill all 130 ends with the jig and every node will fit. Secure each end as well with a plywood strap or a perforated plate against splitting.
  4. Put in the foundations. Set out a decagon with 185 cm sides and a pad foundation of 40 x 40 x 80 cm at every corner, top edge 15 cm above ground. The size comes from the wind, not the snow: 28 m² of covered dome is a parachute, and in wind zone 2 inland about 24 kN pulls upwards. Ten foundations of 40 x 40 x 80 cm weigh 31 kN together and hold it down, while 30 x 30 x 80 cm give only 17 kN, which is too little. Tie the ground ring to the steel bracket with tension resistant brackets and four M12 bolts each. Use ground anchors or ground screws instead and you need a proven withdrawal resistance for them.
  5. Fit the ground ring. Screw the squared timber of 8 x 16 cm onto the steel brackets, an 18 degree mitre at every joint, and bolt the ring together all the way round.
  6. Stand the first row. Work from the bottom upwards and take every nut only finger tight at first. The dome has to be able to settle as it goes up.
  7. Close it at the top. The second row, then the pentagon at the crown. Above 2 m work off a mobile tower, and never stand on the dome.
  8. Tighten the nuts in a crosswise pattern. Then measure the diagonals in the ground ring and adjust anything more than 2 cm out.
  9. Cover it. Work from the top down, overlap the sheets like roof tiles, keder rail along every bottom edge. Fit a roof hatch, or condensation drips off the inside.

Time and cost

Three people need 6 to 10 working days, two of them just for cutting and drilling. Materials come to 800 euros with spruce battens and film, up to 6,000 euros with steel nodes, woven tarpaulin, a door and an insulated floor.

The three most common mistakes

  • Strut lengths not checked. Two centimetres out adds up over five rings into a dome that will not close at the top. Build one pentagon as a sample before you start cutting in batches.
  • Nodes not sealed. At every node water meets a bolt head and runs into the timber. Always carry the cover past on the outside.
  • Base standing in water. With the ground ring on the soil it soaks up water and rots. Pad foundations standing 15 cm proud and a gravel strip all round sort that out.

Worauf es ankommtWhat matters hereDie Knoten sind die Schwachstelle, und der Übergang zum Boden ist die zweite. Beides sorgfältig planen, sonst zieht es an jedem Knoten und der Fuß steht im Wasser.The nodes are the weak point, and the junction with the ground is the second. Plan both carefully, or you get a draught at every node and the base stands in water.

Baumhaus, Tree house
Wochen bis MonateWeeks to monthsMit erfahrener HandNeeds an experienced hand

BaumhausTree house

2 bis 3 Personen, Träger etwa 40 kg in Höhe, schweres Heben2 to 3 people, the beams weigh about 40 kg and go up high, heavy lifting

Der Ort, den Kinder zürst suchen und Erwachsene heimlich auch. Ein Baumhaus kostet fast nichts außer Sorgfalt, und es verschiebt die Perspektive auf das ganze Gelände um vier Meter nach oben.The place children look for first, and adults do too, quietly. A tree house costs almost nothing beyond care, and it shifts your view of the whole site four metres upwards.

So wird gebautHow it is built
Träger nicht am Stamm festzurren, sondern mit Baumschrauben in gesundes Holz setzen und gleitend lagern, damit der Baum weiterwachsen und sich im Wind bewegen kann. Eiche, Buche und Ahorn tragen gut, Weide und Pappel nicht.Do not lash the beams to the trunk. Set them with tree bolts into sound timber and support them so they can slide, which lets the tree keep growing and move in the wind. Oak, beech and maple carry well, willow and poplar do not.
KostenCost
300 bis 3.000 Euro300 to 3,000 euros
Erster SchrittFirst step
Den Baum von jemandem anschauen lassen, der sich auskennt. Ein Pilzbefall im Stammfuss ist von unten oft nicht zu sehen und entscheidet alles.Have the tree looked at by someone who knows trees. Fungal decay at the base of the trunk is often invisible from below and decides everything.
Schritt für SchrittStep by step
Baumhaus, Schnitt 300 100 45 Träger 400 11 50 1 2 3 4 5 6 7 8 9 1 Baumschraube TAB, Schaft 32 mm 2 Zweite Schraube 45 cm versetzt 3 Gleitlager, Auflager beweglich 4 Träger 10 x 20 cm, 400 cm lang 5 Balken 6 x 16 cm, Abstand 50 cm 6 Rauspund Lärche 28 mm 7 Handlauf auf 100 cm Höhe 8 Geländerstäbe, Abstand max 11 cm 9 Treppe 45 Grad, Stufe 20 / 24 cm Nicht maßstäblich, Maße in cm
Bauskizze Baumhaus, am Handy seitlich wischenMeasured sketch of Tree house, swipe sideways on a phone

Bevor du anfängst

Frag beim Bauamt nach, wie es ein Baumhaus einordnet, das wird von Land zu Land unterschiedlich beurteilt, weil es nicht auf dem Boden steht. Nenne dabei die geplante Nutzung. Ein offenes Spielhaus wird anders behandelt als eine Hütte mit geschlossenen Wänden und Schlafplatz, denn das ist ein Aufenthaltsraum und braucht einen Antrag. Verfahrensfrei heißt nur, dass niemand vorher prüft, im Außenbereich ist praktisch jedes Baumhaus genehmigungsbedürftig. Frag im selben Gang beim Grünflächenamt nach der Baumschutzsatzung, geschützte Bäume darf niemand ohne Ausnahme anbohren. Die private Haftpflicht deckt selbst gebaute Baumhäuser oft nicht, klärt das schriftlich, bevor fremde Kinder hochklettern. Unter die Plattform gehört Fallschutz. Und halte den Unterschied auseinander: verfahrensfrei heißt nur, dass du keinen Antrag stellst. Zulässig ist das Vorhaben damit noch nicht, im Außenbereich liegt genau da die eigentliche Hürde.

Das brauchst du

  • 4 Baumschrauben (TAB) Schaft 32 mm, Gewinde 150 mm tragen die Plattform
  • 2 Gleitlager für 32 mm Bolzen, Traglast je 2.000 kg lassen den Baum arbeiten, bei Volllast liegen 8,3 kN je Auflager an und 1.000 kg wären ohne jede Reserve
  • 2 Träger Konstruktionsvollholz 12 x 24 cm, 400 cm lang Haupttragwerk für 4,0 kN/m² Nutzlast, bei 10 x 20 cm dürfte die Stützweite höchstens 300 cm betragen
  • 7 Balken 6 x 16 cm, 250 cm lang im Abstand von 50 cm
  • 10 m² Rauspund Lärche 28 mm Dielung mit 5 mm Fuge
  • 18 m³ Rindenmulch oder Holzschnitzel nach DIN EN 1177 Fallschutz 30 cm hoch auf rund 60 m² Fallraum rings um die Plattform
  • 16 laufende Meter Handlauf 4 x 8 cm 12 m Geländer auf 100 cm Höhe, 4 m Treppenhandlauf auf 90 cm
  • 85 laufende Meter Geländerstab 3 x 4 cm rund 93 Stäbe à 90 cm im Achsmaß 12,9 cm, lichter Abstand höchstens 89 mm

Werkzeug

Akkuschrauber, Bohrmaschine mit Schlangenbohrer 25 mm, Ratsche mit Verlängerungsrohr, Wasserwaage 200 cm, Schlauchwaage, Kettensäge, Klettergurt mit Sicherungsseil

Schritt für Schritt

  1. Baum begutachten lassen. Ein Baumkontrolleur nach FLL-Richtlinie kostet 150 bis 400 Euro. Er erkennt Pilzfruchtkörper am Stammfuß und Totholz in der Krone.
  2. Art und Stärke prüfen. Eiche, Buche, Ahorn und Esskastanie tragen. Weide, Pappel, Birke und Fichte nicht. Mindestens 30 cm Stammdurchmesser auf Höhe der Träger.
  3. Höhe festlegen. Plattform höchstens 300 cm über dem Boden, das ist nach DIN EN 1176-1 die Grenze der freien Fallhöhe. Ab 60 cm Fallhöhe verlangt DIN EN 1177 einen stoßdämpfenden Untergrund, bei 3 m sind das 30 cm lose geschütteter Rindenmulch, Holzschnitzel oder Sand 0,2 bis 2 mm, und zwar im gesamten Fallraum, also 2,5 m rundum. Wurzeln und Steine kommen vorher heraus, der Mulch wird jedes Jahr nachgefüllt und aufgelockert.
  4. Auflagerhöhen anreißen. Mit der Schlauchwaage rund um den Stamm markieren. Zwei Baumschrauben am selben Stamm mindestens 45 cm senkrecht versetzen.
  5. Baumschrauben setzen. Nach Herstellerangabe vorbohren, meist 25 mm Kernloch, Einschraubtiefe mindestens 15 cm in gesundes Holz. Mit Ratsche und einem Meter Rohr als Hebel eindrehen.
  6. Gleitlager auflegen. Ein Auflager fest, das zweite gleitend. Der Baum wächst und schwankt, ein starr eingespannter Träger reißt die Schraube aus dem Holz.
  7. Träger und Balken. Gerechnet wird mit 4,0 kN/m² Nutzlast nach DIN EN 1991-1-1, bei Festen mit vielen Gästen mit 5,0 kN/m². Auf 7,5 m² Plattform laufen damit rund 16,5 kN je Träger auf. Träger 12 x 24 cm auflegen und mit der 200 cm Wasserwaage waagerecht stellen, Balken 6 x 16 cm alle 50 cm in Balkenschuhe hängen. Ein 10 x 20 cm über 4 m Stützweite kommt auf 16,5 N/mm² bei zulässigen 14,8 und biegt sich 25 mm durch, der geht nur bis 3,0 m Stützweite.
  8. Dielen und Geländer. Rauspund mit 5 mm Fuge verlegen. Pfosten mit je zwei Vollgewindeschrauben 8 x 200 an die Balken, Handlauf auf 100 cm, senkrechte Stäbe mit höchstens 89 mm lichtem Abstand. Diese Zahl ist keine Geschmacksfrage: DIN EN 1176-2 verbietet an Spielbauten jede Öffnung zwischen 89 und 230 mm, weil ein Kind dort mit dem Kopf durchrutscht und mit dem Kinn hängen bleibt. Bei 12 m Geländer und 4 cm breiten Stäben sind das rund 93 Stäbe im Achsmaß 12,9 cm.
  9. Aufstieg und Kontrolle. Treppe mit Stufenmaß 20/24 cm, das ergibt 39,8 Grad und nicht 45, das Schrittmaß 2 mal 20 plus 24 gleich 64 cm stimmt. Wer echte 45 Grad will, braucht 24/24. An mindestens einer Seite einen Handlauf auf 90 cm über der Stufenvorderkante, für Kinder einen zweiten auf 60 cm, an der offenen Seite eine Umwehrung mit denselben 89 mm Stababstand, bei 3 m Aufstiegshöhe ist das Pflicht. Einmal im Jahr alle Verbindungen nachziehen und den Einwuchs prüfen.

Zeit und Kosten

Zwei bis drei Personen brauchen 4 bis 8 Arbeitstage. Material 300 Euro für eine kleine Plattform aus Restholz, bis 3.000 Euro mit Baumschrauben, Gleitlagern, Dielung und Treppe, dazu 150 bis 400 Euro für das Baumgutachten und 400 bis 900 Euro für 18 m³ Fallschutz.

Die drei häufigsten Fehler

  • Träger mit Seil oder Kette befestigt. Das schnürt Rinde und Leitungsbahnen ab, der Ast stirbt oberhalb der Fessel. Baumschrauben verletzen den Baum weniger.
  • Beide Auflager starr. Der Baum bewegt sich im Wind um mehrere Zentimeter. Ohne Gleitlager arbeitet die Konstruktion sich locker, bis die Schraube ausreißt.
  • Geländer mit falschem Stababstand. 80 cm Höhe reichen für Erwachsene, nicht für spielende Kinder, und 11 cm lichter Abstand sind genau die verbotene Zahl. DIN EN 1176-2 lässt an Spielbauten nur unter 89 mm oder über 230 mm zu, dazwischen liegt die Kopf- und Halsfangstelle. Handlauf auf 100 cm, senkrechte Stäbe mit höchstens 89 mm lichtem Abstand, keine waagerechten Latten zum Hochklettern.

Before you start

Ask the Bauamt (the local building authority) how it classes a tree house, because the states judge it differently, given that it does not stand on the ground. Name the intended use. An open play house is treated differently from a hut with closed walls and a bed in it, because that is a habitable room and needs an application. Verfahrensfrei only means that nobody checks beforehand, and in the Außenbereich (the open land outside the built-up area) practically every tree house needs approval. While you are at it, ask the Grünflächenamt (the municipal parks department) about the Baumschutzsatzung (the local tree protection bylaw), because nobody may drill into a protected tree without an exemption. Private liability insurance often does not cover a self built tree house, so settle that in writing before other people's children climb up. An impact absorbing surface belongs under the platform. And keep the two things apart: verfahrensfrei (exempt from the approval procedure) only means that you file no application. It does not make the project permissible, and in the Außenbereich that is exactly where the real hurdle sits.

What you need

  • 4 tree bolts (TAB), 32 mm shaft, 150 mm thread they carry the platform
  • 2 sliding brackets for 32 mm bolts, 2,000 kg each they let the tree work, and at full load each bearing carries 8.3 kN, so 1,000 kg would leave no margin at all
  • 2 beams of Konstruktionsvollholz (graded structural timber), 12 x 24 cm, 400 cm long the main structure for an imposed load of 4.0 kN/m², whereas 10 x 20 cm would limit the span to 300 cm
  • 7 joists, 6 x 16 cm, 250 cm long at 50 cm centres
  • 10 m² of larch Rauspund (tongue and groove boarding), 28 mm decking laid with a 5 mm gap
  • 18 m³ of bark mulch or wood chip to DIN EN 1177 an impact absorbing surface 30 cm deep over roughly 60 m² of fall area around the platform
  • 16 linear metres of handrail, 4 x 8 cm 12 m of railing at 100 cm, 4 m of stair handrail at 90 cm
  • 85 linear metres of baluster, 3 x 4 cm about 93 balusters of 90 cm at 12.9 cm centres, clear gap no more than 89 mm

Tools

Cordless drill driver, drill with a 25 mm auger bit, ratchet with an extension tube, 200 cm spirit level, water level, chainsaw, climbing harness with a safety line

Step by step

  1. Have the tree surveyed. A Baumkontrolleur (a qualified tree inspector) working to the FLL guideline costs 150 to 400 euros. He spots fungal brackets at the base of the trunk and dead wood in the crown.
  2. Check species and girth. Oak, beech, maple and sweet chestnut carry a load. Willow, poplar, birch and spruce do not. At least 30 cm of trunk diameter at the height of the beams.
  3. Set the height. The platform goes no more than 300 cm above the ground, which is the limit for free fall height under DIN EN 1176-1. From 60 cm of fall height DIN EN 1177 asks for an impact absorbing surface, and at 3 m that means 30 cm of loose bark mulch, wood chip or sand of 0.2 to 2 mm, across the whole fall area, so 2.5 m all round. Roots and stones come out first, and the mulch gets topped up and loosened every year.
  4. Mark the bearing heights. Use the water level to mark right round the trunk. Two tree bolts in the same trunk sit at least 45 cm apart vertically.
  5. Set the tree bolts. Pre drill as the maker states, usually a 25 mm pilot hole, and drive them at least 15 cm into sound timber. Wind them in with a ratchet and a metre of tube as a lever.
  6. Fit the sliding bracket. One bearing fixed, the second free to slide. The tree grows and it sways, and a beam held rigidly at both ends pulls the bolt out of the timber.
  7. Beams and joists. Calculate with an imposed load of 4.0 kN/m² to DIN EN 1991-1-1, or 5.0 kN/m² for parties with a lot of guests. On a platform of 7.5 m² that puts about 16.5 kN on each beam. Lay the 12 x 24 cm beams and level them with the 200 cm spirit level, then hang joists of 6 x 16 cm every 50 cm in joist hangers. A 10 x 20 cm over a 4 m span reaches 16.5 N/mm² against a permissible 14.8 and deflects 25 mm, so it only works up to a span of 3.0 m.
  8. Decking and railing. Lay the Rauspund with a 5 mm gap. Fix each post to the joists with two fully threaded 8 x 200 screws, handrail at 100 cm, vertical balusters with a clear gap of no more than 89 mm. That figure is not a matter of taste: DIN EN 1176-2 bars any opening between 89 and 230 mm on play structures, because a child slips through it head first and then hangs by the chin. Over 12 m of railing with balusters 4 cm wide that comes to about 93 balusters at 12.9 cm centres.
  9. Access and inspection. Build the stair with a rise of 20 cm and a going of 24 cm, which gives 39.8 degrees rather than 45, and the pace check of two times 20 plus 24 equals 64 cm works out. For a true 45 degrees you need 24 and 24. A handrail on at least one side, 90 cm above the front edge of the tread, a second one at 60 cm for children, and guarding on the open side with the same 89 mm gap, which is required at an access height of 3 m. Once a year, tighten every connection and check how far the tree has grown around the fittings.

Time and cost

Two to three people need 4 to 8 working days. Materials come to 300 euros for a small platform out of leftover timber, up to 3,000 euros with tree bolts, sliding brackets, decking and a stair, plus 150 to 400 euros for the tree survey and 400 to 900 euros for 18 m³ of impact absorbing surface.

The three most common mistakes

  • Beams tied on with rope or chain. That strangles the bark and the vessels underneath, and the limb dies above the binding. Tree bolts do the tree less harm.
  • Both bearings rigid. The tree moves several centimetres in the wind. Without a sliding bracket the structure works itself loose until the bolt tears out.
  • Railing with the wrong baluster spacing. A height of 80 cm is enough for adults but not for children at play, and a clear gap of 11 cm is exactly the forbidden figure. On play structures DIN EN 1176-2 allows only under 89 mm or over 230 mm, and in between lies the head and neck entrapment range. Handrail at 100 cm, vertical balusters with a clear gap of no more than 89 mm, and no horizontal rails for climbing up.

Worauf es ankommtWhat matters hereAb einer gewissen Größe und Höhe ist ein Baumhaus eine bauliche Anlage und braucht eine Genehmigung. Und Absturzsicherung ist keine Geschmacksfrage: Geländer mindestens einen Meter hoch, Abstände unter zwölf Zentimetern.Above a certain size and height a tree house is a structure and needs approval. And fall protection is not a matter of taste: railings at least one metre high, gaps under twelve centimetres.

Trockenmauer, Dry stone wall
Wochen bis MonateWeeks to monthsMit erfahrener HandNeeds an experienced hand

TrockenmauerDry stone wall

2 Personen, Fußsteine über 50 kg, schweres Heben2 people, footing stones over 50 kg, heavy lifting

Stein auf Stein ohne Mörtel. Terrassiert Hänge, speichert Wärme für die Pflanzen davor und ist gleichzeitig Lebensraum für Eidechsen, Wildbienen und Kröten.Stone on stone, no mortar. It terraces a slope, stores warmth for the plants in front of it, and at the same time it is a home for lizards, solitary bees and toads.

So wird gebautHow it is built
Fundamentgraben, grobe Steine unten, nach hinten geneigt setzen, Bindersteine quer durch die Mauer, Hinterfüllung aus Schotter für die Entwässerung.A foundation trench, the coarse stones at the bottom, every stone set leaning back, through stones running the full width, and gravel behind it for drainage.
KostenCost
meist nur Arbeit, wenn Stein vor Ort istusually only labour if the stone is already on site
Erster SchrittFirst step
Regionalen Naturstein verwenden. Er passt optisch und die heimischen Tiere kennen ihn.Use local natural stone. It looks right and the native animals know it.
Schritt für SchrittStep by step
Trockenmauer, Schnitt 120 35 60 15 30 20 1 2 3 4 5 6 7 8 9 1 Schotter 0/45, 20 cm verdichtet 2 Fußsteine, breite Seite unten 3 Anlauf 10 bis 15 Prozent 4 Bindersteine, 3 Stück je m² 5 Verband ohne Kreuzfugen 6 Hinterfüllung Schotter 16/32 7 Geovlies 150 g/m² zum Erdreich 8 Deckplatten oder Rollschicht 9 Sandlinse und Hohlräume am Fuß Nicht maßstäblich, Maße in cm
Bauskizze Trockenmauer, am Handy seitlich wischenMeasured sketch of Dry stone wall, swipe sideways on a phone

Bevor du anfängst

Ruf beim Bauamt an und frag, bis zu welcher Höhe eine Stützmauer bei euch ohne Verfahren gebaut werden darf und was im Außenbereich gilt. Höhere Mauern, Mauern an öffentlichen Verkehrsflächen und solche, die Lasten aus Gebäuden aufnehmen, brauchen einen Antrag mit Standsicherheitsnachweis. Verfahrensfrei heißt nur, dass niemand vorher prüft, Bebauungsplan und Nachbarrecht gelten weiter. Steht schon eine alte Mauer da, fragt zusätzlich die untere Naturschutzbehörde. In mehreren Ländern sind Trockenmauern geschützte Biotope, und Zauneidechsen sind streng geschützt, deshalb wird an bestehenden Mauern zwischen April und September nicht gearbeitet. Beim Bauen ist das Gewicht die Gefahr, Steine über 25 Kilogramm hebt ihr zu zweit.

Das brauchst du

  • 1,3 bis 1,6 Tonnen Naturstein je m² Ansichtsfläche regionaler Bruchstein
  • 3 Bindersteine je m², 60 bis 80 cm lang reichen quer durch die Mauer
  • Fußsteine 40 bis 60 cm, die schwersten des Haufens für die unterste Lage
  • 0,25 m³ Schotter 0/45 je laufendem Meter als Fundamentschicht
  • 0,3 m³ Schotter 16/32 je laufendem Meter Hinterfüllung und Drainage
  • 1 Bahn Geovlies 150 g/m², 100 cm breit zwischen Schotter und Erdreich
  • 4 Latten 5 x 5 cm und 20 m Maurerschnur als Schnurgerüst mit Anlauf
  • Mauerpfeffer, Hauswurz und Zimbelkraut für Fugen und Mauerkrone

Werkzeug

Spaten, Kreuzhacke, Schubkarre, Steinhammer 1,5 kg, Fäustel 1 kg, Steinmeißel, Wasserwaage 100 cm, Handstampfer, Lederhandschuhe, Sicherheitsschuhe S3, Schutzbrille nach EN 166 mit Seitenschutz, Gehörschutz

Schritt für Schritt

  1. Höhe und Neigung festlegen. Trennt zuerst die beiden Fälle. Eine freistehende Trockenmauer bis 120 cm ohne Auflast baut man nach Faustregel. Eine Stützmauer, hinter der ein Weg liegt, auf dem ein Trecker fährt, nicht: 1,20 m Erddruck bei 18 kN/m³ und einem Erdruhedruckbeiwert von 0,33 sind schon 4,3 kN je laufendem Meter, eine Auflast von 10 kN/m² aus einem Fahrzeug verdoppelt das. Über 1,2 m oder mit Auflast gehört ein Standsicherheitsnachweis dazu, denn verfahrensfrei heißt nie, dass die Standsicherheit nicht nachgewiesen werden muss, sie muss nur nicht eingereicht werden. Liegt oben ein begehbarer Weg, kommt ab 1 m Absturzhöhe eine Umwehrung nach Paragraf 38 Musterbauordnung dazu. Die Fußbreite entspricht der halben Höhe, mindestens 50 cm. Anlauf 10 bis 15 Prozent, die Mauer lehnt sich in den Hang.
  2. Graben ausheben. 30 bis 40 cm tief und 20 cm breiter als der Mauerfuß. Sohle waagerecht abziehen, im Gefälle in Stufen abtreppen.
  3. Fundament verdichten. 20 cm Schotter 0/45 in zwei Lagen einbringen und mit dem Handstampfer verdichten, bis nichts mehr nachgibt.
  4. Steine sortieren. Drei Haufen anlegen: Fußsteine, Bindersteine, Füllsteine. Das kostet einen halben Tag und spart zwei.
  5. Erste Lage setzen. Die schwersten Steine mit der breiten Seite nach unten, jeder auf drei Auflagepunkten, um etwa 5 Grad nach hinten geneigt.
  6. Im Verband weiterbauen. Über jeder Fuge liegt ein Stein, Kreuzfugen gibt es nicht. Jeder Stein muss wackelfrei sitzen, notfalls von hinten mit Splitt unterkeilen, nie von vorn.
  7. Bindersteine einbauen. Drei je m², sie reichen von der Vorderkante bis zur Rückseite und verzahnen die Mauer in der Tiefe.
  8. Hinterfüllen. Schichtweise mit Schotter 16/32, immer auf gleicher Höhe wie die Mauer, dahinter das Geovlies gegen einschlämmende Erde.
  9. Krone und Lebensraum. Deckplatten flach auflegen oder Steine hochkant als Rollschicht setzen. Am Fuß eine Sandlinse und Hohlräume für Eidechsen anlegen.

Zeit und Kosten

Geübt setzt eine Person 1 m² Ansichtsfläche am Tag, ungeübt eher 0,5 m². Für 10 m Mauer mit 1 m Höhe rechnen zwei Leute 10 bis 20 Tage. Liegt der Stein auf dem Grundstück, kostet nur die Arbeit, gekaufter Bruchstein 100 bis 250 Euro je Tonne.

Die drei häufigsten Fehler

  • Senkrecht gemauert. Ohne Anlauf drückt der Hang die Mauer nach vorn und sie kippt. 10 bis 15 cm Rücksprung je Meter Höhe halten die Mauer zweihundert Jahre.
  • Kreuzfugen gesetzt. Liegen zwei Fugen übereinander, entsteht eine Sollbruchstelle. Jede Fuge wird von einem Stein der nächsten Lage überdeckt.
  • Mit Erde hinterfüllt. Erde hält Wasser, Wasser gefriert und drückt die Steine heraus. Immer Schotter 16/32 hinterfüllen und mit Geovlies vom Erdreich trennen.

Before you start

Ring the Bauamt (the local building authority) and ask up to what height a retaining wall may be built without a procedure where you are, and what applies in the Außenbereich (the open land outside the built-up area). Higher walls, walls along public roads and walls that carry loads from buildings need an application with a stability calculation. Verfahrensfrei only means that nobody checks beforehand, and the Bebauungsplan (the local development plan) and your neighbours' rights still apply. If an old wall is already standing there, ask the untere Naturschutzbehörde (the nature conservation authority at district level) as well. In several federal states dry stone walls are protected habitats, and sand lizards are strictly protected, which is why nobody works on an existing wall between April and September. While you build, the weight is the danger: lift stones over 25 kilograms with two people.

What you need

  • 1.3 to 1.6 tonnes of natural stone per m² of face local quarried stone
  • 3 through stones per m², 60 to 80 cm long they reach right across the wall
  • Footing stones of 40 to 60 cm, the heaviest in the heap for the bottom course
  • 0.25 m³ of 0/45 gravel per linear metre as the foundation layer
  • 0.3 m³ of 16/32 gravel per linear metre backfill and drainage
  • 1 roll of geotextile fleece, 150 g/m², 100 cm wide between the gravel and the soil
  • 4 battens of 5 x 5 cm and 20 m of mason's line as a string frame that carries the batter
  • Stonecrop, houseleek and ivy-leaved toadflax for the joints and the top of the wall

Tools

Spade, pickaxe, wheelbarrow, 1.5 kg stone hammer, 1 kg lump hammer, stone chisel, 100 cm spirit level, hand tamper, leather gloves, S3 safety boots, goggles to EN 166 with side protection, ear defenders

Step by step

  1. Settle the height and the lean. Separate the two cases first. A free standing dry stone wall up to 120 cm with nothing loading it can be built by rule of thumb. A retaining wall with a track behind it that a tractor drives along cannot: 1.20 m of earth pressure at 18 kN/m³ with an at rest earth pressure coefficient of 0.33 already comes to 4.3 kN per linear metre, and a surcharge of 10 kN/m² from a vehicle doubles that. Above 1.2 m, or with a surcharge, a Standsicherheitsnachweis (a structural stability calculation) belongs with it, because verfahrensfrei never means that stability does not have to be proven, only that the proof does not have to be filed. If there is a path on top that people walk on, guarding under Section 38 of the Musterbauordnung is added from a drop of 1 m. The width at the base is half the height, and at least 50 cm. Batter 10 to 15 per cent, so the wall leans into the slope.
  2. Dig the trench. 30 to 40 cm deep and 20 cm wider than the base of the wall. Level the bottom off, and on a slope step it down.
  3. Compact the foundation. Put in 20 cm of 0/45 gravel in two layers and tamp it by hand until nothing gives any more.
  4. Sort the stone. Make three heaps: footing stones, through stones, filling stones. It costs half a day and saves two.
  5. Set the first course. The heaviest stones with the broad face down, each resting on three points, tilted back by about 5 degrees.
  6. Carry on in bond. A stone sits over every joint and there are no running joints. Every stone has to sit without rocking, and if it will not, pack it up with chippings from behind, never from the front.
  7. Build in the through stones. Three per m², reaching from the front face to the back, tying the wall together through its depth.
  8. Backfill. In layers with 16/32 gravel, always keeping level with the wall, and the geotextile behind that to stop soil washing in.
  9. The top and the habitat. Lay coping stones flat or set stones on edge as a coping course. At the base, put in a pocket of sand and leave cavities for lizards.

Time and cost

With practice one person sets 1 m² of face a day, without practice more like 0.5 m². For 10 m of wall at 1 m high, two people should allow 10 to 20 days. If the stone lies on your own land, only the labour costs anything, while bought quarried stone runs 100 to 250 euros a tonne.

The three most common mistakes

  • Built vertical. Without batter the slope pushes the wall forwards and it tips. A setback of 10 to 15 cm per metre of height keeps the wall standing for two hundred years.
  • Running joints laid in. Two joints one above the other make a line of weakness. Every joint gets covered by a stone in the course above.
  • Backfilled with soil. Soil holds water, the water freezes and pushes the stones out. Always backfill with 16/32 gravel and separate it from the soil with geotextile.

Worauf es ankommtWhat matters hereOhne Neigung nach hinten und ohne Drainage kippt die Mauer beim ersten Frost-Tau-Wechsel.Without the lean to the back and without drainage, the wall tips over at the first freeze and thaw.

Wörterbuch, 99 Begriffe vom Bau erklärtDictionary, 99 building terms explainedDictionary, 99 building terms explained
SiebdruckplatteWasserfest verleimtes Sperrholz mit einer rauen, dunkelbraunen Oberfläche, das jahrelang draußen aushält. Aus einer 18 Millimeter dicken Platte baust du zum Beispiel den Kasten einer Trockentoilette.Im Baumarkt: Siebdruckplatte 18 mm im Holzhandel, dort schneiden sie dir die Platte auf dein Maß, meist für ein bis zwei Euro je Schnitt.
Siebdruckplatte (birch plywood with a resin coated surface)Plywood glued with waterproof adhesive, with a rough dark brown surface that lasts for years outdoors. From an 18 millimetre sheet you build the box of a dry toilet, for example.At the hardware store: Siebdruckplatte 18 mm at a timber merchant, where they cut the sheet to your measurements, usually for one to two euros per cut.
SpaxDer bekannteste Markenname für Holzschrauben, deshalb sagen im Laden alle Spax, egal welche Marke in der Kiste liegt. Im Kopf sitzt eine sternförmige Vertiefung, und die Schraube zieht sich ohne Vorbohren ins Holz.Im Baumarkt: Holzschrauben mit Sternkopf in der Größe aus der Liste, also zum Beispiel 4 x 45 mm, der passende Aufsatz für den Akkuschrauber liegt oft bei.
Spax (the best known brand of wood screw, used as a generic name)The best known brand name for wood screws, which is why everyone in the shop says Spax, whatever make is actually in the box. The head has a star shaped recess, and the screw pulls itself into the wood without a pilot hole.At the hardware store: wood screws with a star head in the size from the list, so 4 x 45 mm for example. The matching bit for the cordless driver often comes with them.
KantholzEin gerade gesägter Balken mit rechteckiger Form. Die Angabe 8 x 8 cm heißt acht Zentimeter breit und acht Zentimeter hoch, die Länge sagst du extra dazu.Im Baumarkt: Kantholz 8 x 8 cm in der gewünschten Länge, Fichte ist billig, Lärche und Douglasie halten draußen viel länger.
Kantholz (squared timber, sawn straight on all four sides)A straight sawn beam with a rectangular shape. The figure 8 x 8 cm means eight centimetres wide and eight centimetres high, and you state the length separately.At the hardware store: Kantholz 8 x 8 cm in the length you want. Spruce is cheap, while larch and Douglas fir last far longer outdoors.
KVH oder KonstruktionsvollholzBauholz, das getrocknet und gehobelt wurde und bei dem große Äste ausgeschnitten sind. Es kostet mehr als einfaches Bauholz und bleibt dafür gerade, statt sich beim Trocknen zu verdrehen.Im Baumarkt: KVH in der Größe aus der Liste, im Holzhandel oder Baustoffhandel, im Baumarkt gibt es meist nur wenige Maße.
KVH oder Konstruktionsvollholz (kiln dried and planed structural timber)Structural timber that has been dried and planed, with the larger knots cut out. It costs more than plain structural timber and stays straight instead of twisting as it dries.At the hardware store: KVH in the size from the list, at a timber or builders merchant. A DIY store usually keeps only a few sizes.
RauspundDicke Bretter für Böden und Dächer, die an den Längskanten ineinandergreifen. Eine Seite ist glatt gehobelt, die andere bleibt rau, daher der Name.Im Baumarkt: Rauspund 28 mm, wird nach Quadratmeter verkauft.
Rauspund (thick tongue and groove boarding, planed on one face)Thick boards for floors and roofs that interlock along their long edges. One face is planed smooth, the other stays rough, and that is where the name comes from.At the hardware store: Rauspund 28 mm, sold by the square metre.
Nut und FederAn der einen Längskante eines Bretts ist eine Rille eingefräst, an der anderen eine passende Leiste. Steckst du die Bretter zusammen, entsteht eine geschlossene Fläche ohne Ritzen.Im Baumarkt: Profilbretter mit Nut und Feder, sag dazu, ob sie nach innen oder nach außen kommen.
Nut und Feder (tongue and groove)One long edge of a board has a groove milled into it, the other a matching tongue. Push the boards together and you get a closed surface with no gaps.At the hardware store: profiled boards with tongue and groove. Say whether they are going inside or outside.
BohleEin besonders dickes Brett ab etwa drei Zentimetern. Für ein Hochbeet nimmt man Bohlen, weil dünne Bretter sich unter dem Druck der feuchten Erde nach außen wölben.Im Baumarkt: Bohle 20 x 4 cm aus Lärche oder Douglasie.
Bohle (a plank, from about three centimetres thick)A particularly thick board, from around three centimetres up. For a raised bed you take planks, because thin boards bow outwards under the pressure of the damp soil.At the hardware store: Bohle 20 x 4 cm in larch or Douglas fir.
Sperrholz und MultiplexDünne Holzlagen, die kreuzweise übereinander verleimt sind. Dadurch ist die Platte in beide Richtungen fest, Multiplex ist die dickere Ausführung mit besonders vielen Lagen.Im Baumarkt: Sperrholz 12 mm oder Multiplex 18 mm, für draußen ausdrücklich nach wasserfester Verleimung fragen.
Sperrholz und Multiplex (plywood and thick multi layer plywood)Thin layers of wood glued crosswise on top of each other. That makes the sheet firm in both directions, and Multiplex is the thicker version with a great many layers.At the hardware store: Sperrholz 12 mm or Multiplex 18 mm. For anything outdoors, ask explicitly for waterproof glue.
OSB-PlatteEine Platte aus großen, flach gepressten Holzspänen, gut erkennbar an der grob gemusterten Oberfläche. Sie ist billig und wird als Beplankung von Wänden und Böden genutzt.Im Baumarkt: OSB 15 mm oder 25 mm, für Böden die Variante mit Nut und Feder.
OSB-Platte (oriented strand board)A board of large wood chips pressed flat, easy to recognise by the coarsely patterned surface. It is cheap and gets used to sheathe walls and floors.At the hardware store: OSB 15 mm or 25 mm, and for floors the version with tongue and groove.
KonterlattungEine zweite Lage Latten, quer über die erste geschraubt. Dadurch bleibt hinter der Holzverkleidung ein Luftspalt, in dem Feuchtigkeit abtrocknen kann, statt die Wand zu durchnässen.Im Baumarkt: Latte 30 x 50 mm.
Konterlattung (counter battens)A second layer of battens screwed across the first. That leaves an air gap behind the timber cladding where damp can dry out, instead of soaking the wall.At the hardware store: batten 30 x 50 mm.
HirnholzDie Schnittfläche am Ende eines Balkens, dort wo man die Jahresringe sieht. Sie saugt Wasser wie ein Strohhalm, deshalb darf sie nie nach oben zeigen und nie auf nassem Boden stehen.
Hirnholz (end grain)The cut face at the end of a beam, where you can see the annual rings. It draws water like a straw, so it must never point upwards and never stand on wet ground.
FuchsschwanzEine ganz gewöhnliche Handsäge mit breitem Blatt und einem Griff, benannt nach der Form des Blattes. Damit sägst du Bretter und Latten ohne Strom, es dauert nur länger als mit der Maschine.Im Baumarkt: Handsäge oder Fuchsschwanz, etwa 15 Euro, für Bauholz eine mit groben Zähnen nehmen.
Fuchsschwanz (a plain hand saw, literally fox tail)An ordinary hand saw with a wide blade and one handle, named after the shape of the blade. You cut boards and battens with it without electricity, it only takes longer than with a machine.At the hardware store: hand saw or Fuchsschwanz, about 15 euros. For structural timber take one with coarse teeth.
HandkreissägeEine Maschine mit rundem Sägeblatt, die du über das Brett schiebst. Legst du eine Führungsschiene auf, werden die Schnitte gerade, freihändig laufen sie schnell schief.Im Baumarkt: Handkreissäge mit Führungsschiene, ohne Schiene lohnt sie kaum.
Handkreissäge (circular saw)A machine with a round blade that you push along the board. Lay a guide rail on top and the cuts come out straight. Freehand they run off line quickly.At the hardware store: circular saw with a guide rail. Without the rail it is hardly worth having.
LochsägeEin runder Sägekranz, den du in die Bohrmaschine spannst. Damit schneidest du saubere runde Löcher, etwa 80 Millimeter für ein Lüftungsrohr.Im Baumarkt: Lochsäge 80 mm mit Aufnahme und Zentrierbohrer.
Lochsäge (hole saw)A round ring of saw teeth that you clamp into the drill. With it you cut clean round holes, say 80 millimetres for a ventilation pipe.At the hardware store: hole saw 80 mm with an arbor and a centring bit.
SchlangenbohrerEin langer Bohrer mit grober Spirale für dicke Balken. Er zieht sich selbst ins Holz und schafft auch zwanzig Zentimeter tiefe Löcher.Im Baumarkt: Schlangenbohrer in der Stärke der Schraube, meist 10 oder 12 mm.
Schlangenbohrer (auger bit)A long bit with a coarse spiral for thick beams. It pulls itself into the wood and manages holes twenty centimetres deep.At the hardware store: auger bit in the thickness of the screw, usually 10 or 12 mm.
Ratsche und SW 17Eine Ratsche ist ein Schraubenschlüssel mit Sperrklinke, der beim Zurückschwenken leer mitläuft. SW 17 heißt Schlüsselweite 17 Millimeter, also der Abstand zwischen zwei gegenüberliegenden Flächen der Mutter, und genau diese Zahl muss auf dem Aufsatz stehen.Im Baumarkt: Ratschenkasten mit Nüssen von 8 bis 22 mm, damit deckst du fast alles ab.
Ratsche und SW 17 (a ratchet, and Schlüsselweite 17, meaning a spanner size of 17 millimetres)A ratchet is a spanner with a pawl that runs free on the back swing. SW 17 means a spanner size of 17 millimetres, so the distance between two opposite faces of the nut, and exactly that number has to be on the socket.At the hardware store: a ratchet set with sockets from 8 to 22 mm, which covers almost everything.
Bohrhammer und SchlagbohrmaschineBeide bohren in Stein, der Bohrhammer klopft dabei viel kräftiger und geht auch durch Beton. Für ein paar Löcher in Ziegel reicht die Schlagbohrmaschine.Im Baumarkt: Bohrhammer mit SDS-Aufnahme, dazu Steinbohrer 8 und 10 mm.
Bohrhammer und Schlagbohrmaschine (rotary hammer and impact drill)Both drill into stone. The rotary hammer strikes far harder and goes through concrete as well. For a few holes in brick the impact drill is enough.At the hardware store: rotary hammer with an SDS chuck, plus masonry bits of 8 and 10 mm.
WinkelschleiferEine Maschine mit schnell drehender Scheibe, im Laden oft Flex genannt, zum Trennen von Stein und Metall. Sie ist das gefährlichste Gerät in dieser Sammlung und will Schutzbrille und beide Hände.Im Baumarkt: Winkelschleifer 125 mm, dazu je eine Trennscheibe für Stein und für Metall.
Winkelschleifer (angle grinder)A machine with a fast spinning disc, often called a Flex in the shop, for cutting stone and metal. It is the most dangerous tool in this collection and wants safety glasses and both hands on it.At the hardware store: angle grinder 125 mm, plus one cutting disc for stone and one for metal.
Multitool mit BimetallblattEine kleine Maschine, deren Sägeblatt schnell hin und her schwingt. Damit sägst du die Nägel in einer Palette durch, ohne das Holz kaputt zu reißen.Im Baumarkt: Multifunktionswerkzeug mit Sägeblättern für Holz mit Nägeln.
Multitool mit Bimetallblatt (oscillating multi tool with a bi metal blade)A small machine whose blade swings quickly back and forth. With it you cut through the nails in a pallet without tearing the wood apart.At the hardware store: oscillating multi tool with blades for wood that has nails in it.
RüttelplatteEine schwere Maschine mit vibrierender Bodenplatte, die Schotter und Sand so festklopft, dass später nichts nachsackt. Sie wiegt 60 bis 100 Kilo und geht nur zu zweit ins Auto.Im Baumarkt: Rüttelplatte im Baumaschinenverleih, etwa 45 Euro am Tag.
Rüttelplatte (plate compactor)A heavy machine with a vibrating base plate that packs gravel and sand down so firmly that nothing settles later. It weighs 60 to 100 kilos and takes two people to get into a car.At the hardware store: plate compactor from a plant hire yard, about 45 euros a day.
HandstampferEine schwere Metallplatte an einem Stiel, mit der du kleine Flächen von Hand festklopfst. Für ein paar Quadratmeter reicht das, darüber leihst du besser die Maschine.
Handstampfer (hand tamper)A heavy metal plate on a handle that you pack small areas down with by hand. For a few square metres that will do, above that you are better off hiring the machine.
RotationslaserEin Gerät auf einem Stativ, das einen Lichtstrahl im Kreis herumdreht. Damit findest du auf einer großen Fläche überall genau dieselbe Höhe, wofür die Wasserwaage viel zu kurz ist.Im Baumarkt: Rotationslaser mit Empfänger und Messlatte, im Verleih 25 bis 40 Euro am Tag.
Rotationslaser (rotating laser level)A device on a tripod that turns a beam of light in a circle. With it you find exactly the same height anywhere on a large area, which a spirit level is far too short for.At the hardware store: rotating laser with a receiver and a levelling staff, 25 to 40 euros a day from a hire shop.
MaurerschnurEine dünne reißfeste Schnur, die zwischen zwei Pflöcken straff gespannt wird. Sie zeigt dir die gerade Linie und die richtige Höhe, an der entlang du baust.Im Baumarkt: Maurerschnur 50 m und ein paar Holzpflöcke, zusammen unter zehn Euro.
Maurerschnur (builders line)A thin line that will not tear, pulled tight between two pegs. It shows you the straight line and the right height to build along.At the hardware store: builders line 50 m and a few wooden pegs, under ten euros together.
SchnurgerüstEin Rahmen aus Pfosten und Brettern rund um die Baustelle, an dem die Schnüre festgemacht werden. So bleiben deine Maße erhalten, auch wenn du mittendrin die Erde ausgräbst.
Schnurgerüst (profile boards set up around the site to carry the string lines)A frame of posts and boards around the site that the lines are tied to. That way your measurements survive even when you dig the soil out in the middle.
RichtlatteEine sehr gerade Latte, meist zwei Meter lang. Damit prüfst du, ob eine Fläche eben ist, und ziehst frischen Beton glatt.Im Baumarkt: Richtlatte oder Abziehlatte aus Aluminium, 200 cm, Holz verzieht sich.
Richtlatte (a straight edge, also used as a screed board)A very straight batten, usually two metres long. With it you check whether a surface is level, and you pull fresh concrete smooth.At the hardware store: straight edge or screed board in aluminium, 200 cm. Wood warps.
im Lot und auswaagenIm Lot heißt genau senkrecht, auswaagen heißt genau waagerecht ausrichten. Beides prüfst du mit der Wasserwaage, wenn die Luftblase zwischen den beiden Strichen steht, passt es.
im Lot und auswaagen (plumb, and setting something level)Plumb means exactly vertical, and auswaagen means setting something exactly horizontal. You check both with the spirit level, and when the bubble sits between the two lines it is right.
SilikonpistoleEin Handgerät, in das die Kartusche mit Dichtmasse eingespannt wird. Der Hebel schiebt die Masse gleichmäßig heraus, von Hand geht das nicht.Im Baumarkt: Kartuschenpresse für Standardkartuschen, etwa zehn Euro.
Silikonpistole (sealant gun)A hand tool that the cartridge of sealant is clamped into. The lever pushes the mass out evenly, which you cannot manage by hand.At the hardware store: cartridge gun for standard cartridges, about ten euros.
Körnung wie 0/32Die beiden Zahlen sind die Korngrößen in Millimetern. 0/32 heißt, es ist alles von Staub bis 32 Millimeter enthalten, und gerade der feine Staub sorgt dafür, dass sich das Material festklopfen lässt und später nichts nachsackt.Im Baumarkt: Schotter 0/32 im Baustoffhandel, Verkauf nach Tonne. Eine Tonne passt nicht ins Auto, frag gleich nach Lieferung oder nach einem Anhänger.
Körnung wie 0/32 (a grading such as 0/32, meaning the range of particle sizes)The two numbers are the grain sizes in millimetres. 0/32 means everything from dust up to 32 millimetres is in there, and it is the fine dust that lets the material be packed down so that nothing settles later.At the hardware store: crushed stone 0/32 at a builders merchant, sold by the tonne. A tonne will not go in a car, so ask about delivery or a trailer straight away.
Kies und Splitt mit zwei ähnlichen ZahlenBei 8/16 oder 16/32 fehlen die feinen Anteile, alle Steinchen sind ungefähr gleich groß. Solches Material bleibt locker und lässt Wasser durch, deshalb nimmt man es überall dort, wo etwas versickern soll.Im Baumarkt: Kies 16/32 oder Splitt 8/16, im Sack oder lose.
Kies und Splitt mit zwei ähnlichen Zahlen (gravel and chippings with two similar numbers)With 8/16 or 16/32 the fine material is missing, so all the stones are roughly the same size. Material like that stays loose and lets water through, which is why it goes wherever something has to soak away.At the hardware store: gravel 16/32 or chippings 8/16, in bags or loose.
Beton C25/30Die Zahlen sagen, wie viel Druck der ausgehärtete Beton aushält, C25/30 ist der übliche Beton für Fundamente. Kleine Mengen mischst du aus dem Sack, ab etwa einem Kubikmeter lohnt der Fahrmischer.Im Baumarkt: Sackbeton 25 kg für wenige Löcher, sonst Transportbeton C25/30 bestellen und dabei sagen, wie weit der Wagen fahren kann.
Beton C25/30 (concrete of strength class C25/30)The numbers say how much pressure the hardened concrete takes, and C25/30 is the usual concrete for foundations. Small amounts you mix from the bag, and from about a cubic metre a ready mix lorry is worth it.At the hardware store: bagged concrete 25 kg for a few holes, otherwise order ready mixed C25/30 and say how close the lorry can get.
Füllbeton C20/25Ein etwas schwächerer und dünnflüssiger Beton, mit dem hohle Steine ausgegossen werden. Er muss fließen können, damit keine Luftlöcher in der Wand bleiben.
Füllbeton C20/25 (a wetter infill concrete of class C20/25 for filling hollow blocks)A slightly weaker and more fluid concrete that hollow blocks are filled with. It has to be able to flow, so that no air pockets are left in the wall.
abbindenBeton trocknet nicht, er bindet ab, das heißt er verbindet sich chemisch mit dem Wasser und wird dabei hart. Deshalb muss er feucht gehalten werden und braucht mehrere Tage Ruhe, bevor Last darauf darf.
abbinden (to cure, said of concrete)Concrete does not dry, it cures, which means it combines chemically with the water and goes hard in the process. That is why it has to be kept damp and needs several days of rest before any load goes on it.
Baustahlmatte Q188Ein Gitter aus Stahlstäben, das in den Beton eingelegt wird, damit er nicht reißt. Q188 ist die übliche Größe für Bodenplatten.Im Baumarkt: Baustahlmatte Q188, die Standardmatte misst 5 x 2,15 m und passt nur auf einen Anhänger.
Baustahlmatte Q188 (Q188 steel reinforcing mesh)A grid of steel bars laid into the concrete so that it does not crack. Q188 is the usual size for floor slabs.At the hardware store: Baustahlmatte Q188. The standard sheet measures 5 x 2.15 m and will only go on a trailer.
SchalungssteinEin hohler Betonstein, der ohne Mörtel aufeinandergesetzt und danach mit flüssigem Beton gefüllt wird. So entsteht eine tragende Wand, ohne dass jemand mauern können muss.Im Baumarkt: Schalungsstein 25 x 25 x 50 cm, einer wiegt etwa 20 Kilo.
Schalungsstein (a hollow concrete block, laid dry and then filled with concrete)A hollow concrete block that is stacked without mortar and then filled with liquid concrete. That gives you a load-bearing wall without anyone needing to know how to lay bricks.At the hardware store: Schalungsstein 25 x 25 x 50 cm. One block weighs about 20 kilos.
SchamotteEin hitzefester Stein aus gebranntem Ton, der die Flamme direkt aushält, ohne zu zerspringen. Er sitzt in Backöfen und Kaminen überall dort, wo das Feuer hinkommt.Im Baumarkt: Schamottstein und dazu passender Schamottmörtel, im Kaminfachhandel oder beim Ofenbauer.
Schamotte (fire clay, as in firebrick)A heat-resistant brick of fired clay that takes the flame directly without cracking apart. It sits in bread ovens and fireplaces wherever the fire reaches.At the hardware store: firebrick and the fire clay mortar that goes with it, at a stove supplier or at a stove builder.
BlähtonKleine leichte Tonkugeln, die bei großer Hitze aufgepoppt sind wie Popcorn. Sie sind innen voller Luft und dämmen deshalb gut, Wasser läuft ohne Weiteres hindurch.Im Baumarkt: Blähton 8/16 im Sack, im Gartenmarkt oder im Baustoffhandel.
Blähton (expanded clay pebbles)Small light clay balls that have popped open under great heat, the way popcorn does. They are full of air inside and insulate well, and water runs straight through them.At the hardware store: Blähton 8/16 in bags, at a garden centre or a builders merchant.
Perlit und VermiculitAufgeblähtes Vulkangestein in weißen oder goldenen Krümeln. Es ist federleicht und brennt nicht, deshalb schüttet man es als Dämmung in den Zwischenraum von Öfen.Im Baumarkt: Perlit oder Vermiculit im Ofenbedarf, im Gartenhandel heißt es oft Pflanzperlit.
Perlit und Vermiculit (perlite and vermiculite)Expanded volcanic rock in white or golden crumbs. It weighs almost nothing and does not burn, so it gets poured into the cavity of a stove as insulation.At the hardware store: perlite or vermiculite at a stove supplier. In garden shops it is often sold as Pflanzperlit.
magern und abmagernFetten Lehm oder fette Erde mit Sand mischen. Reiner Lehm schrumpft beim Trocknen und reißt, mit Sand gemischt bleibt er in Form.
magern und abmagern (to lean a clay mix down by adding sand)Mixing fatty clay or fatty soil with sand. Pure clay shrinks as it dries and cracks, and mixed with sand it holds its shape.
Punktfundament und frostfrei gründenStatt einer durchgehenden Platte gießt man unter jeden Pfosten einen eigenen Betonklotz. Frostfrei heißt, dass er mindestens achtzig Zentimeter tief reicht, damit der Frost ihn im Winter nicht anhebt.
Punktfundament und frostfrei gründen (pad foundations, and founding below the frost line)Instead of one continuous slab you pour a separate block of concrete under each post. Frost free means it reaches at least eighty centimetres down, so that the frost cannot lift it in winter.
verdichtenSchotter oder Sand so lange klopfen oder rütteln, bis sich die Körner ineinanderschieben und nichts mehr nachgibt. Wer das auslässt, hat nach dem ersten Winter Mulden in der Fläche.
verdichten (to compact)Tamping or vibrating gravel or sand until the grains slide into each other and nothing gives way. Leave it out and you have hollows in the surface after the first winter.
StänderwerkDas Gerippe einer Wand aus senkrechten Hölzern in gleichmäßigem Abstand. Dazwischen kommt später die Dämmung, außen und innen werden Platten oder Bretter darauf befestigt.
Ständerwerk (stud framing)The skeleton of a wall made of vertical timbers at even spacing. The insulation goes between them, and boards or sheets are fixed on the outside and the inside.
PfetteEin waagerechter Balken, der oben auf den Pfosten liegt und die schrägen Dachbalken trägt. Bei einem Unterstand sind es meist zwei, einer vorn und einer hinten.
Pfette (purlin)A horizontal beam that lies on top of the posts and carries the sloping roof timbers. On a shelter there are usually two, one at the front and one at the back.
SparrenDie schrägen Balken, die über das Dach von oben nach unten laufen. Auf ihnen liegt die Dachhaut, also zum Beispiel Blech oder Ziegel.
Sparren (rafters)The sloping beams that run down the roof from top to bottom. The roof covering lies on them, so sheet metal or tiles for example.
FirstDie oberste waagerechte Kante eines Dachs, dort wo zwei Dachflächen zusammenstoßen. Bei einem Dach mit nur einer Fläche ist es einfach die hohe Kante.
First (the ridge of a roof)The top horizontal edge of a roof, where two roof surfaces meet. On a roof with only one surface it is simply the high edge.
TraufeDie untere Kante des Dachs, an der das Wasser abläuft und die Rinne hängt. Von First bis Traufe geht es also von ganz oben bis ganz unten.
Traufe (the eaves)The bottom edge of the roof, where the water runs off and the gutter hangs. From ridge to eaves therefore means from the very top to the very bottom.
PultdachEin Dach mit nur einer geneigten Fläche, wie ein schräg gestelltes Pult. Es ist die einfachste Dachform und braucht keinen Grat in der Mitte.
Pultdach (a mono pitch roof)A roof with only one sloping surface, like a lectern set at an angle. It is the simplest roof shape and needs no ridge in the middle.
AussteifungAllesAll, was ein Gerippe gegen Verschieben sichert, meist schräge Streben oder eine fest verschraubte Platte. Ohne sie kippt ein rechteckiger Rahmen seitlich weg.
Aussteifung (bracing)Anything that stops a frame from racking, usually diagonal struts or a firmly screwed sheet. Without it a rectangular frame folds over sideways.
RingankerEin umlaufendes Band aus Gurten, Stahl oder Beton, das die Wände rundum zusammenhält. Es fängt den Druck ab, der die Wände nach außen schieben will.
Ringanker (a ring beam, a tie running right round the building)A band of webbing straps, steel or concrete that runs right round the building and holds the walls together. It takes up the pressure that wants to push the walls outwards.
ZugbandEin Seil, Gurt oder Stab, der zwei Bauteile gegen das Auseinanderdrücken zusammenhält. Bei der Jurte hält es die Wand, die das Dach sonst nach außen schieben würde.
Zugband (a tension tie)A rope, strap or rod that holds two parts together against being pushed apart. On a yurt it holds the wall that the roof would otherwise push outwards.
BalkenschuhEin Blechteil in U-Form, in das ein Balken hineingestellt und dann festgeschraubt wird. So hängt ein Balken sicher am anderen, ohne dass jemand Zapfen schnitzen muss.Im Baumarkt: Balkenschuh mit dem Innenmaß deines Balkens, dazu die kurzen dicken Ankernägel.
Balkenschuh (joist hanger)A U-shaped steel part that a beam is set into and then screwed tight. That way one beam hangs safely from the next, without anyone having to cut a joint.At the hardware store: joist hanger to the inside dimension of your beam, plus the short thick anchor nails.
H-AnkerEin Metallteil in Form eines H, unten ein Blech zum Einbetonieren, oben eine Gabel für den Holzpfosten. Der Pfosten steht damit ein paar Zentimeter über dem Boden und fault nicht von unten weg.Im Baumarkt: H-Anker 91 mm oder 121 mm, die Zahl ist die Breite deines Pfostens.
H-Anker (an H shaped post base, set in concrete)A metal part in the shape of an H, with a plate at the bottom to set in concrete and a fork at the top for the timber post. The post then stands a few centimetres above the ground and does not rot away from below.At the hardware store: H-Anker 91 mm or 121 mm, and the number is the width of your post.
ErdankerEin Stab oder Rohr, meist sechzig Zentimeter lang, das mit dem Vorschlaghammer in den Boden getrieben wird und dort das Fundament ersetzt. Achtzehn Stück einzuschlagen dauert einen halben Tag und macht die Arme müde.Im Baumarkt: Erdanker oder Bodenhülse aus Rohr 32 mm, im Zaunbedarf oder im Gartenmarkt.
Erdanker (a ground anchor driven into the soil)A rod or tube, usually sixty centimetres long, that is driven into the ground with a sledgehammer and takes the place of a foundation. Driving eighteen of them in takes half a day and makes your arms tired.At the hardware store: ground anchor or ground socket from 32 mm tube, in the fencing section or at a garden centre.
VollgewindeschraubeEine lange Holzschraube, deren Gewinde bis unter den Kopf durchläuft. Sie zieht zwei Balken fest zusammen und ersetzt heute viele der alten Holzverbindungen.Im Baumarkt: Vollgewindeschraube 8 x 200 mm mit dem passenden Aufsatz, im Baustoffhandel billiger als im Baumarkt.
Vollgewindeschraube (a fully threaded structural timber screw)A long wood screw whose thread runs all the way up to the head. It pulls two beams tightly together and today it takes the place of many old timber joints.At the hardware store: Vollgewindeschraube 8 x 200 mm with the matching bit, cheaper at a builders merchant than at a DIY store.
KarosseriescheibeEine besonders große dünne Unterlegscheibe. Sie verteilt den Druck der Schraube auf eine breite Fläche, damit der Kopf nicht ins weiche Holz einsinkt.Im Baumarkt: Karosseriescheiben in der Größe der Schraube, also M10 für eine Schraube mit zehn Millimetern.
Karosseriescheibe (a large thin washer, a penny washer)A particularly large thin washer. It spreads the pressure of the screw over a wide area, so that the head does not sink into soft wood.At the hardware store: penny washers in the size of the screw, so M10 for a screw of ten millimetres.
Binder und BindersteineLange Steine, die quer durch die ganze Mauer reichen und beide Seiten miteinander verzahnen. Ohne sie fällt eine Trockenmauer nach ein paar Jahren in zwei Hälften auseinander.
Binder und Bindersteine (through stones that tie both faces of a wall together)Long stones that reach right through the wall and lock both faces together. Without them a dry stone wall falls apart into two halves after a few years.
AnlaufDie leichte Rückneigung einer Mauer gegen den Hang, meist zehn bis fünfzehn Prozent. Dadurch drückt der Berg die Mauer in sich hinein statt nach vorn um.
Anlauf (the batter, the backward lean of a wall)The slight backward lean of a wall into the slope, usually ten to fifteen per cent. That makes the hill press the wall into itself, rather than push it over forwards.
im VerbandSteine so setzen, dass die Fugen nicht übereinanderliegen, sondern immer versetzt sind, wie bei einer Ziegelwand. Eine durchgehende senkrechte Fuge ist die Stelle, an der die Mauer später aufreißt.
im Verband (in bond, with the joints staggered)Setting stones so that the joints do not sit above each other but are always offset, as in a brick wall. A continuous vertical joint is the place where the wall will crack open later.
Vlies und GeotextilEin Stoff aus verfilzten Fasern, der aussieht wie sehr dicker Filz. Er hält Erde zurück und lässt Wasser durch, deshalb liegt er als Trennschicht zwischen Erde und Kies.Im Baumarkt: Geotextil oder Unkrautvlies, die Angabe in Gramm je Quadratmeter ist das Gewicht, 150 g ist der übliche Wert.
Vlies und Geotextil (geotextile fleece)A fabric of matted fibres that looks like very thick felt. It holds soil back and lets water through, so it goes in as a separating layer between soil and gravel.At the hardware store: geotextile or weed fabric. The figure in grams per square metre is the weight, and 150 g is the usual value.
EPDMEine dicke schwarze Gummifolie, die in einem einzigen Stück geliefert wird und Jahrzehnte hält. Man nimmt sie für Teiche und flache Dächer, weil sie ohne Klebenähte auskommt.Im Baumarkt: EPDM-Folie 1,14 mm für Teiche oder 1,5 mm für Dächer, als Zuschnitt nach Maß bestellen.
EPDM (EPDM rubber sheeting)A thick black rubber sheet that comes in one single piece and lasts for decades. It gets used for ponds and flat roofs, because it needs no glued seams.At the hardware store: EPDM sheet 1.14 mm for ponds or 1.5 mm for roofs, ordered cut to size.
Noppenfolie und NoppenbahnEine Kunststoffbahn voller kleiner Höcker, die aussieht wie eine harte Luftpolsterfolie. Die Noppen halten Abstand zur Wand, damit Wasser dort nach unten ablaufen kann.
Noppenfolie und Noppenbahn (dimpled membrane for walls below ground)A plastic sheet covered in small bumps that looks like hard bubble wrap. The dimples keep a gap to the wall, so that water can run down there.
BitumenschweißbahnEine dicke Dachpappe, die mit einem Gasbrenner angeschmolzen und dadurch aufgeklebt wird. Sie dichtet Bauteile ab, die in der Erde liegen.
Bitumenschweißbahn (torch on bitumen membrane)A thick roofing felt that is melted with a gas torch and sticks down as it goes. It seals the parts of a building that sit in the soil.
DampfbremseEine Folie auf der warmen Innenseite einer gedämmten Wand. Sie hält die feuchte Zimmerluft davon ab, in die Dämmung zu ziehen und dort zu Wasser zu werden, und der aufgedruckte sd-Wert sagt, wie dicht sie ist, wobei die kleine Zahl nach außen und die große nach innen gehört.Im Baumarkt: Dampfbremse und das dazu passende Klebeband am besten von einer Marke kaufen, sonst hält die Verklebung nicht.
Dampfbremse (vapour control layer)A membrane on the warm inside face of an insulated wall. It keeps the damp room air from moving into the insulation and turning to water there, and the printed sd value says how tight it is, where the small number belongs on the outside and the large one on the inside.At the hardware store: vapour control layer and the tape that goes with it, best bought from one brand, because otherwise the bond does not hold.
my bei FolieDie Abkürzung für Mikrometer, also ein Tausendstel Millimeter. Eine Gewächshausfolie mit 200 my ist 0,2 Millimeter dick und damit deutlich fester als eine gewöhnliche Baufolie.Im Baumarkt: Gewächshausfolie 200 my, UV-stabil, sonst wird sie nach einem Sommer brüchig.
my bei Folie (my, meaning micron, on plastic sheeting)The abbreviation for micrometre, so a thousandth of a millimetre. A greenhouse film of 200 my is 0.2 millimetres thick and therefore much tougher than ordinary building film.At the hardware store: greenhouse film 200 my, UV stabilised, because otherwise it goes brittle after one summer.
KapillarsperreErde neben einem Teich saugt das Wasser über den Folienrand hinweg, so wie ein Zuckerwürfel den Kaffee hochzieht. Deshalb ziehst du die Folie am Ufer senkrecht hoch und legst eine Kiesrinne dahinter, damit diese Verbindung unterbrochen ist.
Kapillarsperre (capillary break)Soil next to a pond draws the water up over the edge of the liner, the way a sugar cube pulls up coffee. So you take the liner up vertically at the bank and lay a gravel channel behind it, which breaks that connection.
UferwallmatteEin rauer Stoffstreifen, den man über den senkrecht hochgezogenen Folienrand legt. Er lässt sich mit Erde füllen und bepflanzen, sodass der Rand verschwindet.
Uferwallmatte (bank matting for the edge of a pond)A rough strip of fabric laid over the vertical edge of the liner. It can be filled with soil and planted, so that the edge disappears.
QuelltonTongranulat, das mit Wasser aufquillt und dabei dicht wird. Man schüttet es rund um ein Brunnenrohr, damit oben kein Schmutzwasser nach unten sickert.Im Baumarkt: Quellton oder Bentonit, im Brunnenbedarf.
Quellton (bentonite clay granules that swell when wet)Clay granules that swell up with water and seal as they do it. You pour them around a well pipe, so that no dirty water seeps down from above.At the hardware store: Quellton or bentonite, at a well drilling supplier.
HT-RohrDas graue Abwasserrohr für innen, dünnwandig und hitzefest bis etwa neunzig Grad. Die Teile stecken mit Gummidichtungen ineinander, ohne Kleber.Im Baumarkt: HT-Rohr DN 75 und dazu Bögen mit 87 Grad, alles aus derselben Reihe.
HT-Rohr (the grey indoor waste pipe)The grey waste pipe for indoors, thin walled and heat-resistant to about ninety degrees. The parts push into each other with rubber seals, without glue.At the hardware store: HT-Rohr DN 75 and bends of 87 degrees to match, all from the same range.
KG-RohrDas orangebraune Abwasserrohr für draußen und für die Erde, viel dicker und stabiler als das graue. Es hält den Druck des Erdreichs aus.Im Baumarkt: KG-Rohr DN 100 und Bögen mit 45 Grad, dazu etwas Gleitmittel für die Dichtungen.
KG-Rohr (the orange brown underground drainage pipe)The orange brown waste pipe for outdoors and for burying, much thicker and stronger than the grey one. It takes the pressure of the soil.At the hardware store: KG-Rohr DN 100 and bends of 45 degrees, plus a little lubricant for the seals.
DNDN steht für den Nenndurchmesser in Millimetern, also die grobe Weite eines Rohrs. DN 100 heißt Rohr von rund zehn Zentimetern, und alle Teile mit derselben Zahl passen zusammen.
DN (Nenndurchmesser, the nominal diameter in millimetres)DN stands for the nominal diameter in millimetres, so the rough width of a pipe. DN 100 means a pipe of around ten centimetres, and all parts carrying the same number fit together.
Zoll bei GewindenEin altes Maß für Wasserleitungen, das nichts mit dem sichtbaren Durchmesser zu tun hat. Wichtig ist nur, dass beide Teile dieselbe Zahl tragen, also 1/2 Zoll auf 1/2 Zoll.Im Baumarkt: Sag im Laden dazu, ob du ein Innengewinde oder ein Außengewinde brauchst und was drangeschraubt wird.
Zoll bei Gewinden (inch sizes on pipe threads)An old measure for water pipes that has nothing to do with the visible diameter. All that counts is that both parts carry the same number, so 1/2 inch onto 1/2 inch.At the hardware store: say in the shop whether you need a female or a male thread and what is going to be screwed on.
KugelhahnEin Absperrhahn mit Hebel, in dem eine durchbohrte Kugel sitzt. Hebel in Rohrrichtung heißt offen, Hebel quer heißt zu, das erkennst du von weitem.
Kugelhahn (ball valve)A shut-off valve with a lever and a drilled ball inside. Lever in line with the pipe means open, lever across means shut, and you can see that from a distance.
Hanf und DichtpasteFeine Hanffasern, die man mit einer Paste um ein Rohrgewinde wickelt, bevor man es zuschraubt. Der Hanf quillt an und dichtet die Verbindung dauerhaft ab.Im Baumarkt: Dichthanf und Dichtpaste, zusammen unter zehn Euro, im Sanitärregal.
Hanf und Dichtpaste (hemp and jointing paste for pipe threads)Fine hemp fibres that you wind around a pipe thread with a paste before you screw it up. The hemp swells and seals the joint for good.At the hardware store: sealing hemp and jointing paste, under ten euros together, on the plumbing shelf.
RammfilterrohrEin Rohr mit geschlitztem Ende, das in den Boden geschlagen wird und durch die Schlitze Wasser aufnimmt. Das ist die einfachste Art, an Grundwasser zu kommen.
Rammfilterrohr (a driven well point, a slotted pipe hammered into the ground)A pipe with a slotted end that is driven into the ground and takes water in through the slots. It is the simplest way to reach groundwater.
DrainageEin gelochtes Rohr in einer Packung aus grobem Kies, das Wasser sammelt und wegleitet. Es liegt überall dort, wo Wasser sonst am Bauwerk stehen bliebe.
Drainage (a land drain)A perforated pipe in a packing of coarse gravel that collects water and leads it away. It goes wherever water would otherwise stand against the building.
SchwallbeschickerEin Behälter, der sich langsam füllt und dann auf einen Schlag leerläuft. Dadurch kommt das Abwasser stoßweise auf das Filterbeet und verteilt sich gleichmäßig, statt immer an derselben Stelle einzusickern.
Schwallbeschicker (a dosing siphon that releases waste water in surges)A vessel that fills slowly and then empties all at once. That way the waste water reaches the filter bed in surges and spreads evenly, instead of always soaking in at the same spot.
SparduschkopfEin Duschkopf, der Luft ins Wasser mischt. Es fühlt sich an wie eine normale Dusche und verbraucht ungefähr die Hälfte.
Sparduschkopf (a low flow shower head)A shower head that mixes air into the water. It feels like a normal shower and uses roughly half as much.
Gefälle in ProzentZwei Prozent Gefälle heißen zwei Zentimeter Höhenunterschied auf einen Meter Länge. Bei Abwasserrohren ist das die Regel, damit alles abläuft und nichts liegen bleibt.
Gefälle in Prozent (fall stated as a percentage)Two per cent of fall means two centimetres of height difference over one metre of length. On waste pipes that is the rule, so that everything runs away and nothing is left lying.
lichte Weite und lichter AbstandDas Maß im Inneren einer Öffnung, also von Kante zu Kante der Lücke, ohne die Bauteile selbst. Elf Zentimeter lichter Abstand am Geländer heißt elf Zentimeter Luft zwischen zwei Stäben.
lichte Weite und lichter Abstand (clear width and clear spacing)The measurement inside an opening, so from edge to edge of the gap, without the parts themselves. Eleven centimetres of clear spacing on a railing means eleven centimetres of air between two bars.
AchsmaßDer Abstand von Mitte zu Mitte, zum Beispiel von einem Wandständer zum nächsten. Gemessen wird nie die Lücke, sondern immer Mitte zu Mitte, sonst passen die Platten am Ende nicht auf.
Achsmaß (centre to centre spacing)The distance from middle to middle, for example from one wall stud to the next. You never measure the gap, always middle to middle, or the sheets will not line up at the end.
laufender Meter oder lfmDie reine Länge in Metern, ganz ohne Breite und Dicke. Zehn laufende Meter Brett sind schlicht zehn Meter Brett hintereinandergelegt.
laufender Meter oder lfm (linear metre)Plain length in metres, with no width and no thickness. Ten linear metres of board are simply ten metres of board laid end to end.
KubikmeterEin Würfel von einem Meter Kantenlänge, also tausend Liter. Eine Schubkarre fasst rund achtzig Liter, ein Kubikmeter sind also etwa zwölf volle Karren.
Kubikmeter (cubic metre)A cube one metre along each edge, so a thousand litres. A wheelbarrow holds around eighty litres, which makes a cubic metre about twelve full barrows.
daNDekanewton, eine Einheit für Kraft. Ein daN entspricht ungefähr einem Kilo Zugkraft, 2.000 daN sind also rund zwei Tonnen Haltekraft.
daN (decanewton, a unit of force)Decanewton, a unit of force. One daN is roughly one kilo of pull, so 2,000 daN is around two tonnes of holding force.
bindiger BodenErde mit viel Ton und Lehm, die klebt und sich zu einer Wurst rollen lässt. Sie hält eine Grubenwand länger als Sand, wird bei Regen aber schmierig.
bindiger Boden (cohesive soil)Soil with a lot of clay and loam in it, which sticks and can be rolled into a sausage. It holds the wall of a pit longer than sand does, but it turns greasy in rain.
BöschungEine schräg abgeflachte Grubenwand statt einer senkrechten. Die Schräge sorgt dafür, dass die Wand nicht abbricht und jemanden verschüttet.
Böschung (a battered slope on the side of a pit)A pit wall cut back at an angle instead of standing vertical. The slope keeps the wall from breaking away and burying somebody.
VerbauEine Abstützung der Grubenwand mit Platten und Spindeln, wenn du nicht schräg abgraben kannst. Ab 1,25 Meter Tiefe ist eins von beiden Pflicht.
Verbau (trench shoring)Propping the wall of a pit with panels and struts, for when you cannot dig back at an angle. From 1.25 metres of depth, one of the two is required.
AuflastklasseEine Angabe, wie viel Gewicht von oben auf ein Bauteil in der Erde drücken darf. Sie entscheidet, ob über einem Erdkeller nur Wiese liegen darf oder auch ein Auto fahren.
Auflastklasse (the load class for a buried structure)A figure for how much weight may press down from above on a part that sits in the ground. It decides whether only grass may lie over an earth cellar or a car may drive across it.
Grasnarbe und RasensodenDie oberste Schicht aus Gras samt verfilzten Wurzeln. Sticht man sie in Platten ab, heißen diese Soden, und kopfüber gelegt sind sie eine gute unterste Lage im Hochbeet.
Grasnarbe und Rasensoden (turf, and turves cut from it)The top layer of grass together with its matted roots. Cut into slabs they are called turves, and laid upside down they make a good bottom layer in a raised bed.
SohleDer Boden einer Grube, also die tiefste Fläche. Von der Sohle aus rechnet man die Höhe aller Schichten nach oben.
Sohle (the formation level, the bottom of a pit)The floor of a pit, so the lowest surface. From this level you count the height of all the layers upwards.
DGUVDie Deutsche Gesetzliche Unfallversicherung, die die Sicherheitsregeln für Arbeit aufschreibt. Ihre Regeln zu Gruben und Absturz gelten auch für Helfer auf dem eigenen Grundstück.
DGUV (Deutsche Gesetzliche Unfallversicherung, the German statutory accident insurance body)The Deutsche Gesetzliche Unfallversicherung, which writes down the safety rules for work. Its rules on pits and on falling apply to helpers on your own land as well.
DIN EN 1177Die Norm für den Boden unter Spielgeräten. Sie legt fest, wie dick Rindenmulch oder Sand sein muss, damit ein Sturz aus einer bestimmten Höhe glimpflich ausgeht.
DIN EN 1177 (the standard for impact absorbing ground under play equipment)The standard for the ground under play equipment. It lays down how thick bark mulch or sand has to be, so that a fall from a given height ends lightly.
DWA-A 262Das Regelwerk für Pflanzenkläranlagen. Danach rechnet ein Ingenieurbüro aus, wie groß euer Filterbeet sein muss.
DWA-A 262 (the German code of practice for reed bed treatment plants)The set of rules for reed bed treatment plants. An engineering office works out from it how large your filter bed has to be.
EinwohnerwertDie Rechengröße für Abwasser, ein Einwohnerwert entspricht dem Schmutz eines Menschen an einem Tag. Eine Anlage für zehn Einwohnerwerte reicht für zehn dauerhaft anwesende Personen.
Einwohnerwert (population equivalent, the design unit for waste water)The calculation unit for waste water, where one population equivalent is the dirt of one person in one day. A plant for ten population equivalents is enough for ten people living there permanently.
verfahrensfreiEin Bauvorhaben, für das du keinen Bauantrag stellen musst. Alle anderen Regeln zu Abstand, Naturschutz und Brandschutz gelten trotzdem weiter.
verfahrensfrei (exempt from a building application)A building project that you do not have to submit a building application for. All the other rules on distance to the boundary, on nature protection and on fire safety still apply.
FI-SchutzschalterEin Schalter im Sicherungskasten, der den Strom in Sekundenbruchteilen abschaltet, sobald er einen falschen Weg nimmt, zum Beispiel durch einen Menschen. In Werkstatt und Außenbereich ist er Pflicht.
FI-Schutzschalter (a residual current device, an RCD)A switch in the fuse box that cuts the power within a fraction of a second, as soon as it takes a wrong path, through a person for example. In a workshop and outdoors it is required.
EPAL und Stempel HTDer ovale Stempel seitlich auf dem Eckklotz einer Europalette. HT heißt mit Hitze behandelt und damit unbedenklich, MB stünde für eine Begasung mit Chemie und gehört nicht ins Haus.Im Baumarkt: Nach Europaletten mit HT-Stempel fragen, Getränkemärkte und Baustoffhändler geben oft welche ab.
EPAL und Stempel HT (the EPAL mark and the HT stamp on a pallet)The oval stamp on the side of the corner block of a Euro pallet. HT means heat treated and therefore harmless, while MB would stand for fumigation with chemicals and has no place indoors.At the hardware store: ask for Euro pallets with the HT stamp. Drinks shops and builders merchants often give some away.
Gärtopf und GärspundEin Gärtopf ist ein Steinzeugtopf mit einer Wasserrinne im Deckelrand, ein Gärspund ist ein kleiner Wasserverschluss zum Aufstecken auf ein Glas. Beide lassen das Gas der Gärung heraus und keine Luft herein.
Gärtopf und Gärspund (fermentation crock and airlock)A Gärtopf is a stoneware crock with a water channel in the rim of the lid, and a Gärspund is a small water trap that pushes onto the top of a jar. Both let the gas of fermentation out and no air in.
Spannschiene mit FederdrahtEine Aluminiumschiene mit einem Schlitz und dazu ein gewellter Draht. Du legst die Folie über die Schiene und drückst den Draht hinein, dann sitzt die Folie bombenfest und reißt nicht aus.Im Baumarkt: Spannschiene mit Federdraht, wird nach Metern verkauft, im Gewächshausbedarf.
Spannschiene mit Federdraht (film fixing channel with a spring wire)An aluminium channel with a slot, and a wavy wire to go with it. You lay the film over the channel and press the wire in, and then the film sits rock solid and does not tear out.At the hardware store: film fixing channel with spring wire, sold by the metre, at a greenhouse supplier.
FolienflanschEin zweiteiliger Ring, mit dem ein Rohr dicht durch eine Folie geführt wird. Die Folie wird zwischen die beiden Hälften geklemmt und mit einem Kranz Schrauben zusammengepresst.
Folienflansch (a liner flange for taking a pipe through sheeting)A ring in two halves that takes a pipe through a liner without a leak. The liner is clamped between the two halves and pressed together with a ring of screws.
SchlämmkornDie allerfeinsten Teilchen im Kies, feiner als Sand und praktisch Staub. Für ein Filterbeet wird der Kies gewaschen geliefert, weil dieser Staub sonst die Zwischenräume zusetzt und kein Wasser mehr durchläuft.Im Baumarkt: Gewaschenen Filterkies 2/8 bestellen und dabei ausdrücklich gewaschen sagen.
Schlämmkorn (the finest silt fraction in gravel)The very finest particles in gravel, finer than sand and effectively dust. For a filter bed the gravel comes washed, because otherwise this dust clogs the gaps and no more water runs through.At the hardware store: order washed filter gravel 2/8 and say the word washed out loud.
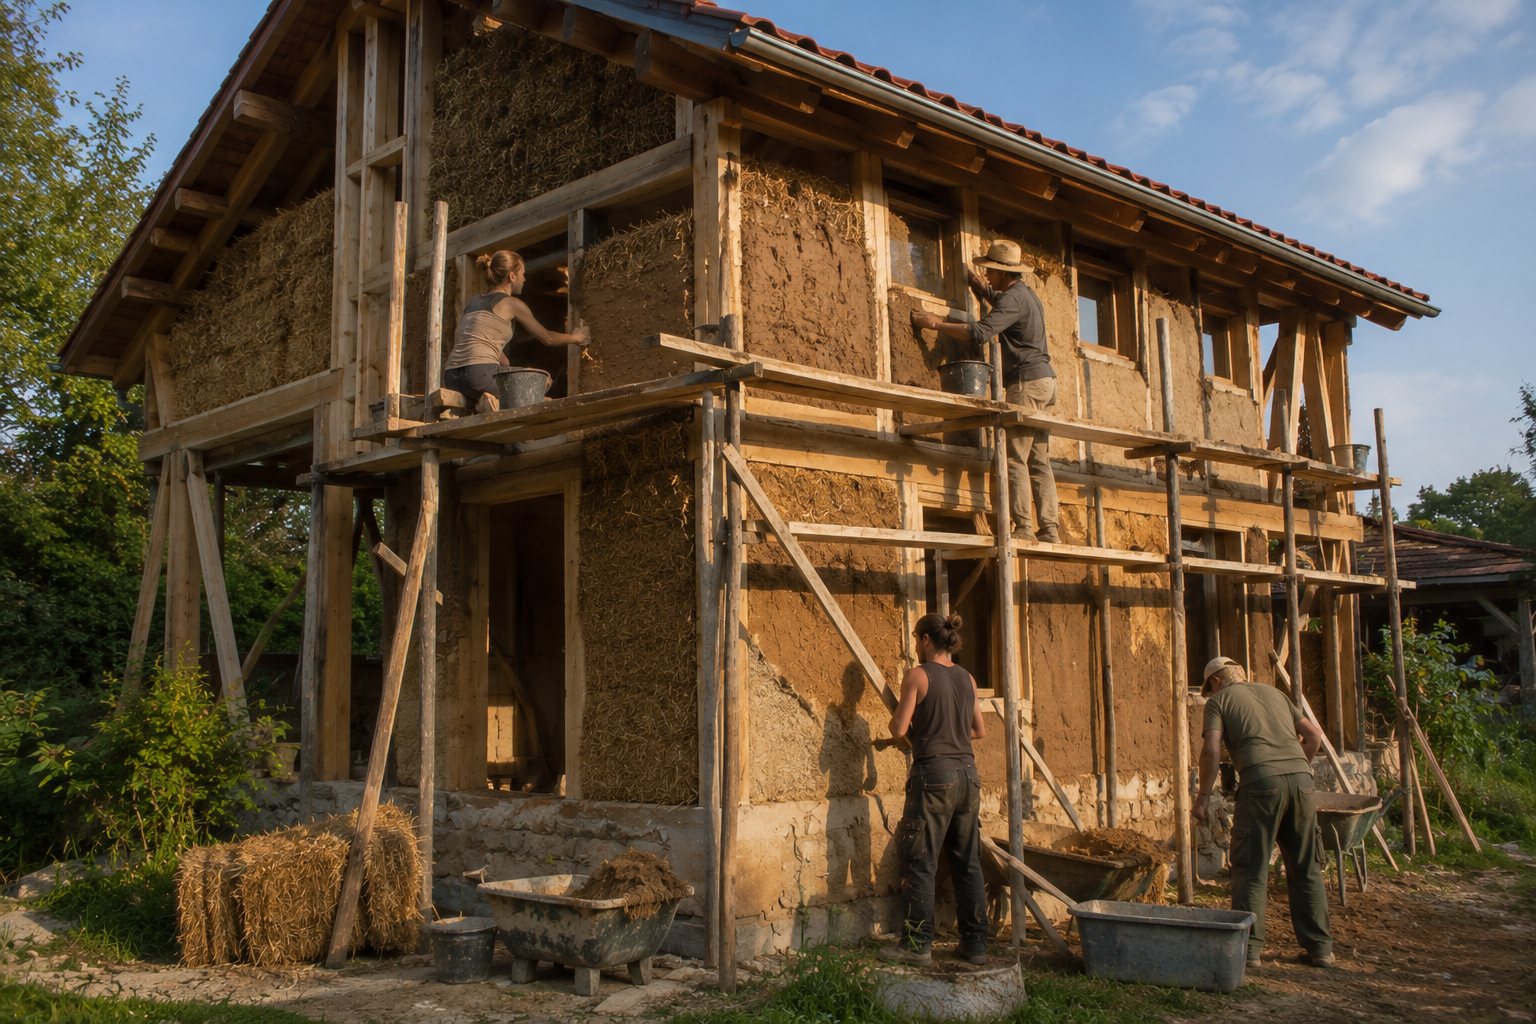
Womit ihr anfangt, die erste WerkzeugkisteWhat to start with, your first tool kitWhat to start with, your first tool kit

Werbung. Die Produktlinks in diesem Abschnitt sind Partnerlinks zu Amazon. Kaufst du darüber, bekommt diese Seite eine kleine Provision, für dich bleibt der Preis gleich. Als Amazon-Partner verdiene ich an qualifizierten Verkäufen. Verlinkt ist jeweils ein Gerät, mit dem man gut arbeiten kann, keine Kaufempfehlung im Sinne eines Tests. Die aktuellen Preise stehen bei Amazon, die Spannen hier sind eigene Schätzungen. Falls ein Modell ausläuft, führt der Zusatzlink zu vergleichbaren Geräten.

Advertising. The product links in this section are affiliate links to Amazon. If you buy through them, this site gets a small commission, and the price stays the same for you. As an Amazon Associate I earn from qualifying purchases. What is linked is a tool you can work with well, not a buying recommendation in the sense of a test. The current prices are at Amazon, and the ranges here are estimates of my own. If a model is discontinued, the extra link leads to comparable tools.

Zuerst, rund 300 EuroStart here, around 300 euros

Akkuschrauber 18 Volt mit zwei Akkus und einem Satz Bits80 bis 110 Euro, gebraucht in 28 von 61 Anleitungen
Cordless drill driver, 18 volt, with two batteries and a set of bits80 to 110 euros, used in 28 of 61 guides
Bei Amazon:At Amazon: Bosch EasyDrill 18V-40, 2 Akkus · Bosch Bit-Satz, 43 Teile · weitere Modellemore models
Wasserwaage 60 cm und 120 cm25 Euro, gebraucht in 39 von 61 Anleitungen
Spirit levels of 60 cm and 120 cm25 euros, used in 39 of 61 guides
Bei Amazon:At Amazon: Stabila 60 cm, Type 80 AS-2 · Stabila 120 cm, Type 70 · weitere Modellemore models
Spaten und Schaufel40 Euro, gebraucht in 28 von 61 Anleitungen
Spade and shovel40 euros, used in 28 of 61 guides
Bei Amazon:At Amazon: Fiskars Gartenspaten, spitz · Fiskars Schaufel, 23,5 cm · weitere Modellemore models
Schubkarre 100 Liter mit Luftrad55 Euro, gebraucht in 22 von 61 Anleitungen
Wheelbarrow, 100 litres, with a pneumatic wheel55 euros, used in 22 of 61 guides
Bei Amazon:At Amazon: Schubkarre 100 l, 250 kg · weitere Modellemore models
Zollstock und Maßband 30 m15 Euro, gebraucht in 18 von 61 Anleitungen
Folding rule and a 30 m tape measure15 euros, used in 18 of 61 guides
Bei Amazon:At Amazon: Stanley Gliedermaßstab, 2 m · Rollbandmaß 30 m, Glasfaser · weitere Modellemore models
Maurerschnur 50 m mit Holzpflöcken10 Euro, gebraucht in 15 von 61 Anleitungen
Builders line, 50 m, with wooden pegs10 euros, used in 15 of 61 guides
Bei Amazon:At Amazon: Maurerschnur 50 m · Holzpflöcke, 15 Stück, 40 cm · weitere Modellemore models
Handsäge, dazu Arbeitshandschuhe und Schutzbrille40 Euro, gebraucht in 16 von 61 Anleitungen
Hand saw, plus work gloves and safety glasses40 euros, used in 16 of 61 guides
Bei Amazon:At Amazon: Bahco Handsäge Superior · Leder-Arbeitshandschuhe, 4 Paar · Uvex Schutzbrille i-Works · weitere Modellemore models

Wenn ihr weitermacht, rund 800 EuroIf you carry on, around 800 euros

Handkreissäge mit Führungsschiene150 bis 200 Euro, gebraucht in 14 von 61 Anleitungen
Circular saw with a guide rail150 to 200 euros, used in 14 of 61 guides
Bei Amazon:At Amazon: Bosch GKS 190 · Bosch Führungsschiene FSN RA · weitere Modellemore models
Bohrhammer mit Steinbohrern von 6 bis 12 mm100 bis 110 Euro, gebraucht in 15 von 61 Anleitungen
Rotary hammer with masonry bits from 6 to 12 mm100 to 110 euros, used in 15 of 61 guides
Bei Amazon:At Amazon: Bosch GBH 2-21, SDS plus · SDS-plus Bohrer-Satz, 5 bis 12 mm · weitere Modellemore models
Stichsäge mit Blättern für Holz60 bis 70 Euro, gebraucht in 7 von 61 Anleitungen
Jigsaw with blades for wood60 to 70 euros, used in 7 of 61 guides
Bei Amazon:At Amazon: Bosch PST 650 · Stichsägeblätter für Holz, Satz · weitere Modellemore models
Vorschlaghammer 5 kg und Fäustel 1 kg40 bis 45 Euro, gebraucht in 10 von 61 Anleitungen
Sledgehammer of 5 kg and a club hammer of 1 kg40 to 45 euros, used in 10 of 61 guides
Bei Amazon:At Amazon: Vorschlaghammer, Fiberglasstiel · Fäustel 1 kg, Fiberglasstiel · weitere Modellemore models
Wasserwaage 200 cm40 bis 45 Euro, gebraucht in 10 von 61 Anleitungen
Spirit level, 200 cm40 to 45 euros, used in 10 of 61 guides
Bei Amazon:At Amazon: Wasserwaage 200 cm, Alu · weitere Modellemore models
Ratschenkasten mit Nüssen 8 bis 22 mm und zwei Rohrzangen90 bis 100 Euro, gebraucht in 12 von 61 Anleitungen
Ratchet set with sockets from 8 to 22 mm and two pipe wrenches90 to 100 euros, used in 12 of 61 guides
Bei Amazon:At Amazon: KS Tools Steckschlüsselsatz · Wasserpumpenzangen, Satz · weitere Modellemore models
Kappsäge und vier Schraubzwingen180 bis 200 Euro, gebraucht in 5 von 61 Anleitungen
Mitre saw and four clamps180 to 200 euros, used in 5 of 61 guides
Bei Amazon:At Amazon: Einhell Zug-Kapp-Gehrungssäge · Schraubzwingen, 4 Stück · weitere Modellemore models

Besser leihen als kaufenBetter hired than bought

Diese Geräte stehen bewusst ohne Kauflink. Ihr braucht sie an ein oder zwei Tagen, und Leihen kostet einen Bruchteil. Baumarkt, Maschinenring oder der Nachbar mit Hof.These machines are deliberately listed without a link to buy. You need them on one or two days, and hiring costs a fraction of the price. Ask at the DIY store, at the Maschinenring (a regional co-operative that shares farm machinery) or at the neighbour with a farmyard.

RüttelplatteKommt in sieben Anleitungen vor, kostet etwa 45 Euro am Tag, wiegt 60 bis 100 Kilo und passt in keinen Kofferraum.
Plate compactorIt turns up in seven guides, costs about 45 euros a day, weighs 60 to 100 kilos and fits in no car boot.
Minibagger 5 Tonnen mit Anhänger200 bis 350 Euro am Tag plus Transport, ihr braucht ihn an zwei Tagen im Jahr, und Abstellplatz und Wartung hat niemand.
Mini excavator of 5 tonnes with a trailer200 to 350 euros a day plus transport. You need it on two days in the year, and nobody has the space to park it or the time to service it.
Betonmischer 140 Liter40 bis 60 Euro am Tag, danach steht er zwei Jahre in der Ecke und rostet fest.
Concrete mixer, 140 litres40 to 60 euros a day, and after that it stands in the corner for two years and rusts solid.
Rotationslaser mit Empfänger25 bis 40 Euro am Tag statt ab 400 Euro Kauf, gebraucht wird er nur beim Abstecken großer Flächen.
Rotating laser with a receiver25 to 40 euros a day instead of 400 euros and up to buy, and it is only wanted when you set out a large area.
Gerüst mit AuffanggurtWird mit Aufbauplan geliefert, lagert im eigenen Bestand schlecht und ist ohne Einweisung gefährlich.
Scaffolding with a safety harnessIt comes with an assembly plan, it stores badly in your own shed, and without instruction it is dangerous.
Motorsäge mit Schnittschutzhose und HelmHolt euch lieber jemanden mit Motorsägenschein, die Schutzausrüstung allein kostet 300 Euro und die Übung fehlt trotzdem.
Chainsaw with cut-protection trousers and helmetBetter to fetch somebody who holds a Motorsägenschein (the German chainsaw certificate). The protective kit alone costs 300 euros, and the practice is still missing.
Kernbohrer 150 bis 160 mm50 bis 80 Euro am Tag, für zwei Löcher im ganzen Leben lohnt der Kauf nie.
Core drill, 150 to 160 mm50 to 80 euros a day, and for two holes in a whole lifetime buying never pays.
Anhänger 750 kg20 bis 40 Euro am Tag im Baumarkt, denn eine Tonne Schotter oder eine Baustahlmatte von 5 Metern geht in keinen Pkw.
Trailer, 750 kg20 to 40 euros a day at the DIY store, because a tonne of crushed stone or a steel reinforcing mesh of 5 metres goes in no car.

Bitte lies das einmal.Please read this once. Diese Anleitungen sind nach bestem Wissen zusammengetragen und ersetzen weder eine Planung noch eine Fachfirma. Bauordnung, Wasserrecht und Naturschutz sind in jedem Bundesland und oft in jeder Gemeinde anders geregelt, und sie ändern sich. Frag vor dem ersten Spatenstich bei deiner Bauaufsicht, deiner unteren Wasserbehörde oder deinem Bezirksschornsteinfeger nach, was bei dir gilt. AllesAll, was mit Statik, Feuer, Strom oder Trinkwasser zu tun hat, gehört in die Hände von Menschen, die dafür ausgebildet sind. Wir übernehmen keine Haftung für Schäden, die beim Nachbauen entstehen.These guides have been put together to the best of our knowledge, and they replace neither proper planning nor a specialist firm. Building law, water law and nature protection are regulated differently in every federal state and often in every municipality, and they change. Before the first spade goes into the ground, ask your Bauaufsicht (the local building control office), your untere Wasserbehörde (the lower water authority of your district) or your Bezirksschornsteinfeger (the district chimney sweep) what applies where you live. Everything to do with structure, fire, electricity or drinking water belongs in the hands of people who are trained for it. We accept no liability for damage that arises when you build these projects.

Please read this once. These guides have been put together to the best of our knowledge, and they replace neither proper planning nor a specialist firm. Building law, water law and nature protection are regulated differently in every federal state and often in every municipality, and they change. Before the first spade goes into the ground, ask your Bauaufsicht (the local building control office), your untere Wasserbehörde (the lower water authority of your district) or your Bezirksschornsteinfeger (the district chimney sweep) what applies where you live. Everything to do with structure, fire, electricity or drinking water belongs in the hands of people who are trained for it. We accept no liability for damage that arises when you build these projects.