Was ihr bauen könntWhat you can build

Garten und ErnährungGarden and food

Hochbeete, Waldgarten, Streuobstwiese, Erdkeller, Hühner und Bienen. Der Teil, der euch irgendwann satt macht.

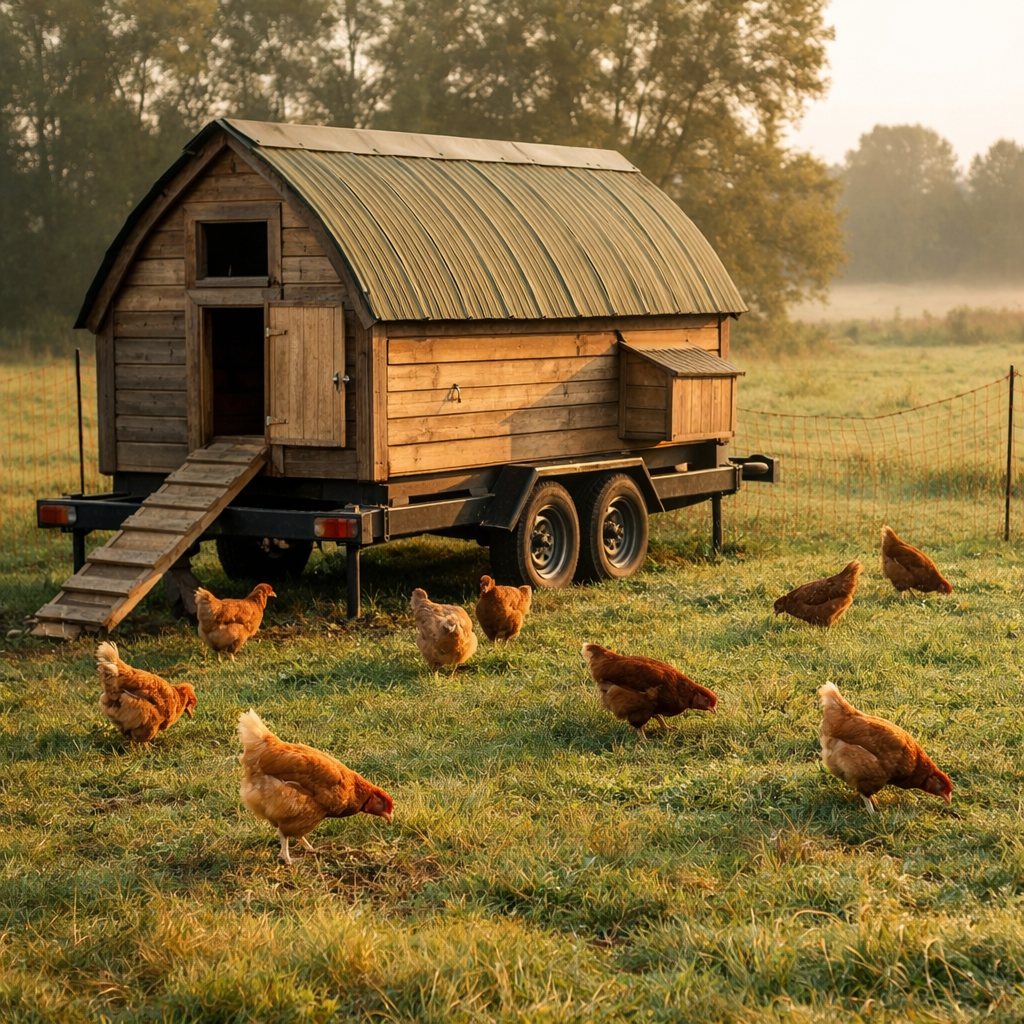
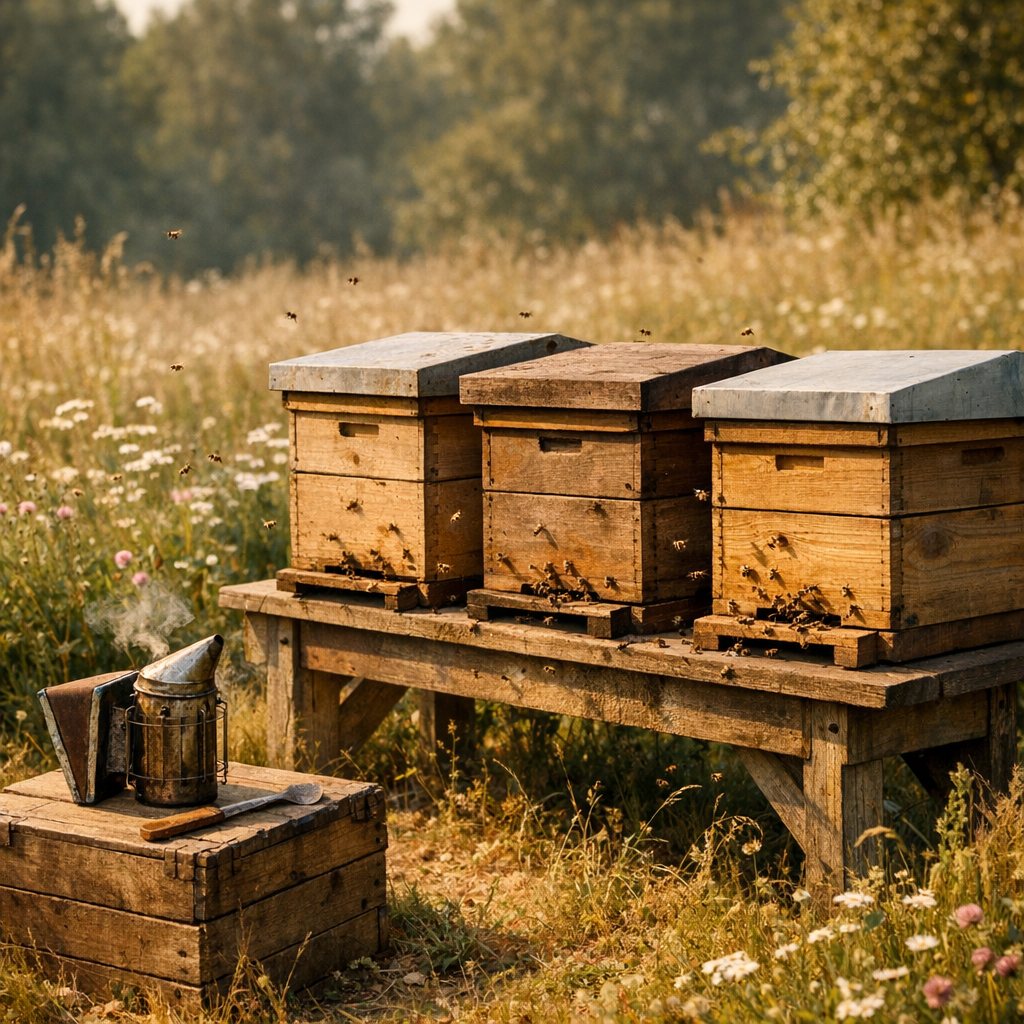
Eine Streuobstwiese mit alten Apfelbäumen, Bienenstöcken und frei laufenden Hühnern im hohen Gras, Sommermorgen
Schon heute realAlready real today

Sieben Linden gärtnert auf sandigem, nährstoffarmem Boden, und der Niederschlag liegt seit 2018 konstant unter 500 Millimetern im Jahr. Trotzdem läuft dort ein eigener Gemüsebaubetrieb, bewässert aus Brunnen und Regentonnen. Vom Gelände fließt kein Tropfen oberirdisch ab: Das gesamte Regenwasser versickert oder verdunstet vor Ort.

AufwandEffort
Boden verbessern, Improving the soil
Über JahreOver yearsOhne VorkenntnisseNo experience needed

Boden verbessernImproving the soil

1 bis 2 Personen, Kalk und Kompost in Säcken zu 25 kg, schweres Heben1 to 2 people, lime and compost in 25 kg sacks, heavy lifting

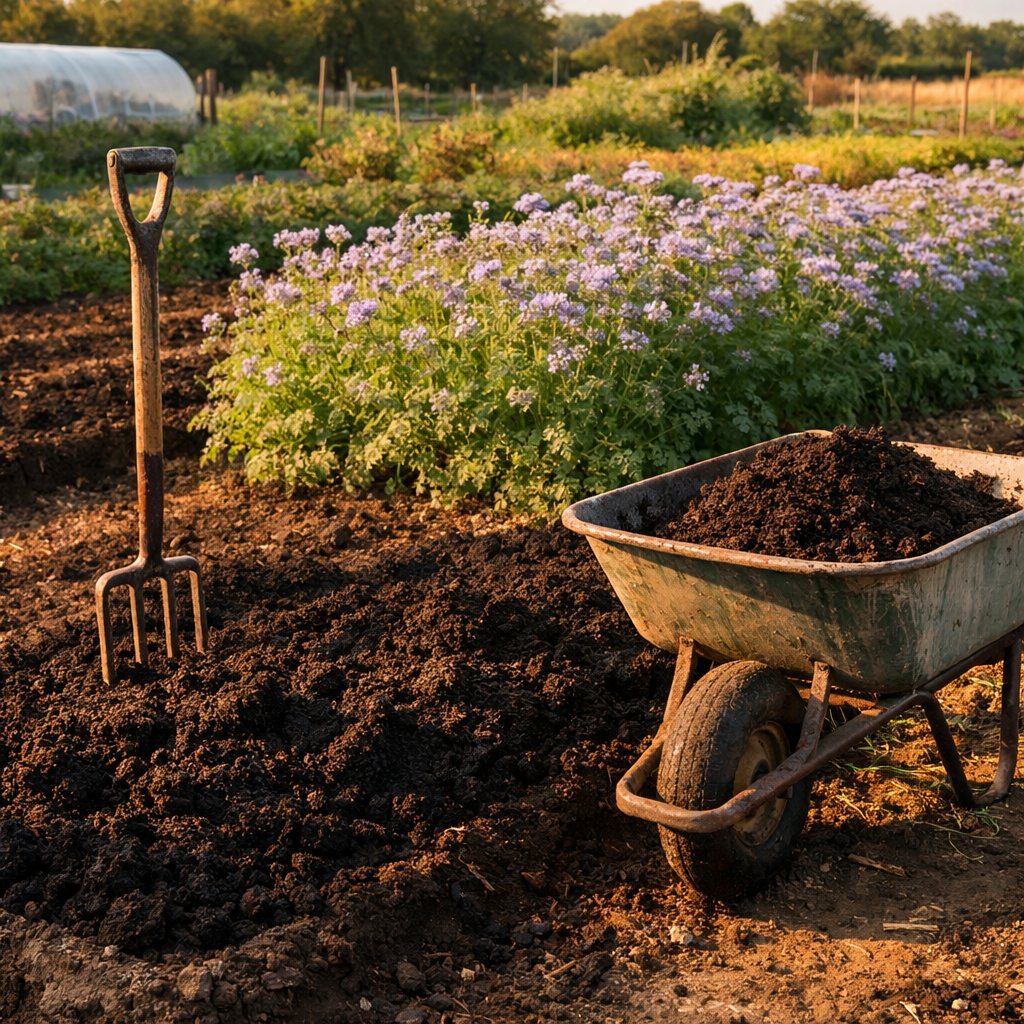
Ein müder Acker wird nicht über Nacht zum Gartenboden. Er wird es, wenn drei Jahre lang nichts mehr nackt liegt, wenn der Kompost oben bleibt statt untergegraben zu werden und wenn Wurzeln die Arbeit machen, für die andere den Pflug holen. Die stillste Baustelle auf dem Hof, und die, die alles andere trägt.A tired field does not turn into garden soil overnight. It turns into garden soil when nothing lies bare for three years, when the compost stays on top instead of being dug under, and when roots do the work that other people fetch a plough for. The quietest building site on the place, and the one that carries everything else.

So wird gebautHow it is built
Analyse, lockern mit der Grabegabel, Kompost flach einharken, Gründüngung säen, mulchen, und das jedes Jahr wieder.A soil test, loosening with the digging fork, raking compost in shallow, sowing a green manure, mulching, and all of it again the next year.
KostenCost
80 bis 400 Euro je 1000 Quadratmeter80 to 400 euros per 1,000 square metres
Erster SchrittFirst step
Spatenprobe im feuchten Frühjahr und eine Bodenanalyse für 35 bis 90 Euro, bevor irgendetwas ausgebracht wird.A spade test in a damp spring and a laboratory soil analysis for 35 to 90 euros, before anything at all goes onto the ground.
Schritt für SchrittStep by step
Boden verbessern, Schnitt 8 Mulch 30 tief 20 bis Sohle 25 Unterboden 1 2 3 4 5 6 7 8 9 1 Gründüngung, Phacelia und Klee 2 Mulch 5 bis 8 cm hoch 3 Kompost, 3 bis 5 Liter je m² 4 Krume mit Regenwürmern 5 Pflugsohle bei 20 cm 6 Wurzeln knicken waagerecht ab 7 Ölrettich bricht die Verdichtung 8 Unterboden, B-Horizont 9 Spatenprobe 30 cm tief Nicht maßstäblich, Maße in cm
Bauskizze Boden verbessern, am Handy seitlich wischenMeasured sketch of Improving the soil, swipe sideways on a phone

Bevor du anfängst

Sobald fremdes Bodenmaterial auf eure Fläche kommt, ist die untere Bodenschutzbehörde im Landratsamt zuständig. Frag dort, ab welcher Menge du die Maßnahme anzeigen musst, im Bund liegt die Schwelle bei 500 Kubikmetern und die Anzeige muss mindestens zwei Wochen vorher raus. Unabhängig davon dokumentierst du die Analysewerte des Materials vor dem Auftrag und bewahrst sie zehn Jahre auf. Auf alten Hofstellen und ehemaligen Gewerbeflächen lässt du vorher auf Blei, Cadmium und Mineralöl prüfen. Genau da liegt die Gefahr, denn belastetes Material landet über das Gemüse auf dem Teller. Auf landwirtschaftlich genutzter Fläche gilt die Düngeverordnung unabhängig von der Betriebsgröße, auf Grünland mit Sperrfrist vom 1. November bis 31. Januar.

Das brauchst du

  • 3 bis 5 Liter reifer Kompost je Quadratmeter und Jahr als Humusnachschub
  • 1 Laboranalyse, 35 bis 90 Euro für pH, Humus und Nährstoffe
  • 50 Liter Mulchmaterial je Quadratmeter für 5 bis 8 cm Auflage
  • 1 g Phacelia oder 7 g Buchweizen je Quadratmeter im Sommer
  • 15 g Winterroggen oder 18 g Ackerbohne je Quadratmeter im Winter
  • 3 g Ölrettich je Quadratmeter gegen Verdichtung im Unterboden
  • 2 g Weißklee je Quadratmeter für die Dauerbegrünung
  • 100 bis 300 g kohlensaurer Kalk je Quadratmeter, nur nach Analyse
  • 1 Liter aufgeladene Pflanzenkohle je Quadratmeter, nie roh

Werkzeug

Spaten, Grabegabel, Schubkarre, Rechen, Handsämaschine oder Streuwagen

Schritt für Schritt

  1. Spatenprobe machen. 30 cm tief stechen, den Ziegel herausheben. Guter Boden krümelt und riecht nach Wald. Wurzeln, die bei 20 cm waagerecht abknicken, zeigen die Pflugsohle, graue Flecken die Staunässe. Unter fünf Regenwürmern je Stich ist er müde.
  2. Analyse bestellen. 16 Einstiche über die Fläche, mischen, 500 g einschicken. LUFA Nord-West oder Agrolab, Grundpaket 35 Euro, mit Humus 90 Euro.
  3. Lockern statt wenden. Grabegabel alle 20 cm einstechen, Stiel kippen, Erde liegen lassen. Umgraben dreht das Bodenleben in die falsche Tiefe und zerreißt das Pilzgeflecht, das die Krümel hält.
  4. Kompost bauen und ausbringen. Zwei Teile Braunes (Laub, Stroh, Häcksel) auf einen Teil Grünes, mindestens 1 m³, nach drei Tagen 60 Grad, zweimal umsetzen. Nach fünf Monaten 3 bis 5 Liter je Quadratmeter flach einharken, nie tiefer als 5 cm.
  5. Pflanzenkohle aufladen. Je Liter Kohle drei Liter Mistwasser, vier Wochen feucht stehen lassen, dann mit dem Kompost ausbringen. So entsteht Terra Preta.
  6. Kalken nach Zahl. Handeln bei Sand unter pH 5,5, Lehm unter 6,0, Ton unter 6,5. Leichte Böden bekommen kohlensauren Kalk oder Dolomit, schwere Branntkalk, nie zusammen mit Mist.
  7. Gründüngung säen. Phacelia April bis September, Buchweizen Mai bis August, Weißklee ab April, Ölrettich bis Mitte September, Winterroggen bis Ende Oktober, Ackerbohne im Oktober oder März. Im Frühjahr abschlegeln, liegen lassen.
  8. Mulchen. Angetrockneter Rasenschnitt, Stroh, Laub oder Laubholzhäcksel, 5 bis 8 cm hoch. Nicht taugen frische Nadelhäcksel, nasse Grasmatten und Rindenmulch im Gemüsebeet.
  9. Fruchtfolge halten. Vier Jahre im Wechsel: Starkzehrer, Mittelzehrer, Schwachzehrer, Leguminose. Jede freie Woche gehört einer Zwischenfrucht, sonst schlämmt der Boden zu.

Zeit und Kosten

Je 100 Quadratmeter im ersten Jahr 6 bis 10 Stunden, danach 3 bis 4. Analyse 35 bis 90 Euro, Saatgut 8 bis 15 Euro, Kalk 12 Euro je 25 kg, Pflanzenkohle 1 bis 2 Euro je Liter. Nach einer Saison mehr Würmer. Ab Jahr zwei krümelt der Boden, ab Jahr fünf steigt der Humusgehalt um 0,3 bis 0,5 Prozentpunkte.

Die drei häufigsten Fehler

  • Rohe Pflanzenkohle eingearbeitet. Frische Kohle ist ein leerer Schwamm und zieht Nährstoffe und Wasser aus dem Boden. Vier Wochen vorher aufladen, sonst fällt die nächste Ernte schwächer aus.
  • Umgegraben statt gelockert. Der Spaten kippt die Schichten und zerreißt die Pilzfäden. Die Grabegabel bringt dieselbe Luft, ohne das Gefüge zu zerstören.
  • Ohne Analyse gekalkt. Über pH 7 blockiert Kalk Eisen und Mangan, die Blätter werden hellgrün. Miss vor dem Kalken.

Before you start

As soon as soil material from elsewhere comes onto your land, the untere Bodenschutzbehörde (the lower soil protection authority, based at the Landratsamt, your district administration) is in charge. Ask there from what quantity you have to notify the work. Nationally the threshold sits at 500 cubic metres and the notification has to go out at least two weeks in advance. Whatever the answer, write down the analysis figures for the material before it is spread and keep them for ten years. On old farmyards and former commercial sites, have the ground checked for lead, cadmium and mineral oil first. That is where the danger sits, because contaminated material reaches the plate by way of the vegetables. On land in agricultural use the Düngeverordnung (the German fertiliser ordinance) applies whatever the size of the holding, and on grassland it brings a closed period from 1 November to 31 January.

What you need

  • 3 to 5 litres of mature compost per square metre per year to keep the humus coming
  • 1 laboratory analysis, 35 to 90 euros for pH, humus and nutrients
  • 50 litres of mulch material per square metre for a layer of 5 to 8 cm
  • 1 g of phacelia or 7 g of buckwheat per square metre in summer
  • 15 g of winter rye or 18 g of field bean per square metre in winter
  • 3 g of oil radish per square metre against compaction in the subsoil
  • 2 g of white clover per square metre for permanent ground cover
  • 100 to 300 g of kohlensaurer Kalk (ground limestone) per square metre, only after a soil test
  • 1 litre of charged biochar per square metre, never raw

Tools

Spade, digging fork, wheelbarrow, rake, hand seeder or spreader

Step by step

  1. Do the spade test. Cut 30 cm deep and lift the block out. Good soil crumbles and smells of woodland. Roots that bend sideways at 20 cm show the plough pan, grey patches show waterlogging. Below five earthworms per spit the soil is tired.
  2. Order the analysis. Take 16 cores spread over the plot, mix them, send in 500 g. LUFA Nord-West or Agrolab, basic package 35 euros, with humus 90 euros.
  3. Loosen instead of turning. Push the digging fork in every 20 cm, tilt the handle, leave the soil where it is. Digging over moves the soil life to the wrong depth and tears the fungal network that holds the crumbs together.
  4. Build the compost and spread it. Two parts brown (leaves, straw, wood chip) to one part green, at least 1 m³, 60 degrees after three days, turned twice. After five months rake in 3 to 5 litres per square metre, shallow, never deeper than 5 cm.
  5. Charge the biochar. Three litres of manure water per litre of char, left damp for four weeks, then spread with the compost. That is how terra preta comes about.
  6. Lime by the numbers. Act below pH 5.5 on sand, below 6.0 on loam, below 6.5 on clay. Light soils get kohlensaurer Kalk (ground limestone) or dolomite, heavy soils get Branntkalk (quicklime), never together with manure.
  7. Sow the green manure. Phacelia April to September, buckwheat May to August, white clover from April, oil radish until mid September, winter rye until the end of October, field bean in October or March. Flail it off in spring and leave it lying.
  8. Mulch. Part dried grass clippings, straw, leaves or hardwood chip, 5 to 8 cm deep. What does not work: fresh conifer chip, wet mats of grass and bark mulch in a vegetable bed.
  9. Keep a rotation. Four years in turn: hungry crops, moderate feeders, light feeders, legumes. Every free week belongs to a catch crop, otherwise the surface silts up.

Time and cost

Per 100 square metres, 6 to 10 hours in the first year, then 3 to 4. Analysis 35 to 90 euros, seed 8 to 15 euros, lime 12 euros per 25 kg, biochar 1 to 2 euros per litre. After one season there are more worms. From year two the soil crumbles, from year five the humus content rises by 0.3 to 0.5 percentage points.

The three most common mistakes

  • Raw biochar worked in. Fresh char is an empty sponge and pulls nutrients and water out of the soil. Charge it four weeks beforehand, otherwise the next harvest comes in weaker.
  • Dug over instead of loosened. The spade tips the layers over and tears the fungal threads. The digging fork brings in the same air without wrecking the structure.
  • Limed without a test. Above pH 7 lime locks up iron and manganese, and the leaves go pale green. Measure before you lime.

Worauf es ankommtWhat matters herePflanzenkohle nur aufgeladen in den Boden bringen, rohe Kohle nimmt der ersten Kultur Nährstoffe und Wasser weg. Und lass den Pflug stehen, was du mit der Grabegabel lockerst, bleibt in Schichten und bleibt lebendig.Only put biochar into the soil once it has been charged, because raw char takes nutrients and water away from the first crop. And leave the plough where it stands. What you loosen with a digging fork keeps its layers and stays alive.

Hochbeete, Raised beds
Ein WochenendeOne weekendEtwas ÜbungSome practice helps

HochbeeteRaised beds

2 Personen, rund 2,5 Kubikmeter Füllung je Beet, schweres Heben2 people, around 2.5 cubic metres of filling per bed, heavy lifting

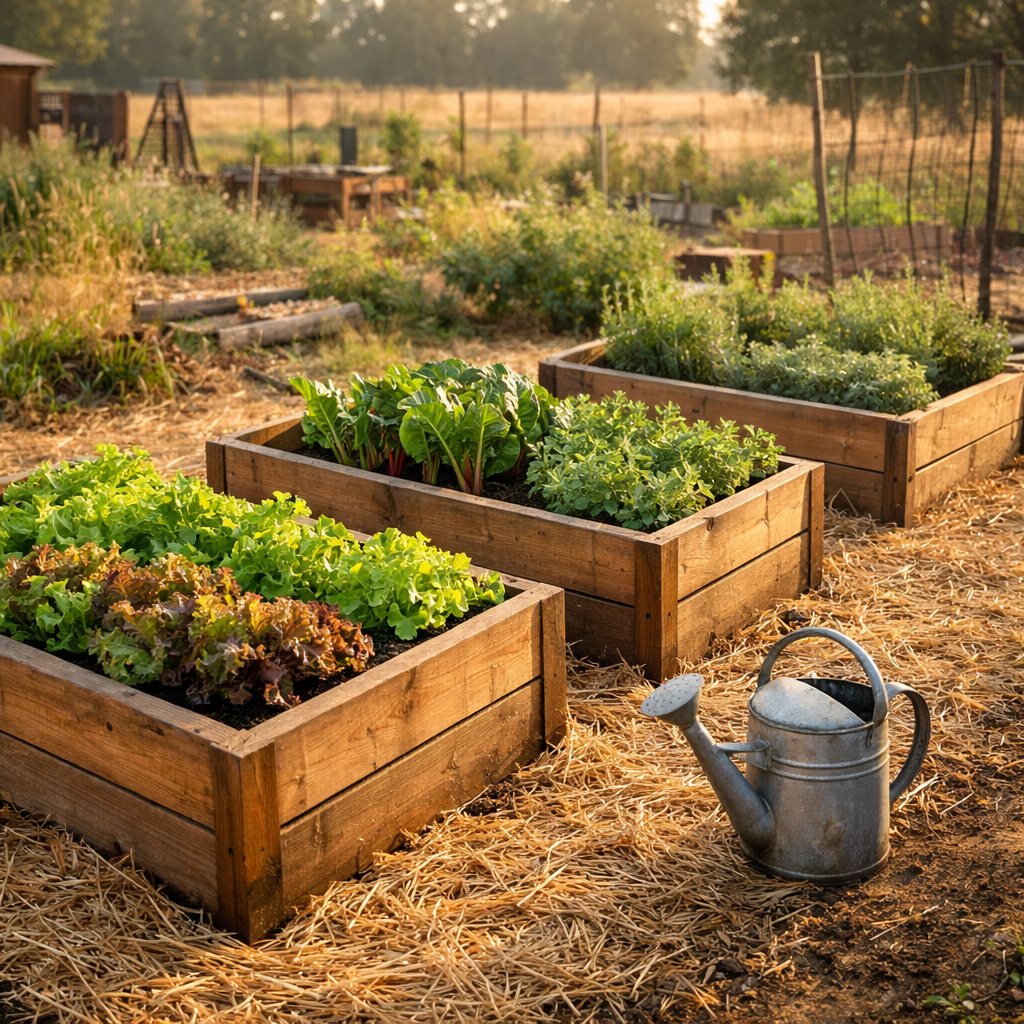
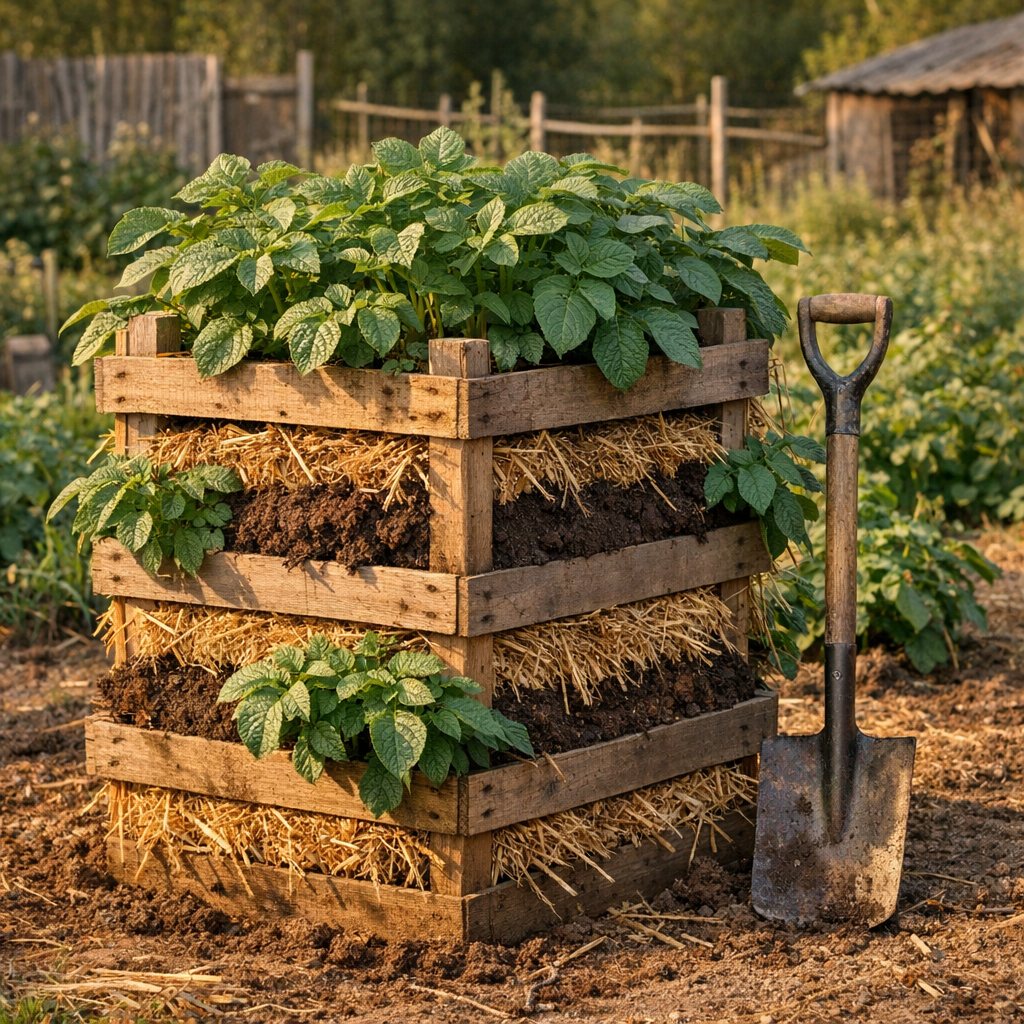
Rückenfreundlich, früher warm im Frühjahr, und sie machen aus schlechtem Boden in einer Saison gutes Beet. Die Schichtung im Inneren ist im Grunde ein stehender Komposthaufen, der euch drei Jahre lang düngt.Kind to the back, warm earlier in spring, and they turn poor ground into a good bed within one season. The layering inside is really a standing compost heap that feeds you for three years.

So wird gebautHow it is built
Von unten nach oben: Wühlmausgitter, grobe Äste, Strauchschnitt, Rasensoden verkehrt herum, halbreifer Kompost, oben 25 Zentimeter gute Erde.From the bottom up: vole mesh, coarse branches, shrub prunings, turves laid upside down, half ripe compost, and 25 centimetres of good soil on top.
KostenCost
60 bis 250 Euro pro Beet60 to 250 euros per bed
Erster SchrittFirst step
Breite auf 1,20 Meter begrenzen, sonst kommt ihr nicht bis zur Mitte. Höhe 80 Zentimeter ist für die meisten Rücken richtig.Keep the width down to 1.20 metres, otherwise you cannot reach the middle. A height of 80 centimetres suits most backs.
Schritt für SchrittStep by step
Hochbeet, Querschnitt12345678980 cm30 cm20 cm25 cm120 cm1Bohlen Lärche 20 x 4 cm2Eckpfosten 8 x 8 cm3Wühlmausgitter 13 mm4Noppenfolie an der Wand5Astwerk grob, 30 cm6Rasensoden, Gras nach unten7Laub oder Stroh, 10 cm8Halbreifer Kompost, 20 cm9Gartenerde 25 cm, gehäuftNicht maßstäblich, Maße in cm
Bauskizze Hochbeete, am Handy seitlich wischenMeasured sketch of Raised beds, swipe sideways on a phone

Bevor du anfängst

Frag beim Bauamt nach, ob eure Fläche zum Innenbereich oder zum Außenbereich zählt. Im Innenbereich braucht ein Hochbeet unter einem Meter Höhe nirgends eine Genehmigung, im Außenbereich kann schon eine Aufschüttung als bauliche Anlage gelten, und dass niemand vorher prüft, macht sie noch nicht zulässig. Den Grenzabstand regelt nicht die Bauordnung, sondern das Nachbarrecht eures Landes, und einige Länder haben dafür gar kein eigenes Gesetz. Ein Gespräch mit dem Nachbarn ersetzt die Auskunft nicht, erspart aber den meisten Ärger. Prüfe vorher mit dem Spaten, ob unter der Grasnarbe Bauschutt liegt. Beim Zuschneiden der Bretter gehören Gehörschutz und Schutzbrille dazu.

Das brauchst du

  • 8 Lärchenbohlen 200 x 20 x 4 cm für die Längsseiten, vier Lagen je Seite
  • 8 Lärchenbohlen 112 x 20 x 4 cm für die Stirnseiten
  • 6 Kanthölzer Lärche 100 x 8 x 8 cm als Eckpfosten und Mittelstützen
  • 2,4 m² Wühlmausgitter, Maschenweite 13 mm auf den Beetboden
  • 5 m² Noppenfolie als Trennschicht zwischen Erde und Holz
  • 120 Edelstahlschrauben 5 x 70 mm für Bohlen und Pfosten
  • 1 m³ grobes Astwerk und Strauchschnitt als unterste Schicht
  • 0,5 m³ Rasensoden aus dem Aushub der Baustelle
  • 0,6 m³ halbreifer Kompost als Nährstoffschicht
  • 0,5 m³ Gartenerde mit Sandanteil für die Pflanzschicht oben

Werkzeug

Spaten, Schubkarre, Akkuschrauber, Handkreissäge oder Fuchsschwanz, Wasserwaage, Zollstock, Blechschere, Handtacker, Gartenschere, Arbeitshandschuhe

Schritt für Schritt

  1. Standort wählen. Volle Sonne, Längsseite von Nord nach Süd. Rundum 60 cm Arbeitsweg frei lassen, auf der Erntesseite 80 cm, damit die Schubkarre durchpasst.
  2. Fläche abstecken. 200 x 120 cm mit Schnur und vier Pflöcken markieren. Beide Diagonalen müssen 233 cm messen, sonst steht der Kasten schief.
  3. Grasnarbe abstechen. Soden 8 cm tief in Streifen abheben und stapeln. Sie kommen später verkehrt herum wieder ins Beet.
  4. Rahmen bauen. Je vier Bohlen an die Pfosten schrauben, zwei Schrauben pro Kreuzung. Das ergibt 80 cm Höhe. In der Mitte jeder Längsseite eine Stütze gegen den Erddruck.
  5. Gitter und Folie einbauen. Wühlmausgitter auf den Boden legen, an den Rändern 10 cm hochziehen, antackern. Innenwände mit Noppenfolie auskleiden, Noppen zum Holz, 3 cm unter der Kante enden.
  6. Schichten aufbauen. Von unten nach oben: 30 cm grobes Astwerk (bis 8 cm Stärke), festtreten. 15 cm Rasensoden mit dem Gras nach unten. 10 cm Laub oder Stroh. 20 cm halbreifer Kompost. 25 cm Gartenerde, davon 15 cm überhöht aufgehäuft.
  7. Angießen. Rund 200 Liter in zwei Durchgängen, damit die Hohlräume im Astwerk zusammenfallen. Dann eine Woche ruhen lassen.
  8. Erstes Jahr bepflanzen. Nur Starkzehrer. Ab Mitte Mai zwei Zucchini mit 100 cm Abstand, vier Tomaten 'Matina' mit 60 cm, sechs Kohlrabi 'Superschmelz' mit 40 cm. Salat dazwischen.
  9. Jeden Herbst nachfüllen. Im Oktober 15 cm Kompost auftragen und mit Laub abdecken. Nach vier bis fünf Jahren die Füllung komplett tauschen.

Zeit und Kosten

Zu zweit zwölf Stunden, also ein Wochenende. Der Zuschnitt dauert drei Stunden, das Befüllen den ganzen zweiten Tag. Material 60 bis 250 Euro je Beet, je nachdem ob Holz, Äste und Kompost vom eigenen Grundstück kommen.

Die drei häufigsten Fehler

  • Zu breit gebaut. Ab 1,40 m kommt niemand bis zur Mitte, ohne ins Beet zu steigen. Bleib bei 1,20 m, bei Zugang von einer Seite bei 70 cm.
  • Wühlmausgitter gespart. Eine Wühlmaus räumt im ersten Winter alle Sellerieknollen und Möhren ab. Das Gitter kostet 25 Euro und lässt sich später nie nachrüsten.
  • Erde direkt ans Holz. Ohne Trennfolie ist auch Lärche nach sechs Jahren durchgefault. Mit Noppenfolie hält die Bohle rund zwölf Jahre.

Before you start

Ask at the Bauamt (the local building authority) whether your land counts as Innenbereich (built up area) or as Außenbereich (open countryside). Inside a built up area a raised bed under one metre high needs no permission anywhere. In the open countryside even a mound of soil can count as a structure, and the fact that nobody checks it beforehand does not make it lawful. The distance to the boundary is not set by the building code but by the Nachbarrecht (the neighbour law of your federal state), and some states have no such law of their own at all. A word with the neighbour does not replace the official answer, but it does save most of the trouble. Check with a spade first whether there is building rubble under the turf. Ear defenders and safety glasses belong with the job when you cut the boards.

What you need

  • 8 larch boards 200 x 20 x 4 cm for the long sides, four courses per side
  • 8 larch boards 112 x 20 x 4 cm for the ends
  • 6 squared larch posts 100 x 8 x 8 cm as corner posts and centre supports
  • 2.4 m² of vole mesh, 13 mm aperture for the base of the bed
  • 5 m² of Noppenfolie (dimpled drainage membrane) as a barrier between soil and timber
  • 120 stainless steel screws 5 x 70 mm for boards and posts
  • 1 m³ of coarse branchwood and shrub prunings for the bottom layer
  • 0.5 m³ of turves from the spoil of the site
  • 0.6 m³ of half ripe compost as the feeding layer
  • 0.5 m³ of garden soil with some sand in it for the planting layer on top

Tools

Spade, wheelbarrow, cordless driver, circular saw or hand saw, spirit level, folding rule, tin snips, hand stapler, secateurs, work gloves

Step by step

  1. Choose the spot. Full sun, long side running north to south. Leave 60 cm of working space all round and 80 cm on the picking side, so the wheelbarrow gets through.
  2. Set out the ground. Mark 200 x 120 cm with string and four pegs. Both diagonals have to measure 233 cm, otherwise the box sits out of square.
  3. Cut off the turf. Lift the turves in strips 8 cm deep and stack them. They go back into the bed later, upside down.
  4. Build the frame. Screw four boards to the posts on each side, two screws at every crossing. That gives a height of 80 cm. One support in the middle of each long side against the pressure of the soil.
  5. Fit the mesh and the membrane. Lay the vole mesh on the ground, turn it 10 cm up at the edges and staple it. Line the inner faces with Noppenfolie, dimples towards the timber, ending 3 cm below the rim.
  6. Build up the layers. From the bottom up: 30 cm of coarse branchwood (up to 8 cm thick), trodden down. 15 cm of turves, grass side down. 10 cm of leaves or straw. 20 cm of half ripe compost. 25 cm of garden soil, of which 15 cm is heaped above the rim.
  7. Water it in. Around 200 litres in two goes, so the voids in the branchwood collapse. Then leave it for a week.
  8. Plant the first year. Hungry feeders only. From mid May two courgettes at 100 cm spacing, four tomatoes 'Matina' at 60 cm, six kohlrabi 'Superschmelz' at 40 cm. Lettuce in between.
  9. Top it up every autumn. In October put on 15 cm of compost and cover it with leaves. After four or five years swap the whole filling.

Time and cost

Twelve hours for two people, so one weekend. Cutting the timber takes three hours, filling the bed takes the whole of the second day. Material 60 to 250 euros per bed, depending on whether the timber, the branches and the compost come off your own land.

The three most common mistakes

  • Built too wide. From 1.40 m onwards nobody reaches the middle without climbing into the bed. Stay at 1.20 m, or 70 cm where you can only get at it from one side.
  • Saved money on the vole mesh. One vole clears out every celeriac and every carrot in the first winter. The mesh costs 25 euros and can never be fitted afterwards.
  • Soil straight against the timber. Without a barrier even larch has rotted through after six years. With Noppenfolie the board lasts around twelve years.

Worauf es ankommtWhat matters hereIm ersten Jahr Starkzehrer pflanzen, sonst schießen Kohl und Zucchini ins Kraut. Das Beet sackt jährlich, jeden Herbst nachfüllen.Plant hungry feeders in the first year, otherwise cabbage and courgettes run to leaf. The bed settles every year, so top it up each autumn.

Kräuterspirale, Herb spiral
Ein WochenendeOne weekendEtwas ÜbungSome practice helps

KräuterspiraleHerb spiral

2 bis 3 Personen, Steine über 25 kg immer zu zweit, schweres Heben2 to 3 people, stones over 25 kg always lifted by two, heavy lifting

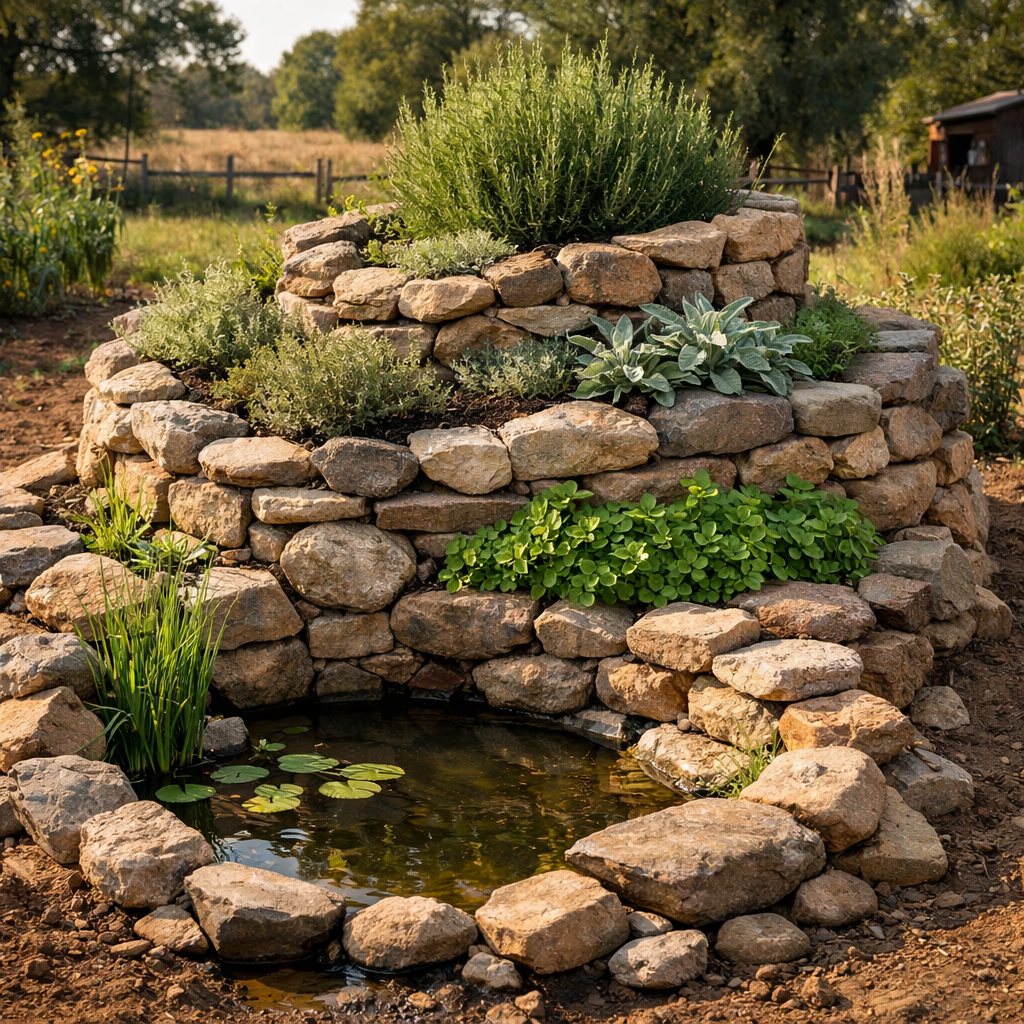
Auf drei Quadratmetern vier Klimazonen. Oben trocken und heiß für Rosmarin und Thymian, unten feucht und schattig für Minze und Waldmeister. Das schönste Anschauungsstück für Besucher, die noch nicht verstehen, was Permakultur meint.Four climate zones on three square metres. Dry and hot at the top for rosemary and thyme, damp and shaded at the foot for mint and woodruff. The best thing to show visitors who do not yet see what permaculture means.

So wird gebautHow it is built
Trockenmauer aus Naturstein, spiralförmig ansteigend, Kern aus Bauschutt für die Drainage, Substrat nach oben hin magerer.A dry stone wall of natural stone rising in a spiral, a core of rubble for drainage, and the growing mix getting leaner towards the top.
KostenCost
100 bis 400 Euro, oft fast umsonst mit gesammeltem Stein100 to 400 euros, often almost nothing if the stone is collected
Erster SchrittFirst step
Nach Süden ausrichten und die Steine sammeln, bevor ihr baut. Das Steinesuchen dauert länger als das Mauern.Face it south and collect the stone before you build. Finding stone takes longer than laying it.
Schritt für SchrittStep by step
Kräuterspirale, Draufsicht und SchnittFreifläche 350 x 350 cmDraufsichtHöhenschnitt123456789300 cm50 cm80 cm20 cm30 cm1Trockenmauer aus Bruchstein2Drainagekern aus Bauschutt3Fundament Schotter auf Vlies4Trockenzone mit Kalksplitt5Mittelzone Boden und Sand6Feuchte Zone mit Kompost7Miniteich im Maurerkübel8Beetband 50 cm breit9Nach oben magerer mischenNicht maßstäblich, Maße in cm
Bauskizze Kräuterspirale, am Handy seitlich wischenMeasured sketch of Herb spiral, swipe sideways on a phone

Bevor du anfängst

Freistehende Mauern sind im Innenbereich in den meisten Landesbauordnungen bis zu einer bestimmten Höhe verfahrensfrei, im Außenbereich ausdrücklich nicht. Ruf beim Bauamt an und frag, welche Höhe bei euch gilt und wie eure Fläche eingestuft ist. Verfahrensfrei heißt dabei nur, dass niemand vorher prüft, der Bebauungsplan gilt weiter. Den Abstand zur Grenze regelt das Nachbarrecht eures Landes, sprich vorher mit dem Nachbarn. Beim Bauen selbst ist das Gewicht die Gefahr. Steine über 25 Kilogramm hebt ihr zu zweit, Sicherheitsschuhe sind Pflicht, und die oberen Lagen dürfen nicht auf Kanten kippen. Baue im Frühjahr oder im September, dann wachsen die Pflanzen sofort an.

Das brauchst du

  • 1,5 Tonnen Bruchstein, Kantenlänge 15 bis 35 cm für die Trockenmauer
  • 0,5 m³ Bauschutt oder Schotter 32/56 als Drainagekern im Inneren
  • 0,4 m³ Schotter 0/32 für das Mauerfundament
  • 0,5 m³ Sand 0/4 zum Abmagern der oberen Zonen
  • 0,5 m³ Mutterboden als Grundlage aller Substratmischungen
  • 0,3 m³ reifer Kompost für den feuchten Fuß der Spirale
  • 0,1 m³ heller Kalksplitt 8/16 als Mulch für die Trockenzone
  • 4 m² Unkrautvlies unter das Fundament
  • 1 Maurerkübel 60 Liter für den Miniteich am Fuß (wahlweise)
  • 16 Kräuterpflanzen im 9er-Topf, nach Zonen sortiert

Werkzeug

Spaten, Schubkarre, Schnur und Pflöcke, Wasserwaage, Gummihammer, Maurerhammer, Rechen, Stampfer, Gießkanne, Sicherheitsschuhe, feste Handschuhe

Schritt für Schritt

  1. Standort festlegen. Voll besonnt, die offene Seite nach Süden. Freie Fläche 350 x 350 cm. Kein Baum in 6 m Umkreis, sonst tropft es und der Rosmarin fault.
  2. Steine sammeln. Rechne mit 1,5 Tonnen aus Bauhof, Abbruch oder Kleinanzeigen. Steine aus Bach und Feldflur mitzunehmen ist vielerorts verboten.
  3. Grundriss aufzeichnen. Pflock in die Mitte, Schnur 150 cm, Kreis markieren. Darin die Spirale mit Sand aufstreuen: zweieinhalb Windungen, Beetband 50 cm breit.
  4. Fundament ausheben. Unter der Mauerlinie 30 cm tief und 40 cm breit graben. Vlies einlegen, 25 cm Schotter einfüllen, in zwei Lagen stampfen.
  5. Drainagekern schütten. In der Mitte einen Kegel aus Bauschutt aufhäufen, 80 cm hoch, unten 120 cm Durchmesser. Er hält die Spirale trocken und trägt das Substrat.
  6. Trocken mauern. Größte Steine nach unten, Fugen versetzen, keine Kreuzfugen. Jede Lage 3 bis 5 Grad nach innen neigen, dahinter mit Splitt hintermauern, kein Mörtel. Die Mauer steigt von 20 cm am Fuß auf 80 cm im Zentrum.
  7. Substrate einfüllen. Oben ein Drittel Mutterboden, ein Drittel Sand, ein Drittel Splitt. Mitte halb Mutterboden, halb Sand. Unten zwei Drittel Mutterboden, ein Drittel Kompost.
  8. Bepflanzen. Ende April bis Mitte Mai. Oben Rosmarin 'Veitshöchheim', Thymian, Currykraut, Lavendel 'Hidcote' mit 30 cm Abstand. Mitte Salbei, Oregano, Bohnenkraut, Ysop mit 25 cm. Unten Schnittlauch, Petersilie, Kerbel mit 20 cm. Am feuchten Fuß Minze und Waldmeister.
  9. Minze bändigen und mulchen. Pfefferminze und Melisse in einen 5-Liter-Topf ohne Boden setzen und bündig eingraben. Trockenzone 3 cm mit Kalksplitt abdecken, den Fuß mit angetrocknetem Rasenschnitt. Sechs Wochen lang zweimal wöchentlich 10 Liter gießen.

Zeit und Kosten

Zu zweit steht die Spirale in zwei bis drei Tagen, das Steinesammeln dauert oft noch einmal so lange. Kosten 100 bis 400 Euro, mit geschenkten Steinen unter 80 Euro für Substrat und Pflanzen.

Die drei häufigsten Fehler

  • Kein Drainagekern. Nur mit Erde gefüllt, steht der Fuß nach dem ersten nassen Winter unter Wasser und der Kern sackt ab. Grober Bauschutt in der Mitte verhindert beides.
  • Mauer senkrecht gesetzt. Ohne Neigung nach innen drückt das Substrat die Steine im Frost heraus. Fünf Grad Anlauf je Lage tragen 30 Jahre.
  • Überall dieselbe Erde. Fetter Kompost auf der Kuppe lässt Thymian und Rosmarin verweichlichen und im Winter erfrieren. Nach oben hin konsequent magerer mischen.

Before you start

Inside a built up area, free standing walls up to a certain height are verfahrensfrei (exempt from any application) under most Landesbauordnungen (the building codes of the federal states). In the open countryside they are expressly not. Ring the Bauamt (the local building authority) and ask which height applies where you are and how your land is classified. Verfahrensfrei only means that nobody checks beforehand. The Bebauungsplan (the local development plan) still holds. The distance to the boundary is set by the Nachbarrecht (the neighbour law of your federal state), so talk to the neighbour first. On the build itself the weight is the danger. Stones over 25 kilograms are lifted by two people, safety boots are not optional, and the upper courses must never be left to tip on an edge. Build in spring or in September, then the plants take hold straight away.

What you need

  • 1.5 tonnes of broken stone, 15 to 35 cm across for the dry stone wall
  • 0.5 m³ of building rubble or 32/56 crushed stone as the drainage core inside
  • 0.4 m³ of 0/32 crushed stone for the footing of the wall
  • 0.5 m³ of 0/4 sand to lean out the upper zones
  • 0.5 m³ of topsoil as the base of every mix
  • 0.3 m³ of mature compost for the damp foot of the spiral
  • 0.1 m³ of pale 8/16 limestone chippings as mulch for the dry zone
  • 4 m² of weed membrane under the footing
  • 1 builder's tub of 60 litres for the small pond at the foot (optional)
  • 16 herb plants in 9 cm pots, sorted by zone

Tools

Spade, wheelbarrow, string and pegs, spirit level, rubber mallet, brick hammer, rake, tamper, watering can, safety boots, stout gloves

Step by step

  1. Fix the position. Full sun, the open side facing south. Clear area 350 x 350 cm. No tree within 6 m, otherwise it drips and the rosemary rots.
  2. Collect the stone. Reckon on 1.5 tonnes from a builders' yard, a demolition site or the small ads. Taking stone out of streams and open farmland is forbidden in many places.
  3. Mark out the plan. A peg in the middle, string 150 cm long, mark the circle. Inside it, trickle out the spiral in sand: two and a half turns, the planting band 50 cm wide.
  4. Dig the footing. Along the line of the wall, dig 30 cm deep and 40 cm wide. Lay the membrane, fill in 25 cm of crushed stone and tamp it in two layers.
  5. Tip in the drainage core. Heap a cone of building rubble in the middle, 80 cm high and 120 cm across at the base. It keeps the spiral dry and carries the growing mix.
  6. Lay the wall dry. Biggest stones at the bottom, joints staggered, no joint running straight over another. Tilt every course 3 to 5 degrees inwards and back it with chippings, no mortar. The wall rises from 20 cm at the foot to 80 cm at the centre.
  7. Fill in the growing mixes. At the top a third topsoil, a third sand, a third chippings. In the middle half topsoil, half sand. At the bottom two thirds topsoil, one third compost.
  8. Plant it. Late April to mid May. At the top rosemary 'Veitshöchheim', thyme, curry plant and lavender 'Hidcote' at 30 cm spacing. In the middle sage, oregano, summer savory and hyssop at 25 cm. At the bottom chives, parsley and chervil at 20 cm. Mint and woodruff at the damp foot.
  9. Keep the mint in check and mulch. Set peppermint and lemon balm in a 5 litre pot with the bottom cut out and sink it flush. Cover the dry zone with 3 cm of limestone chippings and the foot with part dried grass clippings. For six weeks, water 10 litres twice a week.

Time and cost

With two people the spiral stands in two or three days, and collecting the stone often takes as long again. Cost 100 to 400 euros, or under 80 euros for mix and plants if the stone was given to you.

The three most common mistakes

  • No drainage core. Filled with soil alone, the foot stands under water after the first wet winter and the middle sinks. Coarse rubble in the centre stops both.
  • Wall built upright. Without a lean inwards, frost and the growing mix push the stones out. Five degrees of batter per course lasts 30 years.
  • The same soil everywhere. Rich compost on the crown makes thyme and rosemary soft, and then the winter kills them. Mix leaner and leaner towards the top.

Worauf es ankommtWhat matters hereOhne Drainagekern im Inneren steht der Fuß der Spirale nach dem ersten nassen Winter unter Wasser.Without a drainage core inside, the foot of the spiral stands under water after the first wet winter.

Gewächshaus und Folientunnel, Greenhouse and polytunnel
Wochen bis MonateWeeks to monthsEtwas ÜbungSome practice helps

Gewächshaus und FolientunnelGreenhouse and polytunnel

2 Personen, zum Folienauflegen kurz 4 Personen, schweres Heben2 people, 4 people for a short while when the film goes on, heavy lifting

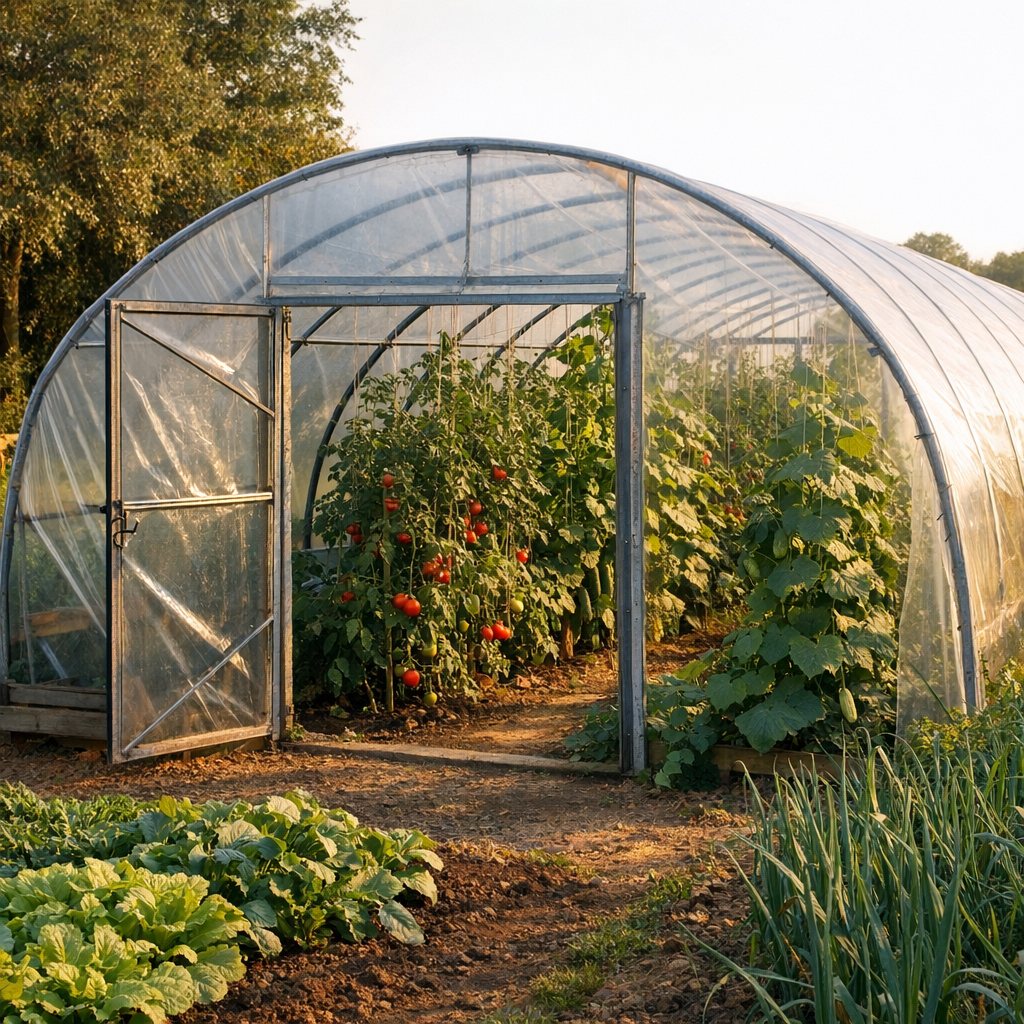
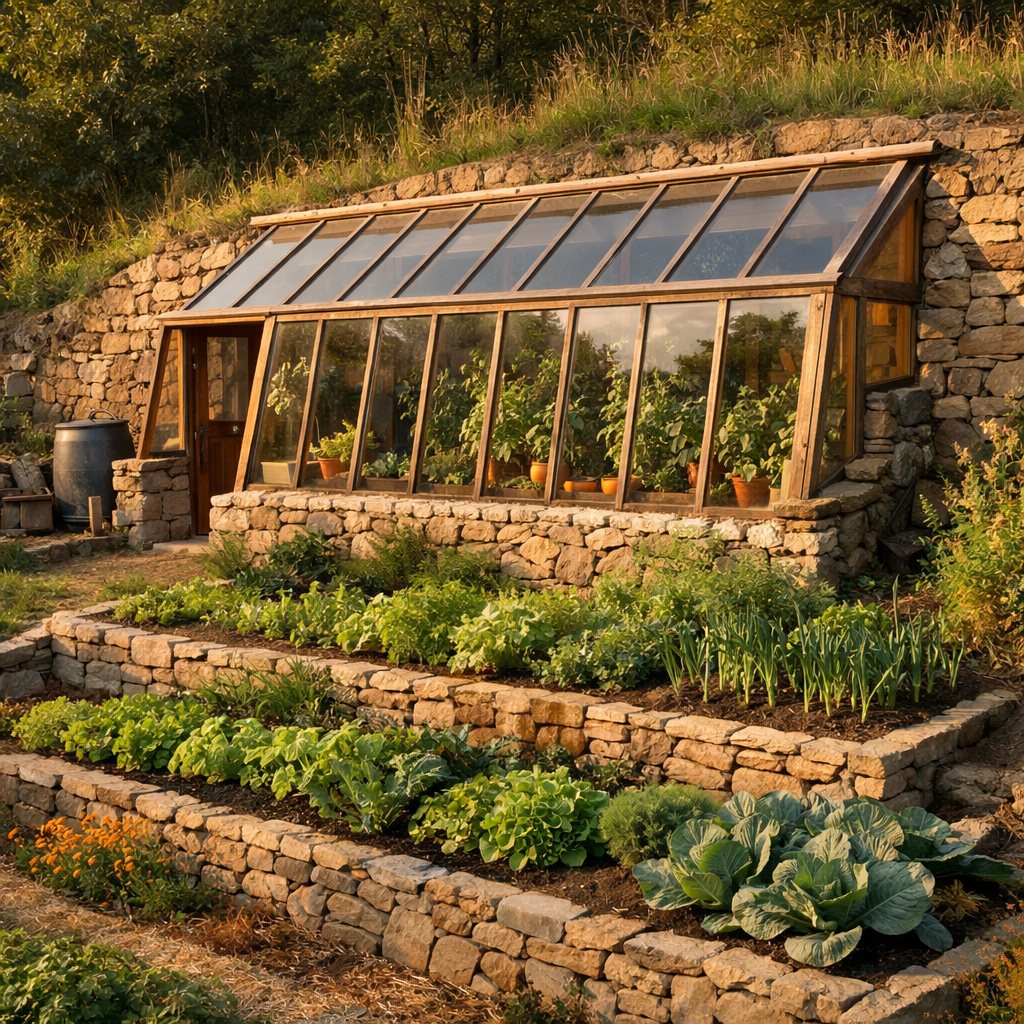
Verlängert die Saison an beiden Enden um jeweils sechs Wochen und macht Tomaten, Paprika und Gurken erst wirklich verlässlich. Der Folientunnel kostet ein Fünftel eines Glashauses und leistet fast dasselbe.Stretches the season by six weeks at each end and makes tomatoes, peppers and cucumbers dependable at last. The polytunnel costs a fifth of a glasshouse and does almost the same work.

So wird gebautHow it is built
Rundbogen aus verzinkten Rohren, Gewächshausfolie mit UV-Stabilisierung, Folie in seitliche Erdgräben eingraben statt nur festklemmen.Hoops of galvanised tube, greenhouse film with UV stabilisation, and the film buried in trenches along the sides instead of merely clamped.
KostenCost
600 Euro Tunnel, 3.000 Euro aufwärts Glashaus600 euros for a tunnel, 3,000 euros and up for a glasshouse
Erster SchrittFirst step
Bauamt fragen. Viele Bundesländer lassen Gewächshäuser bis zu einer bestimmten Größe genehmigungsfrei zu.Ask the Bauamt (the local building authority). Many federal states allow greenhouses up to a certain size without permission.
Schritt für SchrittStep by step
Folientunnel, Querschnitt123456789300 cm200 cm100 cm60 cm100 cm30 cm1Rundbogen Stahlrohr 25 mm2Firstrohr zur Aussteifung3Gewächshausfolie 200 my4Erdanker 60 cm, 50 cm tief5Folienrand eingegraben6Giebeltür 90 x 190 cm7Lüftungsklappe 60 x 40 cm8Beet 100 cm, Weg 60 cm9Nächster Bogen nach 100 cmNicht maßstäblich, Maße in cm
Bauskizze Gewächshaus und Folientunnel, am Handy seitlich wischenMeasured sketch of Greenhouse and polytunnel, swipe sideways on a phone

Bevor du anfängst

Frag zuerst beim Bauamt nach, bis zu welchem Rauminhalt ein privates Gewächshaus bei euch ohne Antrag stehen darf und welche Firsthöhe dabei gilt. Verlass dich auf keine Zahl aus dem Netz. Die Länder regeln das sehr unterschiedlich, und die großzügigen Werte gelten meist nur für Gewächshäuser, die einem landwirtschaftlichen oder forstwirtschaftlichen Betrieb dienen. Bring Maße, Lageplan und den Abstand zur Grenze mit. Verfahrensfrei heißt nur, dass vorher niemand prüft. Bebauungsplan und Abstandsflächen gelten weiter, und im Außenbereich ist das die eigentliche Hürde. Gefährlich wird es bei Schneelast, ab etwa 30 Zentimetern stützt ihr die Decke ab oder räumt sie frei. Und halte den Unterschied auseinander: verfahrensfrei heißt nur, dass du keinen Antrag stellst. Zulässig ist das Vorhaben damit noch nicht, im Außenbereich liegt genau da die eigentliche Hürde.

Das brauchst du

  • 9 Rundbögen aus verzinktem Stahlrohr 25 mm, Spannweite 300 cm, Scheitelhöhe 200 cm
  • 18 Erdanker 60 cm, Rohr 32 mm als Fundament der Bögen
  • 3 Firstrohre je 300 cm zur Längsaussteifung
  • 4 Diagonalstreben 200 cm für die beiden Endfelder
  • 1 Gewächshausfolie 200 my, UV-stabilisiert, 6 x 12 m als Hülle
  • 40 m Spannschiene mit Federdraht zum Befestigen an den Giebeln
  • 10 Kanthölzer Lärche 200 x 8 x 8 cm für Giebelrahmen und Türen
  • 2 Türen 90 x 190 cm an beiden Enden für den Durchzug
  • 6 Sandsäcke à 25 kg zum Beschweren beim Auflegen
  • 1 Min-Max-Thermometer zur Lüftungskontrolle

Werkzeug

Vorschlaghammer mit Setzhilfe, Spaten, Schnur und Pflöcke, Wasserwaage, Zollstock, Akkuschrauber, Metallsäge, Leiter, Cuttermesser, vier Paar Hände

Schritt für Schritt

  1. Standort und Ausrichtung. Längsachse von Nord nach Süd, ebene Fläche, rundum 100 cm Abstand zu Hecken und Zaun. Keine Senke, dort sammelt sich Kaltluft.
  2. Grundfläche abstecken. 300 x 800 cm mit Schnur markieren. Beide Diagonalen müssen 854 cm messen. Erst dann die Pflöcke endgültig setzen.
  3. Erdanker einschlagen. Alle 100 cm einen Anker je Seite, 18 Stück, 50 cm tief, oben 10 cm überstehend. Jeden Anker mit der Wasserwaage lotrecht prüfen.
  4. Bögen aufsetzen. Rohrbögen auf die Anker stecken und mit dem Firstrohr verbinden. In beiden Endfeldern je zwei Diagonalen einziehen, sonst kippt das Gerüst im Wind zur Seite.
  5. Folienrinnen ausheben. Beidseitig einen Graben 30 cm tief und 25 cm breit neben der Ankerreihe, Aushub daneben aufhäufen.
  6. Giebel bauen. Aus Kanthölzern zwei Rahmen mit Türöffnung 90 x 190 cm zimmern und an die Endbögen schrauben. Über jeder Tür eine Lüftungsklappe 60 x 40 cm vorsehen.
  7. Folie auflegen. Nur an einem windstillen Tag über 15 Grad, dann ist die Folie dehnbar. Zu viert über das Gerüst ziehen, mittig ausrichten, mit Sandsäcken sichern.
  8. Folie eingraben. Ränder in die Gräben legen, Erde lagenweise einfüllen und festtreten. Danach die Giebelfolie mit Spannschiene und Federdraht fixieren. Nur eingegrabene Folie übersteht einen Sturm.
  9. Beete anlegen und bepflanzen. Zwei Beete je 100 cm breit, Mittelweg 60 cm, 10 cm Kompost einarbeiten. Ab Mitte April Tomate 'Matina' mit 50 cm, Gurke 'Tanja' mit 40 cm, Paprika 'Roter Augsburger' mit 40 cm Abstand. Ab 25 Grad Innentemperatur beide Türen öffnen, im Juli den ganzen Tag.

Zeit und Kosten

Zwei Personen schaffen das Gerüst in zwei Tagen, die Folie legen vier Leute in einer halben Stunde auf. Mit Beetbau sind es zwei bis drei Wochenenden. Der Tunnel kostet 550 bis 900 Euro, ein Glashaus gleicher Fläche ab 3.000 Euro.

Die drei häufigsten Fehler

  • Lüftung unterschätzt. Ohne Türen an beiden Enden steigt die Temperatur im Juli über 45 Grad, die Blüten fallen ab. Die Öffnungsfläche soll ein Fünftel der Grundfläche betragen.
  • Folie nur geklemmt. Klemmprofile reißen beim ersten Herbststurm aus. Die Folie seitlich 30 cm tief eingraben, dann bleibt sie liegen.
  • Baumarktfolie verwendet. Abdeckfolie ohne UV-Stabilisierung wird nach einem Sommer brüchig. Gewächshausfolie mit 200 my und UV-Schutz hält acht bis zehn Jahre.

Before you start

Ask at the Bauamt (the local building authority) first, up to what volume a private greenhouse may stand without an application where you are, and what ridge height goes with that. Trust no figure you find online. The federal states handle this very differently, and the generous limits usually apply only to greenhouses that serve a farm or a forestry holding. Take the dimensions, a site plan and the distance to the boundary with you. Verfahrensfrei (exempt from any application) only means that nobody checks beforehand. The Bebauungsplan (the local development plan) and the required distances to the boundary still hold, and in the Außenbereich (the open countryside) that is the real hurdle. Snow load is where it gets dangerous. From about 30 centimetres you either prop the roof or clear it. And keep the two things apart: verfahrensfrei only means that you file no application. It does not yet make the project lawful, and in the open countryside that is exactly where the real hurdle lies.

What you need

  • 9 hoops of 25 mm galvanised steel tube, 300 cm span, 200 cm to the ridge
  • 18 ground anchors 60 cm long, 32 mm tube as the footing for the hoops
  • 3 ridge tubes of 300 cm each to brace the length
  • 4 diagonal braces 200 cm long for the two end bays
  • 1 greenhouse film, 200 microns, UV stabilised, 6 x 12 m as the skin
  • 40 m of channel with spring wire to fix the film at the gable ends
  • 10 squared larch timbers 200 x 8 x 8 cm for the gable frames and the doors
  • 2 doors 90 x 190 cm at both ends for a through draught
  • 6 sandbags of 25 kg each to weigh the film down while it goes on
  • 1 maximum minimum thermometer to keep an eye on ventilation

Tools

Sledgehammer with a driving cap, spade, string and pegs, spirit level, folding rule, cordless driver, hacksaw, ladder, utility knife, four pairs of hands

Step by step

  1. Position and orientation. Long axis north to south, level ground, 100 cm clear of hedges and fence all round. No hollow, because cold air gathers there.
  2. Set out the footprint. Mark 300 x 800 cm with string. Both diagonals have to measure 854 cm. Only then drive the pegs for good.
  3. Drive in the ground anchors. One anchor per side every 100 cm, 18 in all, 50 cm deep with 10 cm standing proud. Check every anchor upright with the spirit level.
  4. Set the hoops. Push the hoops onto the anchors and tie them together with the ridge tube. Fit two diagonals in each end bay, otherwise the frame leans over in the wind.
  5. Dig the trenches for the film. On both sides a trench 30 cm deep and 25 cm wide alongside the row of anchors, with the spoil heaped next to it.
  6. Build the gable ends. Make up two frames from the squared timber with a door opening of 90 x 190 cm and screw them to the end hoops. Allow a vent flap 60 x 40 cm above each door.
  7. Put the film on. Only on a still day above 15 degrees, when the film will stretch. Four people pull it over the frame, line it up centrally and hold it with sandbags.
  8. Bury the film. Lay the edges in the trenches, fill in the soil in layers and tread it down. Then fix the film at the gables with the channel and the spring wire. Only buried film comes through a gale.
  9. Lay out the beds and plant. Two beds 100 cm wide each, a central path of 60 cm, 10 cm of compost worked in. From mid April tomato 'Matina' at 50 cm, cucumber 'Tanja' at 40 cm and pepper 'Roter Augsburger' at 40 cm spacing. Open both doors once it reaches 25 degrees inside, and in July leave them open all day.

Time and cost

Two people get the frame up in two days, and four people put the film on in half an hour. With the beds it comes to two or three weekends. The tunnel costs 550 to 900 euros, a glasshouse of the same area starts at 3,000 euros.

The three most common mistakes

  • Ventilation underestimated. Without doors at both ends the temperature climbs past 45 degrees in July and the flowers drop. The opening area should come to a fifth of the floor area.
  • Film only clamped. Clamping profiles tear out in the first autumn gale. Bury the film 30 cm deep at the sides and it stays put.
  • Ordinary DIY store sheeting used. Cover sheeting without UV stabilisation goes brittle after one summer. Greenhouse film at 200 microns with UV protection lasts eight to ten years.

Worauf es ankommtWhat matters hereLüftung wird fast immer unterschätzt. Ohne Firstlüftung und Tür an beiden Enden kocht der Tunnel im Juli.Ventilation is almost always underestimated. Without a ridge vent and a door at each end, the tunnel cooks in July.

Waldgarten, Forest garden
Längeres VorhabenA longer projectEtwas ÜbungSome practice helps

WaldgartenForest garden

2 bis 3 Personen, schweres Heben2 to 3 people, heavy lifting

Sieben Etagen auf derselben Fläche: Kronenbäume, Niederstamm, Straucher, Stauden, Bodendecker, Wurzeln, Kletterer. Die ersten drei Jahre sind Arbeit, danach trägt das System sich weitgehend selbst.Seven storeys on the same ground: canopy trees, low stemmed trees, shrubs, perennials, ground cover, roots and climbers. The first three years are work. After that the system largely carries itself.

So wird gebautHow it is built
Zürst die Bäume setzen, dann von oben nach unten auffüllen. Mulchen statt hacken. Stickstoffsammler wie Erbsenstrauch oder Ölweide großzügig einstreuen.Plant the trees first, then fill in from the top down. Mulch instead of hoeing. Scatter in plenty of nitrogen fixers such as pea shrub or oleaster.
KostenCost
500 bis 3.000 Euro Pflanzgut500 to 3,000 euros for planting stock
Erster SchrittFirst step
Kronenbäume im ersten Herbst pflanzen. Alles andere kann warten, die Bäume nicht.Plant the canopy trees in the first autumn. Everything else can wait. The trees cannot.
Schritt für SchrittStep by step
Waldgarten, Schichtschnitt1234567891100 cm550 cm275 cm15 cm60 cm1Baumschicht, Kronenbäume2Halbstämme alle 5 bis 6 m3Strauchschicht alle 2,75 m4Krautschicht aus Stauden5Bodendecker, Mulch 15 cm6Wurzelschicht, nur lockern7Kletterpflanze ab Jahr vier8Stickstoffsammler Ölweide9Baumpfahl mit DrahthoseNicht maßstäblich, Maße in cm
Bauskizze Waldgarten, am Handy seitlich wischenMeasured sketch of Forest garden, swipe sideways on a phone

Bevor du anfängst

Liegt eure Fläche in einem Schutzgebiet, ist die untere Naturschutzbehörde im Landratsamt zuständig. Frag dort, ob Gehölzpflanzungen bei euch anzeigepflichtig sind und ob es Vorgaben zur Artenwahl gibt, die Flurstücknummer genügt für die Auskunft. Die Grenzabstände für Bäume stehen nicht in der Bauordnung, sondern im Nachbarrecht eures Landes, und die Werte gehen weit auseinander. Lass vor dem Pflanzen eine Bodenprobe machen, die Landwirtschaftliche Untersuchungsanstalt prüft Säuregrad und Nährstoffe für 25 bis 40 Euro. Pflanzzeit ist Oktober bis März. Beim Schnitt in der Höhe ist der Sturz von der Leiter die häufigste schwere Verletzung, arbeitet dabei nie allein.

Das brauchst du

  • 3 Kronenbäume als Hochstamm, etwa Walnuss 'Geisenheim 26', Esskastanie 'Marigoule', Speierling
  • 6 Halbstämme wie Apfel 'Rheinischer Bohnapfel', Birne 'Gellerts Butterbirne', Quitte 'Konstantinopeler'
  • 20 Beerensträucher: Haselnuss, Felsenbirne, Kornelkirsche, Aronia, Josta, Stachelbeere
  • 8 Stickstoffsammler: Erbsenstrauch, Ölweide, Sanddorn (männlich und weiblich)
  • 60 Stauden: Beinwell 'Bocking 14', Bärlauch, Waldmeister, Rhabarber, Meerrettich
  • 3 Kletterpflanzen: Weinrebe 'Muscat bleu', Kiwi 'Weiki', Akebia
  • 9 Baumpfähle Robinie 250 cm plus Kokosstrick zum Anbinden
  • 9 Drahthosen 100 cm hoch gegen Reh und Hase
  • 200 Kartons ohne Klebeband zum Abdecken der Grasnarbe
  • 20 m³ Holzhackschnitzel als Mulchauflage

Werkzeug

Spaten, Grabgabel, Schubkarre, Maßband 30 m, Schnur, Astschere, Baumsäge, Vorschlaghammer, Gießkanne, Millimeterpapier für den Plan

Schritt für Schritt

  1. Fläche aufnehmen. Zeichne 300 m² im Maßstab 1:100 auf. Trage Nordrichtung, Schattenwurf, Windrichtung und feuchte Stellen ein. Ein Nachmittag am Plan erspart späteres Umpflanzen.
  2. Abstände festlegen. Kronenbäume 10 bis 12 m auseinander, Halbstämme 5 bis 6 m, Sträucher 2,5 bis 3 m, Stauden 40 bis 60 cm. Rechne mit der Größe, die der Baum nach zwanzig Jahren hat.
  3. Grasnarbe abdecken. Ab August die Pflanzstellen mit zwei Lagen Karton überlappend auslegen und 15 cm Hackschnitzel darauf. Bis zum Pflanztermin ist die Grasnarbe verrottet.
  4. Pflanzlöcher graben. 80 x 80 cm breit, 60 cm tief. Sohle mit der Grabgabel lockern, nicht düngen. Oberboden und Unterboden getrennt lagern.
  5. Kronenbäume setzen. November bis März bei frostfreiem Boden. Pfahl vor dem Baum auf der Westseite einschlagen, 10 cm Abstand zum Stamm. Veredelungsstelle 10 cm über Erdreich, mit 30 Litern einschlämmen.
  6. Schützen und anbinden. Kokosstrick als liegende Acht, handbreit Spiel. Drahthose 100 cm hoch mit drei Stäben. Ohne Verbissschutz sind die Triebe im ersten Winter abgefressen.
  7. Zweites Jahr, Strauchschicht. Sträucher und Stickstoffsammler im Herbst dazwischen setzen. Erbsenstrauch und Ölweide großzügig einstreuen, etwa jeder dritte Strauch.
  8. Drittes Jahr, Krautschicht. Im April oder September Stauden und Bodendecker pflanzen. Beinwell im Ring um jeden Baum, 80 cm vom Stamm, drei Pflanzen je Baum. Kletterer erst ab Jahr vier an Bäume mit über 12 cm Stammumfang.
  9. Pflege der ersten drei Jahre. Baumscheibe 100 cm im Durchmesser freihalten, Mulch 10 cm vom Stamm entfernt enden lassen. In trockenen Sommern 30 Liter je Baum und Woche. Beinwell dreimal schneiden und als Mulch liegen lassen.

Zeit und Kosten

Für 300 m² brauchen zwei bis drei Personen etwa drei Wochenenden, verteilt über drei Jahre. Danach genügen 20 bis 30 Stunden jährlich. Pflanzgut, Pfähle und Schutz kosten 500 bis 3.000 Euro, wurzelnackte Herbstware ein Drittel weniger.

Die drei häufigsten Fehler

  • Zu dicht gepflanzt. Was im ersten Jahr luftig wirkt, ist nach zwölf Jahren ein Dickicht ohne Ertrag. Halte die Endabstände ein und fülle die Lücken mit einjährigem Gemüse.
  • Mulch am Stamm. Hackschnitzel direkt am Stammfuß halten die Rinde dauerfeucht, sie fault und Wühlmäuse nisten darin. Lass 10 cm zum Stamm.
  • Kein Verbissschutz. Ein Reh nimmt in einer Nacht die Terminaltriebe von zehn Jungbäumen mit. Drahthose und Pfahl gehören am Pflanztag dran.

Before you start

If your land lies in a protected area, the untere Naturschutzbehörde (the lower nature conservation authority, based at the Landratsamt, your district administration) is in charge. Ask there whether planting trees and shrubs has to be notified where you are and whether there are rules on which species you may use. The plot number is enough for them to answer. The distances to the boundary for trees are not in the building code but in the Nachbarrecht (the neighbour law of your federal state), and the figures vary a great deal. Have a soil sample taken before you plant. The Landwirtschaftliche Untersuchungsanstalt (the agricultural testing laboratory) checks acidity and nutrients for 25 to 40 euros. Planting time is October to March. When you prune up in a tree, a fall from the ladder is the commonest serious injury, so never work alone at it.

What you need

  • 3 canopy trees as standards, for instance walnut 'Geisenheim 26', sweet chestnut 'Marigoule' and service tree
  • 6 half standards such as apple 'Rheinischer Bohnapfel', pear 'Gellerts Butterbirne' and quince 'Konstantinopeler'
  • 20 berry shrubs: hazel, juneberry, cornelian cherry, aronia, jostaberry, gooseberry
  • 8 nitrogen fixers: pea shrub, oleaster, sea buckthorn (male and female)
  • 60 perennials: comfrey 'Bocking 14', wild garlic, woodruff, rhubarb, horseradish
  • 3 climbers: grape vine 'Muscat bleu', kiwi 'Weiki', akebia
  • 9 robinia tree stakes 250 cm plus coir rope for tying
  • 9 wire guards 100 cm high against deer and hare
  • 200 cardboard boxes with no tape on them to smother the turf
  • 20 m³ of wood chip as a mulch layer

Tools

Spade, digging fork, wheelbarrow, 30 m tape, string, loppers, pruning saw, sledgehammer, watering can, graph paper for the plan

Step by step

  1. Survey the plot. Draw up 300 m² at a scale of 1:100. Mark north, the shade, the wind direction and the damp spots. One afternoon over the plan saves moving plants later.
  2. Fix the spacings. Canopy trees 10 to 12 m apart, half standards 5 to 6 m, shrubs 2.5 to 3 m, perennials 40 to 60 cm. Work with the size the tree will have after twenty years.
  3. Smother the turf. From August, cover the planting positions with two overlapping layers of cardboard and 15 cm of wood chip on top. By planting time the turf has rotted away.
  4. Dig the planting holes. 80 x 80 cm across, 60 cm deep. Loosen the base with the digging fork and add no fertiliser. Keep topsoil and subsoil in separate heaps.
  5. Set the canopy trees. November to March, with the soil free of frost. Drive the stake in before the tree, on the west side, 10 cm clear of the trunk. Graft union 10 cm above the soil, then puddle in with 30 litres.
  6. Guard and tie. Coir rope in a figure of eight, a hand's width of play. Wire guard 100 cm high on three stakes. Without a guard against browsing, the shoots are eaten off in the first winter.
  7. Second year, the shrub layer. Plant the shrubs and the nitrogen fixers in between in autumn. Scatter in plenty of pea shrub and oleaster, roughly every third shrub.
  8. Third year, the herb layer. Plant perennials and ground cover in April or September. Comfrey in a ring around every tree, 80 cm out from the trunk, three plants per tree. Climbers only from year four, and only on trees over 12 cm in trunk girth.
  9. Care in the first three years. Keep a circle of 100 cm around each trunk clear and let the mulch stop 10 cm short of the bark. In dry summers, 30 litres per tree per week. Cut the comfrey three times and leave it lying as mulch.

Time and cost

For 300 m², two or three people need about three weekends, spread over three years. After that 20 to 30 hours a year are enough. Planting stock, stakes and guards cost 500 to 3,000 euros, and bare rooted autumn stock a third less.

The three most common mistakes

  • Planted too close. What looks airy in the first year is a thicket with no yield after twelve. Keep to the final spacings and fill the gaps with annual vegetables.
  • Mulch against the trunk. Wood chip right at the base keeps the bark permanently wet, it rots and voles nest in it. Leave 10 cm clear of the trunk.
  • No guard against browsing. One roe deer takes the leading shoots off ten young trees in a single night. Guard and stake go on the day you plant.

Worauf es ankommtWhat matters hereDer häufigste Fehler ist zu dicht pflanzen. Was heute luftig aussieht, ist in zwölf Jahren ein Dickicht.The commonest mistake is planting too close. What looks airy today is a thicket in twelve years.

Streuobstwiese anlegen, Planting a meadow orchard
Längeres VorhabenA longer projectEtwas ÜbungSome practice helps

Streuobstwiese anlegenPlanting a meadow orchard

3 Personen, Pfähle und Ballen je 15 bis 30 kg, schweres Heben3 people, stakes and root balls of 15 to 30 kg each, heavy lifting

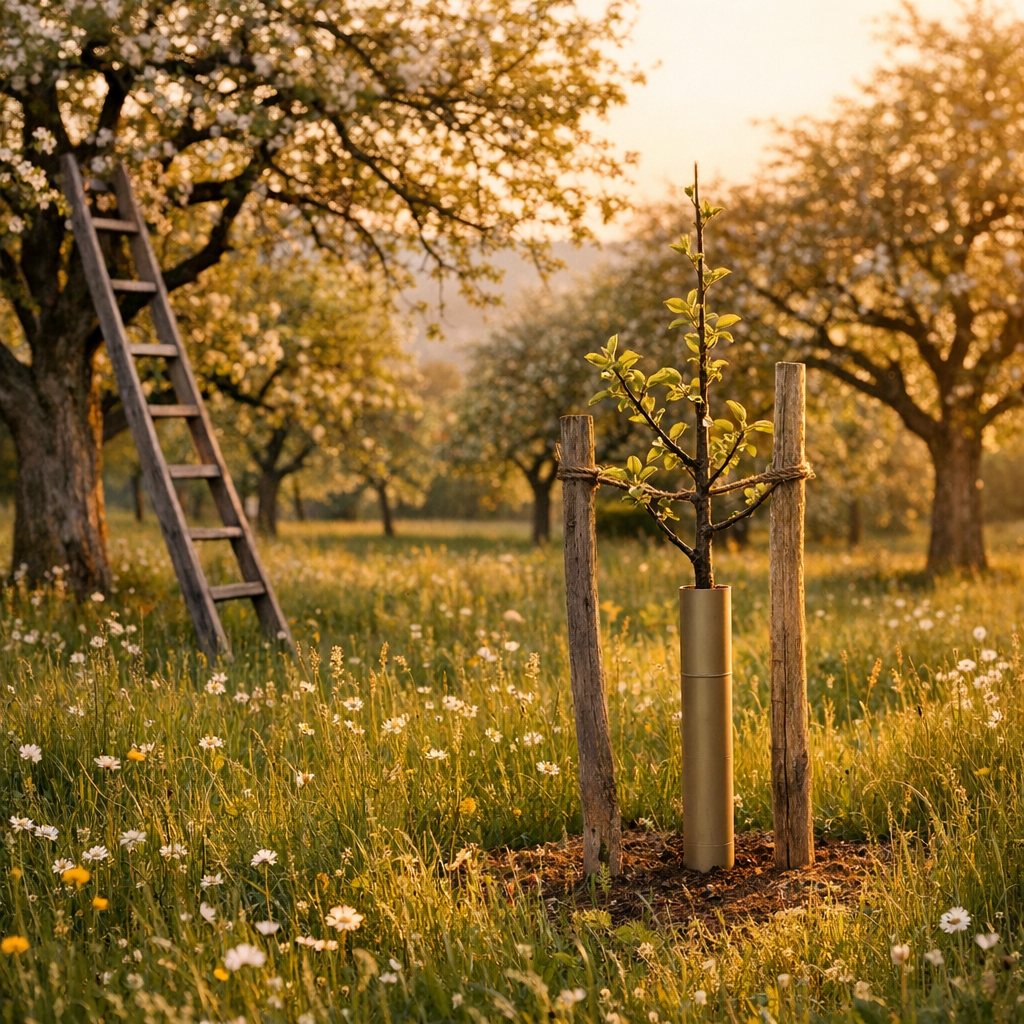
Hochstämme alter Sorten, weit gesetzt, darunter Wiese. Eine der artenreichsten Lebensräume Mitteleuropas, und in zwanzig Jahren ein Vermögen an Obst. Der Baum, den ihr pflanzt, trägt für eure Enkel.Standard trees of old varieties, set far apart, with meadow underneath. A Streuobstwiese is one of the richest habitats in central Europe, and in twenty years a fortune in fruit. The tree you plant will bear for your grandchildren.

So wird gebautHow it is built
Hochstamm mit mindestens 1,80 Meter Stammhöhe, zehn Meter Abstand, Pfahl im Westen, Verbissschutz, Baumscheibe die ersten Jahre offen halten.Standard trees with at least 1.80 metres of clear trunk, ten metres apart, the stake on the west side, a guard against browsing, and the ring around the trunk kept open for the first few years.
KostenCost
40 bis 70 Euro pro Baum inklusive Pfahl und Schutz40 to 70 euros per tree including stake and guard
Erster SchrittFirst step
Beim Landkreis nach Förderprogrammen fragen. Streuobst wird fast überall bezuschusst.Ask the Landkreis (your district council) about funding schemes. Traditional orchards are subsidised almost everywhere.
Schritt für SchrittStep by step
Streuobstwiese, Draufsicht und DetailDraufsicht, DreiecksverbandDetail Pflanzloch mit Pfahl1234567891000 cm866 cm400 cm100 cm50 cm250 cm1Hochstamm, Dreiecksverband2Reihenabstand 10 m versetzt3Grenzabstand 4 m4Pflanzloch 100 x 100 x 50 cm5Robinienpfahl 250 cm, West6Kokosstrick, liegende Acht7Verbissgitter 100 cm hoch8Drahtkorb gegen Wühlmäuse9Baumscheibe 100 cm gemulchtNicht maßstäblich, Maße in cm
Bauskizze Streuobstwiese anlegen, am Handy seitlich wischenMeasured sketch of Planting a meadow orchard, swipe sideways on a phone

Bevor du anfängst

Sprich früh mit der unteren Naturschutzbehörde im Landratsamt. Frag dort zwei Dinge: ob euer Bestand oder die Nachbarfläche unter gesetzlichem Schutz steht, und welche Förderung es für Neupflanzungen gibt. In einigen Ländern stehen Streuobstbestände ab einer bestimmten Größe unter Schutz, dann braucht schon die Umwandlung eine Genehmigung. Bring Flurstücknummer und Pflanzplan mit, der Landschaftspflegeverband hilft beim Antrag. Pflanze zwischen Ende Oktober und Mitte März bei frostfreiem Boden, der Grundwasserstand sollte mindestens 1,20 Meter unter der Oberfläche liegen. Beim Schnitt alter Bäume ist die Leiter die Gefahr. Sichere sie im Baum, arbeite zu zweit und führe die Motorsäge nie über Schulterhöhe.

Das brauchst du

  • 20 Hochstämme mit 1,80 m Stammhöhe auf Sämlingsunterlage, Stammumfang 8/10 cm
  • 20 Pfähle aus Robinie oder Eiche, 250 cm, Ø 8 bis 10 cm, geschält und angespitzt
  • 20 Verbissschutzgitter 100 cm hoch, Ø 60 cm gegen Reh, Hase und Weidevieh
  • 60 m Kokosstrick 8 mm zum Anbinden
  • 20 Drahtkörbe gegen Wühlmäuse, Maschenweite 16 mm
  • 10 kg Kalkanstrich für Stämme gegen Frostrisse an der Südseite
  • 2 m³ reifer Kompost, ein Eimer je Pflanzloch
  • 4 m³ Häckselgut zum Mulchen der Baumscheiben
  • 20 Etiketten aus Aluminium für Sortenname und Pflanzjahr

Werkzeug

Spaten, Grabgabel, Schubkarre, Maßband 50 m, Fluchtstäbe, Vorschlaghammer, Baumschere, Baumsäge, Wasserwaage, Gießfass oder Wasseranhänger

Schritt für Schritt

  1. Raster planen. Auf 5.000 m² passen 20 Hochstämme im Verband 10 x 10 m, versetzt gesetzt. Zur Grenze mindestens 4 m Abstand, zu Gebäuden 8 m.
  2. Sorten wählen. Etwa 60 Prozent Apfel, dazu Birne, Zwetschge, Kirsche. Bewährt sind 'Rheinischer Winterrambur', 'Kaiser Wilhelm', 'Boskoop', 'Köstliche von Charneux', Hauszwetschge. Mit frühen und späten Sorten läuft die Ernte drei Monate.
  3. Im Sommer bestellen. Gute Baumschulen sind ab August ausverkauft. Bestehe auf Sämlingsunterlage, nur sie trägt einen Hochstamm. Regionale Sorten nennt dir der Landschaftspflegeverband.
  4. Pflanzlöcher ausheben. 100 x 100 cm breit, 50 cm tief. Oberboden und Unterboden getrennt lagern, Sohle mit der Grabgabel 20 cm tief lockern, niemals glatt streichen.
  5. Pfahl zuerst setzen. 60 cm tief einschlagen, auf der Westseite, 10 cm vom künftigen Stamm entfernt. Oberkante endet unter dem Kronenansatz. Ein Pfahl nach dem Baum trifft die Wurzeln.
  6. Baum pflanzen. November bis März bei frostfreiem Boden. Beschädigte Wurzeln glatt schneiden, Wurzelwerk im Drahtkorb ausbreiten, Veredelungsstelle 10 cm über Erdreich. Oberboden mit Kompost einfüllen, antreten, Gießrand formen, mit 40 Litern einschlämmen.
  7. Anbinden und schützen. Kokosstrick in liegender Acht, so fest, dass der Stamm nicht scheuert. Verbissgitter mit drei Stäben stellen, unten bodenbündig.
  8. Pflanzschnitt sofort ausführen. Drei bis vier Leitäste im gleichen Winkel auswählen, alles andere entfernen. Leitäste auf gleiche Höhe kürzen, den Mitteltrieb 20 cm höher stehen lassen.
  9. Baumscheibe und Wiese pflegen. Die ersten fünf Jahre einen Kreis von 100 cm Durchmesser grasfrei halten und mulchen. Die Wiese zweimal mähen, erster Schnitt ab 15. Juni, zweiter Ende August, Schnittgut immer abfahren. Nicht mineralisch düngen.

Zeit und Kosten

Zu dritt stehen 20 Bäume nach zwei Wochenenden, ein Loch von Hand dauert 45 Minuten. Je Baum kosten Pflanze, Pfahl, Schutz und Draht 40 bis 70 Euro, insgesamt 800 bis 1.400 Euro. Der Erziehungsschnitt braucht zehn Winter lang je vier Stunden.

Die drei häufigsten Fehler

  • Buschbaum statt Hochstamm. Niedrige Unterlagen werden nur 30 Jahre alt und lassen keine Beweidung zu. Nur Sämlingsunterlagen mit 1,80 m Stammhöhe ergeben eine echte Streuobstwiese.
  • Erziehungsschnitt versäumt. Ungeschnittene Hochstämme bilden zu viele Leitäste und brechen mit 20 Jahren auseinander. Zehn Winter lang jährlich schneiden, danach alle fünf Jahre.
  • Wiese zu früh gemäht. Ein Schnitt im Mai vernichtet die Bodenbrüter und die Hälfte der Blütenpflanzen. Der erste Schnitt gehört nach den 15. Juni.

Before you start

Talk to the untere Naturschutzbehörde (the lower nature conservation authority, based at the Landratsamt, your district administration) early. Ask two things there: whether your stand of trees or the land next door is under legal protection, and what funding there is for new planting. In some federal states, orchard stands above a certain size are protected, and then even converting them needs permission. Take the plot number and the planting plan with you, and the Landschaftspflegeverband (the regional landscape conservation association) will help with the application. Plant between the end of October and mid March with the soil free of frost, and the water table should sit at least 1.20 metres below the surface. When you prune old trees the ladder is the danger. Tie it into the tree, work in pairs and never take the chainsaw above shoulder height.

What you need

  • 20 standard trees with 1.80 m of clear trunk on seedling rootstock, girth 8/10 cm
  • 20 stakes of robinia or oak, 250 cm, Ø 8 to 10 cm, barked and pointed
  • 20 guards against browsing, 100 cm high, Ø 60 cm to keep off deer, hare and grazing stock
  • 60 m of coir rope, 8 mm for tying
  • 20 wire baskets against voles, 16 mm aperture
  • 10 kg of lime wash for the trunks against frost cracks on the south side
  • 2 m³ of mature compost, one bucket per planting hole
  • 4 m³ of wood chip for mulching the rings around the trunks
  • 20 aluminium labels for the variety name and the year of planting

Tools

Spade, digging fork, wheelbarrow, 50 m tape, ranging rods, sledgehammer, secateurs, pruning saw, spirit level, water butt or water trailer

Step by step

  1. Plan the grid. On 5,000 m² there is room for 20 standards at 10 x 10 m, set in a staggered pattern. At least 4 m from the boundary and 8 m from buildings.
  2. Choose the varieties. Around 60 per cent apple, plus pear, plum and cherry. Proven ones are 'Rheinischer Winterrambur', 'Kaiser Wilhelm', 'Boskoop', 'Köstliche von Charneux' and the Hauszwetschge, the old German damson. With early and late varieties the harvest runs for three months.
  3. Order in summer. Good nurseries are sold out from August onwards. Insist on seedling rootstock, because nothing else will carry a standard. The Landschaftspflegeverband (the regional landscape conservation association) will name the local varieties for you.
  4. Dig the planting holes. 100 x 100 cm across, 50 cm deep. Keep topsoil and subsoil in separate heaps, loosen the base 20 cm deep with the digging fork and never smooth it off.
  5. Set the stake first. Drive it 60 cm deep on the west side, 10 cm from where the trunk will stand. The top ends below the first branches. A stake driven after the tree hits the roots.
  6. Plant the tree. November to March, with the soil free of frost. Cut damaged roots back clean, spread the roots out in the wire basket, graft union 10 cm above the soil. Fill in with topsoil and compost, tread it firm, form a watering rim and puddle in with 40 litres.
  7. Tie and guard. Coir rope in a figure of eight, firm enough that the trunk does not chafe. Stand the guard on three stakes, flush with the ground at the bottom.
  8. Do the planting cut straight away. Pick three or four main branches at the same angle and take everything else off. Shorten the main branches to the same height and leave the central leader standing 20 cm higher.
  9. Look after the tree ring and the meadow. For the first five years keep a circle of 100 cm across free of grass and mulch it. Cut the meadow twice, the first cut from 15 June, the second at the end of August, and always carry the cuttings off. Use no mineral fertiliser.

Time and cost

With three people, 20 trees stand after two weekends, and one hole dug by hand takes 45 minutes. Per tree, the plant, the stake, the guard and the wire come to 40 to 70 euros, so 800 to 1,400 euros in all. The formative pruning takes four hours in each of ten winters.

The three most common mistakes

  • Bush trees instead of standards. Dwarfing rootstocks live only 30 years and leave no room for grazing underneath. Only seedling rootstock with 1.80 m of clear trunk gives a real Streuobstwiese.
  • Formative pruning missed. Standards left unpruned form too many main branches and break apart at twenty years old. Prune every winter for ten years, then every five.
  • Meadow cut too early. A cut in May destroys the ground nesting birds and half the flowering plants. The first cut belongs after 15 June.

Worauf es ankommtWhat matters hereErziehungsschnitt in den ersten zehn Jahren ist nicht optional. Ungeschnittene Hochstämme brechen später unter der eigenen Last auseinander.Formative pruning in the first ten years is not optional. Standards left unpruned break apart later under their own weight.

Erdkeller, Root cellar
Längeres VorhabenA longer projectMit erfahrener HandNeeds an experienced hand

ErdkellerRoot cellar

4 Personen plus Baggerfahrer und Kranführer, schweres Heben4 people plus a digger driver and a crane operator, heavy lifting

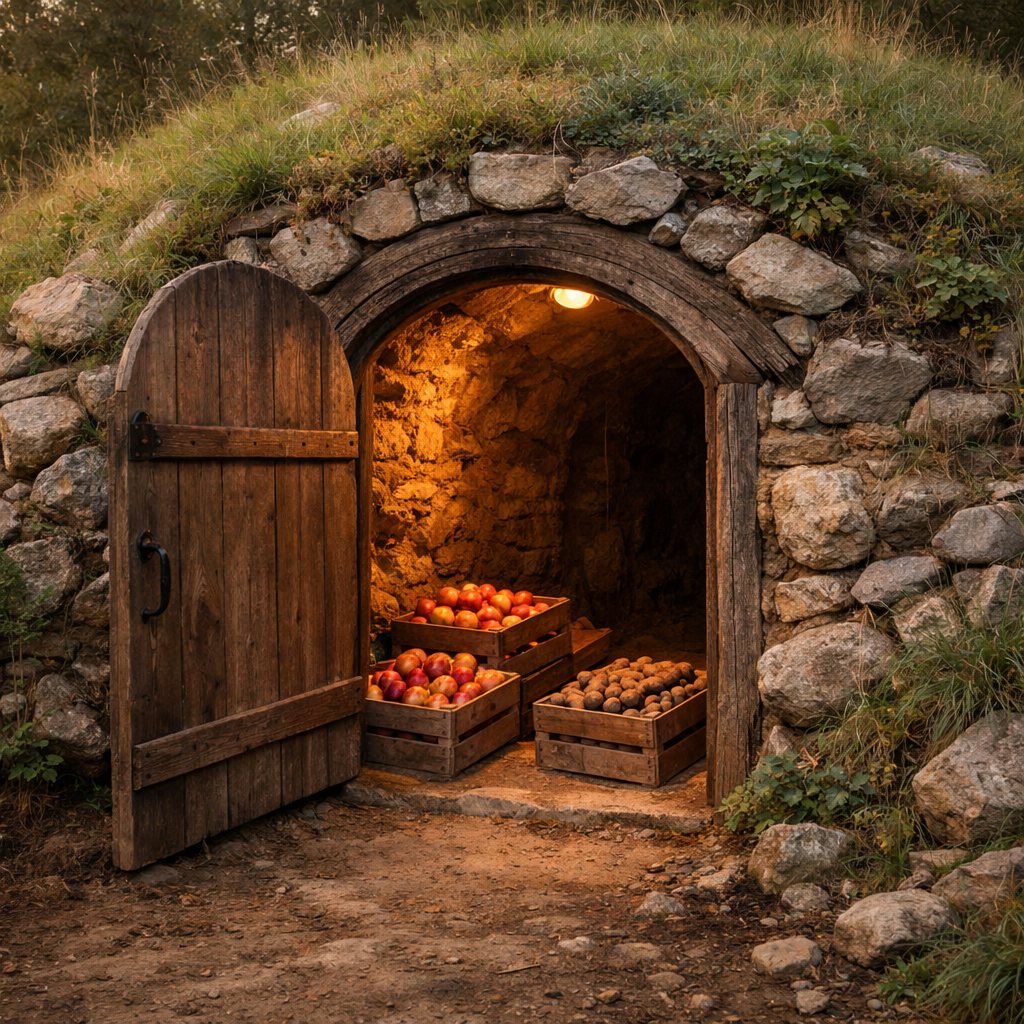
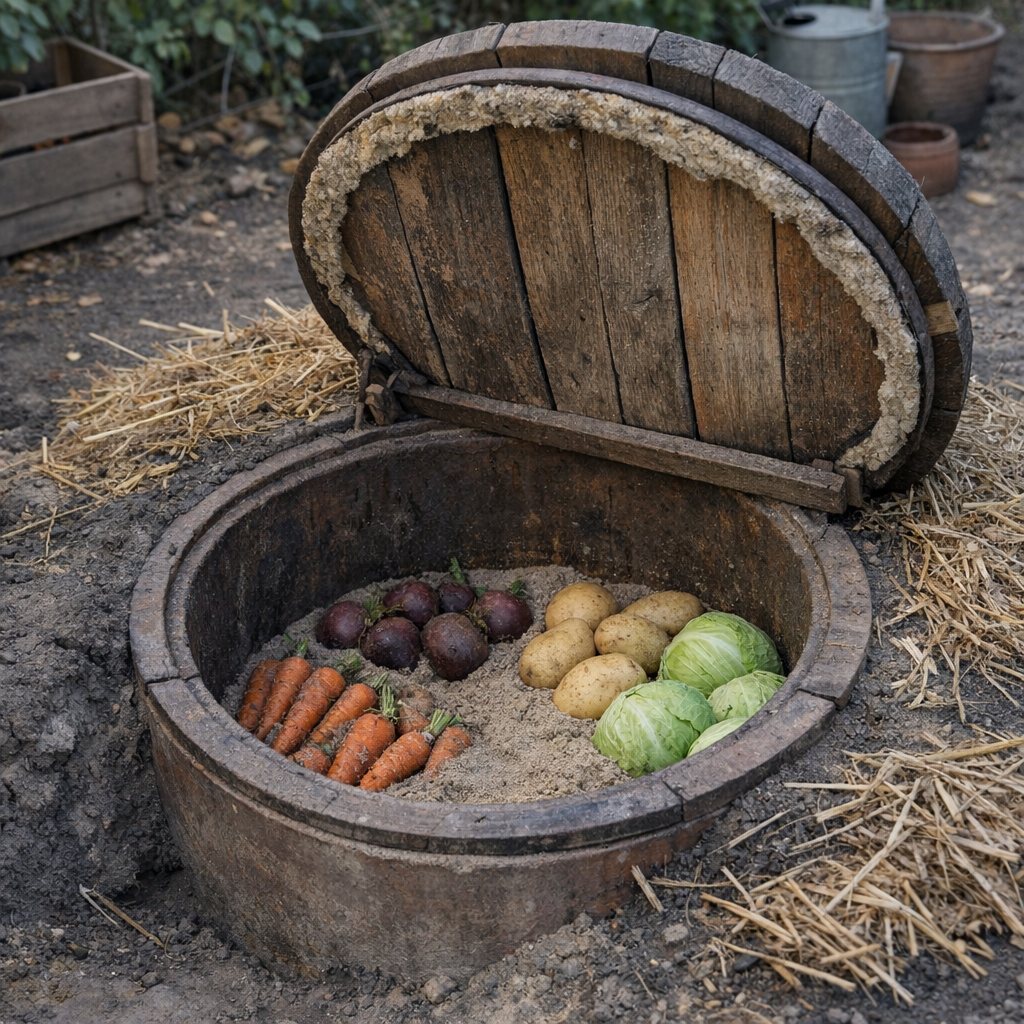
Konstant vier bis acht Grad, hohe Luftfeuchte, kein Strom. Kartoffeln, Möhren, Äpfel und Kohl halten darin bis ins Frühjahr. Der stille Held jeder Selbstversorgung, weil er das Geerntete erst wirklich nutzbar macht.A steady four to eight degrees, high humidity, no electricity. Potatoes, carrots, apples and cabbage keep in there into the spring. The quiet hero of growing your own, because it is what makes the harvest usable in the first place.

So wird gebautHow it is built
In den Hang gegraben, Gewölbe oder Betonrohr, mindestens 80 Zentimeter Erdüberdeckung, Zu- und Abluftrohr auf unterschiedlichen Höhen.Dug into a slope, either a vault or a concrete pipe, at least 80 centimetres of soil over the top, and the inlet and outlet pipes at different heights.
KostenCost
1.500 bis 8.000 Euro1,500 to 8,000 euros
Erster SchrittFirst step
Hanglage suchen. Ein Erdkeller in der Ebene braucht doppelt so viel Aushub und Aufwand.Look for a slope. A root cellar on flat ground needs twice the digging and twice the work.
Schritt für SchrittStep by step
Erdkeller, Längsschnitt123456789500 cm200 cm100 cmüber 150 cm1Stahlbetonrohr DN 20002Erdüberdeckung 100 cm3Abdichtung und Noppenbahn4Kellertür 90 x 190 cm5Zuluft DN 150 unten6Abluft DN 150 am Scheitel7Sohle Schotter und Sand8Ringdrainage, 2 Prozent9Regale mit 40 cm AbstandNicht maßstäblich, Maße in cm
Bauskizze Erdkeller, am Handy seitlich wischenMeasured sketch of Root cellar, swipe sideways on a phone

Bevor du anfängst

Ein Erdkeller ist baurechtlich ein Gebäude, deshalb führt der erste Weg zum Bauamt. Frag dort, bis zu welchem Rauminhalt bei euch kein Antrag nötig ist und ob eure Fläche zum Innenbereich zählt, im Außenbereich braucht ihr fast immer eine Genehmigung. Verfahrensfrei bedeutet nur, dass niemand vorher prüft. Bebauungsplan und Abstandsflächen gelten trotzdem, und die Bauaufsicht kann auch Jahre später den Rückbau verlangen. Hol vor dem ersten Spatenstich die kostenlose Leitungsauskunft ein. Lebensgefährlich ist die offene Grube. Über 1,25 Meter Tiefe verlangt DIN 4124 Böschung oder Verbau, niemand arbeitet allein darin, und abends wird die Baugrube gesichert. Und halte den Unterschied auseinander: verfahrensfrei heißt nur, dass du keinen Antrag stellst. Zulässig ist das Vorhaben damit noch nicht, im Außenbereich liegt genau da die eigentliche Hürde.

Das brauchst du

  • 5 Stahlbetonrohre DN 2000, je 100 cm lang für eine Raumzelle von 5 m
  • 2 Betonfertigteil-Stirnwände, eine mit Türöffnung 90 x 190 cm
  • 1 Kellertür aus Lärche mit Lüftungsschlitz unten
  • 40 m² Bitumenschweißbahn zur Außenabdichtung
  • 40 m² Noppenbahn mit Vlies als Schutzschicht
  • 25 m Drainagerohr DN 100 plus Spülschacht für die Ringdrainage
  • 8 m³ Drainagekies 16/32 für die Arbeitsräume
  • 10 m KG-Rohr DN 150 für Zuluft und Abluft, mit Edelstahlgitter, Regenhaube und Schieber
  • 12 m³ Schotter 0/32 und Sand 0/4 für Sohle und Auflager
  • 20 lfm Lärchenbretter 20 x 2,5 cm für die Regale

Werkzeug

Minibagger 5 t mit Fahrer, Autokran, Rüttelplatte, Spaten, Rotationslaser, Gasbrenner, Kernbohrer 160 mm, Helm, Sicherheitsschuhe

Schritt für Schritt

  1. Hang und Wasser prüfen. Such einen Hang mit mindestens 15 Grad Neigung, am liebsten nach Norden. Grab im Herbst ein Probeloch 200 cm tief. Steht darin Wasser, taugt der Platz nicht.
  2. Statik klären. Stahlbetonrohre DN 2000 gibt es in Auflastklassen. Lass dir vom Werk bestätigen, dass sie für 100 cm Erdüberdeckung zugelassen sind. Ein selbst gemauertes Gewölbe ohne Nachweis eines Tragwerksplaners ist lebensgefährlich.
  3. Baugrube und Sohle. Grube 700 x 400 cm, Sohle 250 cm unter Geländeoberkante, Böschung 60 Grad im bindigen Boden, 45 Grad im Sand. Ab 125 cm Tiefe schreibt die DGUV Böschung oder Verbau vor. Darauf 30 cm Schotter rütteln, 10 cm Sand abziehen, zwei Prozent Gefälle.
  4. Rohre versetzen. Jedes Rohr wiegt 2,8 Tonnen, das geht nur mit Kran. Fugen mit Quellband und Fugenmörtel schließen, dann die Stirnwände anschließen.
  5. Abdichten und drainieren. Außenflächen zweilagig abdichten, Noppenbahn aufkleben. Ringdrainage auf Sohlenhöhe mit zwei Prozent Gefälle zum Spülschacht, in Kies gebettet.
  6. Belüftung einbauen. Das Zuluftrohr DN 150 führt durch die Stirnwand bis 20 cm über den Kellerboden, die Ansaugung liegt außen im Schatten, 30 cm über Gelände. Das Abluftrohr sitzt am höchsten Punkt der Decke und geht senkrecht bis 50 cm über den Erdhügel. Beide Öffnungen brauchen mindestens 150 cm Höhenunterschied, sonst entsteht kein Kaminzug.
  7. Verfüllen. Arbeitsräume in Lagen von 30 cm füllen und leicht verdichten, gleichmäßig von beiden Seiten. Über dem Scheitel 100 cm Erde, oben Wiese ansäen.
  8. Ausbauen und einlagern. Boden aus gestampftem Sand und Lehm belassen, nicht betonieren, das hält 85 bis 95 Prozent Luftfeuchte. Regale aus Lärche mit 40 cm Wandabstand. Ab Oktober einlagern, Ziel sind 4 bis 8 Grad, Äpfel getrennt von Kartoffeln.

Zeit und Kosten

Aushub und Versetzen dauern je einen Tag mit Mietgerät, Abdichtung und Lüftung drei bis vier Wochenenden zu zweit. Insgesamt 1.500 Euro mit gebrauchten Rohren bis 8.000 Euro mit Neuteilen, Kranstellung 400 bis 700 Euro.

Die drei häufigsten Fehler

  • Zuluft und Abluft auf gleicher Höhe. Ohne Höhenversatz entsteht keine Zirkulation, die Luft steht und alles verschimmelt binnen sechs Wochen. Setz die Zuluft tiefer.
  • Ohne Nachweis gebaut. Ein Ziegelgewölbe oder eine Holzdecke trägt 100 cm feuchte Erde nicht dauerhaft. Nimm zugelassene Fertigteile oder hol einen Statiker.
  • Boden versiegelt. Ein Betonboden nimmt dem Keller die Feuchte, Möhren werden weich und Kohl welkt. Lass Sand und Lehm offen.

Before you start

In building law a root cellar counts as a building, so the first stop is the Bauamt (the local building authority). Ask there up to what volume no application is needed where you are, and whether your land counts as Innenbereich (built up area). In the Außenbereich (the open countryside) you almost always need permission. Verfahrensfrei (exempt from any application) only means that nobody checks beforehand. The Bebauungsplan (the local development plan) and the required distances to the boundary hold all the same, and the building inspectorate can still demand removal years later. Before the first spade goes in, get the free search for buried services. The open pit is what can kill you. Beyond 1.25 metres deep, DIN 4124 requires a battered slope or shoring, nobody works down there alone, and the pit is made safe in the evening. And keep the two things apart: verfahrensfrei only means that you file no application. It does not yet make the project lawful, and in the open countryside that is exactly where the real hurdle lies.

What you need

  • 5 reinforced concrete pipes DN 2000, each 100 cm long for a chamber 5 m long
  • 2 precast concrete end walls, one with a door opening of 90 x 190 cm
  • 1 cellar door in larch with a vent slot at the bottom
  • 40 m² of torch on bitumen membrane for waterproofing the outside
  • 40 m² of dimpled sheet with a fleece as a protective layer
  • 25 m of land drain DN 100 plus a rodding chamber for the ring drain
  • 8 m³ of drainage gravel 16/32 for the working space round the walls
  • 10 m of KG-Rohr DN 150 (orange PVC drainage pipe) for the inlet and the outlet air, with a stainless mesh, a rain cowl and a damper
  • 12 m³ of crushed stone 0/32 and sand 0/4 for the base and the bedding
  • 20 running metres of larch board 20 x 2.5 cm for the shelves

Tools

5 t mini digger with a driver, mobile crane, plate compactor, spade, rotating laser level, gas torch, 160 mm core drill, hard hat, safety boots

Step by step

  1. Check the slope and the water. Look for a slope of at least 15 degrees, facing north for preference. Dig a trial hole 200 cm deep in autumn. If water stands in it, the spot is no good.
  2. Settle the structural side. Reinforced concrete pipes DN 2000 come in load classes. Get the works to confirm in writing that they are approved for 100 cm of soil over the top. A vault you build yourself, with no calculation from a structural engineer, can kill you.
  3. The pit and the base. Pit 700 x 400 cm, base 250 cm below ground level, batter 60 degrees in cohesive soil and 45 degrees in sand. From 125 cm deep the DGUV (the German statutory accident insurance body) requires a battered slope or shoring. On the base, compact 30 cm of crushed stone and screed off 10 cm of sand, with a fall of two per cent.
  4. Set the pipes. Each pipe weighs 2.8 tonnes, so this only works with a crane. Close the joints with swelling tape and jointing mortar, then fit the end walls.
  5. Waterproof and drain. Seal the outer faces in two layers and stick the dimpled sheet on. Ring drain at base level with a fall of two per cent to the rodding chamber, bedded in gravel.
  6. Fit the ventilation. The inlet pipe DN 150 runs through the end wall to 20 cm above the cellar floor, and its intake sits outside in the shade, 30 cm above ground. The outlet pipe sits at the highest point of the roof and runs straight up to 50 cm above the earth mound. The two openings need at least 150 cm of height between them, otherwise no stack draught builds up.
  7. Backfill. Fill the working space in layers of 30 cm and compact it lightly, evenly from both sides. 100 cm of soil over the crown, and sow meadow on top.
  8. Fit out and store. Leave the floor as rammed sand and clay, do not concrete it, because that is what holds 85 to 95 per cent humidity. Larch shelves standing 40 cm off the wall. Store from October onwards, aim for 4 to 8 degrees, and keep apples away from potatoes.

Time and cost

Digging and setting the pipes take a day each with hired plant, the waterproofing and the ventilation three or four weekends for two people. All in, 1,500 euros with second-hand pipes and up to 8,000 euros with new parts, plus 400 to 700 euros for the crane.

The three most common mistakes

  • Inlet and outlet at the same height. With no difference in height there is no circulation, the air stands still and everything goes mouldy within six weeks. Set the inlet lower.
  • Built without a calculation. A brick vault or a timber roof will not carry 100 cm of wet soil for long. Use approved precast units or bring in a structural engineer.
  • Floor sealed over. A concrete floor takes the damp out of the cellar, carrots go soft and cabbage wilts. Leave the sand and the clay open.

Worauf es ankommtWhat matters hereOhne getrennte Zu- und Abluft entsteht keine Zirkulation und alles schimmelt. Das ist der eine Fehler, der den ganzen Keller wertlos macht.Without separate inlet and outlet air there is no circulation and everything goes mouldy. That is the one mistake that makes the whole cellar worthless.

Kompostplatz mit drei Kammern, Compost area with three bays
Ein WochenendeOne weekendEtwas ÜbungSome practice helps

Kompostplatz mit drei KammernCompost area with three bays

2 Personen, Paletten je 25 kg, schweres Heben2 people, pallets of 25 kg each, heavy lifting

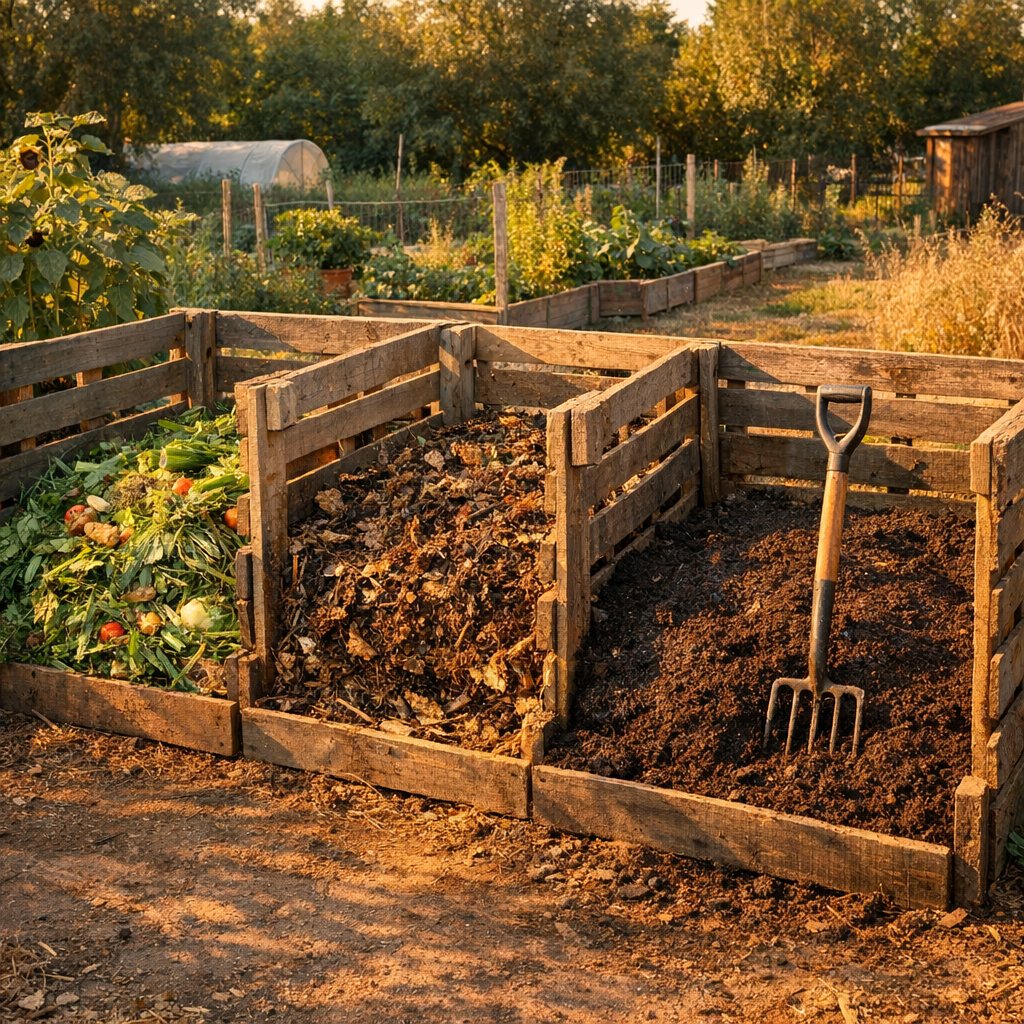
Drei Kammern nebeneinander machen aus einem Haufen ein System: in der ersten landet das Frische, in der zweiten rottet es, aus der dritten holt ihr Erde. Wer umsetzt statt nur aufzuhäufen, ist in vier Monaten fertig statt in zwei Jahren.Three bays side by side turn a heap into a system: the fresh material goes into the first, it rots down in the second, and out of the third you take soil. Turn the heap instead of only piling it up and you are done in four months rather than two years.

So wird gebautHow it is built
Drei Boxen aus Paletten oder Lärchenbrettern mit Luft zwischen den Latten, offen zum Boden, halbschattiger Standort, Deckel oder Vlies gegen Ausschwemmung.Three boxes of pallets or larch boards with air between the slats, open to the ground, in part shade, with a lid or a fleece so the rain does not wash the goodness out.
KostenCost
0 bis 200 Euro0 to 200 euros
Erster SchrittFirst step
Standort in Wegnähe wählen. Ein Kompost, zu dem man laufen muss, wird nicht benutzt.Pick a spot near the path. A compost heap you have to walk to does not get used.
Schritt für SchrittStep by step
Kompostplatz, Ansicht der drei Kammernnach 6 Wochennach 6 Wochen123456789100 cm100 cm105 cm320 cm10 cm1Pfosten 10 x 10 cm, Hülse2Wände aus Europaletten3Schiebebretter in 3 cm Nut4Deckel 130 x 90 cm, geneigt5Kammer 1, frisch geschichtet6Kammer 2, nach sechs Wochen7Kammer 3, reifer Kompost8Reisig 10 cm als Polster9Boden offen, kein BetonNicht maßstäblich, Maße in cm
Bauskizze Kompostplatz mit drei Kammern, am Handy seitlich wischenMeasured sketch of Compost area with three bays, swipe sideways on a phone

Bevor du anfängst

Ein Kompostplatz braucht keine Genehmigung. Die Stelle, bei der du trotzdem nachfragst, ist die Abfallberatung des Landkreises. Frag, ob eure Gemeinde einen Anschlusszwang an die Biotonne hat und was ihr daneben selbst kompostieren dürft. Wollt ihr Material von außerhalb annehmen, wird daraus schnell eine abfallrechtlich relevante Anlage, auch das klärt ihr dort. Den Abstand zur Grenze regelt das Nachbarrecht eures Landes, zwei Meter sind sinnvoller als das Mindestmaß, weil Gerüche mehr Streit machen als jede Vorschrift. Gekochte Speisereste ziehen Ratten an und gehören nicht hinein. Beim Sieben trägst du eine Maske FFP2, im Staub aus reifem Kompost stecken Schimmelsporen.

Das brauchst du

  • 8 Pfosten Lärche oder Eiche 150 x 10 x 10 cm als Tragegerüst
  • 8 Einschlagbodenhülsen 90 cm, damit kein Pfosten im Boden fault
  • 9 Europaletten 120 x 80 cm für Rückwand und Trennwände
  • 36 Lärchenbretter 110 x 12 x 2,4 cm als einschiebbare Vorderwände
  • 16 Latten 100 x 4 x 4 cm als Führungsschienen
  • 3 Deckel 130 x 90 cm aus Siebdruckplatte oder Trapezblech
  • 6 Scharniere und 120 Schrauben 6 x 100 mm für Deckel und Rahmen
  • 1 Sack Urgesteinsmehl 25 kg gegen Geruch und für die Struktur
  • 0,3 m³ Reisig als unterste Belüftungslage
  • 1 Wurfsieb mit 15 mm Maschenweite für den fertigen Kompost

Werkzeug

Spaten, Grabgabel, Schubkarre, Akkuschrauber, Handkreissäge, Vorschlaghammer, Wasserwaage, Mistgabel zum Umsetzen, Handschuhe, Staubmaske

Schritt für Schritt

  1. Standort wählen. Halbschattig, gern unter Holunder oder Hasel, aber am Weg. Ein Kompost, zu dem man 60 m laufen muss, wird nicht benutzt. Davor 150 cm Wendeplatz.
  2. Fläche abstecken. Drei Kammern von je 100 x 100 x 100 cm ergeben 320 x 110 cm Grundfläche. Der Boden bleibt offen, ohne Beton und Folie, damit Würmer einwandern.
  3. Pfosten und Wände. Acht Bodenhülsen im Achsabstand von 105 cm lotrecht einschlagen, Pfosten verschrauben. Rückwand und vier Querwände aus Paletten anschrauben, zwischen den Latten immer 2 cm Luft lassen, sonst fault der Haufen.
  4. Vorderwände als Schiebeböden. An jeden Pfosten zwei Latten so schrauben, dass eine 3 cm breite Nut entsteht. Die Bretter werden von oben eingeschoben und zum Umsetzen einzeln herausgezogen.
  5. Deckel aufsetzen. Leicht nach hinten geneigt, mit 10 cm Überstand. Er hält den Starkregen ab, der sonst die Nährstoffe auswäscht.
  6. Kammer 1 befüllen. Unten 10 cm Reisig als Luftpolster. Dann im Wechsel schichten: 20 cm Grünes (Rasenschnitt, Küchenabfälle), darauf 10 cm Braunes (Häcksel, Laub, Stroh, Pappe). Dazwischen eine Schaufel Gartenerde und Urgesteinsmehl.
  7. Feuchte prüfen. Faustprobe: Eine Handvoll zusammendrücken, es sollen ein bis zwei Tropfen kommen. Zu trockenes Material wird nicht heiß, zu nasses stinkt.
  8. Umsetzen. Nach sechs Wochen Kammer 1 in Kammer 2 werfen, außen nach innen, nach weiteren sechs Wochen von 2 nach 3. Die Temperatur steigt danach wieder auf 55 bis 65 Grad.
  9. Ernten und ausbringen. Nach vier bis fünf Monaten durch das Sieb werfen, Grobes zurück in Kammer 1. Im Frühjahr 3 Liter je Quadratmeter flach einharken, nicht untergraben.

Zeit und Kosten

Zwei Personen bauen den Platz an einem Tag, rund acht Arbeitsstunden. Das Umsetzen einer vollen Kammer dauert 40 Minuten. Aus gebrauchten Paletten kostet er nur die Schrauben, etwa 25 Euro, mit Lärchenholz 150 bis 200 Euro.

Die drei häufigsten Fehler

  • Nur Rasenschnitt eingefüllt. Frisches Gras verdichtet sich zu einer nassen, stinkenden Schicht ohne Sauerstoff. Auf jede Lage Grünes gehört eine halb so dicke Lage Braunes.
  • Auf Beton oder Folie gestellt. Ohne Bodenkontakt kommen weder Würmer noch Pilze hinein, das Sickerwasser steht im Haufen. Stell ihn auf gewachsenen Boden.
  • Zu klein gebaut. Unter einem Kubikmeter erreicht ein Haufen nie die Rottetemperatur, Unkrautsamen und Keime überleben. Ein Meter Kantenlänge je Kammer ist die Untergrenze.

Before you start

A compost area needs no permission. The place to ask all the same is the Abfallberatung (the waste advice service of your district council). Ask whether your parish makes the brown bin compulsory and what you may still compost yourself alongside it. If you want to take in material from outside, it soon becomes a facility that falls under waste law, and they will tell you about that too. The distance to the boundary is set by the Nachbarrecht (the neighbour law of your federal state), and two metres makes more sense than the bare minimum, because smells cause more argument than any rule. Cooked food waste draws rats and does not belong in there. Wear an FFP2 mask when you screen the compost, because the dust off mature compost carries mould spores.

What you need

  • 8 posts of larch or oak 150 x 10 x 10 cm as the frame
  • 8 drive in post anchors, 90 cm, so that no post rots in the ground
  • 9 Euro pallets 120 x 80 cm for the back wall and the dividers
  • 36 larch boards 110 x 12 x 2.4 cm as the sliding front walls
  • 16 battens 100 x 4 x 4 cm as the guide rails
  • 3 lids 130 x 90 cm of Siebdruckplatte (birch plywood with a resin coating) or profiled steel sheet
  • 6 hinges and 120 screws 6 x 100 mm for the lids and the frame
  • 1 sack of Urgesteinsmehl (finely ground rock dust), 25 kg against smells and for structure
  • 0.3 m³ of brushwood as the bottom layer for air
  • 1 throwing screen with a 15 mm mesh for the finished compost

Tools

Spade, digging fork, wheelbarrow, cordless driver, circular saw, sledgehammer, spirit level, muck fork for turning, gloves, dust mask

Step by step

  1. Choose the spot. Part shade, under elder or hazel if you can, but next to the path. A compost heap you have to walk 60 m to does not get used. Leave 150 cm in front to turn the wheelbarrow.
  2. Set out the ground. Three bays of 100 x 100 x 100 cm each come to a footprint of 320 x 110 cm. The ground stays open, with no concrete and no sheeting, so that worms can move in.
  3. Posts and walls. Drive in eight post anchors upright at 105 cm centres and screw the posts into them. Screw on the back wall and four cross walls made of pallets, always leaving 2 cm of air between the slats, otherwise the heap goes putrid.
  4. Front walls as sliding boards. Screw two battens to each post so that a groove 3 cm wide is left between them. The boards drop in from above and come out one at a time when you turn the heap.
  5. Put the lid on. Tilted slightly to the back, with a 10 cm overhang. It keeps off the heavy rain that would otherwise wash the nutrients out.
  6. Fill bay 1. 10 cm of brushwood at the bottom as an air cushion. Then layer in turn: 20 cm of green (grass clippings, kitchen waste), then 10 cm of brown (wood chip, leaves, straw, cardboard). A shovel of garden soil and some rock dust in between.
  7. Check the moisture. The fist test: squeeze a handful and one or two drops should come out. Material that is too dry never heats up, material that is too wet stinks.
  8. Turn it. After six weeks throw bay 1 into bay 2, the outside material to the inside, and after another six weeks from 2 into 3. The temperature climbs back to 55 to 65 degrees afterwards.
  9. Harvest it and spread it. After four or five months throw it through the screen and put the coarse stuff back into bay 1. In spring rake in 3 litres per square metre, shallow, and do not dig it under.

Time and cost

Two people build the whole thing in a day, around eight working hours. Turning a full bay takes 40 minutes. Out of second-hand pallets it costs no more than the screws, about 25 euros, and in larch 150 to 200 euros.

The three most common mistakes

  • Nothing but grass clippings. Fresh grass packs down into a wet, stinking layer with no oxygen in it. Every layer of green needs a layer of brown half as thick on top.
  • Stood on concrete or sheeting. With no contact to the ground neither worms nor fungi get in, and the seepage water stands in the heap. Stand it on undisturbed soil.
  • Built too small. Below one cubic metre a heap never reaches composting temperature, and weed seeds and pathogens survive. One metre each way per bay is the lower limit.

Worauf es ankommtWhat matters hereBraun und grün im Wechsel schichten. Nur Rasenschnitt fault, nur Holz verrottet nicht.Layer brown and green in turn. Grass clippings on their own go putrid, wood on its own does not rot at all.

Saatgutarchiv, Seed archive
Ein WochenendeOne weekendOhne VorkenntnisseNo experience needed

SaatgutarchivSeed archive

1 Person1 person

Wer fünf Jahre lang aus der eigenen Ernte nachbaut, hat am Ende Pflanzen, die auf genau diesen Boden und dieses Klima eingestellt sind und die es sonst nirgends gibt. Nebenbei braucht ihr dann keinen Saatguthersteller mehr.Grow on from your own harvest for five years and you end up with plants tuned to this soil and this climate, plants that exist nowhere else. Along the way you stop needing a seed company at all.

So wird gebautHow it is built
Dunkler, kühler, trockener Schrank, Gläser mit Reiskörnern als Trockenmittel, Etiketten mit Sorte, Jahr und Herkunft. Ein Buch für die Aufzeichnungen.A dark, cool, dry cupboard, jars with rice grains as a drying agent, labels with variety, year and origin. A book for the records.
KostenCost
unter 100 Eurounder 100 euros
Erster SchrittFirst step
Mit Bohnen, Erbsen und Tomaten anfangen. Die sind Selbstbefruchter und machen keine Überraschungen.Start with beans, peas and tomatoes. They pollinate themselves and spring no surprises.
Schritt für SchrittStep by step
Saatgutarchiv, Ansicht des RegalsNordwandGlas im SchnittArtSorteErntejahr123456789150 cm60 cm26 cm16 cm18 cm1Schrank 60 x 40 x 150 cm2Vier Fachböden, 60 Gläser3Schraubglas 250 bis 500 ml4Papiertüten 8 x 12 cm5Stoffsäckchen mit Reis6Etikett mit Art und Jahr7Schubladen für Tüten, Sieb8Hygrometer, Summe unter 709Karteikasten, SortenbuchNicht maßstäblich, Maße in cm
Bauskizze Saatgutarchiv, am Handy seitlich wischenMeasured sketch of Seed archive, swipe sideways on a phone

Bevor du anfängst

Für den eigenen Bedarf und den Tausch unter Gärtnern müsst ihr nichts anmelden. Sobald ihr Saatgut verkauft, greift das Saatgutverkehrsgesetz, und dann ist das Bundessortenamt die Stelle, bei der ihr nachfragt. Die Frage dort lautet, ob eure Sorte zugelassen oder als Erhaltungssorte eingetragen ist und welche Ausnahmen für kleine Mengen gerade gelten, denn daran hat sich mehrfach etwas geändert. Beim Vermehren selbst zählt der Abstand, Fremdbefruchter kreuzen sich weit: bei Kürbis und Möhre rechnet ihr 500 Meter, bei Kohl 1.000 Meter, sonst hilft nur ein Netz. Achtet darauf, dass gebeiztes Saatgut aus dem Handel niemals im Archiv landet.

Das brauchst du

  • 1 Holzschrank mit Tür, mindestens 60 x 40 x 150 cm an einer kühlen Nordwand
  • 60 Schraubgläser 250 bis 500 ml als luftdichte Behälter
  • 200 Papiertüten 8 x 12 cm zum Sortieren in den Gläsern
  • 2 kg Rundkornreis oder Silicagel als Trockenmittel
  • 60 Stoffsäckchen 6 x 8 cm für das Trockenmittel im Glas
  • 1 Thermo-Hygrometer zur Kontrolle von Temperatur und Luftfeuchte
  • 1 Feinwaage mit 0,1 g Auflösung zum Portionieren
  • 1 Siebsatz mit 1, 2 und 4 mm Maschenweite zum Reinigen
  • 1 gebundenes Buch als Sortenbuch plus Stift und Etiketten
  • 10 m² Insektenschutznetz, 0,8 mm Masche zum Abdecken kreuzender Arten

Werkzeug

Zwei Schüsseln, feines Küchensieb, Küchentücher, Gartenschere, Leinensack zum Ausklopfen, Markierungsband, Trichter, Ventilator

Schritt für Schritt

  1. Lagerplatz einrichten. Nordwand, kein Dachboden (dort werden es im Juli 60 Grad), kein feuchter Keller. Temperatur in Grad plus Luftfeuchte in Prozent bleiben unter 70.
  2. Mit einfachen Arten beginnen. Im ersten Jahr nur Selbstbefruchter: Buschbohne 'Maxi', Stangenbohne 'Neckarkönigin', Erbse 'Kleine Rheinländerin', Tomate 'Matina', Kopfsalat 'Maikönig'. Nur samenfeste Sorten, niemals F1-Hybriden.
  3. Genug Pflanzen anbauen. Du brauchst mindestens 15 Bohnenpflanzen, 6 Tomaten und 20 Salatpflanzen. Aus zwei Pflanzen wird die Sorte binnen fünf Jahren schwach und krankheitsanfällig.
  4. Mutterpflanzen auswählen. Im Juli die drei kräftigsten Pflanzen mit Band markieren, nach Gesundheit, Ertrag und Reifezeit. Von diesen wird nichts geerntet, sie bleiben bis zur Samenreife stehen.
  5. Richtig ernten. Bohnen und Erbsen an der Pflanze trocknen lassen, bis die Hülsen rascheln, meist Ende August. Tomaten überreif pflücken. Salat, wenn ein Drittel der Samenstände flauschig ist.
  6. Saatgut reinigen. Bohnen, Erbsen und Salat im Leinensack ausklopfen, sieben und die Spreu vor einem Ventilator abblasen. Tomaten und Gurken ausquetschen, das Mus zwei bis drei Tage bei 20 Grad stehen lassen, dann spülen.
  7. Nachtrocknen. Sieben bis vierzehn Tage auf Papier bei höchstens 30 Grad, niemals in der Sonne oder auf der Heizung. Test: Eine Bohne muss beim Hammerschlag zerspringen, nicht platt werden.
  8. Abfüllen und beschriften. Glas füllen, ein Stoffsäckchen mit zwei Esslöffeln Reis dazulegen, fest verschließen. Etikett mit Art, Sorte, Erntejahr, Ort und Zahl der Mutterpflanzen, alles zusätzlich ins Sortenbuch eintragen.
  9. Keimprobe im Januar. 20 Körner auf feuchtes Küchenpapier in eine Dose bei 20 Grad. Nach sieben bis zehn Tagen zählen. Unter 70 Prozent Keimung neu vermehren. Haltbarkeit: Bohne vier Jahre, Tomate sechs, Möhre zwei, Pastinake eines.

Zeit und Kosten

Der Schrank ist an einem Nachmittag eingerichtet. Je Art rechnest du über die Saison mit zwei bis vier Stunden für Auswahl, Ernte und Reinigung. Gläser, Waage und Hygrometer kosten unter 100 Euro. Ab dem zweiten Jahr sparst du 80 bis 150 Euro im Jahr.

Die drei häufigsten Fehler

  • Zu feucht abgefüllt. Saatgut mit über zehn Prozent Restfeuchte schimmelt im geschlossenen Glas oder keimt darin. Mach den Bruchtest, bevor du abfüllst.
  • Hybridsorten vermehrt. Aus F1-Saatgut wachsen in der zweiten Generation völlig unterschiedliche, meist schwächere Pflanzen. Achte beim Kauf auf die Angabe samenfest.
  • Zu wenige Mutterpflanzen. Wer jedes Jahr von derselben einen Pflanze nachbaut, züchtet Inzuchtschwäche heran. Mische Samen von mindestens drei Pflanzen.

Before you start

For your own use and for swapping among gardeners you have to register nothing. As soon as you sell seed, the Saatgutverkehrsgesetz (the German seed trade act) applies, and then the Bundessortenamt (the federal plant variety office) is the place to ask. The question to put there is whether your variety is approved or entered as a conservation variety, and which exemptions for small quantities are in force at the moment, because that has changed several times. In the growing itself, distance is what counts, since cross pollinators reach a long way: reckon on 500 metres for squash and carrot and 1,000 metres for cabbage, and beyond that only a net helps. Make sure that treated seed from the shops never ends up in the archive.

What you need

  • 1 wooden cupboard with a door, at least 60 x 40 x 150 cm against a cool north wall
  • 60 screw top jars, 250 to 500 ml as airtight containers
  • 200 paper bags 8 x 12 cm for sorting inside the jars
  • 2 kg of short grain rice or silica gel as a drying agent
  • 60 cloth bags 6 x 8 cm for the drying agent in the jar
  • 1 thermo-hygrometer to keep track of temperature and humidity
  • 1 fine scale reading to 0.1 g for weighing out portions
  • 1 set of sieves with 1, 2 and 4 mm mesh for cleaning
  • 1 bound book to serve as the variety register plus a pen and labels
  • 10 m² of insect netting, 0.8 mm mesh to cover the species that cross

Tools

Two bowls, fine kitchen sieve, kitchen paper, secateurs, linen sack for threshing, marking tape, funnel, fan

Step by step

  1. Set up the store. A north wall, no loft (it reaches 60 degrees up there in July), no damp cellar. Temperature in degrees plus humidity in per cent should stay under 70.
  2. Begin with the easy species. In the first year, self pollinators only: dwarf bean 'Maxi', climbing bean 'Neckarkönigin', pea 'Kleine Rheinländerin', tomato 'Matina', butterhead lettuce 'Maikönig'. Open pollinated varieties only, never F1 hybrids.
  3. Grow enough plants. You need at least 15 bean plants, 6 tomatoes and 20 lettuces. Taken from two plants, the variety turns weak and prone to disease within five years.
  4. Pick the mother plants. In July mark the three strongest plants with tape, going by health, yield and ripening time. Nothing is picked off these, they stand until the seed is ripe.
  5. Harvest properly. Let beans and peas dry on the plant until the pods rattle, usually at the end of August. Pick tomatoes over ripe. Lettuce when a third of the seed heads has gone fluffy.
  6. Clean the seed. Thresh beans, peas and lettuce in the linen sack, sieve them and blow the chaff off in front of a fan. Squeeze tomatoes and cucumbers out, leave the pulp for two or three days at 20 degrees, then rinse it.
  7. Dry it off. Seven to fourteen days on paper at 30 degrees at most, never in the sun and never on a radiator. The test: a bean has to shatter under a hammer blow, not go flat.
  8. Fill the jars and label them. Fill the jar, put in a cloth bag with two tablespoons of rice and close it tight. The label carries species, variety, year of harvest, place and the number of mother plants, and all of it goes into the variety register as well.
  9. Germination test in January. 20 seeds on damp kitchen paper in a tub at 20 degrees. Count after seven to ten days. Below 70 per cent germination, grow a fresh batch. Keeping time: bean four years, tomato six, carrot two, parsnip one.

Time and cost

The cupboard is set up in an afternoon. Per species, reckon on two to four hours over the season for selecting, harvesting and cleaning. Jars, scale and hygrometer cost under 100 euros. From the second year on you save 80 to 150 euros a year.

The three most common mistakes

  • Filled in too damp. Seed with more than ten per cent moisture left in it goes mouldy in a closed jar, or germinates in there. Do the breaking test before you fill.
  • Hybrids saved for seed. From F1 seed the second generation grows into completely different and usually weaker plants. When you buy, look for the word samenfest, which means open pollinated.
  • Too few mother plants. Save from the same single plant year after year and you breed in inbreeding depression. Mix seed from at least three plants.

Worauf es ankommtWhat matters hereKürbis, Kohl und Möhre kreuzen sich weiträumig aus. Für diese Arten braucht ihr Abstand oder Abdeckung.Squash, cabbage and carrot cross over long distances. For those species you need either separation or a cover.

Anbau in die Höhe, Growing upwards
Ein WochenendeOne weekendEtwas ÜbungSome practice helps

Anbau in die HöheGrowing upwards

1 bis 2 Personen1 to 2 people

Ein Garten wird immer in Quadratmetern gerechnet, dabei steht der Raum darüber leer. Wer senkrecht pflanzt, vervielfacht die Anbaufläche, ohne einen Meter Boden dazuzugewinnen. An einer sonnigen Wand von zwei mal drei Metern wächst mehr Salat als in einem ganzen Beet.A garden always gets counted in square metres, and all the while the space above it stands empty. Plant upwards and you multiply the growing area without gaining a single metre of ground. A sunny wall of two by three metres grows more lettuce than a whole bed.

So wird gebautHow it is built
Drei Wege, die sich kombinieren lassen. Pflanztaschen oder Töpfe an einem Lattengerüst an der Wand. Regale in Etagen, sodass Gießwasser von oben durch alle Ebenen läuft. Und Rankgerüste für alles, was ohnehin klettern will: Bohnen, Gurken, Zucchini, Kürbis, Melone. Turmbeete wie der Kartoffelturm arbeiten nach demselben Prinzip.Three ways that can be combined. Planting pockets or pots on a batten frame against the wall. Shelves in tiers, so that the water you pour in at the top runs down through every level. And frames for everything that wants to climb anyway: beans, cucumbers, courgettes, squash, melon. Tower beds like the potato tower work on the same principle.
KostenCost
50 bis 400 Euro50 to 400 euros
Erster SchrittFirst step
Eine Wand suchen, die von zehn bis sechzehn Uhr Sonne hat, und dort anfangen. Nordwände bringen nichts außer Schnecken.Find a wall that gets sun from ten in the morning until four in the afternoon, and start there. North walls bring nothing but slugs.
Schritt für SchrittStep by step
Anbau in die Höhe, AnsichtDetail4 cm123456789300 cm50 cm25 cm180 cm60 cm1Tragelatte 6 x 4 cm2Riegel auf 60, 120, 180 cm3Abstandshalter 4 cm Luft4Pflanzkübel 12 Liter5Tropfschlauch 2 l je Stunde6Rankschnur alle 25 cm7Stangenbohne, 6 Korn8Erdanker für die Schnüre9Auffangrinne am PutzNicht maßstäblich, Maße in cm
Bauskizze Anbau in die Höhe, am Handy seitlich wischenMeasured sketch of Growing upwards, swipe sideways on a phone

Bevor du anfängst

Zur Miete ist der Vermieter die Stelle, die zustimmen muss, und zwar schriftlich, bevor die erste Bohrung in der Fassade sitzt. Frag ihn ausdrücklich nach Bohrungen, nach Lasten an der Brüstung und nach dem Rückbau am Ende des Mietverhältnisses. Viele Hausordnungen verbieten Kästen außen am Balkon, und zwar aus gutem Grund. Genau das ist hier die Gefahr: ein nasser Pflanzkasten wiegt schnell 30 Kilogramm und trifft im Zweifel jemanden auf dem Gehweg. Häng nichts nach außen, prüfe die Tragfähigkeit des Untergrundes mit einem Testdübel und nimm bei Hohlblockstein Injektionsanker. Bau im März oder April auf, dann steht alles vor der Aussaat.

Das brauchst du

  • 6 Lärchenlatten 300 x 6 x 4 cm als senkrechte Tragelatten
  • 4 Lärchenlatten 200 x 6 x 4 cm als Riegel auf 60, 120 und 180 cm
  • 20 Abstandshalter 4 cm mit Fassadendübel 10 x 100 mm für die Hinterlüftung
  • 12 Pflanzkübel mit 12 Litern Inhalt, mit Wasserablauf im Boden
  • 150 Liter Substrat aus Kompost, Gartenerde, Kokosfaser und Blähton
  • 30 Liter Blähton als Drainage, 3 cm je Topf
  • 15 m Tropfschlauch mit 12 Tropfern à 2 l/h für die Bewässerung
  • 1 Bewässerungscomputer mit Zeitschaltuhr am Hahn oder an der Regentonne
  • 20 m Rankschnur plus 10 Ösen für Bohnen und Gurken
  • 1 Auffangrinne 200 cm gegen Spritzwasser am Putz

Werkzeug

Bohrhammer mit 10 mm Steinbohrer, Akkuschrauber, Wasserwaage 100 cm, Zollstock, Handsäge, Leiter, Schutzbrille, Staubsauger

Schritt für Schritt

  1. Wand prüfen. Die Fläche muss von 10 bis 16 Uhr Sonne bekommen, also Süd oder Südwest. Nordwände bringen nur Schnecken. Unter einem Dachüberstand ist Bewässerung Pflicht.
  2. Untergrund testen. Vollziegel und Beton tragen problemlos. Bei einem Wärmedämmverbundsystem darfst du nicht bohren, dort steht ein freies Gerüst vor der Wand in Bodenhülsen.
  3. Last rechnen. Ein 12-Liter-Topf wiegt nass rund 15 kg, zwölf Töpfe plus Gerüst ergeben 205 kg. Ein Fassadendübel in Vollziegel hält etwa 40 kg, plane mindestens zwölf Dübel.
  4. Lattenrost montieren. Senkrechte Latten alle 50 cm setzen, immer mit 4 cm Abstandshaltern. Ohne Luftspalt bleibt die Wand feucht und der Putz platzt nach zwei Wintern ab.
  5. Töpfe aufhängen und füllen. Drei Reihen auf 60, 120 und 180 cm, je vier Töpfe im Abstand von 50 cm, die unterste 30 cm über dem Boden. In jeden Topf 3 cm Blähton, Vlies, dann Substrat bis 3 cm unter den Rand.
  6. Bewässerung installieren. Tropfschlauch am obersten Riegel entlangführen, je Topf einen Tropfer mit 2 l/h. Zeitschaltuhr im Mai einmal täglich sechs Minuten, im Juli zweimal acht Minuten.
  7. Rankgerüst spannen. Schnüre alle 25 cm senkrecht vom Erdanker bis zur Öse auf 220 cm. Stangenbohne 'Neckarkönigin' ab Mitte Mai mit sechs Korn je Schnur, Gurke 'Tanja' alle 30 cm.
  8. Etagen bepflanzen. Ab April Pflücksalat 'Salad Bowl' mit 20 cm Abstand, dazu Spinat und Radieschen. Ab Mitte Mai je Topf drei Erdbeeren 'Ostara' oder Kräuter. Im August Feldsalat.
  9. Winterfest machen. Im November Töpfe leeren oder mit Vlies und Noppenfolie einpacken, denn Frost dringt seitlich in kleine Gefäße ein. Tropfleitung entleeren.

Zeit und Kosten

Eine bis zwei Personen brauchen ein Wochenende, etwa zehn Stunden. Das Bohren des Lattenrosts dauert am längsten. Material 50 Euro mit gebrauchten Eimern, 400 Euro mit Systemtöpfen.

Die drei häufigsten Fehler

  • Zu kleine Gefäße. Töpfe unter zehn Litern sind an einem heißen Julitag bis mittags leer. Ab zehn Litern, besser zwölf, hält die Erde einen Tag durch.
  • Ohne Hinterlüftung geschraubt. Direkt an die Wand montierte Latten stauen Feuchte, der Putz wird nass und friert im Winter auf. Vier Zentimeter Luft trocknen die Wand.
  • Obere Reihe vergessen. Was oben hängt, bekommt beim Gießen am wenigsten und trocknet zuerst aus. Setz oben robuste Kräuter oder gib jedem Topf einen Tropfer.

Before you start

In rented property the Vermieter (the landlord) is the one who has to agree, and in writing, before the first hole goes into the facade. Ask specifically about drilling, about loads on the balcony parapet and about putting everything back at the end of the tenancy. Many house rules forbid boxes on the outside of a balcony, and for good reason. That is where the danger sits here: a wet planter soon weighs 30 kilograms, and if it comes down it hits somebody on the pavement. Hang nothing on the outside, test what you are fixing into with a trial plug, and use resin anchors in hollow block. Build in March or April, then everything stands ready before sowing.

What you need

  • 6 larch battens 300 x 6 x 4 cm as the upright bearers
  • 4 larch battens 200 x 6 x 4 cm as rails at 60, 120 and 180 cm
  • 20 spacers of 4 cm with facade fixings 10 x 100 mm for the air gap behind
  • 12 planters holding 12 litres each, with drainage in the base
  • 150 litres of growing mix of compost, garden soil, coir and expanded clay
  • 30 litres of expanded clay as drainage, 3 cm per pot
  • 15 m of drip line with 12 drippers at 2 l/h for the watering
  • 1 watering controller with a timer on the tap or on the water butt
  • 20 m of climbing twine plus 10 eyelets for beans and cucumbers
  • 1 catch gutter of 200 cm to keep splashes off the render

Tools

Hammer drill with a 10 mm masonry bit, cordless driver, spirit level 100 cm, folding rule, hand saw, ladder, safety glasses, vacuum cleaner

Step by step

  1. Check the wall. The face has to get sun from 10 in the morning until 4 in the afternoon, so south or south west. North walls bring nothing but slugs. Under an overhanging roof, watering is not optional.
  2. Test what you are fixing into. Solid brick and concrete carry the load without trouble. Into a Wärmedämmverbundsystem (external wall insulation) you must not drill at all, and there a free standing frame goes in front of the wall in ground sockets.
  3. Work out the load. A 12 litre pot weighs around 15 kg wet, and twelve pots plus the frame come to 205 kg. One facade fixing in solid brick holds about 40 kg, so allow at least twelve of them.
  4. Fit the batten frame. Set the upright battens every 50 cm, always on 4 cm spacers. Without an air gap the wall stays damp and the render blows off after two winters.
  5. Hang the pots and fill them. Three rows at 60, 120 and 180 cm, four pots in each at 50 cm spacing, the lowest row 30 cm off the ground. In each pot 3 cm of expanded clay, a fleece, then growing mix to 3 cm below the rim.
  6. Install the watering. Run the drip line along the top rail, one dripper at 2 l/h per pot. Set the timer in May for six minutes once a day, in July for eight minutes twice a day.
  7. Tension the climbing frame. Strings every 25 cm, running straight up from a ground anchor to an eyelet at 220 cm. Climbing bean 'Neckarkönigin' from mid May with six seeds per string, cucumber 'Tanja' every 30 cm.
  8. Plant the tiers. From April, loose leaf lettuce 'Salad Bowl' at 20 cm spacing, with spinach and radishes. From mid May, three strawberries 'Ostara' per pot, or herbs. In August, lamb's lettuce.
  9. Make it ready for winter. In November either empty the pots or wrap them in fleece and Noppenfolie (dimpled drainage membrane), because frost gets into small containers from the side. Drain the drip line.

Time and cost

One or two people need a weekend, about ten hours. Drilling for the batten frame takes the longest. Material 50 euros with second-hand buckets, 400 euros with proper planting systems.

The three most common mistakes

  • Containers too small. Pots under ten litres are empty by midday on a hot day in July. From ten litres upwards, better twelve, the soil lasts a whole day.
  • Screwed on with no air gap. Battens fixed straight onto the wall trap the damp, the render gets wet and the frost breaks it open in winter. Four centimetres of air dry the wall out.
  • Top row forgotten. Whatever hangs at the top gets the least when you water and dries out first. Put tough herbs up there, or give every pot its own dripper.

Worauf es ankommtWhat matters hereDas eine Problem ist Wasser. Kleine Gefässe trocknen an einem heißen Julitag komplett aus, und was oben hängt, bekommt am wenigsten ab. Entweder Tropfbewässerung mit Zeitschaltuhr oder Gefässe ab zehn Litern. Das zweite ist Gewicht: nasse Erde wiegt ein Vielfaches der trockenen, das muss die Wand tragen.The first problem is water. Small containers dry out completely on a hot July day, and whatever hangs at the top gets the least. Either drip irrigation on a timer or containers of ten litres and up. The second is weight: wet soil weighs several times what dry soil weighs, and the wall has to carry it.

Kartoffelturm, Potato tower
Ein WochenendeOne weekendOhne VorkenntnisseNo experience needed

KartoffelturmPotato tower

2 Personen2 people

Ein Quadratmeter Boden, aufgestellt in die Senkrechte. Kartoffeln bilden Wurzeln entlang des ganzen verschütteten Stiels, wer also mitwächst und immer wieder auffüllt, erntet aus einem Turm, was sonst ein halbes Beet braucht.One square metre of soil, stood up on end. Potatoes form roots along the whole buried stem, so if you keep topping up as the plant grows, one tower gives you what would otherwise take half a bed.

So wird gebautHow it is built
Ring aus Draht, Holzlatten oder gestapelten Paletten, etwa achtzig Zentimeter hoch. Unten Stroh und Erde, Knollen einlegen, und bei jedem Handbreit Wuchs seitlich Stroh und Erde nachfüllen, bis der Turm voll ist.A ring of wire mesh, timber battens or stacked pallets, about eighty centimetres high. Straw and soil at the bottom, lay in the tubers, then add more straw and soil at the sides with every hand's width of growth, until the tower is full.
KostenCost
20 bis 80 Euro20 to 80 euros
Erster SchrittFirst step
Vorgekeimte Knollen frühfester Sorten besorgen. Späte Sorten stehen zu lange im Turm und faulen eher.Get chitted tubers of an early, firm variety. Late varieties stand in the tower too long and are more likely to rot.
Schritt für SchrittStep by step
Kartoffelturm, Schnitt12345678990 cm Durchmesser100 cm80 cm hoch30 cm tief10 cm1Volierendraht, 90 cm Durchmesser2Holzpfahl 5 x 5 cm, 30 cm tief3Stroh an der Innenwand4Erde und Kompost, halb und halb5Pflanzstelle, sechs Knollen6Gießrohr DN 75, seitlich gelocht7Sandbett gegen Staunässe8Wühlmausgitter, Masche 13 mm9Anhäufeln alle 20 cm TriebNicht maßstäblich, Maße in cm
Bauskizze Kartoffelturm, am Handy seitlich wischenMeasured sketch of Potato tower, swipe sideways on a phone

Bevor du anfängst

Im Kleingarten ist der Vereinsvorstand die Stelle, die ihr fragt, auf Pachtland der Verpächter. Erkundigt euch, ob ein befristeter Aufbau erlaubt ist und wie der Rückbau geregelt wird, das steht meist in der Gartenordnung. Nimm zertifiziertes Pflanzgut aus dem Fachhandel und keine Speiseware aus dem Supermarkt, der Grund sind eingeschleppte Viren und Nematoden. Halte vier Jahre Anbaupause auf derselben Fläche ein. Gefährlich ist das Gewicht: ein 80 Zentimeter hoher Turm wiegt nass über 300 Kilogramm und kann ein Kind unter sich begraben, wenn er kippt. Verankere ihn und stell ihn nicht auf Gefälle. Grün gewordene Knollen enthalten Solanin.

Das brauchst du

  • 3 m Volierendraht, Masche 25 mm, 100 cm hoch als Mantel
  • 8 kg vorgekeimte Pflanzkartoffeln, frühe Sorte wie Nicola oder Sieglinde als Saatgut
  • 1 Ballen Stroh, ungespritzt, 15 kg für die Wandfüllung
  • 200 l Gartenerde und reifer Kompost, halb und halb als Wachstumsschicht
  • 3 Holzpfähle 5 x 5 cm, 120 cm lang zur Stabilisierung
  • 1 KG-Rohr DN 75, 90 cm, seitlich gelocht als Gießrohr in die Mitte
  • 25 kg Sand als Drainage unter dem Turm
  • 1 m² Wühlmausgitter, Masche 13 mm gegen Nager
  • 20 Kabelbinder zum Schließen des Mantels
  • 1 kg Hornspäne für die Düngergabe im Juni

Werkzeug

Spaten, Seitenschneider, Vorschlaghammer, Zollstock, Wasserwaage, Schubkarre, Gießkanne, Arbeitshandschuhe

Schritt für Schritt

  1. Standort wählen. Er braucht 6 Stunden Sonne und höchstens 5 Prozent Gefälle. Halte 80 cm Abstand zum Nachbarbeet.
  2. Knollen vorkeimen. Ab Mitte Februar hell und kühl bei 10 bis 15 Grad in flache Kisten stellen. Nach 4 bis 6 Wochen sind die Keime 2 cm lang und dunkelgrün.
  3. Fundament legen. Kreis von 90 cm Durchmesser abstechen, Grasnarbe 10 cm tief abtragen, Wühlmausgitter auslegen, 5 cm Sand einbringen und waagerecht abziehen.
  4. Mantel aufstellen. Draht zum Zylinder von 90 cm Durchmesser rollen, 15 cm überlappen, alle 20 cm mit Kabelbindern schließen. Drei Pfähle 30 cm tief einschlagen und anbinden.
  5. Knollen legen. Innenwand mit 10 cm Stroh auskleiden, 20 cm Erde einfüllen, Gießrohr mittig stellen. Ab Mitte April bei 8 Grad Bodentemperatur sechs Knollen im Kreis legen, 8 cm Erde darüber.
  6. Anhäufeln. Bei 20 cm Triebhöhe seitlich 10 cm Stroh nachlegen und Erde bis 5 cm unter die Spitzen füllen. Alle 2 bis 3 Wochen wiederholen, vier bis fünf Runden bis 80 cm.
  7. Gießen und düngen. 10 bis 15 l pro Woche ins Rohr, bei über 25 Grad täglich 5 l. Nach sechs Wochen 300 g Hornspäne einarbeiten.
  8. Ernten. 90 bis 110 Tage nach dem Legen, wenn das Kraut gelb wird. Mantel aufschneiden, Turm auf eine Plane kippen, Knollen absammeln, dunkel bei 4 bis 8 Grad lagern.

Zeit und Kosten

Zu zweit steht der Turm in 3 bis 4 Stunden. Dazu vier Anhäufel-Runden von je 30 Minuten und im Sommer 10 Minuten Gießen am Tag. Material 20 bis 80 Euro, Ertrag 8 bis 15 kg.

Die drei häufigsten Fehler

  • Zu spät angehäufelt. Steht der Trieb schon 40 cm hoch, bildet er unten keine Wurzeln mehr und es bleibt bei 2 kg Ernte. Sieh zweiwöchentlich nach.
  • Kein Gießrohr eingebaut. Wasser von oben läuft außen am Stroh ab, der Kern bleibt staubtrocken und die Knollen bleiben murmelgroß.
  • Staunässe am Fuß. Ohne Sandbett steht der Turm im Wasser, die unteren Knollen faulen und der Aufbau kippt seitlich weg.

Before you start

In an allotment the Vereinsvorstand (the board of the allotment association) is who you ask, on rented land it is the landlord. Ask whether a temporary structure is allowed and how it has to be taken down again, that is usually written in the Gartenordnung (the association's garden rules). Use certified seed potatoes from a proper supplier and not eating potatoes from the supermarket, because of imported viruses and nematodes. Leave four years before potatoes go on the same ground again. The weight is what makes this dangerous: a tower 80 centimetres high weighs over 300 kilograms when wet and can bury a child underneath it if it goes over. Anchor it, and do not stand it on a slope. Tubers that have turned green contain solanine.

What you need

  • 3 m of Volierendraht (welded aviary mesh), 25 mm mesh, 100 cm high as the outer skin
  • 8 kg of chitted seed potatoes, an early variety such as Nicola or Sieglinde as planting stock
  • 1 bale of unsprayed straw, 15 kg for the wall packing
  • 200 l of garden soil and ripe compost, half and half as the growing layer
  • 3 wooden stakes 5 x 5 cm, 120 cm long to hold it steady
  • 1 KG-Rohr DN 75 (the orange PVC drainage pipe), 90 cm, drilled along the side as a watering pipe down the middle
  • 25 kg of sand as drainage under the tower
  • 1 m² of Wühlmausgitter (fine galvanised mesh against voles), 13 mm mesh to keep rodents out
  • 20 cable ties for closing the skin
  • 1 kg of Hornspäne (horn shavings, a slow nitrogen feed) for the feed in June

Tools

Spade, side cutters, sledgehammer, folding rule, spirit level, wheelbarrow, watering can, work gloves

Step by step

  1. Choose the spot. It needs 6 hours of sun and no more than 5 per cent slope. Keep 80 cm clear of the next bed.
  2. Chit the tubers. From the middle of February, stand them in shallow trays somewhere light and cool at 10 to 15 degrees. After 4 to 6 weeks the shoots are 2 cm long and dark green.
  3. Lay the base. Cut out a circle 90 cm across, strip the turf 10 cm deep, lay the vole mesh, then spread 5 cm of sand and level it.
  4. Stand the skin up. Roll the mesh into a cylinder 90 cm across, overlap it by 15 cm and close it with cable ties every 20 cm. Drive the three stakes 30 cm into the ground and tie the mesh to them.
  5. Lay the tubers. Line the inside wall with 10 cm of straw, fill in 20 cm of soil and stand the watering pipe in the middle. From the middle of April, once the soil is at 8 degrees, lay six tubers in a circle and cover them with 8 cm of soil.
  6. Earth up. Once the shoots stand 20 cm high, add another 10 cm of straw at the sides and fill in soil to 5 cm below the tips. Repeat every 2 to 3 weeks, four or five rounds until you reach 80 cm.
  7. Water and feed. 10 to 15 l a week into the pipe, and 5 l a day once it goes above 25 degrees. After six weeks work in 300 g of horn shavings.
  8. Harvest. 90 to 110 days after planting, when the foliage turns yellow. Cut the skin open, tip the tower onto a tarpaulin, pick out the tubers and store them in the dark at 4 to 8 degrees.

Time and cost

With two of you the tower is up in 3 to 4 hours. On top of that come four rounds of earthing up at 30 minutes each, and 10 minutes of watering a day in summer. Materials 20 to 80 euros, yield 8 to 15 kg.

The three most common mistakes

  • Earthed up too late. Once a shoot stands 40 cm high it forms no more roots lower down, and the harvest stops at 2 kg. Look in every two weeks.
  • No watering pipe fitted. Water poured on top runs off down the outside of the straw, the core stays bone dry and the tubers stay the size of marbles.
  • Waterlogged at the foot. Without the sand bed the tower stands in water, the lower tubers rot and the whole stack leans over and falls.

Worauf es ankommtWhat matters hereDer Turm trocknet schneller aus als jedes Beet. Ohne regelmäßiges Gießen bleiben die Knollen klein, und Staunässe am Fuß lässt sie kippen.The tower dries out faster than any bed. Without regular watering the tubers stay small, and waterlogged ground at the foot will tip the whole thing over.

Hanggewächshaus, Greenhouse dug into a slope
Längeres VorhabenA longer projectMit erfahrener HandNeeds an experienced hand

HanggewächshausGreenhouse dug into a slope

3 Personen plus Baggerfahrer, schweres Heben3 people plus a digger operator, heavy lifting

In den Hang gegraben, nach Süden verglast, nach Norden im Erdreich. Der Boden hält die Wärme des Tages fest, deshalb bleibt es drinnen frostfrei, wenn draußen schon alles erfroren ist. In Südamerika heißt diese Bauform Walipini.Dug into the slope, glazed to the south, in the ground to the north. The earth holds the warmth of the day, so it stays frost free inside when everything outside has frozen already. In South America this form is called a walipini.

So wird gebautHow it is built
Grube in den Hang, Rückwand als Erd- oder Trockenmauer, Dach als schräge Verglasung im Winkel der Wintersonne. Entwässerung nach unten ist Pflicht, sonst steht die Grube nach dem ersten Starkregen voll.A pit dug into the slope, a back wall of earth or dry stone, and a sloping glazed roof set at the angle of the winter sun. Drainage running downhill is not optional, otherwise the pit stands full after the first heavy rain.
KostenCost
1.500 bis 8.000 Euro1,500 to 8,000 euros
Erster SchrittFirst step
Grundwasserstand und Hangneigung prüfen, bevor gegraben wird. An falscher Stelle wird aus dem Gewächshaus eine Zisterne.Check the groundwater level and the fall of the slope before anyone digs. In the wrong place the greenhouse turns into a cistern.
Schritt für SchrittStep by step
Hanggewächshaus, Schnitt123456789400 cm breit240 cm120 cm200 cm tief40 Grad1Rückwand aus Schalungssteinen2Abdichtung, XPS 80 mm, Noppen3Ringdrainage DN 100 im Kies4Sparren mit Stegplatten 16 mm5Firstlüfter 100 x 60 cm6Zuluftklappe 40 x 30 cm7Wasserfässer als Wärmespeicher8Blockstufen 17 auf 30 cm9Beet mit 40 cm MutterbodenNicht maßstäblich, Maße in cm
Bauskizze Hanggewächshaus, am Handy seitlich wischenMeasured sketch of Greenhouse dug into a slope, swipe sideways on a phone

Bevor du anfängst

Die untere Bauaufsichtsbehörde im Landratsamt ist eure erste Adresse. Frag dort, bis zu welchem Rauminhalt ein Gewächshaus bei euch ohne Antrag steht und was die zwei Meter tiefe Grube daran ändert, denn mit ihr kommen Standsicherheit und Abstandsflächen ins Spiel. Bring Schnitt, Lageplan und die Grundstücksgrenzen mit. Verfahrensfrei heißt nur, dass niemand vorher prüft, im Außenbereich braucht ihr fast immer einen Bauantrag. Hol die kostenlose Leitungsauskunft bei Strom, Gas und Wasserversorger ein. Das eigentliche Risiko ist die Grube. Bis 1,25 Meter darf senkrecht abgegraben werden, darüber verlangt DIN 4124 Böschung oder Verbau. Niemand arbeitet allein darin, und abends sichert ein Bauzaun die Kante.

Das brauchst du

  • 32 m² Stegdoppelplatten Polycarbonat 16 mm als Dachverglasung
  • 10 Kanthölzer Douglasie 10 x 10 cm, 4 m lang als Sparren
  • 60 Schalungssteine 50 x 25 x 25 cm für die Rückwand
  • 3 m³ Beton C25/30 mit 12 Bewehrungsstäben 12 mm für Fundament und Wand
  • 25 m Drainagerohr DN 100 mit Filtervlies zur Entwässerung
  • 6 m³ Drainagekies 16/32 zum Hinterfüllen
  • 40 m² Bitumenbahn, Noppenbahn und 24 m² XPS 80 mm als Abdichtung und Dämmung
  • 1 Firstlüfter 100 x 60 cm, 2 Zuluftklappen 40 x 30 cm, 2 Wachszylinderöffner für den Luftwechsel
  • 6 Blockstufen Beton 100 x 35 x 15 cm und 4 schwarze Regentonnen 200 l als Zugang und Wärmespeicher

Werkzeug

Minibagger (Miete), Rotationslaser, Wasserwaage, Schnur, Handkreissäge, Akkuschrauber, Maurerkelle, Rüttelplatte, Schubkarre

Schritt für Schritt

  1. Untergrund prüfen. Der Hang soll 15 bis 30 Prozent nach Süden fallen. Grab eine Schürfgrube 2 m tief und lass sie 48 Stunden offen. Steht Wasser darin, such einen anderen Platz.
  2. Maße festlegen. 8 m lang, 4 m breit. Die Sohle liegt am Nordrand 2 m unter Gelände, die Nordwand misst 2,40 m, die Südwand 1,20 m, das Dach steigt mit 40 Grad an.
  3. Ausheben. Rund 60 m³ Boden, zwei Tage Minibagger. Böschungen nach DIN 4124 anlegen, ab 1,25 m Tiefe bleibt nichts senkrecht stehen. Mutterboden getrennt lagern.
  4. Drainage legen. Ringdrainage DN 100 mit 2 Prozent Gefälle in ein Kiesbett 16/32, rundum Filtervlies, freier Auslauf mindestens 5 m tiefer am Hangfuß.
  5. Rückwand bauen. Streifenfundament 40 x 60 cm, darauf Schalungssteine setzen, senkrecht bewehren, in Lagen von 50 cm verfüllen. Ab 1,50 m Wandhöhe rechnet ein Statiker.
  6. Abdichten und dämmen. Bitumenbahn aufschweißen, XPS 80 mm davorsetzen, Noppenbahn als Schutz, dann Kies hinterfüllen und alle 30 cm verdichten.
  7. Dach bauen. Sparren alle 80 cm verschrauben, Polycarbonat in Alu-Profilen mit EPDM-Dichtung verlegen, Kanten oben mit Aluband, unten mit Lochband schließen. Schneelast 0,85 kN/m².
  8. Lüften und einrichten. Lüftungsfläche 20 Prozent der Grundfläche, bei 32 m² also 6 m². Treppe mit 17 cm Steigung und 30 cm Auftritt, Beete mit 40 cm Mutterboden, vier Tonnen an die Nordwand.

Zeit und Kosten

Zwei bis drei Personen brauchen 3 bis 6 Wochenenden plus zwei Tage Bagger. Baggermiete 200 bis 350 Euro am Tag, Beton 130 Euro pro m³, Polycarbonat 25 bis 40 Euro pro m². Insgesamt 1.500 bis 8.000 Euro.

Die drei häufigsten Fehler

  • Grube ohne Ablauf. Ohne Ringdrainage mit freiem Auslauf steht die Grube nach dem ersten Starkregen 40 cm unter Wasser. Eine Pumpe fällt bei Stromausfall aus.
  • Dach zu flach. Bei 20 Grad Neigung spiegelt die Wintersonne am Glas ab und Schnee bleibt liegen. Bei 40 Grad Neigung trifft Wintersonne durch.
  • Erddruck unterschätzt. Eine Wand aus Schalungssteinen ohne Bewehrung bekommt im zweiten Winter Risse und schiebt sich nach innen.

Before you start

Your first stop is the untere Bauaufsichtsbehörde (the local building control office) at the Landratsamt (the district administration). Ask up to what volume a greenhouse stands without an application where you live, and what the two metre deep pit changes about that, because with the pit come structural stability and boundary distances. Take a section drawing, a site plan and the plot boundaries with you. Verfahrensfrei (exempt from a permit procedure) only means that nobody checks in advance, and out in the Außenbereich (the open land outside the built up area) you almost always need a building application. Get the free Leitungsauskunft (the search that tells you where cables and pipes run) from the electricity, gas and water suppliers. The pit itself is the real risk. Up to 1.25 metres you may dig straight down, above that DIN 4124 calls for battered sides or shoring. Nobody works down there alone, and in the evening a site fence guards the edge.

What you need

  • 32 m² of Stegdoppelplatten (twin wall polycarbonate sheets), 16 mm as the roof glazing
  • 10 squared Douglas fir timbers 10 x 10 cm, 4 m long as rafters
  • 60 Schalungssteine (hollow blocks that get filled with concrete on site) 50 x 25 x 25 cm for the back wall
  • 3 m³ of C25/30 concrete with 12 reinforcing bars of 12 mm for the footing and the wall
  • 25 m of DN 100 drainage pipe with a filter sleeve for the drainage
  • 6 m³ of 16/32 drainage gravel for backfilling
  • 40 m² of Bitumenbahn (bitumen waterproofing membrane), Noppenbahn (dimpled protection sheet) and 24 m² of XPS 80 mm as waterproofing and insulation
  • 1 ridge vent 100 x 60 cm, 2 inlet flaps 40 x 30 cm, 2 wax cylinder openers for the air change
  • 6 concrete block steps 100 x 35 x 15 cm and 4 black water butts of 200 l as the way in and as heat store

Tools

Mini digger (hired), rotating laser level, spirit level, string line, circular saw, cordless driver, bricklayer's trowel, plate compactor, wheelbarrow

Step by step

  1. Check the ground. The slope should fall 15 to 30 per cent towards the south. Dig a trial pit 2 m deep and leave it open for 48 hours. If water stands in it, look for another place.
  2. Set the dimensions. 8 m long, 4 m wide. At the northern edge the floor sits 2 m below ground level, the north wall measures 2.40 m, the south wall 1.20 m, and the roof rises at 40 degrees.
  3. Dig out. Around 60 m³ of soil, two days with the mini digger. Batter the sides as DIN 4124 (the German standard for excavations) requires, because below 1.25 m nothing stays standing vertically. Stack the topsoil separately.
  4. Lay the drainage. A DN 100 ring drain at 2 per cent fall in a bed of 16/32 gravel, filter fleece all round, with a free outlet at least 5 m lower down at the foot of the slope.
  5. Build the back wall. A strip footing 40 x 60 cm, hollow blocks set on top, vertical reinforcement, filled in courses of 50 cm. Above 1.50 m of wall height a structural engineer does the sums.
  6. Waterproof and insulate. Torch on the bitumen membrane, set 80 mm XPS in front of it, add the dimpled sheet as protection, then backfill with gravel and compact every 30 cm.
  7. Build the roof. Screw the rafters at 80 cm centres, lay the polycarbonate in aluminium profiles with EPDM gaskets, and close the edges with solid tape at the top and perforated tape at the bottom. Snow load 0.85 kN/m².
  8. Ventilate and fit out. Vent area 20 per cent of the floor area, so 6 m² for 32 m². Steps with a 17 cm rise and a 30 cm tread, beds with 40 cm of topsoil, the four butts against the north wall.

Time and cost

Two or three people need 3 to 6 weekends plus two days with the digger. Digger hire 200 to 350 euros a day, concrete 130 euros per m³, polycarbonate 25 to 40 euros per m². All in, 1,500 to 8,000 euros.

The three most common mistakes

  • A pit with no outlet. Without a ring drain that runs away freely, the pit stands 40 cm under water after the first heavy rain. A pump gives up the moment the power does.
  • Roof too shallow. At 20 degrees of pitch the winter sun reflects off the glazing and snow stays lying on it. At 40 degrees the winter sun comes straight through.
  • Soil pressure underrated. A wall of hollow blocks without reinforcement cracks in its second winter and pushes inwards.

Worauf es ankommtWhat matters hereLüftung wird noch häufiger unterschätzt als beim normalen Gewächshaus. Ohne Abluft oben und Zuluft unten steht die Luft und alles schimmelt.Ventilation gets underrated here even more than in an ordinary greenhouse. Without an outlet at the top and an inlet at the bottom the air stands still and everything goes mouldy.

Kühlloch, Cool pit
Ein WochenendeOne weekendOhne VorkenntnisseNo experience needed

KühllochCool pit

1 bis 2 Personen1 to 2 people

Der kleine Bruder des Erdkellers, an einem Nachmittag gegraben. Ein eingelassenes Fass oder Rohr im Schatten hält Butter, Milch und Gemüse über Tage kühl, ganz ohne Strom. Für Bauwagen und Zeltplätze oft die einzige Kühlung, die es braucht.The little brother of the root cellar, dug in one afternoon. A barrel or a pipe sunk into shaded ground keeps butter, milk and vegetables cool for days, with no electricity at all. For a site caravan or a camp it is often all the cooling anyone needs.

So wird gebautHow it is built
Tonne oder Kunststofffass senkrecht eingraben, Deckel bündig mit dem Boden, darüber eine Strohmatte oder ein Brett gegen die Sonne. Standort im Schatten und am Nordhang.Sink a butt or a plastic barrel upright in the ground, lid level with the surface, and a straw mat or a board over it against the sun. Choose a shaded spot, ideally on a north facing slope.
KostenCost
unter 100 Eurounder 100 euros
Erster SchrittFirst step
Erst eine Woche lang die Temperatur im Loch messen, bevor Lebensmittel hinein wandern. Die Werte schwanken je nach Boden stark.Measure the temperature in the hole for a week before any food goes in. The readings vary a lot with the soil.
Schritt für SchrittStep by step
Kühlloch, Schnitt12345678975 cm Lochweite78 cm Fass80 cm Tiefe15 cm Kies10 cm Luft4 cmBoden in 80 cm TiefeJuli 12 bis 15 GradWinter 4 bis 7 Grad1Fass 120 l, 51 cm Durchmesser2Spannringdeckel mit Dichtung3Strohmatte auf vier Ziegeln4Wühlmausgitter, Masche 13 mm5Sand 0/2, in Lagen gestampft6Kiesbett 8/16, 15 cm hoch7Stapelkörbe 30 x 40 cm8Ziegel als Sockel im Fass9Thermometer mit Min und MaxNicht maßstäblich, Maße in cm
Bauskizze Kühlloch, am Handy seitlich wischenMeasured sketch of Cool pit, swipe sideways on a phone

Bevor du anfängst

Ein Kühlloch ist keine bauliche Anlage und braucht keinen Bauantrag. Die Stelle, bei der du trotzdem anrufst, ist die Leitungsauskunft der Versorger, denn Hausanschlüsse liegen oft flacher als 90 Zentimeter. Als Pächter holst du zusätzlich die schriftliche Zustimmung des Eigentümers ein und regelst den Rückbau gleich mit. Für die Hygiene gilt eine einfache Grenze: was im Laden gekühlt bei vier Grad steht, gehört nicht hinein, ein Erdloch hält diese Temperatur nicht sicher. Sobald du Gäste gegen Geld bewirtest, verlangt das Lebensmittelrecht eine dokumentierte Kühlkette und damit einen echten Kühlschrank. Sichere den Deckel gegen kleine Kinder und markiere ihn, damit niemand hineintritt.

Das brauchst du

  • 1 Kunststofffass 120 l mit Spannringdeckel, lebensmittelecht als Kühlraum
  • 40 l Drainagekies 8/16 als Bett unter dem Fass
  • 50 kg Sand 0/2 zum Verfüllen des Ringspalts
  • 1 m² Wühlmausgitter verzinkt, Masche 13 mm gegen Nager
  • 1 Strohmatte 100 x 100 cm oder 1 Holzdeckel 80 x 80 cm als Sonnenschutz
  • 4 Ziegelsteine als Abstandshalter unter dem Sonnenschutz
  • 2 Digitalthermometer mit Minimum und Maximum zur Kontrolle
  • 3 Stapelkörbe 30 x 40 cm für Ordnung im Fass
  • 1 m Seil 8 mm zum Herausziehen der Körbe
  • 1 Gummidichtung passend zum Spannring hält Mäuse und Feuchte draußen

Werkzeug

Spaten, Erdlochbohrer, Eimer, Wasserwaage, Zollstock, Schubkarre, Kantholz zum Stampfen, Arbeitshandschuhe

Schritt für Schritt

  1. Standort suchen. Nordseite eines Gebäudes oder unter einem Laubbaum, ganztägig Schatten, keine Senke. Der Weg zur Küche sollte unter 30 m liegen.
  2. Vorher messen. Grab ein Probeloch von 80 cm Tiefe, häng ein Thermometer hinein und deck es ab. Üblich sind im Juli 12 bis 15 Grad, im Winter 4 bis 7 Grad. Über 16 Grad such woanders.
  3. Loch graben. Ein 120-l-Fass misst 51 cm im Durchmesser und 78 cm hoch. Grab 75 cm weit und 93 cm tief, also Fassmaß plus 20 cm Ringspalt und 15 cm Kiesbett.
  4. Kiesbett einbringen. 15 cm Kies 8/16 einfüllen, stampfen und waagerecht abziehen. So läuft Sickerwasser ab und das Fass steht nicht im Nassen.
  5. Fass einsetzen. Der Deckelrand muss 3 bis 5 cm über dem Gelände stehen. Ringspalt in Lagen von 20 cm mit Sand füllen und jede Lage mit dem Kantholz stampfen.
  6. Sonnenschutz bauen. Vier Ziegel um den Deckel legen, Strohmatte darauf. Die 10 cm Luftspalt senken die Deckeltemperatur im Sommer um 5 bis 8 Grad. Wühlmausgitter darunter beschweren.
  7. Einrichten und betreiben. Zwei Ziegel auf den Fassboden, darauf die Körbe. Butter und Käse ganz unten, Gemüse darüber. Nur vor 8 Uhr oder nach 20 Uhr öffnen, nie länger als zwei Minuten.
  8. Pflegen und überwintern. Wöchentlich mit Essigwasser 1 zu 10 auswischen, alle vier Wochen leeren und lüften. Ab November 20 cm Stroh über den Deckel, dann bleibt es bei Frost über null Grad.

Zeit und Kosten

Allein dauert das Kühlloch 3 bis 5 Stunden, zu zweit gut zwei. Das Fass kostet gebraucht 20 bis 40 Euro, Kies und Sand 15 Euro, Thermometer 12 Euro, Strohmatte 20 Euro. Insgesamt unter 100 Euro.

Die drei häufigsten Fehler

  • Deckel bündig eingebaut. Sitzt der Rand auf Geländehöhe, läuft beim nächsten Gewitter Regenwasser hinein und die Vorräte schwimmen. Drei bis fünf Zentimeter Überstand reichen.
  • Nachmittagssonne übersehen. Ein morgens schattiger Platz bekommt ab 15 Uhr oft volle Sonne, dann klettert das Fass auf 18 Grad. Beobachte ihn einen ganzen Tag.
  • Falsche Lebensmittel gelagert. Hackfleisch, Geflügel und Rohmilch brauchen dauerhaft 4 Grad. Butter, Hartkäse, Eier, Bier und Gemüse vertragen 12 bis 15 Grad.

Before you start

A cool pit is not a building and needs no building application. The one call you still make is to the Leitungsauskunft (the utility search that tells you where cables and pipes run), because house connections often lie shallower than 90 centimetres. As a tenant you also get the owner's written agreement and settle the removal at the same time. On hygiene there is one simple line: anything the shop keeps chilled at four degrees does not belong in there, because a hole in the ground will not hold that temperature reliably. As soon as you feed guests for money, German food law wants a documented cold chain and with it a proper fridge. Secure the lid against small children and mark it, so that nobody steps into it.

What you need

  • 1 food grade plastic barrel of 120 l with a clamp ring lid as the cool chamber
  • 40 l of 8/16 drainage gravel as a bed under the barrel
  • 50 kg of 0/2 sand for filling the gap around it
  • 1 m² of galvanised Wühlmausgitter (fine mesh against voles), 13 mm mesh to keep rodents out
  • 1 straw mat 100 x 100 cm or 1 wooden cover 80 x 80 cm as shade
  • 4 bricks as spacers under the shade
  • 2 digital thermometers with minimum and maximum for checking
  • 3 stacking crates 30 x 40 cm to keep order inside the barrel
  • 1 m of 8 mm rope for lifting the crates out
  • 1 rubber gasket to match the clamp ring keeps mice and damp out

Tools

Spade, earth auger, bucket, spirit level, folding rule, wheelbarrow, a length of timber for tamping, work gloves

Step by step

  1. Find the spot. The north side of a building or under a broadleaf tree, shade all day, no hollow. The walk to the kitchen should stay under 30 m.
  2. Measure first. Dig a test hole 80 cm deep, hang a thermometer in it and cover it over. In July 12 to 15 degrees is usual, in winter 4 to 7 degrees. Above 16 degrees, look elsewhere.
  3. Dig the hole. A 120 l barrel measures 51 cm across and 78 cm high. Dig 75 cm wide and 93 cm deep, which is the barrel plus 20 cm of gap around it and 15 cm of gravel bed.
  4. Put in the gravel bed. Fill in 15 cm of 8/16 gravel, tamp it and level it off. Seeping water then runs away and the barrel does not stand in the wet.
  5. Set the barrel in. The rim of the lid has to sit 3 to 5 cm above the surface. Fill the gap around it with sand in layers of 20 cm and tamp every layer with the timber.
  6. Build the shade. Lay four bricks around the lid and the straw mat on top of them. That 10 cm air gap drops the lid temperature by 5 to 8 degrees in summer. Weigh the vole mesh down underneath.
  7. Fit it out and run it. Two bricks on the floor of the barrel, the crates on top. Butter and cheese right at the bottom, vegetables above them. Open it only before 8 in the morning or after 8 in the evening, and never for longer than two minutes.
  8. Keep it clean and get it through winter. Wipe it out weekly with vinegar and water at 1 to 10, and empty and air it every four weeks. From November put 20 cm of straw over the lid, then it stays above zero in frost.

Time and cost

On your own the cool pit takes 3 to 5 hours, with two of you a good two. A second hand barrel costs 20 to 40 euros, gravel and sand 15 euros, thermometers 12 euros, straw mat 20 euros. Under 100 euros all together.

The three most common mistakes

  • Lid set flush. If the rim sits at ground level, the next thunderstorm washes rainwater in and the stores float. Three to five centimetres proud is enough.
  • Afternoon sun missed. A place that is shaded in the morning often gets full sun from three in the afternoon, and then the barrel climbs to 18 degrees. Watch the spot for a whole day.
  • The wrong food stored. Minced meat, poultry and raw milk need a steady 4 degrees. Butter, hard cheese, eggs, beer and vegetables take 12 to 15 degrees.

Worauf es ankommtWhat matters hereKein Ersatz für einen Kühlschrank bei Fleisch oder Rohmilch. Und dicht abdecken, sonst finden Mäuse die Vorräte vor euch.It is no replacement for a fridge when it comes to meat or raw milk. And cover it tightly, or the mice will find the stores before you do.

Einlegen und Fermentieren, Pickling and fermenting
Ein WochenendeOne weekendOhne VorkenntnisseNo experience needed

Einlegen und FermentierenPickling and fermenting

1 Person1 person

Die Ernte kommt im August auf einmal und soll bis März reichen. Salz, Essig und Zeit lösen das seit Jahrtausenden. Sauerkraut, eingelegte Bohnen, Gurken, Kimchi: Milchsäurebakterien machen haltbar und nebenbei bekömmlicher.The harvest all arrives in August and has to last until March. Salt, vinegar and time have solved that for thousands of years. Sauerkraut, pickled beans, cucumbers, kimchi: lactic acid bacteria keep the food and make it easier to digest along the way.

So wird gebautHow it is built
Für Fermentiertes braucht es nur Glas, Salz und ein Gewicht, das alles unter der Lake hält. Zwei Prozent Salz aufs Gemüsegewicht ist die Faustzahl, danach zwei Wochen bei Raumtemperatur, dann kühl stellen.For a ferment you need nothing but a jar, salt and a weight that holds everything under the brine. Two per cent salt by the weight of the vegetables is the rule of thumb, then two weeks at room temperature, then somewhere cool.
KostenCost
unter 150 Euro für Gläser, Gewichte und Salzunder 150 euros for jars, weights and salt
Erster SchrittFirst step
Mit Weisskohl anfangen. Er verzeiht Anfängerfehler und braucht außer Salz nichts.Start with white cabbage. It forgives a beginner's mistakes and needs nothing but salt.
Schritt für SchrittStep by step
Einlegen und Fermentieren, Schnitt1234567895 cm2 cm Lake2 mm8 cm GewichtSalzmengenKraut 2 Prozent: 100 g auf 5 kgLake 2,5 Prozent: 25 g je LiterGurken 3 Prozent: 30 g je Liter1Deckel taucht in die Wasserrinne2Wasserrinne als Gärverschluss3Luftraum 5 cm unter dem Deckel4Lake steht 2 cm über allem5Zwei Beschwerungssteine6Kohl auf 2 mm gehobelt7Gärtopf Steinzeug 10 l8Bügelglas mit Glasgewicht9Salz nach GemüsegewichtNicht maßstäblich, Maße in cm
Bauskizze Einlegen und Fermentieren, am Handy seitlich wischenMeasured sketch of Pickling and fermenting, swipe sideways on a phone

Bevor du anfängst

Für den eigenen Haushalt ist keine Anmeldung nötig. Sobald ihr verkauft oder Gäste gegen Geld verpflegt, geltet ihr als Lebensmittelunternehmer, und dann ist das Lebensmittelüberwachungsamt des Landkreises die Stelle, bei der ihr den Betrieb anzeigt. Frag dort nach der Belehrung nach Paragraf 43 Infektionsschutzgesetz und nach der Kennzeichnung, beides wird bei der ersten Kontrolle geprüft. In der Küche zählt der Säuregrad. Milchsäuregärung senkt den pH unter 4,5, und unterhalb von 4,6 wächst Clostridium botulinum nicht. Ungesäuertes Gemüse in Öl ist genau deshalb gefährlich und hat schon Menschen auf die Intensivstation gebracht. Gewölbte Deckel bleiben zu, probiert nicht. Alte Gärtöpfe können bleihaltige Glasuren haben.

Das brauchst du

  • 1 Gärtopf Steinzeug 10 l mit Wasserrinne und 2 Steinen für Sauerkraut
  • 6 Bügelgläser 1 l mit Gummiring für kleine Ansätze
  • 6 Glasgewichte, Durchmesser 8 cm halten das Gemüse unter der Lake
  • 2 kg Steinsalz ohne Jod und ohne Rieselhilfe für die Lake
  • 1 Digitalwaage bis 5 kg, Auflösung 1 g fürs Salz
  • 1 Krauthobel mit 3 Klingen und 1 Holzstampfer für Kohl auf 2 mm
  • 5 l Tafelessig 5 Prozent und 500 g Zucker für Essiggemüse
  • 100 g Senfkörner, 50 g Dillsamen, 30 Lorbeerblätter als Gewürze
  • 12 Twist-off-Gläser 720 ml mit neuen Deckeln zum Einkochen
  • 1 Raumthermometer und Etiketten zur Kontrolle

Werkzeug

Krauthobel, Schüssel 15 l, Holzstampfer, Digitalwaage, Messbecher, Trichter, Einkochtopf, sauberes Küchentuch

Schritt für Schritt

  1. Gemüse wählen. Weißkohl von Ende August bis Oktober, Einlegegurken Ende Juni bis August, Bohnen im Juli, Chinakohl im September.
  2. Sauber arbeiten. Gläser 10 Minuten auskochen oder 15 Minuten bei 120 Grad in den Backofen, Gummiringe überbrühen.
  3. Sauerkraut ansetzen. 5 kg Weißkohl auf 2 mm hobeln, zwei Prozent Salz vom Gemüsegewicht sind 100 g. Mischen, 20 Minuten ziehen lassen, dann stampfen, bis die Lake über dem Kraut steht.
  4. Beschweren. In Lagen füllen, jede Lage stampfen, oben 5 cm Luft lassen. Die Lake muss 2 cm über allem stehen, sonst mit 20 g Salz auf 1 l Wasser auffüllen.
  5. Gärung führen. Drei bis fünf Tage bei 20 bis 22 Grad, danach 3 bis 4 Wochen bei 15 bis 18 Grad. Nach insgesamt 4 bis 6 Wochen ist das Kraut fertig.
  6. Ganzes Gemüse in Lake. Bohnen, Möhren und Blumenkohl in 2,5 Prozent Lake, also 25 g Salz auf 1 l Wasser, Gurken in 3 Prozent. Nach 7 bis 14 Tagen kühl stellen.
  7. Kimchi und Essiggemüse. Chinakohl 4 Stunden in 8 Prozent Lake, abspülen, mit Chiliflocken, Knoblauch und Ingwer einreiben, 2 bis 3 Tage bei 20 Grad. Essigsud aus je 500 ml Essig und Wasser, 100 g Zucker und 20 g Salz aufkochen, 30 Minuten bei 90 Grad einkochen.
  8. Kontrollieren und lagern. Zwei Wochen täglich schauen. Weiße Kahmhefe abschöpfen, pelziger oder farbiger Bewuchs, dann wegwerfen. Mit Inhalt, Salzprozent und Datum beschriften. Bei 0 bis 8 Grad hält es zwölf Monate.

Zeit und Kosten

Zwei Personen verarbeiten an einem Samstag in 5 bis 7 Stunden rund 30 kg Gemüse. Danach kosten die Ansätze 5 Minuten Kontrolle am Tag. Grundausstattung 80 bis 150 Euro, Salz 2 Euro pro Kilo. Gärtöpfe halten 40 Jahre.

Die drei häufigsten Fehler

  • Falsches Salz genommen. Jodsalz und Rieselhilfen trüben die Lake und bremsen die Milchsäurebakterien. Auf der Packung darf nur Salz stehen.
  • Gemüse schaut heraus. Jedes Stück über der Lake schimmelt binnen drei Tagen und verdirbt den Ansatz. Glasgewicht auflegen, Lake 2 cm hoch halten.
  • Zu warm vergoren. Über 25 Grad arbeiten die falschen Keime schneller, das Kraut wird weich und riecht hefig. Stell den Topf in 18 Grad.

Before you start

For your own household nothing has to be registered. As soon as you sell, or feed guests for money, you count as a food business, and then the Lebensmittelüberwachungsamt (the district food safety office) is where you register. Ask there about the instruction under Section 43 of the Infektionsschutzgesetz (the German infection protection act) and about labelling, because both get checked at the first inspection. In the kitchen it is the acidity that counts. Lactic fermentation pushes the pH below 4.5, and below 4.6 Clostridium botulinum does not grow. Unacidified vegetables in oil are dangerous for exactly that reason and have put people in intensive care. Jars with a bulging lid stay shut, and you do not taste them. Old fermenting crocks can carry lead in the glaze.

What you need

  • 1 stoneware Gärtopf (fermenting crock with a water channel seal) of 10 l with 2 weight stones for sauerkraut
  • 6 Bügelgläser (clamp lid jars) of 1 l with rubber rings for small batches
  • 6 glass weights, 8 cm across hold the vegetables under the brine
  • 2 kg of rock salt with no iodine and no anti caking agent for the brine
  • 1 digital scale up to 5 kg, reading to 1 g for the salt
  • 1 Krauthobel (a cabbage slicer) with 3 blades and 1 wooden tamper for cabbage at 2 mm
  • 5 l of table vinegar at 5 per cent and 500 g of sugar for vinegar pickles
  • 100 g of mustard seed, 50 g of dill seed, 30 bay leaves as spices
  • 12 twist-off jars of 720 ml with new lids for the water bath
  • 1 room thermometer and labels for keeping track

Tools

Cabbage slicer, 15 l bowl, wooden tamper, digital scale, measuring jug, funnel, preserving pan, clean tea towel

Step by step

  1. Choose the vegetables. White cabbage from late August to October, pickling cucumbers from late June to August, beans in July, Chinese cabbage in September.
  2. Work clean. Boil the jars for 10 minutes or put them in the oven for 15 minutes at 120 degrees, and scald the rubber rings.
  3. Start the sauerkraut. Slice 5 kg of white cabbage at 2 mm. Two per cent salt by vegetable weight comes to 100 g. Mix it, leave it 20 minutes, then tamp until the brine stands above the cabbage.
  4. Weigh it down. Fill in layers, tamp each one, leave 5 cm of space at the top. The brine has to stand 2 cm above everything, otherwise top it up with 20 g of salt to 1 l of water.
  5. Guide the ferment. Three to five days at 20 to 22 degrees, then 3 to 4 weeks at 15 to 18 degrees. After 4 to 6 weeks in total the cabbage is ready.
  6. Whole vegetables in brine. Beans, carrots and cauliflower go into a 2.5 per cent brine, which is 25 g of salt to 1 l of water, cucumbers into 3 per cent. After 7 to 14 days move them somewhere cool.
  7. Kimchi and vinegar pickles. Chinese cabbage for 4 hours in an 8 per cent brine, rinsed, then rubbed with chilli flakes, garlic and ginger, then 2 to 3 days at 20 degrees. For the pickling liquor boil up 500 ml each of vinegar and water with 100 g of sugar and 20 g of salt, then process the jars for 30 minutes at 90 degrees.
  8. Check and store. Look at them every day for two weeks. Skim off white kahm yeast, and if the growth is furry or coloured, throw the batch away. Label with contents, salt percentage and date. At 0 to 8 degrees it keeps for twelve months.

Time and cost

Two people work through around 30 kg of vegetables in 5 to 7 hours on a Saturday. After that the batches cost 5 minutes of checking a day. Basic kit 80 to 150 euros, salt 2 euros a kilo. A fermenting crock lasts 40 years.

The three most common mistakes

  • The wrong salt used. Iodised salt and anti caking agents cloud the brine and slow the lactic acid bacteria down. The packet should list salt and nothing else.
  • Vegetables poking out. Any piece above the brine goes mouldy within three days and spoils the batch. Put a glass weight on and keep 2 cm of brine over the top.
  • Fermented too warm. Above 25 degrees the wrong microbes work faster, the cabbage goes soft and smells yeasty. Stand the crock somewhere at 18 degrees.

Worauf es ankommtWhat matters hereAlles muss unter der Lake bleiben, sonst schimmelt es. Eine weisse Kahmhefe an der Oberfläche ist harmlos, pelziger oder farbiger Bewuchs bedeutet: wegwerfen, nicht abschöpfen.Everything has to stay under the brine, otherwise it goes mouldy. A white kahm yeast on the surface is harmless, but furry or coloured growth means the batch goes out, not that you skim it off.

Einkochen und Vorräte anlegen, Preserving in jars and building a store
Ein WochenendeOne weekendEtwas ÜbungSome practice helps

Einkochen und Vorräte anlegenPreserving in jars and building a store

2 Personen2 people

Ein Sommer bringt mehr Ernte, als eine Gruppe frisch essen kann, und im Februar steht die Küche leer. Einkochen im Glas verschiebt den Überfluss in den Winter. Es braucht wenig Technik, dafür saubere Arbeit, verlässliche Temperaturen und ein kühles dunkles Regal, in dem die Gläser ein Jahr überstehen.A summer brings in more than a group can eat fresh, and in February the kitchen stands empty. Preserving in jars moves that surplus into the winter. It takes little equipment, but it does take clean work, reliable temperatures and a cool dark shelf where the jars will keep for a year.

So wird gebautHow it is built
Einkochautomat oder großer Topf für Obst und Eingelegtes, Drucktopf für alles Säurearme, dazu geprüfte Gläser, frische Gummiringe und ein dunkles Regal bei 10 bis 16 Grad.A preserving boiler or a big pan for fruit and pickles, a pressure canner for everything low in acid, plus checked jars, fresh rubber rings and a dark shelf at 10 to 16 degrees.
KostenCost
200 bis 600 Euro Grundausstattung200 to 600 euros for the basic kit
Erster SchrittFirst step
Zwanzig Gläser zusammensuchen und jeden Rand auf Scharten abtasten, bevor das erste Obst in den Topf kommt.Gather twenty jars and run a finger round every rim for chips, before the first fruit goes in the pan.
Schritt für SchrittStep by step
Einkochen und Vorräte anlegen, Schnitt 90 Topf 36 breit 20 hoch Wasser 12 Regal 60 breit 1 2 3 4 5 6 7 8 9 1 Deckel mit Thermometer 2 Weckglas 1 Liter, Kopfraum 2 cm 3 Gummiring und zwei Klammern 4 Wasser bis zur Schulter 5 Einlegerost am Boden 6 Heizung, 80 bis 90 Grad 7 Temperaturregler am Topf 8 Regal, dunkel bei 10 bis 16 Grad 9 Ältestes Glas steht vorn Nicht maßstäblich, Maße in cm
Bauskizze Einkochen und Vorräte anlegen, am Handy seitlich wischenMeasured sketch of Preserving in jars and building a store, swipe sideways on a phone

Bevor du anfängst

Solange ihr für den eigenen Haushalt einkocht, ist keine Behörde zuständig. Wer verkauft oder Gäste gegen Geld verpflegt, meldet den Betrieb beim Lebensmittelüberwachungsamt des Landkreises an und fragt dort nach Belehrung und Kennzeichnung. Wichtiger ist die Küche selbst. Clostridium botulinum sitzt im Boden und damit an jedem Gemüse, seine Sporen sterben erst zwischen 116 und 121 Grad. Säurearmes gehört deshalb in einen Druckeinkochtopf mit ablesbarem Manometer, bis 300 Meter über dem Meer bei 116 Grad, darüber bei 121 Grad. Der Backofen taugt dafür nicht, weil die Temperatur im Glas nicht kontrollierbar ist. Jedes Glas mit gewölbtem Deckel oder trüber Lake wandert ungeöffnet in den Müll.

Das brauchst du

  • 40 Weckgläser 1 Liter mit Gummiring und 2 Klammern für Obst und Eingelegtes
  • 30 Weckgläser 370 ml für Mus und Gelee
  • 60 Twist-off-Gläser 720 ml mit neuen Deckeln für Tomatensauce
  • 120 rote Gummiringe als Nachschub
  • 1 Einkochautomat 27 Liter fasst 14 Litergläser
  • 1 Drucktopf 10 Liter mit Manometer für Säurearmes
  • 3 Liter Tafelessig 5 Prozent und 200 g Zitronensäure zum Säuern
  • 20 kg Zucker für Kompott und Sirup
  • 500 Etiketten und 1 dunkles Regal fürs Lager

Werkzeug

Einkochautomat oder großer Topf mit Deckel und Einlegerost, Glasheber, Trichter, Küchenthermometer, Zeitschaltuhr, Drucktopf für säurearmes Gut

Schritt für Schritt

  1. Gläser prüfen. Jeden Rand abtasten, bei einer Scharte dichtet kein Ring. Gummiringe über drei Jahre wegwerfen, Twist-off-Deckel nur einmal nutzen.
  2. Nach Säure einteilen. Obst, Essiggemüse und gesäuerte Tomaten liegen unter pH 4,5 und dürfen ins Wasserbad. Bohnen, Erbsen, Karotten, Pilze, Fleisch und Suppen nur in den Drucktopf.
  3. Reinigen. Gläser heiß spülen und 10 Minuten auskochen, Gummiringe 5 Minuten in Essigwasser.
  4. Füllen und säuern. 2 cm Kopfraum bei Litergläsern, 3 cm bei Mus. Tomaten brauchen 1 Teelöffel Zitronensäure je Liter. Rand mit Essigtuch abwischen.
  5. Im Wasserbad einkochen. Gläser bis zur Schulter in gleich warmes Wasser. Steinobst 30 Minuten bei 80 Grad, Kompott, Tomatensauce und Essiggemüse 30 Minuten bei 90 Grad, gezählt ab Erreichen der Temperatur. Im Backofen stattdessen 175 Grad ohne Umluft, bei den ersten Bläschen ausschalten, 30 Minuten nachziehen.
  6. Drucktopf für Säurearmes. 3 cm Wasser einfüllen, 116 Grad halten. Bohnen und Karotten im Literglas 25 bis 30 Minuten, Fleisch und Brühe 90 Minuten.
  7. Deckeltest nach 24 Stunden. Klammern ab, das Weckglas am Deckel anheben. Trägt der Deckel, ist es dicht. Twist-off-Deckel wölben sich nach innen. Undichtes in den Kühlschrank.
  8. Beschriften, lagern, rechnen. Inhalt und Datum aufs Etikett. Regal bei 10 bis 16 Grad, dunkel, ältestes Glas vorn. Pro Person 90 bis 120 Litergläser für die 30 Wochen von Oktober bis April.

Zeit und Kosten

Zu zweit sind an einem langen Tag 60 bis 80 Gläser zu schaffen. Der Automat kostet 90 bis 180 Euro, ein Drucktopf 120 bis 280 Euro, Gläser vom Flohmarkt 50 Cent, neue 2 bis 3 Euro. Zusammen 200 bis 600 Euro. Ein Liter Tomatensauce kostet dann 40 Cent an Strom, Deckel und Gummi.

Die drei häufigsten Fehler

  • Bohnen im Wasserbad. Bei 100 Grad überleben die Sporen von Clostridium botulinum und wachsen im luftdichten Glas ohne Säure weiter. Auch zweimaliges Einkochen an zwei Tagen ist nie geprüft worden und gilt nicht als sicher. Säurearmes gehört in den Drucktopf, ins Gefrierfach, in die Milchsäure oder in Essig.
  • Rand nicht abgewischt. Ein Tropfen Saft unter dem Ring lässt Luft durch, das Glas zieht kein Vakuum.
  • Zu warm gelagert. Über 20 Grad rosten Deckel und Gummis werden hart. Dunkel bei 10 bis 16 Grad hält der Vorrat zwei Jahre.

Before you start

As long as you preserve for your own household, no authority is involved. Anyone who sells, or feeds guests for money, registers the business with the Lebensmittelüberwachungsamt (the district food safety office) and asks there about instruction and labelling. The kitchen matters more. Clostridium botulinum sits in the soil and therefore on every vegetable, and its spores only die between 116 and 121 degrees. Food low in acid goes into a pressure canner with a gauge you can read, at 116 degrees up to 300 metres above sea level and at 121 degrees above that. The oven is no good for this, because the temperature inside the jar cannot be controlled. Every jar with a bulging lid or cloudy liquid goes in the bin unopened.

What you need

  • 40 Weckgläser (German preserving jars with a glass lid) of 1 litre with a rubber ring and 2 clamps for fruit and pickles
  • 30 Weckgläser of 370 ml for purée and jelly
  • 60 twist-off jars of 720 ml with new lids for tomato sauce
  • 120 red rubber rings as replacements
  • 1 Einkochautomat (electric preserving boiler) of 27 litres takes 14 one litre jars
  • 1 pressure canner of 10 litres with a gauge for food low in acid
  • 3 litres of table vinegar at 5 per cent and 200 g of citric acid for acidifying
  • 20 kg of sugar for compote and syrup
  • 500 labels and 1 dark shelf unit for the store

Tools

Preserving boiler or a big pan with a lid and a rack, jar lifter, funnel, kitchen thermometer, timer, pressure canner for food low in acid

Step by step

  1. Check the jars. Run a finger round every rim, because no ring seals against a chip. Throw out rubber rings older than three years and use twist-off lids only once.
  2. Sort by acidity. Fruit, vinegar pickles and acidified tomatoes sit below pH 4.5 and may go in the water bath. Beans, peas, carrots, mushrooms, meat and soups go in the pressure canner only.
  3. Clean. Wash the jars in hot water and boil them for 10 minutes, and give the rubber rings 5 minutes in vinegar water.
  4. Fill and acidify. 2 cm of headroom in litre jars, 3 cm for purée. Tomatoes need 1 teaspoon of citric acid per litre. Wipe the rim with a cloth dipped in vinegar.
  5. Process in the water bath. Stand the jars up to the shoulder in water of the same temperature. Stone fruit 30 minutes at 80 degrees, compote, tomato sauce and vinegar pickles 30 minutes at 90 degrees, counted from the moment the temperature is reached. In the oven instead, 175 degrees without the fan, switch off at the first bubbles and leave them 30 minutes.
  6. Pressure canner for food low in acid. Pour in 3 cm of water and hold 116 degrees. Beans and carrots in a litre jar 25 to 30 minutes, meat and stock 90 minutes.
  7. Lid test after 24 hours. Take the clamps off and lift the Weckglas by its glass lid. If the lid carries the jar, the seal holds. Twist-off lids curve inwards. Anything that has not sealed goes in the fridge.
  8. Label, store, count. Contents and date on the label. Shelf at 10 to 16 degrees, dark, oldest jar at the front. Reckon 90 to 120 litre jars per person for the 30 weeks from October to April.

Time and cost

Two of you can manage 60 to 80 jars in one long day. The boiler costs 90 to 180 euros, a pressure canner 120 to 280 euros, jars from a flea market 50 cents, new ones 2 to 3 euros. Together 200 to 600 euros. A litre of tomato sauce then costs 40 cents in electricity, lids and rings.

The three most common mistakes

  • Beans in the water bath. At 100 degrees the spores of Clostridium botulinum survive and carry on growing in a sealed jar without acid. Processing twice on two days has never been tested either and does not count as safe. Food low in acid belongs in the pressure canner, in the freezer, in lactic acid or in vinegar.
  • Rim not wiped. One drop of juice under the ring lets air through and the jar pulls no vacuum.
  • Stored too warm. Above 20 degrees lids rust and rubber rings go hard. Kept dark at 10 to 16 degrees the store lasts two years.

Worauf es ankommtWhat matters hereClostridium botulinum bildet Sporen, die 100 Grad im Wasserbad überstehen und im luftdichten säurearmen Glas ein Gift bilden. Bohnen, Erbsen, Karotten, Pilze, Fleisch und Suppen werden nur im Drucktopf bei 116 Grad sicher haltbar, sonst gehören sie ins Gefrierfach, in die Milchsäure oder in Essig.Clostridium botulinum forms spores that survive 100 degrees in a water bath and then build a toxin inside a sealed jar with little acid in it. Beans, peas, carrots, mushrooms, meat and soups only keep safely when they go into a pressure canner at 116 degrees. Otherwise they belong in the freezer, in lactic acid or in vinegar.

Biotop und Wildnisecke, Biotope and wild corner
Ein WochenendeOne weekendEtwas ÜbungSome practice helps

Biotop und WildniseckeBiotope and wild corner

3 bis 4 Personen, Stämme über 100 kg, schweres Heben3 to 4 people, logs over 100 kg, heavy lifting

Die Ecke, in der ihr nichts tut. Totholz, Lesesteinhaufen, Brennnesseln, ein Stück ungemähte Wiese. Was dort einzieht, übernimmt danach die Schädlingsbekämpfung im ganzen Garten, kostenlos und rund um die Uhr.The corner where you do nothing. Dead wood, a pile of field stones, nettles, a patch of unmown meadow. Whatever moves in there takes over pest control for the whole garden, free of charge and around the clock.

So wird gebautHow it is built
Ein Haufen aus dickem Totholz, daneben Steine mit Hohlräumen, dazu ein Sandarium für Wildbienen. Alles in der Sonne, alles ungestört, mindestens fünf Quadratmeter.A heap of thick dead wood, stones with cavities beside it, and a sand bed for solitary bees. All of it in the sun, all of it left alone, five square metres at the very least.
KostenCost
meist nichts außer dem Verzicht auf die Flächeusually nothing beyond giving up the ground
Erster SchrittFirst step
Die Fläche im Gruppengespräch festlegen und wirklich markieren. Sonst mäht sie irgendwann jemand in bester Absicht.Agree the area as a group and then mark it properly. Otherwise someone will mow it one day with the best of intentions.
Schritt für SchrittStep by step
Biotop und Wildnisecke, Draufsicht200 cm150 cm4Süden100 cmWildnisN12356789700 cm500 cm1Totholzhaufen, 40 cm eingegraben2Benjeshecke aus Strauchschnitt3Lesesteinhaufen auf Schotter4Dachziegel für Eidechsen5Sandarium, nach Süden geneigt6Blühfläche mit Regiosaatgut7Mahd, immer nur die Hälfte8Wasserschale, 30 cm breit9Eckpfahl mit SchildNicht maßstäblich, Maße in cm
Bauskizze Biotop und Wildnisecke, am Handy seitlich wischenMeasured sketch of Biotope and wild corner, swipe sideways on a phone

Bevor du anfängst

Die untere Naturschutzbehörde im Landratsamt ist zuständig, sobald ihr eine Fläche umgestaltet oder aus der Nutzung nehmt. Frag dort, ob eure Ecke bereits als gesetzlich geschütztes Biotop geführt wird, mit der Flurstücknummer ist das in Minuten geklärt. Nehmt ihr landwirtschaftliche Fläche heraus, sprecht vorher mit dem Landwirtschaftsamt über Prämien, und als Pächter holt ihr die schriftliche Zustimmung des Verpächters ein. Entscheidend ist der Zeitpunkt: vom 1. März bis 30. September verbietet Paragraf 39 Bundesnaturschutzgesetz das Roden von Hecken und Gebüschen. Sind Zauneidechsen oder Erdkröten eingezogen, bleibt der Steinhaufen liegen. Zieht Jakobskreuzkraut heraus, es vergiftet Weidetiere.

Das brauchst du

  • 6 Stammstücke Eiche oder Buche, 25 bis 40 cm dick, 100 bis 150 cm lang als Totholzhaufen
  • 2 m³ Lesesteine, Kantenlänge 10 bis 40 cm für den Steinhaufen
  • 1,5 m³ ungewaschener Sand 0/2 mit Lehmanteil für das Sandarium
  • 0,5 m³ grober Schotter 32/63 als frostfreier Kern
  • 3 m³ Strauchschnitt für Reisighaufen und Benjeshecke
  • 100 g Regiosaatgut aus deinem Ursprungsgebiet für 40 m² Blühfläche
  • 4 Eichenpfähle 8 x 8 cm, 120 cm lang zum Abstecken
  • 1 Holzschild mit Aufschrift Wildnisfläche gegen versehentliches Mähen
  • 10 alte Dachziegel als Unterschlupf für Eidechsen
  • 1 flache Wasserschale, 30 cm breit, 5 cm tief als Tränke

Werkzeug

Spaten, Schubkarre, Astschere, Handsäge, Sense oder Balkenmäher, Vorschlaghammer, Rechen, Arbeitshandschuhe

Schritt für Schritt

  1. Fläche festlegen. Fünf Quadratmeter sind das Minimum, ab 30 m² kommen mehr Arten. Südseite, mindestens 6 Stunden Sonne, windgeschützt, 5 m Abstand zum Gemüsebeet.
  2. Beschluss festhalten. Klärt in der Gruppe, wer die Fläche betreut. Vier Pfähle 40 cm tief in die Ecken schlagen, Schild anbringen. Ohne Markierung ist sie in der zweiten Saison weg.
  3. Boden abmagern. Für die Blühfläche 5 cm Oberboden abziehen und wegfahren. Magerer Boden bringt mehr Arten. Nicht düngen und niemals Rindenmulch aufbringen.
  4. Totholzhaufen setzen. Grube 2 x 1,5 m, 40 cm tief. Stämme zu einem Drittel eingraben, Endhöhe 80 bis 120 cm. Im Erdkontakt bleibt das Holz feucht, dort wachsen Käferlarven über drei bis fünf Jahre.
  5. Lesesteinhaufen bauen. Fläche 1,5 x 1,5 m, Grube 50 cm tief mit Schotter füllen, darüber Steine locker aufsetzen, Hohlräume von 5 bis 15 cm lassen. Südseite frei halten, hier überwintern Zauneidechsen.
  6. Sandarium anlegen. Grube 1 x 1 m, 60 cm tief, mit ungewaschenem Sand füllen und leicht nach Süden neigen. Drei Viertel aller Wildbienenarten nisten im Boden.
  7. Blühfläche ansäen. 2 bis 4 g Regiosaatgut pro Quadratmeter, entweder Ende August bis Anfang September oder Mitte März bis Mitte Mai. Nur andrücken, nicht einharken, sechs Wochen feucht halten.
  8. Pflegen. Zwischen Ende Februar und Anfang März die Hälfte der Fläche mit der Sense auf 10 cm mähen, Schnittgut drei Tage liegen lassen, dann abräumen. Die andere Hälfte folgt im nächsten Jahr.

Zeit und Kosten

Drei bis vier Personen brauchen ein Wochenende, zusammen 12 bis 16 Arbeitsstunden. Das meiste Material fällt auf dem Hof an. Zugekauft kostet Sand 40 Euro pro Tonne und Regiosaatgut 60 bis 120 Euro pro Kilo, insgesamt etwa 300 Euro.

Die drei häufigsten Fehler

  • Zu ordentlich gebaut. Ein sauberer Haufen im Halbschatten, außen mit Rindenmulch abgedeckt, bleibt leer. Stapel ihn locker in die Sonne.
  • Gewaschener Spielsand verwendet. Reiner Quarzsand ohne Feinanteil hat keinen Halt, die Nistgänge brechen zusammen. Nimm Sand mit Lehmanteil aus der Kiesgrube.
  • Alles auf einmal gemäht. Wer im Herbst die ganze Fläche abräumt, nimmt Schmetterlingsraupen das Winterquartier. Mähe höchstens die Hälfte.

Before you start

The untere Naturschutzbehörde (the local nature conservation authority) at the Landratsamt (the district administration) is in charge as soon as you reshape a piece of ground or take it out of use. Ask there whether your corner is already listed as a protected biotope, which takes minutes once you give the plot number. If you are taking farmland out of production, talk to the Landwirtschaftsamt (the agricultural office) about subsidies first, and as a tenant get the landlord's written agreement. Timing decides a great deal: from 1 March to 30 September, Section 39 of the Bundesnaturschutzgesetz (the federal nature conservation act) forbids the clearing of hedges and shrubs. Once sand lizards or common toads have moved in, the stone pile stays where it is. Pull out ragwort, it poisons grazing animals.

What you need

  • 6 oak or beech logs, 25 to 40 cm thick, 100 to 150 cm long for the dead wood heap
  • 2 m³ of field stones, 10 to 40 cm across for the stone pile
  • 1.5 m³ of unwashed 0/2 sand with some loam in it for the sand bed
  • 0.5 m³ of coarse 32/63 hardcore as a frost free core
  • 3 m³ of shrub prunings for a brushwood heap and a Benjeshecke (a dead hedge of loosely stacked brushwood)
  • 100 g of Regiosaatgut (native seed certified for its region) from your own area for 40 m² of flowering ground
  • 4 oak stakes 8 x 8 cm, 120 cm long for marking it out
  • 1 wooden sign reading Wildnisfläche (wild ground) against accidental mowing
  • 10 old roof tiles as shelter for lizards
  • 1 shallow water dish, 30 cm across, 5 cm deep as a drinking place

Tools

Spade, wheelbarrow, loppers, hand saw, scythe or sickle bar mower, sledgehammer, rake, work gloves

Step by step

  1. Fix the area. Five square metres is the minimum, and from 30 m² upwards more species arrive. South facing, at least 6 hours of sun, out of the wind, 5 m away from the vegetable beds.
  2. Write the decision down. Settle in the group who looks after the area. Drive four stakes 40 cm into the corners and fix the sign. Without a marker it is gone by the second season.
  3. Make the soil poorer. For the flowering ground strip 5 cm of topsoil and cart it away. Poor soil brings more species. Do not feed it, and never spread bark mulch.
  4. Set the dead wood heap. A pit 2 x 1.5 m, 40 cm deep. Bury a third of each log, finished height 80 to 120 cm. In contact with the soil the wood stays damp, and beetle larvae grow in it over three to five years.
  5. Build the stone pile. An area of 1.5 x 1.5 m, a pit 50 cm deep filled with hardcore, stones set loosely on top with cavities of 5 to 15 cm. Keep the south side clear, this is where sand lizards spend the winter.
  6. Lay out the sand bed. A pit 1 x 1 m, 60 cm deep, filled with unwashed sand and tilted slightly to the south. Three quarters of all solitary bee species nest in the ground.
  7. Sow the flowering ground. 2 to 4 g of regional seed per square metre, either from late August to early September or from the middle of March to the middle of May. Press it down only, do not rake it in, and keep it damp for six weeks.
  8. Look after it. Between late February and early March scythe half the area down to 10 cm, leave the cuttings lying for three days, then clear them away. The other half follows next year.

Time and cost

Three or four people need a weekend, 12 to 16 working hours all together. Most of the material turns up on the place anyway. Bought in, sand costs 40 euros a tonne and regional seed 60 to 120 euros a kilo, around 300 euros in total.

The three most common mistakes

  • Built too tidily. A neat heap in half shade with bark mulch over the outside stays empty. Stack it loosely, in the sun.
  • Washed play sand used. Pure quartz sand with no fines has no hold and the nest tunnels collapse. Take sand with some loam in it from the gravel pit.
  • Everything mown at once. Clearing the whole area in autumn takes the winter quarters away from butterfly caterpillars. Cut half of it at most.

Worauf es ankommtWhat matters hereDas Schwerste daran ist das Nichtstun. Eine Wildnisecke sieht zwei Jahre lang nach Unordnung aus, bevor sie anfängt zu leben.The hardest part of it is doing nothing. A wild corner looks like a mess for two years before it starts to come alive.

Hühner im Mobilstall, Chickens in a mobile coop
Wochen bis MonateWeeks to monthsEtwas ÜbungSome practice helps

Hühner im MobilstallChickens in a mobile coop

2 Personen, Futtersäcke 25 kg, schweres Heben2 people, 25 kg feed sacks, heavy lifting

Eier, Küchenabfallverwertung, Schädlingsbekämpfung und Bodenlockerung in einem Tier. Ein Mobilstall wandert alle paar Tage weiter, dann ist die Wiese nie kahlgefressen und das Land wird gleichmäßig gedüng.Eggs, kitchen scraps dealt with, pest control and soil worked over, all in one animal. A mobile coop moves on every few days, so the grass is never eaten bare and the land gets manured evenly.

So wird gebautHow it is built
Stall auf Rädern oder Kufen, Legenester von außen zugänglich, mobiler Elektrozaun, sicherer Nachtverschluss gegen Fuchs und Marder.A coop on wheels or skids, nest boxes you can reach from outside, a movable electric fence, and a night door that really does shut against fox and marten.
KostenCost
800 bis 4.000 Euro Mobilstall800 to 4,000 euros for the mobile coop
Erster SchrittFirst step
Vor dem ersten Huhn beim Veterinäramt anmelden und in die Tierseuchenkasse eintragen. Das gilt schon ab einem Tier.Before the first hen arrives, register with the Veterinäramt (the district veterinary office) and sign up with the Tierseuchenkasse (the animal disease fund of your federal state). That applies from one bird onwards.
Schritt für SchrittStep by step
Hühner im Mobilstall, Seitenansicht123456789112 cm300 cm40 cm30 cm100 cm tief1Legenester, von außen zugänglich2Sitzstangen, 30 cm Abstand3Kotbrett unter den Stangen4Einstreu 5 cm auf dem Boden5Automatische Klappe mit Rampe6Räder und Fahrwerk7Sandbad mit Asche und Kieselgur8Geflügelnetz 112 cm hoch9Erdungsstab, 100 cm tiefNicht maßstäblich, Maße in cm
Bauskizze Hühner im Mobilstall, am Handy seitlich wischenMeasured sketch of Chickens in a mobile coop, swipe sideways on a phone

Bevor du anfängst

Das Veterinäramt des Landkreises ist die Stelle, bei der ihr euch meldet, und zwar ab dem ersten Tier. Lasst euch dort die Registriernummer nach Viehverkehrsverordnung geben, tragt den Bestand bei der Tierseuchenkasse ein und fragt gleich, was bei einer angeordneten Aufstallung wegen Geflügelpest von euch verlangt wird. Führt ein Bestandsregister mit Zugängen, Abgängen und Behandlungen und hebt es drei Jahre auf. Steht der Stall im Außenbereich, fragt zusätzlich beim Bauamt nach. Räder machen einen Wagen baurechtlich nicht frei, und verfahrensfrei wäre er noch lange nicht zulässig. Verendete Tiere gehen an die Tierkörperbeseitigung, vergraben ist verboten.

Das brauchst du

  • 1 Mobilstall für 20 bis 30 Hühner, 6 m² Innenfläche als Nachtquartier
  • 6 m Sitzstangen 5 x 4 cm, Kanten gerundet 20 cm je Huhn
  • 4 Legenester 30 x 35 x 35 cm, außen zugänglich ein Nest je 5 Hennen
  • 1 Geflügelnetz 50 m, 112 cm hoch als mobiler Auslauf
  • 1 Weidezaungerät 12 V, mindestens 1 Joule plus Erdungsstab
  • 1 Futterautomat 25 kg und 1 Tränke 30 l für Futter und Wasser
  • 4 Sack Legemehl je 25 kg und 10 kg Muschelgrit als Grundfutter
  • 1 automatische Hühnerklappe gegen Fuchs und Marder
  • 2 m² Sandbad mit Holzasche und Kieselgur gegen Milben
  • 20 geimpfte Junghennen, 18 Wochen alt als Startherde

Werkzeug

Akkuschrauber, Zollstock, Wasserwaage, Vorschlaghammer, Zaunprüfer, Freischneider, Schubkarre, Taschenlampe

Schritt für Schritt

  1. Anmelden. Vor dem ersten Huhn: Anzeige beim Veterinäramt, Registrierung in der Tierdatenbank HI-Tier und Eintrag in die Tierseuchenkasse. Das gilt ab einem Tier.
  2. Fläche planen. Ein Netz von 50 m umschließt als Quadrat rund 150 m², genug für 20 Hühner bei wöchentlichem Umsetzen. Rechne 4 bis 8 m² je Tier.
  3. Stall aufstellen. Ebener Platz, höchstens 5 Prozent Gefälle, Stall waagerecht ausrichten, sonst klemmt die Klappe. Eingang windabgewandt nach Südosten.
  4. Innen einrichten. Sitzstangen mit 30 cm Abstand, die unterste 40 cm über dem Kotbrett, Einstreu 5 cm hoch. Legenester bis zur 19. Woche geschlossen halten, sonst schlafen die Hennen darin.
  5. Zaun stellen. Netz straff spannen, Pfähle alle 3 m, Bewuchs darunter auf 5 cm kürzen, Erdungsstab 1 m tief setzen. Unter 2.500 Volt hält kein Fuchs, gut sind 4.000 Volt.
  6. Einstallen. Junghennen abends einsetzen und drei Tage drinnen lassen, damit sie den Stall annehmen. Danach kehren sie abends von allein zurück.
  7. Füttern und umsetzen. 120 bis 130 g Legemehl je Huhn und Tag, Grit frei zugänglich, 250 ml Wasser je Tier. Alle 5 bis 7 Tage 15 bis 20 m weiterziehen, jede Fläche vier Wochen ruhen lassen.
  8. Kontrollieren. Morgens öffnen, abends Eier holen und Tiere zählen, dann die Klappe nachdrücken. Alle vier Wochen nachts die Sitzstangen auf Rote Vogelmilbe absuchen, zweimal im Jahr Kotprobe zum Tierarzt.

Zeit und Kosten

Aufbau und Einrichtung dauern zu zweit ein bis zwei Tage, danach täglich 20 bis 30 Minuten und 45 Minuten fürs Umsetzen. Mobilstall 800 bis 4.000 Euro, im Eigenbau ab 600 Euro, Netz und Gerät 250 bis 400 Euro, Junghenne 12 bis 18 Euro. Pro Huhn und Jahr 30 Euro und 250 bis 300 Eier.

Die drei häufigsten Fehler

  • Klappe nicht kontrolliert. Der Marder kommt zwischen 23 und 4 Uhr und braucht 5 cm Öffnung. Eine Klappe, die auf einem Halm aufsetzt, bleibt offen.
  • Zaun ohne Spannung. Hoher Bewuchs zieht die Spannung unter 1.000 Volt, dann springt der Fuchs darüber. Miss wöchentlich.
  • Zu lange auf einer Fläche. Nach drei Wochen ist die Wiese kahl, Würmer und Kokzidien reichern sich an. Steht der Stall, ist die Wiese hin.

Before you start

The Veterinäramt (the district veterinary office) is where you report, and that starts with the first bird. Get your registration number under the Viehverkehrsverordnung (the German regulation on livestock movement), enter the flock with the Tierseuchenkasse (the animal disease fund of your federal state) and ask straight away what is expected of you if the birds have to be kept indoors because of avian influenza. Keep a flock register with arrivals, losses and treatments, and hold on to it for three years. If the coop stands in the Außenbereich (the open land outside the built up area), ask the Bauamt (the local building authority) as well. Wheels do not free a wagon from building law, and even verfahrensfrei (exempt from a permit procedure) would not yet mean it is allowed. Dead birds go to the Tierkörperbeseitigung (the official carcass disposal service), burying them is forbidden.

What you need

  • 1 mobile coop for 20 to 30 hens, 6 m² of floor as night quarters
  • 6 m of perches 5 x 4 cm, edges rounded 20 cm per hen
  • 4 nest boxes 30 x 35 x 35 cm, reachable from outside one nest per 5 hens
  • 1 poultry net 50 m, 112 cm high as the movable run
  • 1 fence energiser 12 V, at least 1 joule plus an earth rod
  • 1 feed hopper of 25 kg and 1 drinker of 30 l for feed and water
  • 4 sacks of layer mash at 25 kg each and 10 kg of oyster shell grit as the basic feed
  • 1 automatic pop hole door against fox and marten
  • 2 m² of dust bath with wood ash and diatomaceous earth against mites
  • 20 vaccinated pullets, 18 weeks old as the starting flock

Tools

Cordless driver, folding rule, spirit level, sledgehammer, fence tester, brushcutter, wheelbarrow, torch

Step by step

  1. Register. Before the first hen arrives: notify the Veterinäramt (the district veterinary office), register in the livestock database HI-Tier and sign up with the Tierseuchenkasse (the animal disease fund of your federal state). This applies from one bird onwards.
  2. Plan the ground. A net of 50 m set as a square encloses around 150 m², enough for 20 hens if you move them weekly. Reckon 4 to 8 m² per bird.
  3. Position the coop. Level ground, no more than 5 per cent slope, and set the coop true, otherwise the door jams. Entrance out of the wind, facing south east.
  4. Fit out the inside. Perches 30 cm apart, the lowest 40 cm above the droppings board, litter 5 cm deep. Keep the nest boxes shut until the 19th week, otherwise the hens sleep in them.
  5. Put up the fence. Pull the net taut, posts every 3 m, cut the growth underneath to 5 cm, drive the earth rod 1 m down. Below 2,500 volts no fox is held back, 4,000 volts is good.
  6. Move the birds in. Put the pullets in during the evening and keep them inside for three days, so that they take to the coop. After that they come back on their own at dusk.
  7. Feed and move on. 120 to 130 g of layer mash per hen per day, grit freely available, 250 ml of water per bird. Every 5 to 7 days pull the coop 15 to 20 m on, and let each patch rest for four weeks.
  8. Check. Open up in the morning, collect the eggs in the evening, count the birds, then push the door to. Every four weeks go out at night and search the perches for red poultry mite, and twice a year take a droppings sample to the vet.

Time and cost

Two people need one to two days to set it up and fit it out, then 20 to 30 minutes a day and 45 minutes for every move. A mobile coop 800 to 4,000 euros, built yourself from 600 euros, net and energiser 250 to 400 euros, a pullet 12 to 18 euros. Per hen and year, 30 euros and 250 to 300 eggs.

The three most common mistakes

  • Door not checked. The marten comes between 11 at night and 4 in the morning and needs an opening of 5 cm. A door that lands on a stalk of grass stays open.
  • Fence with no voltage. Tall growth pulls the voltage below 1,000 volts, and then the fox jumps it. Measure weekly.
  • Too long on one patch. After three weeks the grass is bare and worms and coccidia build up. If the coop stands still, the grass is finished.

Worauf es ankommtWhat matters hereDer Marder kommt nachts. Ein Stall, der nicht wirklich dicht verschließt, kostet euch irgendwann die ganze Herde.The marten comes at night. A coop that does not shut properly will cost you the whole flock sooner or later.

Bienen, Bees
Wochen bis MonateWeeks to monthsMit erfahrener HandNeeds an experienced hand

BienenBees

1 bis 2 Personen, volle Honigkiste über 25 kg, schweres Heben1 to 2 people, a full super of honey over 25 kg, heavy lifting

Bestäubung für den ganzen Hof, Honig als Nebenprodukt und ein Zugang zum Jahreslauf, den kaum etwas anderes gibt. Ein Volk versorgt einen Umkreis von drei Kilometern.Pollination for the whole place, honey as a by-product and a way into the turning year that little else gives you. One colony covers a radius of three kilometres.

So wird gebautHow it is built
Zwei Völker zum Start, nie nur eines. Ein sonniger, windgeschützter Stand mit Flugloch nach Südosten und Wasser in der Nähe.Two colonies to start with, never only one. A sunny stand out of the wind, with the entrance facing south east and water nearby.
KostenCost
500 bis 1.200 Euro für zwei Völker mit Ausrüstung500 to 1,200 euros for two colonies with the kit
Erster SchrittFirst step
Ein Jahr lang bei einem Imker im Verein mitlaufen, bevor ihr eigene Völker holt. Bücher ersetzen das nicht.Work alongside a beekeeper in the local association for a year before you fetch colonies of your own. Books do not replace that.
Schritt für SchrittStep by step
Bienen, Schnitt12345678940 cm22 cm42 cm22 cm10 Rähmchen je Zarge1Deckel mit Innendeckel2Honigraum, obere Zarge3Brutraum, untere Zarge4Rähmchen mit Mittelwand5Draht im Rähmchen, Detail6Gitterboden mit Bodenschieber7Flugloch mit Mäusegitter8Anflugbrett nach Südosten9Beutenbock, 40 cm hochNicht maßstäblich, Maße in cm
Bauskizze Bienen, am Handy seitlich wischenMeasured sketch of Bees, swipe sideways on a phone

Bevor du anfängst

Vor dem ersten Volk meldet ihr die Haltung beim Veterinäramt des Landkreises an, so verlangt es Paragraf 1a Bienenseuchenverordnung, dazu kommt die Registrierung nach Viehverkehrsverordnung. Fragt dort auch, ob euer Standort in einem Sperrbezirk wegen Amerikanischer Faulbrut liegt, denn dann darf kein Volk bewegt werden. Ruft danach bei eurer Landestierseuchenkasse an und fragt, ob Bienen dort meldepflichtig sind. In etwa neun Ländern ist das so, in anderen ausdrücklich nicht. Für Menschen zählt vor allem das Flugloch. Richtet es nicht auf Wege oder Sitzplätze, und klärt vorher, ob jemand im Haus auf Bienengift allergisch reagiert. Ein Notfallset gehört dann griffbereit.

Das brauchst du

  • 2 Bienenvölker im Maß Zander oder Deutsch Normal mit Gesundheitszeugnis
  • 4 Beuten mit je 2 Zargen und Deckel je Volk eine plus Reserve
  • 40 Rähmchen mit Draht und Mittelwänden für den Wabenbau
  • 2 Schutzjacken mit Schleier für sicheres Arbeiten
  • 1 Smoker und 1 Stockmeißel als Grundwerkzeug
  • 4 Beutenböcke, 40 cm hoch für Rückenhöhe
  • 30 kg Zucker und 25 kg Futterteig zum Einfüttern
  • 1 l Ameisensäure 60 Prozent plus Verdunster gegen Varroa im Sommer
  • 500 ml Oxalsäure-Lösung 3,5 Prozent für die Restentmilbung im Dezember
  • 1 Refraktometer misst den Wassergehalt im Honig
  • 2 Bodenschieber und 2 Mäusegitter für Milbenzählung und Winter

Werkzeug

Stockmeißel, Smoker, Abkehrbesen, Wabenzange, Entdeckelungsgabel, Refraktometer, Honigschleuder, Kübel 30 l

Schritt für Schritt

  1. Ein Jahr mitlaufen. Such den Imkerverein am Ort, ein Anfängerkurs kostet 80 bis 250 Euro. Arbeite ein Jahr an einem fremden Stand mit, bevor du eigene Völker holst.
  2. Standort einrichten. Sonnig, windgeschützt, Flugloch nach Südosten, nie auf Wege oder Nachbargrundstück. Steht 3 m davor eine 2 m hohe Hecke, fliegen die Bienen über Kopfhöhe ab. Wasser in der Nähe.
  3. Anmelden. Vor dem Aufstellen die Anzeige beim Veterinäramt nach Bienenseuchen-Verordnung, dazu Eintrag in die Tierseuchenkasse. Die Völkerzahl meldest du jährlich.
  4. Völker holen. Kauf im Mai oder Juni zwei Ableger bei einem Imker der Region, mit Gesundheitszeugnis unter neun Monaten. Abends bei geschlossenem Flugloch transportieren.
  5. Durchsehen. Von April bis Mitte Juli alle 7 bis 9 Tage Schwarmkontrolle, Weiselzellen suchen und Raum geben. Nur bei über 12 Grad und trockenem Wetter.
  6. Honig ernten. Erste Ernte Ende Mai, zweite Mitte Juli. Nur verdeckelte Waben nehmen, Wassergehalt unter 18 Prozent. Schleudern und sieben, nach zwei Tagen abfüllen.
  7. Varroa behandeln. Direkt nach der letzten Ernte Ende Juli zweimal Ameisensäure 60 Prozent im Abstand von sieben Tagen, bei 15 bis 25 Grad. Ab 10 Milben Fall am Tag behandelst du sofort. Ende Dezember Oxalsäure träufeln bei unter 5 Grad.
  8. Einfüttern und überwintern. Ab August je Volk 15 bis 20 kg Futter in Portionen von 3 bis 5 l Sirup, bis Mitte September abgeschlossen. Ein wintertaugliches Volk wiegt mit Beute 35 bis 40 kg. Ab Oktober Mäusegitter.

Zeit und Kosten

Zwei Völker brauchen von April bis Juli je 2 bis 3 Stunden pro Woche, im Winter fast nichts. Die Erstausstattung liegt bei 500 bis 1.200 Euro, eine Schleuder bei 250 bis 900 Euro oder 20 Euro Leihe im Verein. Laufend 60 bis 120 Euro je Volk, Ertrag 15 bis 30 kg Honig.

Die drei häufigsten Fehler

  • Nur ein Volk gekauft. Ohne Vergleich merkst du nicht, ob dein Volk schwach ist, und du kannst bei Weisellosigkeit keine Brutwabe umhängen.
  • Varroabehandlung verschoben. Wer erst im September behandelt, zieht geschädigte Winterbienen auf. Das Volk wirkt im Oktober gesund und ist im Februar tot.
  • Zu oft geöffnet. Jede Durchsicht kostet zwei Tage Arbeit. Öffne höchstens alle sieben Tage und arbeite zügig.

Before you start

Before the first colony you register the hives with the Veterinäramt (the district veterinary office), as Section 1a of the Bienenseuchenverordnung (the German bee disease regulation) requires, and on top of that comes registration under the Viehverkehrsverordnung (the regulation on livestock movement). Ask there as well whether your site lies in a Sperrbezirk (a restricted zone) because of American foul brood, because then no colony may be moved. Then ring your Landestierseuchenkasse (the animal disease fund of your federal state) and ask whether bees have to be reported there. In around nine of the federal states they do, in others expressly not. For the people around, it is the hive entrance that matters most. Do not point it at paths or seating, and find out beforehand whether anyone in the house reacts allergically to bee venom. If so, an emergency kit belongs within reach.

What you need

  • 2 colonies in the Zander or Deutsch Normal frame size with a health certificate
  • 4 hives with 2 boxes and a roof each one per colony plus a spare
  • 40 frames with wire and wax foundation for comb building
  • 2 bee jackets with veils for working safely
  • 1 smoker and 1 hive tool as the basic tools
  • 4 hive stands, 40 cm high to save your back
  • 30 kg of sugar and 25 kg of fondant for the autumn feeding
  • 1 l of formic acid at 60 per cent plus an evaporator against varroa in summer
  • 500 ml of oxalic acid solution at 3.5 per cent for the last treatment in December
  • 1 refractometer measures the water content of the honey
  • 2 floor inserts and 2 mouse guards for counting mites and for winter

Tools

Hive tool, smoker, bee brush, frame grip, uncapping fork, refractometer, honey extractor, 30 l bucket

Step by step

  1. Spend a year alongside someone. Find the beekeeping association in your area, where a beginners' course costs 80 to 250 euros. Work at somebody else's stand for a year before you fetch colonies of your own.
  2. Set up the stand. Sunny, out of the wind, entrance facing south east, never towards a path or the neighbour's plot. With a hedge 2 m high standing 3 m in front, the bees leave above head height. Water nearby.
  3. Register. Before the hives go up, notify the Veterinäramt (the district veterinary office) as the Bienenseuchenverordnung (the German bee disease regulation) requires, and sign up with the Tierseuchenkasse (the animal disease fund of your federal state). You report the number of colonies once a year.
  4. Fetch the colonies. In May or June buy two nucleus colonies from a beekeeper in your region, with a health certificate less than nine months old. Move them in the evening with the entrance closed.
  5. Inspect. From April to the middle of July check for swarming every 7 to 9 days, look for queen cells and give the colony room. Only above 12 degrees and in dry weather.
  6. Harvest the honey. First harvest at the end of May, second in the middle of July. Take capped combs only, water content below 18 per cent. Extract and strain, then jar it two days later.
  7. Treat for varroa. Straight after the last harvest at the end of July, formic acid at 60 per cent twice, seven days apart, at 15 to 25 degrees. From 10 mites dropping a day you treat at once. At the end of December trickle oxalic acid, below 5 degrees.
  8. Feed up and overwinter. From August give each colony 15 to 20 kg of feed in portions of 3 to 5 l of syrup, finished by the middle of September. A colony fit for winter weighs 35 to 40 kg with the hive. Mouse guards from October.

Time and cost

Two colonies take 2 to 3 hours a week each from April to July, and almost nothing in winter. The first outlay comes to 500 to 1,200 euros, an extractor to 250 to 900 euros, or 20 euros to borrow one from the association. Running costs 60 to 120 euros per colony, yield 15 to 30 kg of honey.

The three most common mistakes

  • Only one colony bought. With nothing to compare it against you will not notice that your colony is weak, and if it loses its queen you have no brood comb to hang across.
  • Varroa treatment put off. Treat only in September and the colony raises damaged winter bees. It looks healthy in October and is dead by February.
  • Opened too often. Every inspection costs the colony two days of work. Open it no more than every seven days, and work briskly.

Worauf es ankommtWhat matters hereAnmeldung beim Veterinäramt ist Pflicht. Und die Varroamilbe braucht eine feste Behandlungsroutine, sonst ist das Volk im zweiten Winter tot.Registering with the Veterinäramt (the district veterinary office) is compulsory. And the varroa mite needs a fixed treatment routine, otherwise the colony is dead in its second winter.

Teich, Pond
Längeres VorhabenA longer projectEtwas ÜbungSome practice helps

TeichPond

4 bis 5 Personen, Folienrolle über 100 kg, schweres Heben4 to 5 people, a roll of liner over 100 kg, heavy lifting

Wasser bringt Leben. Ein Teich ist Löschwasserreserve, Klimaanlage, Badestelle, Lebensraum für Amphibien und der Ort, an dem sich abends alle von selbst treffen.Water brings life. A pond is a reserve for firefighting, air conditioning, a place to swim, a home for amphibians and the spot where everyone ends up in the evening without anyone arranging it.

So wird gebautHow it is built
Flachwasserzone an mindestens einer Seite, damit Tiere wieder herauskommen, tiefste Stelle ab 1,50 Meter frostsicher, Lehmdichtung oder Folie mit Vlies.A shallow zone on at least one side, so that animals can get out again, a deepest point from 1.50 metres down so it does not freeze through, and either a clay seal or a liner over fleece.
KostenCost
1.000 bis 15.000 Euro1,000 to 15,000 euros
Erster SchrittFirst step
Untere Wasserbehörde fragen. Ab einer bestimmten Größe und in Gewässernähe ist der Teich genehmigungspflichtig.Ask the untere Wasserbehörde (the local water authority). Above a certain size, and anywhere near an existing watercourse, a pond needs a permit.
Schritt für SchrittStep by step
Teich, QuerschnittAufbau unter dem Wasser12345678920 cm50 cm150 cm15 cm5 cm SandUfer 1 zu 51Sumpfzone 0 bis 20 cm2Flachwasser 20 bis 50 cm3Tiefzone ab 150 cm4EPDM 1,14 mm auf Schutzvlies5Sandbett 5 cm unter dem Vlies6Kapillarsperre, Folie 15 cm hoch7Kiesrinne hinter dem Ufer8Seerose im Korb, 80 bis 120 cm9Findlinge als AusstiegNicht maßstäblich, Maße in cm
Bauskizze Teich, am Handy seitlich wischenMeasured sketch of Pond, swipe sideways on a phone

Bevor du anfängst

Die untere Wasserbehörde im Landratsamt entscheidet, ob euer Teich genehmigungspflichtig ist. Eine feste Quadratmetergrenze gibt es nicht, deshalb lautet die Frage dort anders: schneidet der Teich das Grundwasser an, bekommt er einen Zulauf oder einen Ablauf, liegt er in Gewässernähe oder in einem Schutzgebiet? Ein zum Grundwasser abgedichteter Gartenteich ohne Zulauf und Ablauf bleibt meist frei, alles andere klärt ihr vorher. Holt vor dem Baggern die Leitungsauskunft ein. Die Gefahr für Menschen ist eindeutig: Kleinkinder ertrinken lautlos und in 20 Zentimetern Wasser. Als Eigentümer trifft euch die Verkehrssicherungspflicht, also eine feste Regel für Kinder und eine Rettungsstange am Ufer.

Das brauchst du

  • 1 EPDM-Teichfolie 1,14 mm, Länge plus zweimal Tiefe plus 1 m Rand als Abdichtung
  • Schutzvlies 500 g/m² in Foliengröße gegen Wurzeln
  • 3 m³ Sand 0/2 und 2 m³ Kies 8/16 für Ausgleichsschicht und Flachwasser
  • 40 Findlinge, 20 bis 50 cm für Ufer und Ausstiege
  • 1 m³ mageres, phosphatarmes Teichsubstrat für die Pflanzzonen
  • 30 heimische Wasserpflanzen wie Igelkolben, Froschlöffel, Seerose zur Bepflanzung
  • 20 m Uferwallmatte als Kapillarsperre
  • 4 Pflanzkörbe 40 x 40 cm für die Seerosen
  • 1 Rettungsstange 3 m und 1 Ring für die Verkehrssicherung

Werkzeug

Minibagger (Miete), Spaten, Schubkarre, Rotationslaser, Schnur, Rechen, Teppichmesser

Schritt für Schritt

  1. Genehmigung klären. Ruf die untere Wasserbehörde im Landratsamt an. Je nach Landeswassergesetz ist ein Teich ab etwa 100 m² anzeigepflichtig, in Schutzgebieten immer. Rechne mit 4 bis 12 Wochen Bearbeitung.
  2. Standort wählen. Mindestens 6 Stunden Sonne, aber nicht unter Bäumen, 8 bis 10 m Abstand zu Birke, Weide und Pappel. Nicht in die Senke legen, sonst läuft gedüngtes Oberflächenwasser hinein.
  3. Zonen festlegen. Unter 25 m² trägt sich ein Teich nicht selbst. Sumpfzone 0 bis 20 cm und Flachwasser 20 bis 50 cm auf je 30 Prozent, Tiefzone ab 150 cm auf 20 Prozent. Böschungen flacher als 1 zu 3.
  4. Umriss abstecken. Leg die Form mit Sand auf den Boden und schau sie ein paar Tage aus dem Fenster an. Buchten verlängern das Ufer.
  5. Ausheben. Von außen nach innen arbeiten, die Zonen als Stufen ausformen. Die Oberkante rundum mit dem Laser auf eine Höhe bringen, Toleranz 2 cm.
  6. Untergrund und Folie. Steine und Wurzeln entfernen, 5 cm Sand einbringen, Vlies mit 30 cm Überlappung auslegen. EPDM bei 15 bis 20 Grad verlegen, Falten großflächig legen.
  7. Kapillarsperre bauen. Den Folienrand hinter dem Ufer 15 cm senkrecht hochziehen, dahinter eine Kiesrinne, erst danach zuschneiden. Ragt Erdreich über die Folie, saugt es den Teich pro Sommerwoche um 5 cm leer.
  8. Bepflanzen und füllen. 10 cm Substrat in die Flachzonen, zwei bis drei Pflanzen je Quadratmeter, Seerosen in Körben in 80 bis 120 cm Tiefe. Über 24 bis 48 Stunden langsam füllen. Nach 3 bis 6 Wochen wird das Wasser grün.

Zeit und Kosten

Für 50 m² brauchen drei bis fünf Personen ein Wochenende plus ein bis zwei Tage Bagger. Baggermiete 200 bis 350 Euro am Tag, EPDM 9 bis 14 Euro pro m², Vlies 2 Euro pro m². Ein Teich von 25 m² kostet 1.000 bis 2.500 Euro, 200 m² bis zu 15.000 Euro.

Die drei häufigsten Fehler

  • Steilufer ohne Ausstieg. An glatter Folie mit 45 Grad Neigung kommen Igel und Molche nicht heraus und ertrinken. Mindestens eine Seite mit 1 zu 5 abflachen.
  • Rand nicht in Waage. Zwei Zentimeter Höhenunterschied sind bei 10 m Teichlänge sichtbar, das Wasser läuft an der tiefsten Stelle über.
  • Fische eingesetzt. Goldfische und Karpfen fressen Laich und Libellenlarven und wühlen das Wasser trüb. Lass die Fische weg.

Before you start

The untere Wasserbehörde (the local water authority) at the Landratsamt (the district administration) decides whether your pond needs a permit. There is no fixed limit in square metres, so the questions there run differently: does the pond cut into the groundwater, does it get an inflow or an outflow, does it lie near a watercourse or inside a protected area? A garden pond sealed off from the groundwater with no inflow and no outflow usually stays free of all that, everything else you settle beforehand. Get the Leitungsauskunft (the search that tells you where cables and pipes run) before the digger arrives. The danger to people is plain: small children drown silently, and in 20 centimetres of water. As the owner you carry the Verkehrssicherungspflicht (the legal duty to keep your land safe for others), which means a firm rule for children and a rescue pole at the bank.

What you need

  • 1 EPDM pond liner of 1.14 mm, length plus twice the depth plus 1 m for the edge as the seal
  • Protective fleece at 500 g/m² in the size of the liner against roots
  • 3 m³ of 0/2 sand and 2 m³ of 8/16 gravel for the levelling layer and the shallows
  • 40 boulders, 20 to 50 cm for the bank and the exit ramps
  • 1 m³ of lean pond substrate, low in phosphate for the planting zones
  • 30 native water plants such as branched bur-reed, water plantain and water lily for planting up
  • 20 m of Uferwallmatte (a planting mat for the pond edge) as a capillary barrier
  • 4 planting baskets 40 x 40 cm for the water lilies
  • 1 rescue pole of 3 m and 1 ring buoy for keeping the place safe

Tools

Mini digger (hired), spade, wheelbarrow, rotating laser level, string line, rake, carpet knife

Step by step

  1. Settle the permit. Ring the untere Wasserbehörde (the local water authority) at the Landratsamt (the district administration). Depending on the Landeswassergesetz (the water act of your federal state), a pond has to be notified from about 100 m² upwards, and always in a protected area. Reckon on 4 to 12 weeks of processing.
  2. Choose the spot. At least 6 hours of sun, but not under trees, and 8 to 10 m clear of birch, willow and poplar. Do not put it in a hollow, or fertilised surface water will run into it.
  3. Set out the zones. Below 25 m² a pond does not carry itself. Marsh zone 0 to 20 cm and shallows 20 to 50 cm at 30 per cent each, deep zone from 150 cm at 20 per cent. Slopes shallower than 1 in 3.
  4. Mark out the outline. Lay the shape on the ground in sand and look at it from the window for a few days. Bays make the bank longer.
  5. Dig out. Work from the outside inwards and shape the zones as steps. Bring the top edge all the way round to one level with the laser, tolerance 2 cm.
  6. Base and liner. Take out stones and roots, bring in 5 cm of sand, lay the fleece with a 30 cm overlap. Lay the EPDM at 15 to 20 degrees and fold the creases into wide, flat pleats.
  7. Build the capillary barrier. Behind the bank, pull the edge of the liner 15 cm vertically upwards, put a gravel channel behind that, and only then trim it. If soil reaches over the liner, it wicks 5 cm out of the pond every summer week.
  8. Plant up and fill. 10 cm of substrate in the shallow zones, two or three plants per square metre, water lilies in baskets at 80 to 120 cm depth. Fill slowly over 24 to 48 hours. After 3 to 6 weeks the water turns green.

Time and cost

For 50 m² three to five people need a weekend plus one or two days with the digger. Digger hire 200 to 350 euros a day, EPDM 9 to 14 euros per m², fleece 2 euros per m². A pond of 25 m² costs 1,000 to 2,500 euros, one of 200 m² up to 15,000 euros.

The three most common mistakes

  • Steep banks with no way out. On smooth liner at 45 degrees hedgehogs and newts cannot climb out and they drown. Flatten at least one side to 1 in 5.
  • Edge not level. Two centimetres of difference show up over 10 m of pond, and the water runs out over the lowest point.
  • Fish put in. Goldfish and carp eat spawn and dragonfly larvae and stir the water cloudy. Leave the fish out.

Worauf es ankommtWhat matters hereKeine Fische, wenn ihr Amphibien wollt. Beides zusammen geht nicht, die Fische fressen den Laich.No fish if you want amphibians. The two do not go together, because the fish eat the spawn.

Pilzzucht auf Stammstücken, Growing mushrooms on logs
Ein WochenendeOne weekendEtwas ÜbungSome practice helps

Pilzzucht auf StammstückenGrowing mushrooms on logs

2 Personen, Stämme etwa 30 kg, schweres Heben2 people, logs of about 30 kg, heavy lifting

Austernseitlinge und Shiitake wachsen auf frisch geschlagenem Laubholz, das sonst im Ofen landen würde. Einmal beimpft trägt ein Stamm vier bis sechs Jahre, ohne dass ihr noch etwas tun müsst.Oyster mushrooms and shiitake grow on freshly cut hardwood that would otherwise end up in the stove. Once inoculated, a log carries for four to six years without you having to do anything more.

So wird gebautHow it is built
Frisches Buchen- oder Eichenholz, Löcher bohren, Dübelbrut einschlagen, mit Wachs versiegeln, schattig und feucht liegend lagern.Fresh beech or oak, holes drilled, dowel spawn tapped in, sealed with wax, then stacked lying in the shade and kept damp.
KostenCost
50 bis 150 Euro für die erste Charge50 to 150 euros for the first batch
Erster SchrittFirst step
Holz im Winter schlagen und innerhalb weniger Wochen beimpfen. Älteres Holz ist schon von anderen Pilzen besetzt.Cut the wood in winter and inoculate it within a few weeks. Older wood is already taken by other fungi.
Schritt für SchrittStep by step
Pilzzucht auf Stammstücken, Schnitt12345678910 cm5 cm100 cm lang8,5 mm30 mm tief10 cm1Stammstück 100 cm, 15 bis 25 cm2Bohrloch 8,5 mm, 30 mm tief3Dübel 2 mm unter der Rinde4Wachs über jedem Loch5Wachs auf beiden Stirnflächen6Reihen um 5 cm versetzt7Auflager 10 cm über dem Boden8Schattiernetz gegen Austrocknen9Ein Drittel senkrecht eingrabenNicht maßstäblich, Maße in cm
Bauskizze Pilzzucht auf Stammstücken, am Handy seitlich wischenMeasured sketch of Growing mushrooms on logs, swipe sideways on a phone

Bevor du anfängst

Willst du das Holz selbst schlagen, ist das Forstamt die Stelle, die du fragst. Es stellt den Holzeinschlagsschein aus und sagt dir, welchen Nachweis es verlangt, meist einen Motorsägenkurs für 150 bis 250 Euro. Ohne schriftliche Erlaubnis des Waldbesitzers nimmst du kein Holz. Außerhalb des Waldes verbietet Paragraf 39 Bundesnaturschutzgesetz vom 1. März bis 30. September das Fällen von Bäumen und Hecken. Die Motorsäge ist hier das eigentliche Risiko. Schnittschutzhose, Helm und Sicherheitsschuhe sind Pflicht, und im Wald arbeitet niemand allein. Beim Ernten gilt eine einfache Regel: nimm nur, was du selbst beimpft hast. Rohen Shiitake immer durchgaren.

Das brauchst du

  • 10 frische Stammstücke Buche, Eiche oder Erle, 15 bis 25 cm dick, 100 cm lang als Substrat
  • 250 Dübel Impfbrut Austernseitling (Pleurotus ostreatus) für fünf Stämme
  • 250 Dübel Impfbrut Shiitake (Lentinula edodes) für fünf weitere
  • 500 g Bienenwachs oder Käsewachs zum Versiegeln der Löcher
  • 1 Holzbohrer 8,5 mm mit Tiefenanschlag 30 mm für die Bohrlöcher
  • 1 Schattiernetz 4 x 5 m hält die Feuchte im Holz
  • 4 Kanthölzer 8 x 8 cm als Auflager
  • 1 Flasche Alkohol 70 Prozent zum Reinigen der Hände
  • 20 Etiketten für Sorte und Impfdatum
  • 1 alter Topf und 1 Pinsel für das Wachs

Werkzeug

Motorsäge, Akkubohrer mit Tiefenanschlag, Gummihammer, Kochplatte, Pinsel, Zollstock, Schnittschutzausrüstung

Schritt für Schritt

  1. Holz schlagen. Zwischen November und Februar, solange die Rinde fest sitzt. Geeignet sind Buche, Eiche, Hainbuche, Birke, Erle und Pappel. Niemals Nadelholz, das Harz verhindert die Besiedlung.
  2. Ablagern. Zwei bis acht Wochen schattig und aufgebockt liegen lassen. Frisches Holz wehrt sich noch. Ab drei Monaten sitzen Fremdpilze darin. Beimpfen spätestens Ende März.
  3. Bohrmuster anzeichnen. Diamantmuster mit 10 cm Abstand in der Reihe, 5 cm zwischen den Reihen, jede Reihe um 5 cm versetzt. Auf 1 m Stamm kommen 40 bis 50 Löcher.
  4. Bohren. Mit dem 8,5-mm-Bohrer senkrecht 30 mm tief bohren, Späne ausblasen. Nicht in Astlöcher und nicht in beschädigte Rindenstellen bohren.
  5. Dübel einschlagen. Hände und Hammer mit Alkohol abwischen, jeden Dübel 2 bis 3 mm unter die Rindenoberfläche treiben. Offene Packungen am selben Tag aufbrauchen.
  6. Versiegeln. Wachs im Wasserbad auf 65 bis 70 Grad bringen und über jedes Loch und beide Stirnflächen streichen. Das hält die Feuchte im Holz.
  7. Durchwachsen lassen. Stämme schattig auf Kanthölzern 10 cm über dem Boden stapeln, Netz darüber. Austernseitling braucht 6 bis 9 Monate, Shiitake 12 bis 18 Monate. Bei Trockenheit wöchentlich 20 Minuten wässern, die Holzfeuchte soll über 35 Prozent liegen.
  8. Aufstellen und ernten. Sind die Stirnflächen weiß durchwachsen, grab die Stämme zu einem Drittel senkrecht ein. Austernseitling fruchtet von September bis November, Shiitake im Frühjahr und Herbst. Danach den Stamm 12 bis 24 Stunden beschwert wässern für den nächsten Schub.

Zeit und Kosten

Zwei Personen beimpfen zehn Stämme in 6 bis 8 Stunden. Dübelbrut kostet 12 bis 18 Euro je 100 Stück, Wachs 10 Euro, Netz 25 Euro, zusammen 50 bis 150 Euro. Ab dem zweiten Jahr bringt ein Stamm 1 bis 3 kg Pilze.

Die drei häufigsten Fehler

  • Falsches oder zu altes Holz. Fichte und Kiefer werden nie besiedelt, und Buche vom Wegrand ist voll mit Schimmel und Trameten.
  • Löcher nicht versiegelt. Ohne Wachs trocknen die Dübel binnen zwei Wochen aus und Fremdsporen besetzen die Bohrungen. Der Stamm fruchtet nie.
  • Zu sonnig gelagert. Ein Stapel an der Südwand trocknet im Juli unter 25 Prozent Holzfeuchte, das Myzel stirbt. Stapel nordseitig oder unter Netz.

Before you start

If you want to cut the wood yourself, the Forstamt (the forestry office) is who you ask. It issues the Holzeinschlagsschein (the permit to fell timber) and tells you what proof it wants, usually a chainsaw course for 150 to 250 euros. Without the written permission of the forest owner you take no wood at all. Outside the forest, Section 39 of the Bundesnaturschutzgesetz (the federal nature conservation act) forbids the felling of trees and hedges from 1 March to 30 September. The chainsaw is the real risk here. Chainsaw trousers, helmet and safety boots are compulsory, and nobody works alone in the woods. When you harvest there is one simple rule: take only what you inoculated yourself. Always cook shiitake through.

What you need

  • 10 fresh logs of beech, oak or alder, 15 to 25 cm thick, 100 cm long as the substrate
  • 250 dowels of oyster mushroom spawn (Pleurotus ostreatus) for five logs
  • 250 dowels of shiitake spawn (Lentinula edodes) for five more
  • 500 g of beeswax or cheese wax for sealing the holes
  • 1 wood drill bit of 8.5 mm with a depth stop at 30 mm for the holes
  • 1 shade net 4 x 5 m keeps the moisture in the wood
  • 4 squared timbers 8 x 8 cm as bearers
  • 1 bottle of alcohol at 70 per cent for cleaning your hands
  • 20 labels for the species and the date of inoculation
  • 1 old pan and 1 brush for the wax

Tools

Chainsaw, cordless drill with a depth stop, rubber mallet, hotplate, brush, folding rule, chainsaw protective clothing

Step by step

  1. Cut the wood. Between November and February, while the bark still sits tight. Beech, oak, hornbeam, birch, alder and poplar all work. Never softwood, because the resin stops the fungus taking hold.
  2. Let it rest. Leave it lying in the shade for two to eight weeks, up off the ground. Fresh wood still fights back. After three months other fungi have moved in. Inoculate by the end of March at the latest.
  3. Mark the drilling pattern. A diamond pattern with 10 cm between the holes in a row, 5 cm between the rows, every row offset by 5 cm. A log of 1 m takes 40 to 50 holes.
  4. Drill. With the 8.5 mm bit, drill straight in to 30 mm and blow the shavings out. Do not drill into knots or into damaged patches of bark.
  5. Tap the dowels in. Wipe your hands and the mallet with alcohol and drive every dowel 2 to 3 mm below the surface of the bark. Use up an opened bag the same day.
  6. Seal. Bring the wax to 65 to 70 degrees in a water bath and brush it over every hole and both cut ends. That keeps the moisture in the wood.
  7. Let the mycelium run. Stack the logs in the shade on bearers 10 cm above the ground and put the net over them. Oyster mushrooms need 6 to 9 months, shiitake 12 to 18 months. In dry weather water them for 20 minutes a week, and keep the moisture in the wood above 35 per cent.
  8. Stand them up and harvest. Once the cut ends have grown through white, set the logs upright with a third of each buried. Oyster mushrooms fruit from September to November, shiitake in spring and autumn. After a flush, weigh the log down in water for 12 to 24 hours to bring on the next one.

Time and cost

Two people inoculate ten logs in 6 to 8 hours. Dowel spawn costs 12 to 18 euros per 100, wax 10 euros, the net 25 euros, 50 to 150 euros all together. From the second year on, one log gives 1 to 3 kg of mushrooms.

The three most common mistakes

  • Wrong wood, or wood too old. Spruce and pine are never colonised, and beech that has lain by the track is full of mould and bracket fungi.
  • Holes left unsealed. Without wax the dowels dry out within two weeks and other spores take the holes. The log never fruits.
  • Stacked too sunny. A stack against a south wall dries below 25 per cent wood moisture in July and the mycelium dies. Stack it on the north side or under the net.

Worauf es ankommtWhat matters hereNiemals Nadelholz nehmen. Und beim Ernten wirklich sicher sein, was da wächst.Never use softwood. And when you harvest, be certain what it is that has grown there.

Wörterbuch, 99 Begriffe vom Bau erklärtDictionary, 99 building terms explainedDictionary, 99 building terms explained
SiebdruckplatteWasserfest verleimtes Sperrholz mit einer rauen, dunkelbraunen Oberfläche, das jahrelang draußen aushält. Aus einer 18 Millimeter dicken Platte baust du zum Beispiel den Kasten einer Trockentoilette.Im Baumarkt: Siebdruckplatte 18 mm im Holzhandel, dort schneiden sie dir die Platte auf dein Maß, meist für ein bis zwei Euro je Schnitt.
Siebdruckplatte (birch plywood with a resin coated surface)Plywood glued with waterproof adhesive, with a rough dark brown surface that lasts for years outdoors. From an 18 millimetre sheet you build the box of a dry toilet, for example.At the hardware store: Siebdruckplatte 18 mm at a timber merchant, where they cut the sheet to your measurements, usually for one to two euros per cut.
SpaxDer bekannteste Markenname für Holzschrauben, deshalb sagen im Laden alle Spax, egal welche Marke in der Kiste liegt. Im Kopf sitzt eine sternförmige Vertiefung, und die Schraube zieht sich ohne Vorbohren ins Holz.Im Baumarkt: Holzschrauben mit Sternkopf in der Größe aus der Liste, also zum Beispiel 4 x 45 mm, der passende Aufsatz für den Akkuschrauber liegt oft bei.
Spax (the best known brand of wood screw, used as a generic name)The best known brand name for wood screws, which is why everyone in the shop says Spax, whatever make is actually in the box. The head has a star shaped recess, and the screw pulls itself into the wood without a pilot hole.At the hardware store: wood screws with a star head in the size from the list, so 4 x 45 mm for example. The matching bit for the cordless driver often comes with them.
KantholzEin gerade gesägter Balken mit rechteckiger Form. Die Angabe 8 x 8 cm heißt acht Zentimeter breit und acht Zentimeter hoch, die Länge sagst du extra dazu.Im Baumarkt: Kantholz 8 x 8 cm in der gewünschten Länge, Fichte ist billig, Lärche und Douglasie halten draußen viel länger.
Kantholz (squared timber, sawn straight on all four sides)A straight sawn beam with a rectangular shape. The figure 8 x 8 cm means eight centimetres wide and eight centimetres high, and you state the length separately.At the hardware store: Kantholz 8 x 8 cm in the length you want. Spruce is cheap, while larch and Douglas fir last far longer outdoors.
KVH oder KonstruktionsvollholzBauholz, das getrocknet und gehobelt wurde und bei dem große Äste ausgeschnitten sind. Es kostet mehr als einfaches Bauholz und bleibt dafür gerade, statt sich beim Trocknen zu verdrehen.Im Baumarkt: KVH in der Größe aus der Liste, im Holzhandel oder Baustoffhandel, im Baumarkt gibt es meist nur wenige Maße.
KVH oder Konstruktionsvollholz (kiln dried and planed structural timber)Structural timber that has been dried and planed, with the larger knots cut out. It costs more than plain structural timber and stays straight instead of twisting as it dries.At the hardware store: KVH in the size from the list, at a timber or builders merchant. A DIY store usually keeps only a few sizes.
RauspundDicke Bretter für Böden und Dächer, die an den Längskanten ineinandergreifen. Eine Seite ist glatt gehobelt, die andere bleibt rau, daher der Name.Im Baumarkt: Rauspund 28 mm, wird nach Quadratmeter verkauft.
Rauspund (thick tongue and groove boarding, planed on one face)Thick boards for floors and roofs that interlock along their long edges. One face is planed smooth, the other stays rough, and that is where the name comes from.At the hardware store: Rauspund 28 mm, sold by the square metre.
Nut und FederAn der einen Längskante eines Bretts ist eine Rille eingefräst, an der anderen eine passende Leiste. Steckst du die Bretter zusammen, entsteht eine geschlossene Fläche ohne Ritzen.Im Baumarkt: Profilbretter mit Nut und Feder, sag dazu, ob sie nach innen oder nach außen kommen.
Nut und Feder (tongue and groove)One long edge of a board has a groove milled into it, the other a matching tongue. Push the boards together and you get a closed surface with no gaps.At the hardware store: profiled boards with tongue and groove. Say whether they are going inside or outside.
BohleEin besonders dickes Brett ab etwa drei Zentimetern. Für ein Hochbeet nimmt man Bohlen, weil dünne Bretter sich unter dem Druck der feuchten Erde nach außen wölben.Im Baumarkt: Bohle 20 x 4 cm aus Lärche oder Douglasie.
Bohle (a plank, from about three centimetres thick)A particularly thick board, from around three centimetres up. For a raised bed you take planks, because thin boards bow outwards under the pressure of the damp soil.At the hardware store: Bohle 20 x 4 cm in larch or Douglas fir.
Sperrholz und MultiplexDünne Holzlagen, die kreuzweise übereinander verleimt sind. Dadurch ist die Platte in beide Richtungen fest, Multiplex ist die dickere Ausführung mit besonders vielen Lagen.Im Baumarkt: Sperrholz 12 mm oder Multiplex 18 mm, für draußen ausdrücklich nach wasserfester Verleimung fragen.
Sperrholz und Multiplex (plywood and thick multi layer plywood)Thin layers of wood glued crosswise on top of each other. That makes the sheet firm in both directions, and Multiplex is the thicker version with a great many layers.At the hardware store: Sperrholz 12 mm or Multiplex 18 mm. For anything outdoors, ask explicitly for waterproof glue.
OSB-PlatteEine Platte aus großen, flach gepressten Holzspänen, gut erkennbar an der grob gemusterten Oberfläche. Sie ist billig und wird als Beplankung von Wänden und Böden genutzt.Im Baumarkt: OSB 15 mm oder 25 mm, für Böden die Variante mit Nut und Feder.
OSB-Platte (oriented strand board)A board of large wood chips pressed flat, easy to recognise by the coarsely patterned surface. It is cheap and gets used to sheathe walls and floors.At the hardware store: OSB 15 mm or 25 mm, and for floors the version with tongue and groove.
KonterlattungEine zweite Lage Latten, quer über die erste geschraubt. Dadurch bleibt hinter der Holzverkleidung ein Luftspalt, in dem Feuchtigkeit abtrocknen kann, statt die Wand zu durchnässen.Im Baumarkt: Latte 30 x 50 mm.
Konterlattung (counter battens)A second layer of battens screwed across the first. That leaves an air gap behind the timber cladding where damp can dry out, instead of soaking the wall.At the hardware store: batten 30 x 50 mm.
HirnholzDie Schnittfläche am Ende eines Balkens, dort wo man die Jahresringe sieht. Sie saugt Wasser wie ein Strohhalm, deshalb darf sie nie nach oben zeigen und nie auf nassem Boden stehen.
Hirnholz (end grain)The cut face at the end of a beam, where you can see the annual rings. It draws water like a straw, so it must never point upwards and never stand on wet ground.
FuchsschwanzEine ganz gewöhnliche Handsäge mit breitem Blatt und einem Griff, benannt nach der Form des Blattes. Damit sägst du Bretter und Latten ohne Strom, es dauert nur länger als mit der Maschine.Im Baumarkt: Handsäge oder Fuchsschwanz, etwa 15 Euro, für Bauholz eine mit groben Zähnen nehmen.
Fuchsschwanz (a plain hand saw, literally fox tail)An ordinary hand saw with a wide blade and one handle, named after the shape of the blade. You cut boards and battens with it without electricity, it only takes longer than with a machine.At the hardware store: hand saw or Fuchsschwanz, about 15 euros. For structural timber take one with coarse teeth.
HandkreissägeEine Maschine mit rundem Sägeblatt, die du über das Brett schiebst. Legst du eine Führungsschiene auf, werden die Schnitte gerade, freihändig laufen sie schnell schief.Im Baumarkt: Handkreissäge mit Führungsschiene, ohne Schiene lohnt sie kaum.
Handkreissäge (circular saw)A machine with a round blade that you push along the board. Lay a guide rail on top and the cuts come out straight. Freehand they run off line quickly.At the hardware store: circular saw with a guide rail. Without the rail it is hardly worth having.
LochsägeEin runder Sägekranz, den du in die Bohrmaschine spannst. Damit schneidest du saubere runde Löcher, etwa 80 Millimeter für ein Lüftungsrohr.Im Baumarkt: Lochsäge 80 mm mit Aufnahme und Zentrierbohrer.
Lochsäge (hole saw)A round ring of saw teeth that you clamp into the drill. With it you cut clean round holes, say 80 millimetres for a ventilation pipe.At the hardware store: hole saw 80 mm with an arbor and a centring bit.
SchlangenbohrerEin langer Bohrer mit grober Spirale für dicke Balken. Er zieht sich selbst ins Holz und schafft auch zwanzig Zentimeter tiefe Löcher.Im Baumarkt: Schlangenbohrer in der Stärke der Schraube, meist 10 oder 12 mm.
Schlangenbohrer (auger bit)A long bit with a coarse spiral for thick beams. It pulls itself into the wood and manages holes twenty centimetres deep.At the hardware store: auger bit in the thickness of the screw, usually 10 or 12 mm.
Ratsche und SW 17Eine Ratsche ist ein Schraubenschlüssel mit Sperrklinke, der beim Zurückschwenken leer mitläuft. SW 17 heißt Schlüsselweite 17 Millimeter, also der Abstand zwischen zwei gegenüberliegenden Flächen der Mutter, und genau diese Zahl muss auf dem Aufsatz stehen.Im Baumarkt: Ratschenkasten mit Nüssen von 8 bis 22 mm, damit deckst du fast alles ab.
Ratsche und SW 17 (a ratchet, and Schlüsselweite 17, meaning a spanner size of 17 millimetres)A ratchet is a spanner with a pawl that runs free on the back swing. SW 17 means a spanner size of 17 millimetres, so the distance between two opposite faces of the nut, and exactly that number has to be on the socket.At the hardware store: a ratchet set with sockets from 8 to 22 mm, which covers almost everything.
Bohrhammer und SchlagbohrmaschineBeide bohren in Stein, der Bohrhammer klopft dabei viel kräftiger und geht auch durch Beton. Für ein paar Löcher in Ziegel reicht die Schlagbohrmaschine.Im Baumarkt: Bohrhammer mit SDS-Aufnahme, dazu Steinbohrer 8 und 10 mm.
Bohrhammer und Schlagbohrmaschine (rotary hammer and impact drill)Both drill into stone. The rotary hammer strikes far harder and goes through concrete as well. For a few holes in brick the impact drill is enough.At the hardware store: rotary hammer with an SDS chuck, plus masonry bits of 8 and 10 mm.
WinkelschleiferEine Maschine mit schnell drehender Scheibe, im Laden oft Flex genannt, zum Trennen von Stein und Metall. Sie ist das gefährlichste Gerät in dieser Sammlung und will Schutzbrille und beide Hände.Im Baumarkt: Winkelschleifer 125 mm, dazu je eine Trennscheibe für Stein und für Metall.
Winkelschleifer (angle grinder)A machine with a fast spinning disc, often called a Flex in the shop, for cutting stone and metal. It is the most dangerous tool in this collection and wants safety glasses and both hands on it.At the hardware store: angle grinder 125 mm, plus one cutting disc for stone and one for metal.
Multitool mit BimetallblattEine kleine Maschine, deren Sägeblatt schnell hin und her schwingt. Damit sägst du die Nägel in einer Palette durch, ohne das Holz kaputt zu reißen.Im Baumarkt: Multifunktionswerkzeug mit Sägeblättern für Holz mit Nägeln.
Multitool mit Bimetallblatt (oscillating multi tool with a bi metal blade)A small machine whose blade swings quickly back and forth. With it you cut through the nails in a pallet without tearing the wood apart.At the hardware store: oscillating multi tool with blades for wood that has nails in it.
RüttelplatteEine schwere Maschine mit vibrierender Bodenplatte, die Schotter und Sand so festklopft, dass später nichts nachsackt. Sie wiegt 60 bis 100 Kilo und geht nur zu zweit ins Auto.Im Baumarkt: Rüttelplatte im Baumaschinenverleih, etwa 45 Euro am Tag.
Rüttelplatte (plate compactor)A heavy machine with a vibrating base plate that packs gravel and sand down so firmly that nothing settles later. It weighs 60 to 100 kilos and takes two people to get into a car.At the hardware store: plate compactor from a plant hire yard, about 45 euros a day.
HandstampferEine schwere Metallplatte an einem Stiel, mit der du kleine Flächen von Hand festklopfst. Für ein paar Quadratmeter reicht das, darüber leihst du besser die Maschine.
Handstampfer (hand tamper)A heavy metal plate on a handle that you pack small areas down with by hand. For a few square metres that will do, above that you are better off hiring the machine.
RotationslaserEin Gerät auf einem Stativ, das einen Lichtstrahl im Kreis herumdreht. Damit findest du auf einer großen Fläche überall genau dieselbe Höhe, wofür die Wasserwaage viel zu kurz ist.Im Baumarkt: Rotationslaser mit Empfänger und Messlatte, im Verleih 25 bis 40 Euro am Tag.
Rotationslaser (rotating laser level)A device on a tripod that turns a beam of light in a circle. With it you find exactly the same height anywhere on a large area, which a spirit level is far too short for.At the hardware store: rotating laser with a receiver and a levelling staff, 25 to 40 euros a day from a hire shop.
MaurerschnurEine dünne reißfeste Schnur, die zwischen zwei Pflöcken straff gespannt wird. Sie zeigt dir die gerade Linie und die richtige Höhe, an der entlang du baust.Im Baumarkt: Maurerschnur 50 m und ein paar Holzpflöcke, zusammen unter zehn Euro.
Maurerschnur (builders line)A thin line that will not tear, pulled tight between two pegs. It shows you the straight line and the right height to build along.At the hardware store: builders line 50 m and a few wooden pegs, under ten euros together.
SchnurgerüstEin Rahmen aus Pfosten und Brettern rund um die Baustelle, an dem die Schnüre festgemacht werden. So bleiben deine Maße erhalten, auch wenn du mittendrin die Erde ausgräbst.
Schnurgerüst (profile boards set up around the site to carry the string lines)A frame of posts and boards around the site that the lines are tied to. That way your measurements survive even when you dig the soil out in the middle.
RichtlatteEine sehr gerade Latte, meist zwei Meter lang. Damit prüfst du, ob eine Fläche eben ist, und ziehst frischen Beton glatt.Im Baumarkt: Richtlatte oder Abziehlatte aus Aluminium, 200 cm, Holz verzieht sich.
Richtlatte (a straight edge, also used as a screed board)A very straight batten, usually two metres long. With it you check whether a surface is level, and you pull fresh concrete smooth.At the hardware store: straight edge or screed board in aluminium, 200 cm. Wood warps.
im Lot und auswaagenIm Lot heißt genau senkrecht, auswaagen heißt genau waagerecht ausrichten. Beides prüfst du mit der Wasserwaage, wenn die Luftblase zwischen den beiden Strichen steht, passt es.
im Lot und auswaagen (plumb, and setting something level)Plumb means exactly vertical, and auswaagen means setting something exactly horizontal. You check both with the spirit level, and when the bubble sits between the two lines it is right.
SilikonpistoleEin Handgerät, in das die Kartusche mit Dichtmasse eingespannt wird. Der Hebel schiebt die Masse gleichmäßig heraus, von Hand geht das nicht.Im Baumarkt: Kartuschenpresse für Standardkartuschen, etwa zehn Euro.
Silikonpistole (sealant gun)A hand tool that the cartridge of sealant is clamped into. The lever pushes the mass out evenly, which you cannot manage by hand.At the hardware store: cartridge gun for standard cartridges, about ten euros.
Körnung wie 0/32Die beiden Zahlen sind die Korngrößen in Millimetern. 0/32 heißt, es ist alles von Staub bis 32 Millimeter enthalten, und gerade der feine Staub sorgt dafür, dass sich das Material festklopfen lässt und später nichts nachsackt.Im Baumarkt: Schotter 0/32 im Baustoffhandel, Verkauf nach Tonne. Eine Tonne passt nicht ins Auto, frag gleich nach Lieferung oder nach einem Anhänger.
Körnung wie 0/32 (a grading such as 0/32, meaning the range of particle sizes)The two numbers are the grain sizes in millimetres. 0/32 means everything from dust up to 32 millimetres is in there, and it is the fine dust that lets the material be packed down so that nothing settles later.At the hardware store: crushed stone 0/32 at a builders merchant, sold by the tonne. A tonne will not go in a car, so ask about delivery or a trailer straight away.
Kies und Splitt mit zwei ähnlichen ZahlenBei 8/16 oder 16/32 fehlen die feinen Anteile, alle Steinchen sind ungefähr gleich groß. Solches Material bleibt locker und lässt Wasser durch, deshalb nimmt man es überall dort, wo etwas versickern soll.Im Baumarkt: Kies 16/32 oder Splitt 8/16, im Sack oder lose.
Kies und Splitt mit zwei ähnlichen Zahlen (gravel and chippings with two similar numbers)With 8/16 or 16/32 the fine material is missing, so all the stones are roughly the same size. Material like that stays loose and lets water through, which is why it goes wherever something has to soak away.At the hardware store: gravel 16/32 or chippings 8/16, in bags or loose.
Beton C25/30Die Zahlen sagen, wie viel Druck der ausgehärtete Beton aushält, C25/30 ist der übliche Beton für Fundamente. Kleine Mengen mischst du aus dem Sack, ab etwa einem Kubikmeter lohnt der Fahrmischer.Im Baumarkt: Sackbeton 25 kg für wenige Löcher, sonst Transportbeton C25/30 bestellen und dabei sagen, wie weit der Wagen fahren kann.
Beton C25/30 (concrete of strength class C25/30)The numbers say how much pressure the hardened concrete takes, and C25/30 is the usual concrete for foundations. Small amounts you mix from the bag, and from about a cubic metre a ready mix lorry is worth it.At the hardware store: bagged concrete 25 kg for a few holes, otherwise order ready mixed C25/30 and say how close the lorry can get.
Füllbeton C20/25Ein etwas schwächerer und dünnflüssiger Beton, mit dem hohle Steine ausgegossen werden. Er muss fließen können, damit keine Luftlöcher in der Wand bleiben.
Füllbeton C20/25 (a wetter infill concrete of class C20/25 for filling hollow blocks)A slightly weaker and more fluid concrete that hollow blocks are filled with. It has to be able to flow, so that no air pockets are left in the wall.
abbindenBeton trocknet nicht, er bindet ab, das heißt er verbindet sich chemisch mit dem Wasser und wird dabei hart. Deshalb muss er feucht gehalten werden und braucht mehrere Tage Ruhe, bevor Last darauf darf.
abbinden (to cure, said of concrete)Concrete does not dry, it cures, which means it combines chemically with the water and goes hard in the process. That is why it has to be kept damp and needs several days of rest before any load goes on it.
Baustahlmatte Q188Ein Gitter aus Stahlstäben, das in den Beton eingelegt wird, damit er nicht reißt. Q188 ist die übliche Größe für Bodenplatten.Im Baumarkt: Baustahlmatte Q188, die Standardmatte misst 5 x 2,15 m und passt nur auf einen Anhänger.
Baustahlmatte Q188 (Q188 steel reinforcing mesh)A grid of steel bars laid into the concrete so that it does not crack. Q188 is the usual size for floor slabs.At the hardware store: Baustahlmatte Q188. The standard sheet measures 5 x 2.15 m and will only go on a trailer.
SchalungssteinEin hohler Betonstein, der ohne Mörtel aufeinandergesetzt und danach mit flüssigem Beton gefüllt wird. So entsteht eine tragende Wand, ohne dass jemand mauern können muss.Im Baumarkt: Schalungsstein 25 x 25 x 50 cm, einer wiegt etwa 20 Kilo.
Schalungsstein (a hollow concrete block, laid dry and then filled with concrete)A hollow concrete block that is stacked without mortar and then filled with liquid concrete. That gives you a load-bearing wall without anyone needing to know how to lay bricks.At the hardware store: Schalungsstein 25 x 25 x 50 cm. One block weighs about 20 kilos.
SchamotteEin hitzefester Stein aus gebranntem Ton, der die Flamme direkt aushält, ohne zu zerspringen. Er sitzt in Backöfen und Kaminen überall dort, wo das Feuer hinkommt.Im Baumarkt: Schamottstein und dazu passender Schamottmörtel, im Kaminfachhandel oder beim Ofenbauer.
Schamotte (fire clay, as in firebrick)A heat-resistant brick of fired clay that takes the flame directly without cracking apart. It sits in bread ovens and fireplaces wherever the fire reaches.At the hardware store: firebrick and the fire clay mortar that goes with it, at a stove supplier or at a stove builder.
BlähtonKleine leichte Tonkugeln, die bei großer Hitze aufgepoppt sind wie Popcorn. Sie sind innen voller Luft und dämmen deshalb gut, Wasser läuft ohne Weiteres hindurch.Im Baumarkt: Blähton 8/16 im Sack, im Gartenmarkt oder im Baustoffhandel.
Blähton (expanded clay pebbles)Small light clay balls that have popped open under great heat, the way popcorn does. They are full of air inside and insulate well, and water runs straight through them.At the hardware store: Blähton 8/16 in bags, at a garden centre or a builders merchant.
Perlit und VermiculitAufgeblähtes Vulkangestein in weißen oder goldenen Krümeln. Es ist federleicht und brennt nicht, deshalb schüttet man es als Dämmung in den Zwischenraum von Öfen.Im Baumarkt: Perlit oder Vermiculit im Ofenbedarf, im Gartenhandel heißt es oft Pflanzperlit.
Perlit und Vermiculit (perlite and vermiculite)Expanded volcanic rock in white or golden crumbs. It weighs almost nothing and does not burn, so it gets poured into the cavity of a stove as insulation.At the hardware store: perlite or vermiculite at a stove supplier. In garden shops it is often sold as Pflanzperlit.
magern und abmagernFetten Lehm oder fette Erde mit Sand mischen. Reiner Lehm schrumpft beim Trocknen und reißt, mit Sand gemischt bleibt er in Form.
magern und abmagern (to lean a clay mix down by adding sand)Mixing fatty clay or fatty soil with sand. Pure clay shrinks as it dries and cracks, and mixed with sand it holds its shape.
Punktfundament und frostfrei gründenStatt einer durchgehenden Platte gießt man unter jeden Pfosten einen eigenen Betonklotz. Frostfrei heißt, dass er mindestens achtzig Zentimeter tief reicht, damit der Frost ihn im Winter nicht anhebt.
Punktfundament und frostfrei gründen (pad foundations, and founding below the frost line)Instead of one continuous slab you pour a separate block of concrete under each post. Frost free means it reaches at least eighty centimetres down, so that the frost cannot lift it in winter.
verdichtenSchotter oder Sand so lange klopfen oder rütteln, bis sich die Körner ineinanderschieben und nichts mehr nachgibt. Wer das auslässt, hat nach dem ersten Winter Mulden in der Fläche.
verdichten (to compact)Tamping or vibrating gravel or sand until the grains slide into each other and nothing gives way. Leave it out and you have hollows in the surface after the first winter.
StänderwerkDas Gerippe einer Wand aus senkrechten Hölzern in gleichmäßigem Abstand. Dazwischen kommt später die Dämmung, außen und innen werden Platten oder Bretter darauf befestigt.
Ständerwerk (stud framing)The skeleton of a wall made of vertical timbers at even spacing. The insulation goes between them, and boards or sheets are fixed on the outside and the inside.
PfetteEin waagerechter Balken, der oben auf den Pfosten liegt und die schrägen Dachbalken trägt. Bei einem Unterstand sind es meist zwei, einer vorn und einer hinten.
Pfette (purlin)A horizontal beam that lies on top of the posts and carries the sloping roof timbers. On a shelter there are usually two, one at the front and one at the back.
SparrenDie schrägen Balken, die über das Dach von oben nach unten laufen. Auf ihnen liegt die Dachhaut, also zum Beispiel Blech oder Ziegel.
Sparren (rafters)The sloping beams that run down the roof from top to bottom. The roof covering lies on them, so sheet metal or tiles for example.
FirstDie oberste waagerechte Kante eines Dachs, dort wo zwei Dachflächen zusammenstoßen. Bei einem Dach mit nur einer Fläche ist es einfach die hohe Kante.
First (the ridge of a roof)The top horizontal edge of a roof, where two roof surfaces meet. On a roof with only one surface it is simply the high edge.
TraufeDie untere Kante des Dachs, an der das Wasser abläuft und die Rinne hängt. Von First bis Traufe geht es also von ganz oben bis ganz unten.
Traufe (the eaves)The bottom edge of the roof, where the water runs off and the gutter hangs. From ridge to eaves therefore means from the very top to the very bottom.
PultdachEin Dach mit nur einer geneigten Fläche, wie ein schräg gestelltes Pult. Es ist die einfachste Dachform und braucht keinen Grat in der Mitte.
Pultdach (a mono pitch roof)A roof with only one sloping surface, like a lectern set at an angle. It is the simplest roof shape and needs no ridge in the middle.
AussteifungAllesAll, was ein Gerippe gegen Verschieben sichert, meist schräge Streben oder eine fest verschraubte Platte. Ohne sie kippt ein rechteckiger Rahmen seitlich weg.
Aussteifung (bracing)Anything that stops a frame from racking, usually diagonal struts or a firmly screwed sheet. Without it a rectangular frame folds over sideways.
RingankerEin umlaufendes Band aus Gurten, Stahl oder Beton, das die Wände rundum zusammenhält. Es fängt den Druck ab, der die Wände nach außen schieben will.
Ringanker (a ring beam, a tie running right round the building)A band of webbing straps, steel or concrete that runs right round the building and holds the walls together. It takes up the pressure that wants to push the walls outwards.
ZugbandEin Seil, Gurt oder Stab, der zwei Bauteile gegen das Auseinanderdrücken zusammenhält. Bei der Jurte hält es die Wand, die das Dach sonst nach außen schieben würde.
Zugband (a tension tie)A rope, strap or rod that holds two parts together against being pushed apart. On a yurt it holds the wall that the roof would otherwise push outwards.
BalkenschuhEin Blechteil in U-Form, in das ein Balken hineingestellt und dann festgeschraubt wird. So hängt ein Balken sicher am anderen, ohne dass jemand Zapfen schnitzen muss.Im Baumarkt: Balkenschuh mit dem Innenmaß deines Balkens, dazu die kurzen dicken Ankernägel.
Balkenschuh (joist hanger)A U-shaped steel part that a beam is set into and then screwed tight. That way one beam hangs safely from the next, without anyone having to cut a joint.At the hardware store: joist hanger to the inside dimension of your beam, plus the short thick anchor nails.
H-AnkerEin Metallteil in Form eines H, unten ein Blech zum Einbetonieren, oben eine Gabel für den Holzpfosten. Der Pfosten steht damit ein paar Zentimeter über dem Boden und fault nicht von unten weg.Im Baumarkt: H-Anker 91 mm oder 121 mm, die Zahl ist die Breite deines Pfostens.
H-Anker (an H shaped post base, set in concrete)A metal part in the shape of an H, with a plate at the bottom to set in concrete and a fork at the top for the timber post. The post then stands a few centimetres above the ground and does not rot away from below.At the hardware store: H-Anker 91 mm or 121 mm, and the number is the width of your post.
ErdankerEin Stab oder Rohr, meist sechzig Zentimeter lang, das mit dem Vorschlaghammer in den Boden getrieben wird und dort das Fundament ersetzt. Achtzehn Stück einzuschlagen dauert einen halben Tag und macht die Arme müde.Im Baumarkt: Erdanker oder Bodenhülse aus Rohr 32 mm, im Zaunbedarf oder im Gartenmarkt.
Erdanker (a ground anchor driven into the soil)A rod or tube, usually sixty centimetres long, that is driven into the ground with a sledgehammer and takes the place of a foundation. Driving eighteen of them in takes half a day and makes your arms tired.At the hardware store: ground anchor or ground socket from 32 mm tube, in the fencing section or at a garden centre.
VollgewindeschraubeEine lange Holzschraube, deren Gewinde bis unter den Kopf durchläuft. Sie zieht zwei Balken fest zusammen und ersetzt heute viele der alten Holzverbindungen.Im Baumarkt: Vollgewindeschraube 8 x 200 mm mit dem passenden Aufsatz, im Baustoffhandel billiger als im Baumarkt.
Vollgewindeschraube (a fully threaded structural timber screw)A long wood screw whose thread runs all the way up to the head. It pulls two beams tightly together and today it takes the place of many old timber joints.At the hardware store: Vollgewindeschraube 8 x 200 mm with the matching bit, cheaper at a builders merchant than at a DIY store.
KarosseriescheibeEine besonders große dünne Unterlegscheibe. Sie verteilt den Druck der Schraube auf eine breite Fläche, damit der Kopf nicht ins weiche Holz einsinkt.Im Baumarkt: Karosseriescheiben in der Größe der Schraube, also M10 für eine Schraube mit zehn Millimetern.
Karosseriescheibe (a large thin washer, a penny washer)A particularly large thin washer. It spreads the pressure of the screw over a wide area, so that the head does not sink into soft wood.At the hardware store: penny washers in the size of the screw, so M10 for a screw of ten millimetres.
Binder und BindersteineLange Steine, die quer durch die ganze Mauer reichen und beide Seiten miteinander verzahnen. Ohne sie fällt eine Trockenmauer nach ein paar Jahren in zwei Hälften auseinander.
Binder und Bindersteine (through stones that tie both faces of a wall together)Long stones that reach right through the wall and lock both faces together. Without them a dry stone wall falls apart into two halves after a few years.
AnlaufDie leichte Rückneigung einer Mauer gegen den Hang, meist zehn bis fünfzehn Prozent. Dadurch drückt der Berg die Mauer in sich hinein statt nach vorn um.
Anlauf (the batter, the backward lean of a wall)The slight backward lean of a wall into the slope, usually ten to fifteen per cent. That makes the hill press the wall into itself, rather than push it over forwards.
im VerbandSteine so setzen, dass die Fugen nicht übereinanderliegen, sondern immer versetzt sind, wie bei einer Ziegelwand. Eine durchgehende senkrechte Fuge ist die Stelle, an der die Mauer später aufreißt.
im Verband (in bond, with the joints staggered)Setting stones so that the joints do not sit above each other but are always offset, as in a brick wall. A continuous vertical joint is the place where the wall will crack open later.
Vlies und GeotextilEin Stoff aus verfilzten Fasern, der aussieht wie sehr dicker Filz. Er hält Erde zurück und lässt Wasser durch, deshalb liegt er als Trennschicht zwischen Erde und Kies.Im Baumarkt: Geotextil oder Unkrautvlies, die Angabe in Gramm je Quadratmeter ist das Gewicht, 150 g ist der übliche Wert.
Vlies und Geotextil (geotextile fleece)A fabric of matted fibres that looks like very thick felt. It holds soil back and lets water through, so it goes in as a separating layer between soil and gravel.At the hardware store: geotextile or weed fabric. The figure in grams per square metre is the weight, and 150 g is the usual value.
EPDMEine dicke schwarze Gummifolie, die in einem einzigen Stück geliefert wird und Jahrzehnte hält. Man nimmt sie für Teiche und flache Dächer, weil sie ohne Klebenähte auskommt.Im Baumarkt: EPDM-Folie 1,14 mm für Teiche oder 1,5 mm für Dächer, als Zuschnitt nach Maß bestellen.
EPDM (EPDM rubber sheeting)A thick black rubber sheet that comes in one single piece and lasts for decades. It gets used for ponds and flat roofs, because it needs no glued seams.At the hardware store: EPDM sheet 1.14 mm for ponds or 1.5 mm for roofs, ordered cut to size.
Noppenfolie und NoppenbahnEine Kunststoffbahn voller kleiner Höcker, die aussieht wie eine harte Luftpolsterfolie. Die Noppen halten Abstand zur Wand, damit Wasser dort nach unten ablaufen kann.
Noppenfolie und Noppenbahn (dimpled membrane for walls below ground)A plastic sheet covered in small bumps that looks like hard bubble wrap. The dimples keep a gap to the wall, so that water can run down there.
BitumenschweißbahnEine dicke Dachpappe, die mit einem Gasbrenner angeschmolzen und dadurch aufgeklebt wird. Sie dichtet Bauteile ab, die in der Erde liegen.
Bitumenschweißbahn (torch on bitumen membrane)A thick roofing felt that is melted with a gas torch and sticks down as it goes. It seals the parts of a building that sit in the soil.
DampfbremseEine Folie auf der warmen Innenseite einer gedämmten Wand. Sie hält die feuchte Zimmerluft davon ab, in die Dämmung zu ziehen und dort zu Wasser zu werden, und der aufgedruckte sd-Wert sagt, wie dicht sie ist, wobei die kleine Zahl nach außen und die große nach innen gehört.Im Baumarkt: Dampfbremse und das dazu passende Klebeband am besten von einer Marke kaufen, sonst hält die Verklebung nicht.
Dampfbremse (vapour control layer)A membrane on the warm inside face of an insulated wall. It keeps the damp room air from moving into the insulation and turning to water there, and the printed sd value says how tight it is, where the small number belongs on the outside and the large one on the inside.At the hardware store: vapour control layer and the tape that goes with it, best bought from one brand, because otherwise the bond does not hold.
my bei FolieDie Abkürzung für Mikrometer, also ein Tausendstel Millimeter. Eine Gewächshausfolie mit 200 my ist 0,2 Millimeter dick und damit deutlich fester als eine gewöhnliche Baufolie.Im Baumarkt: Gewächshausfolie 200 my, UV-stabil, sonst wird sie nach einem Sommer brüchig.
my bei Folie (my, meaning micron, on plastic sheeting)The abbreviation for micrometre, so a thousandth of a millimetre. A greenhouse film of 200 my is 0.2 millimetres thick and therefore much tougher than ordinary building film.At the hardware store: greenhouse film 200 my, UV stabilised, because otherwise it goes brittle after one summer.
KapillarsperreErde neben einem Teich saugt das Wasser über den Folienrand hinweg, so wie ein Zuckerwürfel den Kaffee hochzieht. Deshalb ziehst du die Folie am Ufer senkrecht hoch und legst eine Kiesrinne dahinter, damit diese Verbindung unterbrochen ist.
Kapillarsperre (capillary break)Soil next to a pond draws the water up over the edge of the liner, the way a sugar cube pulls up coffee. So you take the liner up vertically at the bank and lay a gravel channel behind it, which breaks that connection.
UferwallmatteEin rauer Stoffstreifen, den man über den senkrecht hochgezogenen Folienrand legt. Er lässt sich mit Erde füllen und bepflanzen, sodass der Rand verschwindet.
Uferwallmatte (bank matting for the edge of a pond)A rough strip of fabric laid over the vertical edge of the liner. It can be filled with soil and planted, so that the edge disappears.
QuelltonTongranulat, das mit Wasser aufquillt und dabei dicht wird. Man schüttet es rund um ein Brunnenrohr, damit oben kein Schmutzwasser nach unten sickert.Im Baumarkt: Quellton oder Bentonit, im Brunnenbedarf.
Quellton (bentonite clay granules that swell when wet)Clay granules that swell up with water and seal as they do it. You pour them around a well pipe, so that no dirty water seeps down from above.At the hardware store: Quellton or bentonite, at a well drilling supplier.
HT-RohrDas graue Abwasserrohr für innen, dünnwandig und hitzefest bis etwa neunzig Grad. Die Teile stecken mit Gummidichtungen ineinander, ohne Kleber.Im Baumarkt: HT-Rohr DN 75 und dazu Bögen mit 87 Grad, alles aus derselben Reihe.
HT-Rohr (the grey indoor waste pipe)The grey waste pipe for indoors, thin walled and heat-resistant to about ninety degrees. The parts push into each other with rubber seals, without glue.At the hardware store: HT-Rohr DN 75 and bends of 87 degrees to match, all from the same range.
KG-RohrDas orangebraune Abwasserrohr für draußen und für die Erde, viel dicker und stabiler als das graue. Es hält den Druck des Erdreichs aus.Im Baumarkt: KG-Rohr DN 100 und Bögen mit 45 Grad, dazu etwas Gleitmittel für die Dichtungen.
KG-Rohr (the orange brown underground drainage pipe)The orange brown waste pipe for outdoors and for burying, much thicker and stronger than the grey one. It takes the pressure of the soil.At the hardware store: KG-Rohr DN 100 and bends of 45 degrees, plus a little lubricant for the seals.
DNDN steht für den Nenndurchmesser in Millimetern, also die grobe Weite eines Rohrs. DN 100 heißt Rohr von rund zehn Zentimetern, und alle Teile mit derselben Zahl passen zusammen.
DN (Nenndurchmesser, the nominal diameter in millimetres)DN stands for the nominal diameter in millimetres, so the rough width of a pipe. DN 100 means a pipe of around ten centimetres, and all parts carrying the same number fit together.
Zoll bei GewindenEin altes Maß für Wasserleitungen, das nichts mit dem sichtbaren Durchmesser zu tun hat. Wichtig ist nur, dass beide Teile dieselbe Zahl tragen, also 1/2 Zoll auf 1/2 Zoll.Im Baumarkt: Sag im Laden dazu, ob du ein Innengewinde oder ein Außengewinde brauchst und was drangeschraubt wird.
Zoll bei Gewinden (inch sizes on pipe threads)An old measure for water pipes that has nothing to do with the visible diameter. All that counts is that both parts carry the same number, so 1/2 inch onto 1/2 inch.At the hardware store: say in the shop whether you need a female or a male thread and what is going to be screwed on.
KugelhahnEin Absperrhahn mit Hebel, in dem eine durchbohrte Kugel sitzt. Hebel in Rohrrichtung heißt offen, Hebel quer heißt zu, das erkennst du von weitem.
Kugelhahn (ball valve)A shut-off valve with a lever and a drilled ball inside. Lever in line with the pipe means open, lever across means shut, and you can see that from a distance.
Hanf und DichtpasteFeine Hanffasern, die man mit einer Paste um ein Rohrgewinde wickelt, bevor man es zuschraubt. Der Hanf quillt an und dichtet die Verbindung dauerhaft ab.Im Baumarkt: Dichthanf und Dichtpaste, zusammen unter zehn Euro, im Sanitärregal.
Hanf und Dichtpaste (hemp and jointing paste for pipe threads)Fine hemp fibres that you wind around a pipe thread with a paste before you screw it up. The hemp swells and seals the joint for good.At the hardware store: sealing hemp and jointing paste, under ten euros together, on the plumbing shelf.
RammfilterrohrEin Rohr mit geschlitztem Ende, das in den Boden geschlagen wird und durch die Schlitze Wasser aufnimmt. Das ist die einfachste Art, an Grundwasser zu kommen.
Rammfilterrohr (a driven well point, a slotted pipe hammered into the ground)A pipe with a slotted end that is driven into the ground and takes water in through the slots. It is the simplest way to reach groundwater.
DrainageEin gelochtes Rohr in einer Packung aus grobem Kies, das Wasser sammelt und wegleitet. Es liegt überall dort, wo Wasser sonst am Bauwerk stehen bliebe.
Drainage (a land drain)A perforated pipe in a packing of coarse gravel that collects water and leads it away. It goes wherever water would otherwise stand against the building.
SchwallbeschickerEin Behälter, der sich langsam füllt und dann auf einen Schlag leerläuft. Dadurch kommt das Abwasser stoßweise auf das Filterbeet und verteilt sich gleichmäßig, statt immer an derselben Stelle einzusickern.
Schwallbeschicker (a dosing siphon that releases waste water in surges)A vessel that fills slowly and then empties all at once. That way the waste water reaches the filter bed in surges and spreads evenly, instead of always soaking in at the same spot.
SparduschkopfEin Duschkopf, der Luft ins Wasser mischt. Es fühlt sich an wie eine normale Dusche und verbraucht ungefähr die Hälfte.
Sparduschkopf (a low flow shower head)A shower head that mixes air into the water. It feels like a normal shower and uses roughly half as much.
Gefälle in ProzentZwei Prozent Gefälle heißen zwei Zentimeter Höhenunterschied auf einen Meter Länge. Bei Abwasserrohren ist das die Regel, damit alles abläuft und nichts liegen bleibt.
Gefälle in Prozent (fall stated as a percentage)Two per cent of fall means two centimetres of height difference over one metre of length. On waste pipes that is the rule, so that everything runs away and nothing is left lying.
lichte Weite und lichter AbstandDas Maß im Inneren einer Öffnung, also von Kante zu Kante der Lücke, ohne die Bauteile selbst. Elf Zentimeter lichter Abstand am Geländer heißt elf Zentimeter Luft zwischen zwei Stäben.
lichte Weite und lichter Abstand (clear width and clear spacing)The measurement inside an opening, so from edge to edge of the gap, without the parts themselves. Eleven centimetres of clear spacing on a railing means eleven centimetres of air between two bars.
AchsmaßDer Abstand von Mitte zu Mitte, zum Beispiel von einem Wandständer zum nächsten. Gemessen wird nie die Lücke, sondern immer Mitte zu Mitte, sonst passen die Platten am Ende nicht auf.
Achsmaß (centre to centre spacing)The distance from middle to middle, for example from one wall stud to the next. You never measure the gap, always middle to middle, or the sheets will not line up at the end.
laufender Meter oder lfmDie reine Länge in Metern, ganz ohne Breite und Dicke. Zehn laufende Meter Brett sind schlicht zehn Meter Brett hintereinandergelegt.
laufender Meter oder lfm (linear metre)Plain length in metres, with no width and no thickness. Ten linear metres of board are simply ten metres of board laid end to end.
KubikmeterEin Würfel von einem Meter Kantenlänge, also tausend Liter. Eine Schubkarre fasst rund achtzig Liter, ein Kubikmeter sind also etwa zwölf volle Karren.
Kubikmeter (cubic metre)A cube one metre along each edge, so a thousand litres. A wheelbarrow holds around eighty litres, which makes a cubic metre about twelve full barrows.
daNDekanewton, eine Einheit für Kraft. Ein daN entspricht ungefähr einem Kilo Zugkraft, 2.000 daN sind also rund zwei Tonnen Haltekraft.
daN (decanewton, a unit of force)Decanewton, a unit of force. One daN is roughly one kilo of pull, so 2,000 daN is around two tonnes of holding force.
bindiger BodenErde mit viel Ton und Lehm, die klebt und sich zu einer Wurst rollen lässt. Sie hält eine Grubenwand länger als Sand, wird bei Regen aber schmierig.
bindiger Boden (cohesive soil)Soil with a lot of clay and loam in it, which sticks and can be rolled into a sausage. It holds the wall of a pit longer than sand does, but it turns greasy in rain.
BöschungEine schräg abgeflachte Grubenwand statt einer senkrechten. Die Schräge sorgt dafür, dass die Wand nicht abbricht und jemanden verschüttet.
Böschung (a battered slope on the side of a pit)A pit wall cut back at an angle instead of standing vertical. The slope keeps the wall from breaking away and burying somebody.
VerbauEine Abstützung der Grubenwand mit Platten und Spindeln, wenn du nicht schräg abgraben kannst. Ab 1,25 Meter Tiefe ist eins von beiden Pflicht.
Verbau (trench shoring)Propping the wall of a pit with panels and struts, for when you cannot dig back at an angle. From 1.25 metres of depth, one of the two is required.
AuflastklasseEine Angabe, wie viel Gewicht von oben auf ein Bauteil in der Erde drücken darf. Sie entscheidet, ob über einem Erdkeller nur Wiese liegen darf oder auch ein Auto fahren.
Auflastklasse (the load class for a buried structure)A figure for how much weight may press down from above on a part that sits in the ground. It decides whether only grass may lie over an earth cellar or a car may drive across it.
Grasnarbe und RasensodenDie oberste Schicht aus Gras samt verfilzten Wurzeln. Sticht man sie in Platten ab, heißen diese Soden, und kopfüber gelegt sind sie eine gute unterste Lage im Hochbeet.
Grasnarbe und Rasensoden (turf, and turves cut from it)The top layer of grass together with its matted roots. Cut into slabs they are called turves, and laid upside down they make a good bottom layer in a raised bed.
SohleDer Boden einer Grube, also die tiefste Fläche. Von der Sohle aus rechnet man die Höhe aller Schichten nach oben.
Sohle (the formation level, the bottom of a pit)The floor of a pit, so the lowest surface. From this level you count the height of all the layers upwards.
DGUVDie Deutsche Gesetzliche Unfallversicherung, die die Sicherheitsregeln für Arbeit aufschreibt. Ihre Regeln zu Gruben und Absturz gelten auch für Helfer auf dem eigenen Grundstück.
DGUV (Deutsche Gesetzliche Unfallversicherung, the German statutory accident insurance body)The Deutsche Gesetzliche Unfallversicherung, which writes down the safety rules for work. Its rules on pits and on falling apply to helpers on your own land as well.
DIN EN 1177Die Norm für den Boden unter Spielgeräten. Sie legt fest, wie dick Rindenmulch oder Sand sein muss, damit ein Sturz aus einer bestimmten Höhe glimpflich ausgeht.
DIN EN 1177 (the standard for impact absorbing ground under play equipment)The standard for the ground under play equipment. It lays down how thick bark mulch or sand has to be, so that a fall from a given height ends lightly.
DWA-A 262Das Regelwerk für Pflanzenkläranlagen. Danach rechnet ein Ingenieurbüro aus, wie groß euer Filterbeet sein muss.
DWA-A 262 (the German code of practice for reed bed treatment plants)The set of rules for reed bed treatment plants. An engineering office works out from it how large your filter bed has to be.
EinwohnerwertDie Rechengröße für Abwasser, ein Einwohnerwert entspricht dem Schmutz eines Menschen an einem Tag. Eine Anlage für zehn Einwohnerwerte reicht für zehn dauerhaft anwesende Personen.
Einwohnerwert (population equivalent, the design unit for waste water)The calculation unit for waste water, where one population equivalent is the dirt of one person in one day. A plant for ten population equivalents is enough for ten people living there permanently.
verfahrensfreiEin Bauvorhaben, für das du keinen Bauantrag stellen musst. Alle anderen Regeln zu Abstand, Naturschutz und Brandschutz gelten trotzdem weiter.
verfahrensfrei (exempt from a building application)A building project that you do not have to submit a building application for. All the other rules on distance to the boundary, on nature protection and on fire safety still apply.
FI-SchutzschalterEin Schalter im Sicherungskasten, der den Strom in Sekundenbruchteilen abschaltet, sobald er einen falschen Weg nimmt, zum Beispiel durch einen Menschen. In Werkstatt und Außenbereich ist er Pflicht.
FI-Schutzschalter (a residual current device, an RCD)A switch in the fuse box that cuts the power within a fraction of a second, as soon as it takes a wrong path, through a person for example. In a workshop and outdoors it is required.
EPAL und Stempel HTDer ovale Stempel seitlich auf dem Eckklotz einer Europalette. HT heißt mit Hitze behandelt und damit unbedenklich, MB stünde für eine Begasung mit Chemie und gehört nicht ins Haus.Im Baumarkt: Nach Europaletten mit HT-Stempel fragen, Getränkemärkte und Baustoffhändler geben oft welche ab.
EPAL und Stempel HT (the EPAL mark and the HT stamp on a pallet)The oval stamp on the side of the corner block of a Euro pallet. HT means heat treated and therefore harmless, while MB would stand for fumigation with chemicals and has no place indoors.At the hardware store: ask for Euro pallets with the HT stamp. Drinks shops and builders merchants often give some away.
Gärtopf und GärspundEin Gärtopf ist ein Steinzeugtopf mit einer Wasserrinne im Deckelrand, ein Gärspund ist ein kleiner Wasserverschluss zum Aufstecken auf ein Glas. Beide lassen das Gas der Gärung heraus und keine Luft herein.
Gärtopf und Gärspund (fermentation crock and airlock)A Gärtopf is a stoneware crock with a water channel in the rim of the lid, and a Gärspund is a small water trap that pushes onto the top of a jar. Both let the gas of fermentation out and no air in.
Spannschiene mit FederdrahtEine Aluminiumschiene mit einem Schlitz und dazu ein gewellter Draht. Du legst die Folie über die Schiene und drückst den Draht hinein, dann sitzt die Folie bombenfest und reißt nicht aus.Im Baumarkt: Spannschiene mit Federdraht, wird nach Metern verkauft, im Gewächshausbedarf.
Spannschiene mit Federdraht (film fixing channel with a spring wire)An aluminium channel with a slot, and a wavy wire to go with it. You lay the film over the channel and press the wire in, and then the film sits rock solid and does not tear out.At the hardware store: film fixing channel with spring wire, sold by the metre, at a greenhouse supplier.
FolienflanschEin zweiteiliger Ring, mit dem ein Rohr dicht durch eine Folie geführt wird. Die Folie wird zwischen die beiden Hälften geklemmt und mit einem Kranz Schrauben zusammengepresst.
Folienflansch (a liner flange for taking a pipe through sheeting)A ring in two halves that takes a pipe through a liner without a leak. The liner is clamped between the two halves and pressed together with a ring of screws.
SchlämmkornDie allerfeinsten Teilchen im Kies, feiner als Sand und praktisch Staub. Für ein Filterbeet wird der Kies gewaschen geliefert, weil dieser Staub sonst die Zwischenräume zusetzt und kein Wasser mehr durchläuft.Im Baumarkt: Gewaschenen Filterkies 2/8 bestellen und dabei ausdrücklich gewaschen sagen.
Schlämmkorn (the finest silt fraction in gravel)The very finest particles in gravel, finer than sand and effectively dust. For a filter bed the gravel comes washed, because otherwise this dust clogs the gaps and no more water runs through.At the hardware store: order washed filter gravel 2/8 and say the word washed out loud.
Womit ihr anfangt, die erste WerkzeugkisteWhat to start with, your first tool kitWhat to start with, your first tool kit

Werbung. Die Produktlinks in diesem Abschnitt sind Partnerlinks zu Amazon. Kaufst du darüber, bekommt diese Seite eine kleine Provision, für dich bleibt der Preis gleich. Als Amazon-Partner verdiene ich an qualifizierten Verkäufen. Verlinkt ist jeweils ein Gerät, mit dem man gut arbeiten kann, keine Kaufempfehlung im Sinne eines Tests. Die aktuellen Preise stehen bei Amazon, die Spannen hier sind eigene Schätzungen. Falls ein Modell ausläuft, führt der Zusatzlink zu vergleichbaren Geräten.

Advertising. The product links in this section are affiliate links to Amazon. If you buy through them, this site gets a small commission, and the price stays the same for you. As an Amazon Associate I earn from qualifying purchases. What is linked is a tool you can work with well, not a buying recommendation in the sense of a test. The current prices are at Amazon, and the ranges here are estimates of my own. If a model is discontinued, the extra link leads to comparable tools.

Zuerst, rund 300 EuroStart here, around 300 euros

Akkuschrauber 18 Volt mit zwei Akkus und einem Satz Bits80 bis 110 Euro, gebraucht in 28 von 61 Anleitungen
Cordless drill driver, 18 volt, with two batteries and a set of bits80 to 110 euros, used in 28 of 61 guides
Bei Amazon:At Amazon: Bosch EasyDrill 18V-40, 2 Akkus · Bosch Bit-Satz, 43 Teile · weitere Modellemore models
Wasserwaage 60 cm und 120 cm25 Euro, gebraucht in 39 von 61 Anleitungen
Spirit levels of 60 cm and 120 cm25 euros, used in 39 of 61 guides
Bei Amazon:At Amazon: Stabila 60 cm, Type 80 AS-2 · Stabila 120 cm, Type 70 · weitere Modellemore models
Spaten und Schaufel40 Euro, gebraucht in 28 von 61 Anleitungen
Spade and shovel40 euros, used in 28 of 61 guides
Bei Amazon:At Amazon: Fiskars Gartenspaten, spitz · Fiskars Schaufel, 23,5 cm · weitere Modellemore models
Schubkarre 100 Liter mit Luftrad55 Euro, gebraucht in 22 von 61 Anleitungen
Wheelbarrow, 100 litres, with a pneumatic wheel55 euros, used in 22 of 61 guides
Bei Amazon:At Amazon: Schubkarre 100 l, 250 kg · weitere Modellemore models
Zollstock und Maßband 30 m15 Euro, gebraucht in 18 von 61 Anleitungen
Folding rule and a 30 m tape measure15 euros, used in 18 of 61 guides
Bei Amazon:At Amazon: Stanley Gliedermaßstab, 2 m · Rollbandmaß 30 m, Glasfaser · weitere Modellemore models
Maurerschnur 50 m mit Holzpflöcken10 Euro, gebraucht in 15 von 61 Anleitungen
Builders line, 50 m, with wooden pegs10 euros, used in 15 of 61 guides
Bei Amazon:At Amazon: Maurerschnur 50 m · Holzpflöcke, 15 Stück, 40 cm · weitere Modellemore models
Handsäge, dazu Arbeitshandschuhe und Schutzbrille40 Euro, gebraucht in 16 von 61 Anleitungen
Hand saw, plus work gloves and safety glasses40 euros, used in 16 of 61 guides
Bei Amazon:At Amazon: Bahco Handsäge Superior · Leder-Arbeitshandschuhe, 4 Paar · Uvex Schutzbrille i-Works · weitere Modellemore models

Wenn ihr weitermacht, rund 800 EuroIf you carry on, around 800 euros

Handkreissäge mit Führungsschiene150 bis 200 Euro, gebraucht in 14 von 61 Anleitungen
Circular saw with a guide rail150 to 200 euros, used in 14 of 61 guides
Bei Amazon:At Amazon: Bosch GKS 190 · Bosch Führungsschiene FSN RA · weitere Modellemore models
Bohrhammer mit Steinbohrern von 6 bis 12 mm100 bis 110 Euro, gebraucht in 15 von 61 Anleitungen
Rotary hammer with masonry bits from 6 to 12 mm100 to 110 euros, used in 15 of 61 guides
Bei Amazon:At Amazon: Bosch GBH 2-21, SDS plus · SDS-plus Bohrer-Satz, 5 bis 12 mm · weitere Modellemore models
Stichsäge mit Blättern für Holz60 bis 70 Euro, gebraucht in 7 von 61 Anleitungen
Jigsaw with blades for wood60 to 70 euros, used in 7 of 61 guides
Bei Amazon:At Amazon: Bosch PST 650 · Stichsägeblätter für Holz, Satz · weitere Modellemore models
Vorschlaghammer 5 kg und Fäustel 1 kg40 bis 45 Euro, gebraucht in 10 von 61 Anleitungen
Sledgehammer of 5 kg and a club hammer of 1 kg40 to 45 euros, used in 10 of 61 guides
Bei Amazon:At Amazon: Vorschlaghammer, Fiberglasstiel · Fäustel 1 kg, Fiberglasstiel · weitere Modellemore models
Wasserwaage 200 cm40 bis 45 Euro, gebraucht in 10 von 61 Anleitungen
Spirit level, 200 cm40 to 45 euros, used in 10 of 61 guides
Bei Amazon:At Amazon: Wasserwaage 200 cm, Alu · weitere Modellemore models
Ratschenkasten mit Nüssen 8 bis 22 mm und zwei Rohrzangen90 bis 100 Euro, gebraucht in 12 von 61 Anleitungen
Ratchet set with sockets from 8 to 22 mm and two pipe wrenches90 to 100 euros, used in 12 of 61 guides
Bei Amazon:At Amazon: KS Tools Steckschlüsselsatz · Wasserpumpenzangen, Satz · weitere Modellemore models
Kappsäge und vier Schraubzwingen180 bis 200 Euro, gebraucht in 5 von 61 Anleitungen
Mitre saw and four clamps180 to 200 euros, used in 5 of 61 guides
Bei Amazon:At Amazon: Einhell Zug-Kapp-Gehrungssäge · Schraubzwingen, 4 Stück · weitere Modellemore models

Besser leihen als kaufenBetter hired than bought

Diese Geräte stehen bewusst ohne Kauflink. Ihr braucht sie an ein oder zwei Tagen, und Leihen kostet einen Bruchteil. Baumarkt, Maschinenring oder der Nachbar mit Hof.These machines are deliberately listed without a link to buy. You need them on one or two days, and hiring costs a fraction of the price. Ask at the DIY store, at the Maschinenring (a regional co-operative that shares farm machinery) or at the neighbour with a farmyard.

RüttelplatteKommt in sieben Anleitungen vor, kostet etwa 45 Euro am Tag, wiegt 60 bis 100 Kilo und passt in keinen Kofferraum.
Plate compactorIt turns up in seven guides, costs about 45 euros a day, weighs 60 to 100 kilos and fits in no car boot.
Minibagger 5 Tonnen mit Anhänger200 bis 350 Euro am Tag plus Transport, ihr braucht ihn an zwei Tagen im Jahr, und Abstellplatz und Wartung hat niemand.
Mini excavator of 5 tonnes with a trailer200 to 350 euros a day plus transport. You need it on two days in the year, and nobody has the space to park it or the time to service it.
Betonmischer 140 Liter40 bis 60 Euro am Tag, danach steht er zwei Jahre in der Ecke und rostet fest.
Concrete mixer, 140 litres40 to 60 euros a day, and after that it stands in the corner for two years and rusts solid.
Rotationslaser mit Empfänger25 bis 40 Euro am Tag statt ab 400 Euro Kauf, gebraucht wird er nur beim Abstecken großer Flächen.
Rotating laser with a receiver25 to 40 euros a day instead of 400 euros and up to buy, and it is only wanted when you set out a large area.
Gerüst mit AuffanggurtWird mit Aufbauplan geliefert, lagert im eigenen Bestand schlecht und ist ohne Einweisung gefährlich.
Scaffolding with a safety harnessIt comes with an assembly plan, it stores badly in your own shed, and without instruction it is dangerous.
Motorsäge mit Schnittschutzhose und HelmHolt euch lieber jemanden mit Motorsägenschein, die Schutzausrüstung allein kostet 300 Euro und die Übung fehlt trotzdem.
Chainsaw with cut-protection trousers and helmetBetter to fetch somebody who holds a Motorsägenschein (the German chainsaw certificate). The protective kit alone costs 300 euros, and the practice is still missing.
Kernbohrer 150 bis 160 mm50 bis 80 Euro am Tag, für zwei Löcher im ganzen Leben lohnt der Kauf nie.
Core drill, 150 to 160 mm50 to 80 euros a day, and for two holes in a whole lifetime buying never pays.
Anhänger 750 kg20 bis 40 Euro am Tag im Baumarkt, denn eine Tonne Schotter oder eine Baustahlmatte von 5 Metern geht in keinen Pkw.
Trailer, 750 kg20 to 40 euros a day at the DIY store, because a tonne of crushed stone or a steel reinforcing mesh of 5 metres goes in no car.

Bitte lies das einmal.Please read this once. Diese Anleitungen sind nach bestem Wissen zusammengetragen und ersetzen weder eine Planung noch eine Fachfirma. Bauordnung, Wasserrecht und Naturschutz sind in jedem Bundesland und oft in jeder Gemeinde anders geregelt, und sie ändern sich. Frag vor dem ersten Spatenstich bei deiner Bauaufsicht, deiner unteren Wasserbehörde oder deinem Bezirksschornsteinfeger nach, was bei dir gilt. AllesAll, was mit Statik, Feuer, Strom oder Trinkwasser zu tun hat, gehört in die Hände von Menschen, die dafür ausgebildet sind. Wir übernehmen keine Haftung für Schäden, die beim Nachbauen entstehen.These guides have been put together to the best of our knowledge, and they replace neither proper planning nor a specialist firm. Building law, water law and nature protection are regulated differently in every federal state and often in every municipality, and they change. Before the first spade goes into the ground, ask your Bauaufsicht (the local building control office), your untere Wasserbehörde (the lower water authority of your district) or your Bezirksschornsteinfeger (the district chimney sweep) what applies where you live. Everything to do with structure, fire, electricity or drinking water belongs in the hands of people who are trained for it. We accept no liability for damage that arises when you build these projects.

Please read this once. These guides have been put together to the best of our knowledge, and they replace neither proper planning nor a specialist firm. Building law, water law and nature protection are regulated differently in every federal state and often in every municipality, and they change. Before the first spade goes into the ground, ask your Bauaufsicht (the local building control office), your untere Wasserbehörde (the lower water authority of your district) or your Bezirksschornsteinfeger (the district chimney sweep) what applies where you live. Everything to do with structure, fire, electricity or drinking water belongs in the hands of people who are trained for it. We accept no liability for damage that arises when you build these projects.