Was ihr bauen könntWhat you can build

Feuer, Wärme und StromFire, heat and power

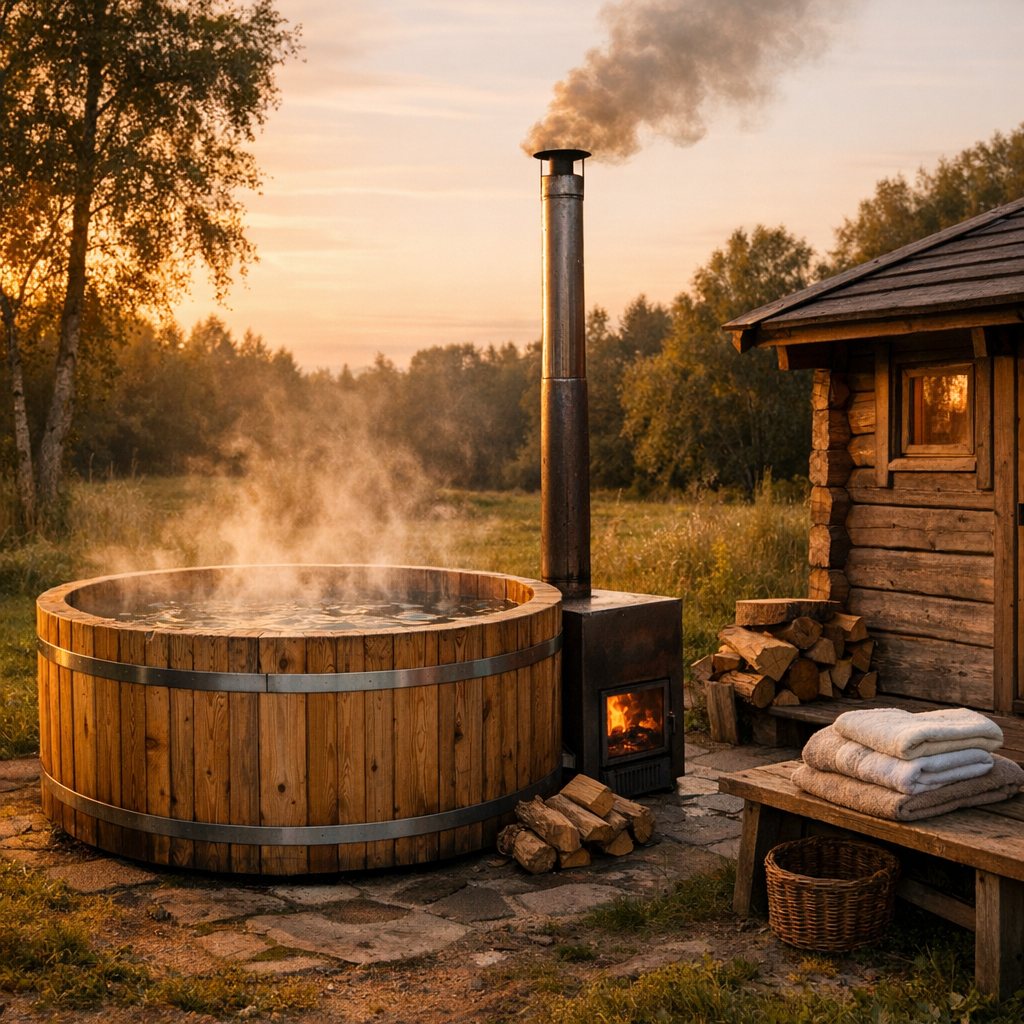
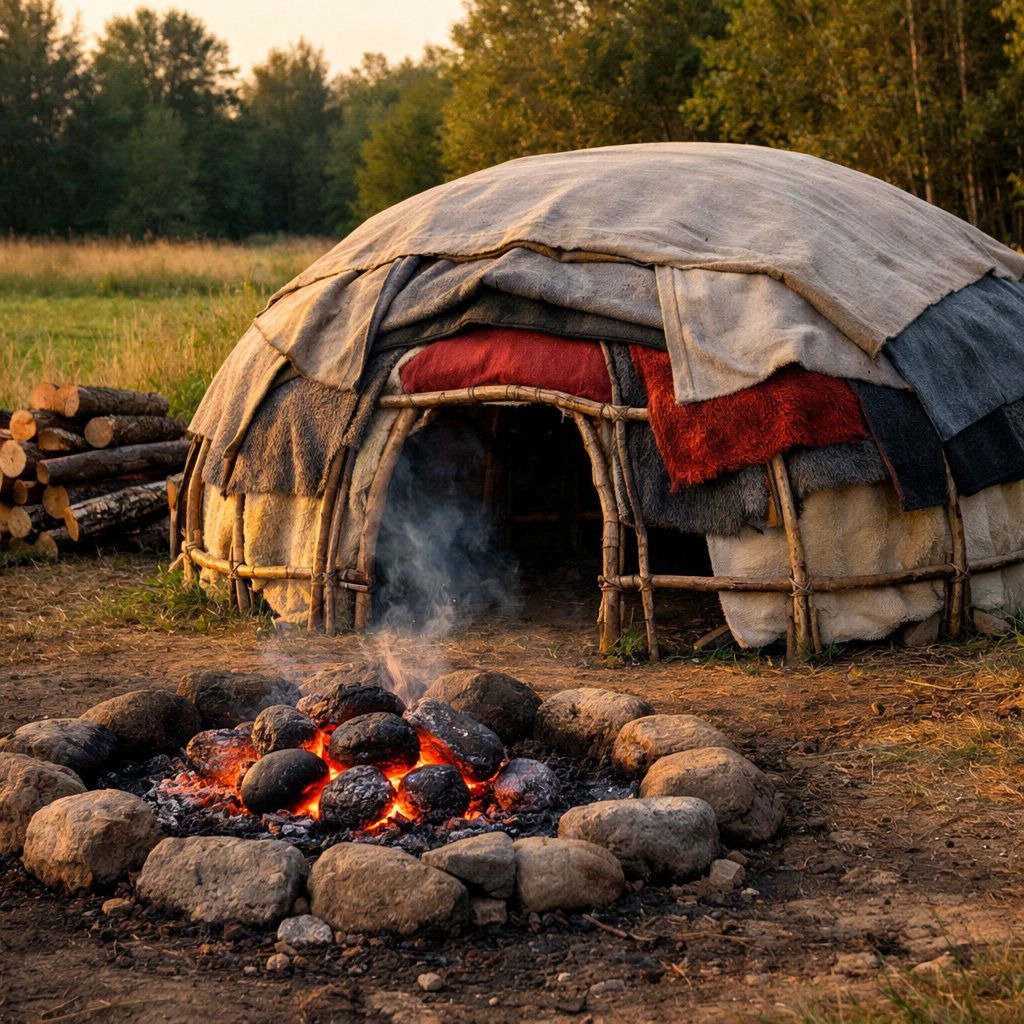
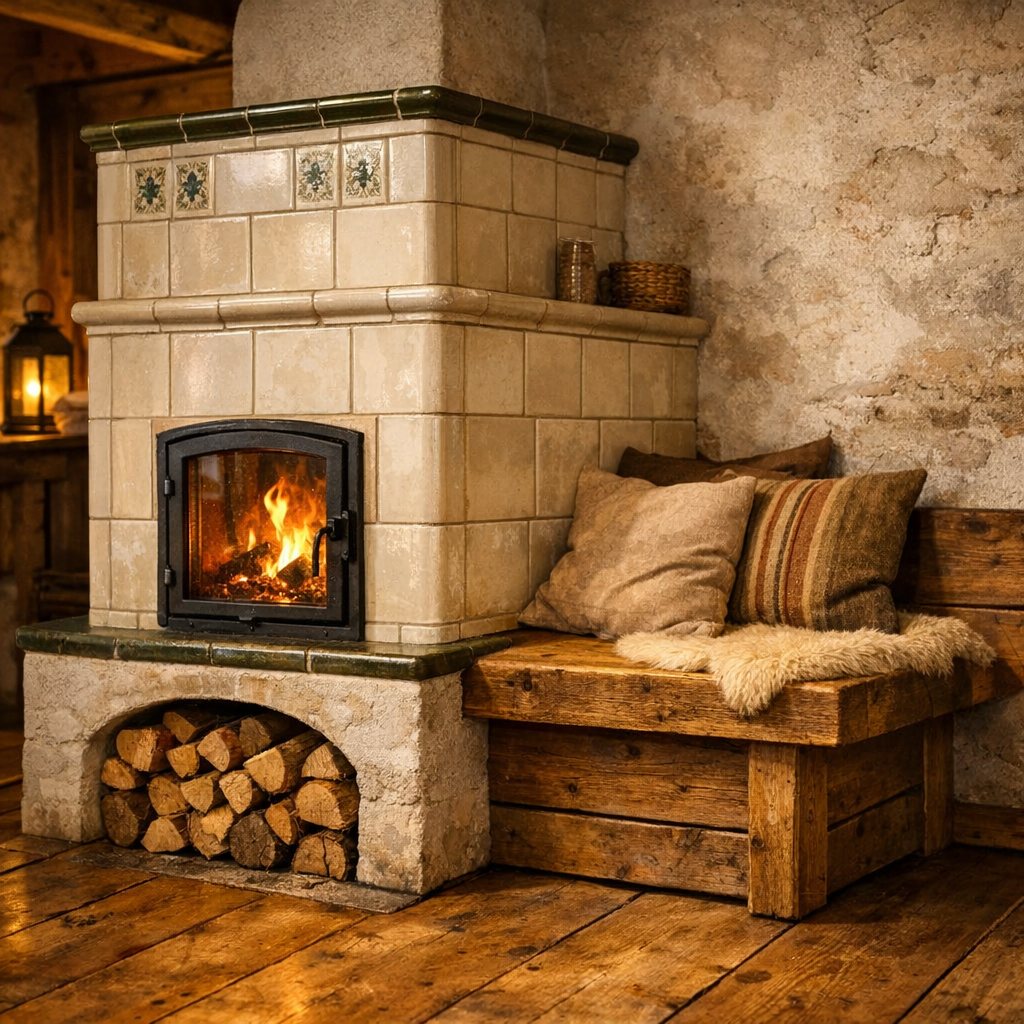
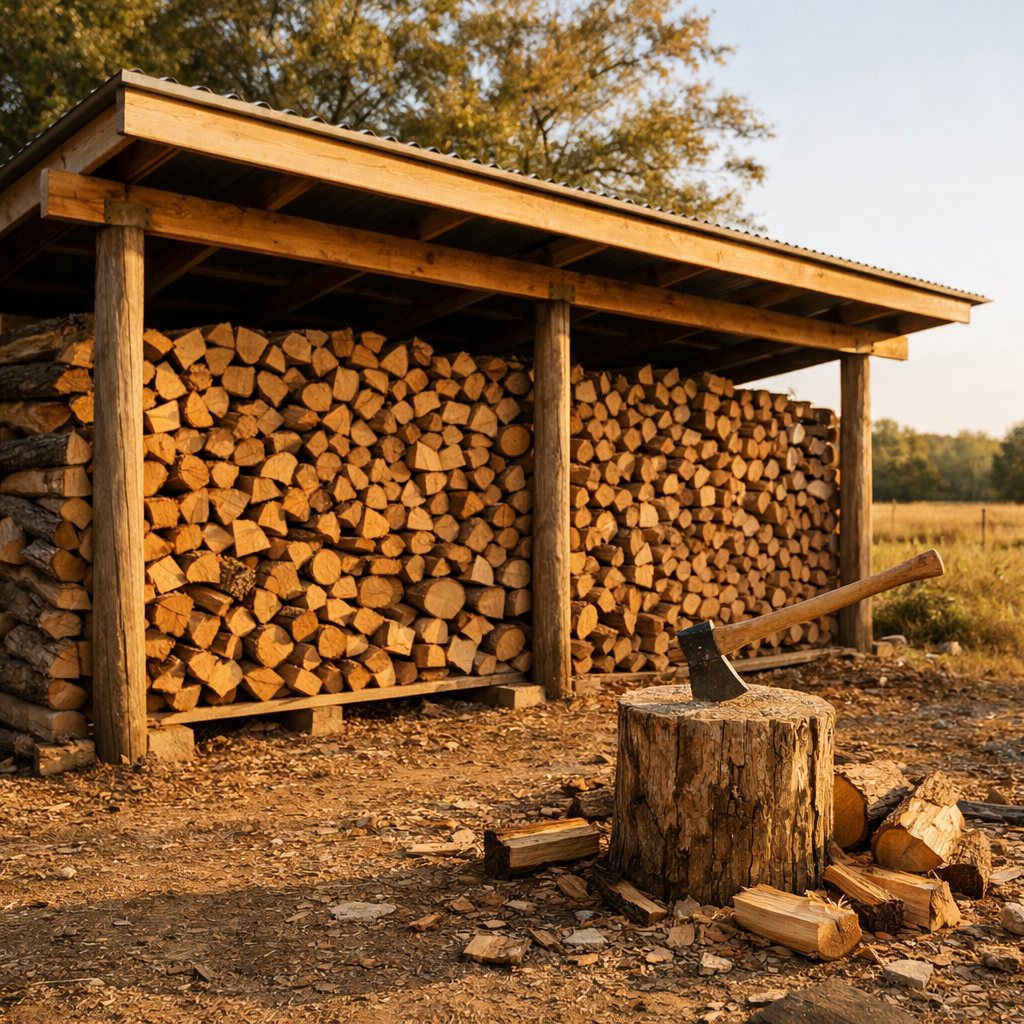
Lehmbackofen, Feuerplatz, Photovoltaik, Kleinwind, Solarthermie, Badezuber. Wärme und Strom aus dem, was ohnehin da ist.

Ein aufgeschichteter Brennholzstapel unter einem Scheunendach, darüber Solarmodule auf dem Dach, klares Winterlicht
Schon heute realAlready real today

Jühnde bei Göttingen deckt seit Ende 2005 seinen Wärme- und Strombedarf aus Biomasse der eigenen Feldflur. Ein Nahwärmenetz versorgt rund 140 Haushalte, gespeist aus einer Biogasanlage und einem Holzhackschnitzel-Heizwerk. Die Anlage speist etwa doppelt so viel Strom ein, wie das Dorf selbst verbraucht. Jühnde war das erste Bioenergiedorf Deutschlands, inzwischen gibt es Nachahmer im ganzen Land.

AufwandEffort
Lehmbackofen, Clay bread oven
Wochen bis MonateWeeks to monthsEtwas ÜbungSome practice helps

LehmbackofenClay bread oven

3 Personen, schweres Heben3 people, heavy lifting

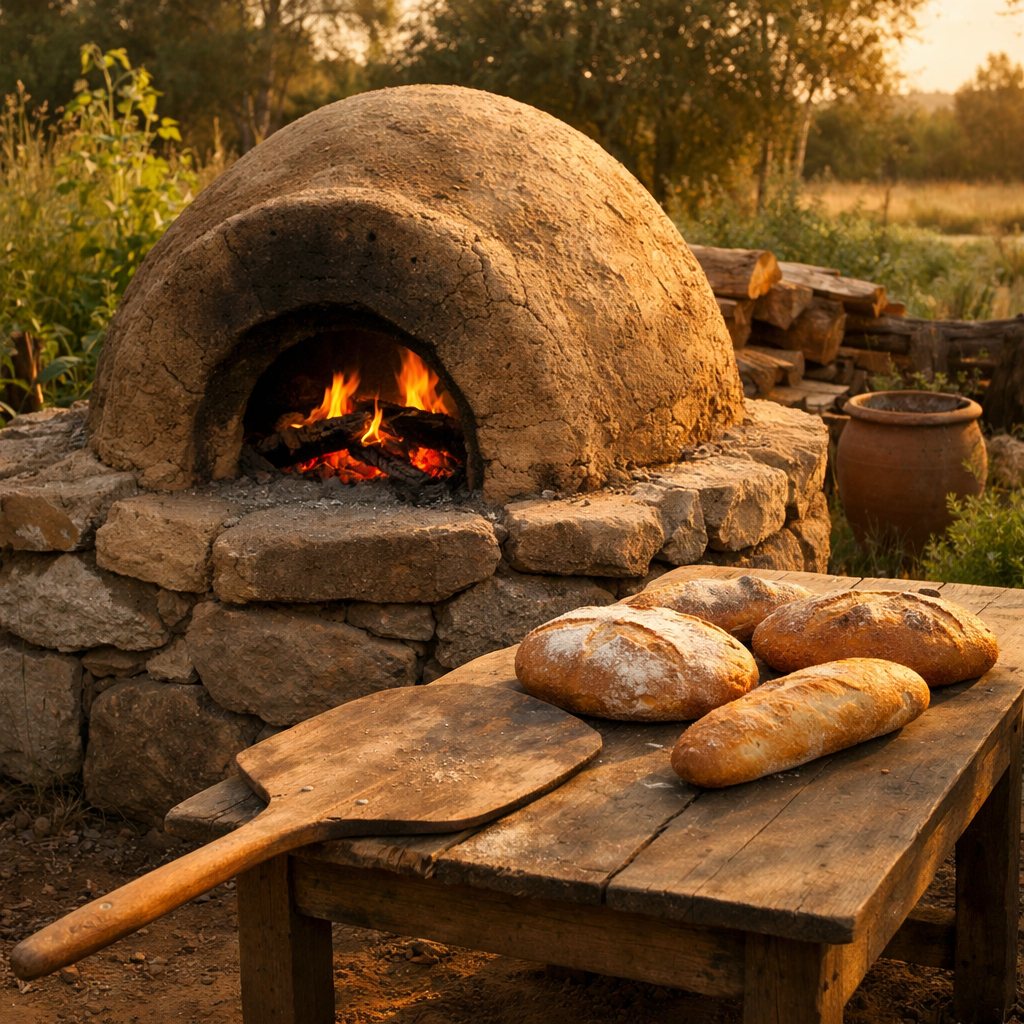
Vierhundert Grad aus Lehm, Sand und Stroh. Zwei Tage Bauzeit im Team, danach backt ihr Brot, Pizza und Aufläufe mit der Restwärme eines einzigen Feuers. Kaum etwas zieht Menschen so zuverlässig zusammen.Four hundred degrees out of clay, sand and straw. Two days of building as a team, and after that you bake bread, pizza and gratins on the residual heat of a single fire. Almost nothing pulls people together as reliably.

So wird gebautHow it is built
Fundament, Sockel, Sandkuppel als verlorene Schalung, darüber Lehm-Stroh-Schichten, außen Kalkputz, ein Dach darüber. Trocknen lassen, langsam einfeuern.Foundation, base, a sand dome as sacrificial formwork, layers of clay and straw over it, lime render outside, a roof above. Let it dry, fire it slowly.
KostenCost
200 bis 600 Euro, viel davon aus dem Boden vor Ort200 to 600 euros, much of it out of the ground on site
Erster SchrittFirst step
Erst einen Lehmtest machen: Kugel formen, fallen lassen. Was zerbröselt, braucht mehr Ton, was klebt, mehr Sand.Do a clay test first: roll a ball, drop it. What crumbles needs more clay, what sticks needs more sand.
Schritt für SchrittStep by step
Lehmbackofen, SchnittBackraumKuppel 40Tür 25Sohle 1001234561Fundament aus Schotter und Beton2Dämmschicht aus Glasflaschen3Ofensohle aus Schamottsteinen4Lehmkuppel, 10 cm stark5Ofenloch, 63 Prozent der Höhe6Außenputz aus Lehm und StrohNicht maßstäblich, Maße in cm
Bauskizze Lehmbackofen, am Handy seitlich wischenMeasured sketch of Clay bread oven, swipe sideways on a phone

Bevor du anfängst

Ruf zuerst beim Bauamt deiner Gemeinde an. Ein freistehender Backofen ist dort kein Gebäude, sondern eine Feuerstätte, und für Feuerstätten nennt jede Landesbauordnung eine Leistungsgrenze, unterhalb derer kein Antrag nötig ist. Frag genau danach und nimm einen einfachen Lageplan mit Standort und Abstand zur Grundstücksgrenze mit. Verfahrensfrei bedeutet dabei nur, dass vorher niemand prüft. Der Bebauungsplan gilt trotzdem, und im Außenbereich wird aus einem verfahrensfreien Bau schnell ein unzulässiger. Die eigentliche Gefahr ist die Glut. Der Ofen bleibt Stunden heiß, Funken fliegen weit, und bei Trockenheit gilt vielerorts ein Feuerverbot. Halte Wasser und Löschsand bereit und prüfe vorher den Waldbrandgefahrenindex des Deutschen Wetterdienstes.

Das brauchst du

  • 30 Schamotteplatten 25 x 12 x 5 cm für rund 0,8 m² Ofensohle einschließlich Arbeitsrand, ohne Mörtel gelegt
  • 0,10 m³ Baulehm aus der eigenen Grube oder vom Töpferbedarf, die Kuppelschale braucht 0,028 m³ und die Dämmschicht 0,045 m³, der Rest ist Reserve für Schlämmprobe und Rissreparatur
  • 0,20 m³ scharfer Sand 0/2 zum Magern und für die Kuppelform, allein die Sandform verbraucht davon rund 0,10 m³
  • 2 Ballen Stroh, auf 10 cm gehäckselt für die Dämmschicht
  • 25 Sack Beton C25/30 à 25 kg und 1 Baustahlmatte Q188 fürs Fundament
  • 144 Kalksandsteine 24 x 11,5 x 11,3 cm für den Sockel, 4,74 m Umfang mal 0,95 m Höhe sind 4,5 m² bei 32 Steinen je m²
  • 80 l Blähton 8/16 als Dämmung unter der Sohle
  • 1 Ofentür aus 5 mm Stahl, 40 x 25 cm mit Rahmen und Griff
  • 2 Sack Kalkputz à 25 kg als Wetterschutz außen

Werkzeug

Maurerkelle, Wasserwaage, Schubkarre, Spaten, Winkelschleifer mit Steinscheibe, Maurerschnur, Einmachglas für die Schlämmprobe

Schritt für Schritt

  1. Lehm prüfen. Zwei Handvoll Lehm ins Einmachglas, Wasser dazu, schütteln, 24 Stunden stehen lassen. Setzt sich oben eine Tonschicht von 15 bis 25 Prozent ab, taugt der Lehm.
  2. Fundament gießen. 130 x 130 cm abstecken, 40 cm ausheben, 25 cm Schotter 0/32 verdichten, darüber 12 cm Beton mit Matte. Drei Tage abbinden.
  3. Sockel mauern. Auf 95 cm hochmauern, das ist bequeme Arbeitshöhe. Innen mit Schotter füllen, Deckplatte aus 8 cm Beton gießen.
  4. Sohle legen. 10 cm Blähton mit dünnem Lehmschlamm binden, 2 cm feinen Sand darauf, dann die Schamotteplatten dicht an dicht legen und in beide Richtungen auswaagen. Die Sohle misst mit Arbeitsrand rund 0,8 m², dafür reichen 30 Platten. Mit 5 cm Dicke bringt sie rund 80 kg Speichermasse und hält drei Chargen Brot durch, mit 3 cm nicht.
  5. Sandform aufschütten. Kuppel aus feuchtem Sand formen, 65 cm Durchmesser, 40 cm Höhe, fest klopfen bis sie trägt, dann mit nassem Zeitungspapier abdecken.
  6. Erste Lehmschicht. Lehm und Sand 1 zu 2 mit den Füßen mischen. Faustgroße Batzen von unten nach oben aufsetzen, Schichtdicke 10 cm rundum gleich.
  7. Türöffnung schneiden. Sie wird 63 Prozent der Innenhöhe hoch, also 25 cm, und 35 cm breit. Nach zwei Tagen ausschneiden, Sand herausholen.
  8. Dämmen, putzen, überdachen. Lehm und Häckselstroh 1 zu 1 mischen, 8 cm auftragen, drei Wochen trocknen, Risse schließen, dann 1,5 cm Kalkputz. Darüber ein Satteldach auf vier Pfosten, 60 cm Überstand.
  9. Langsam einfeuern. Erstes Feuer handtellergroß, eine Stunde. Über sieben Tage täglich steigern. Später heizt ihr zwei Stunden mit 12 kg Holz und backt bei 250 Grad.

Zeit und Kosten

Zwei bis drei Personen, zwei volle Tage für Fundament, Sockel und Kuppel, dazu drei Wochen Trockenzeit. Material 200 bis 600 Euro. Teuer sind Beton, Schamotte und Dach, den Lehm holt ihr meist vom eigenen Grundstück.

Die drei häufigsten Fehler

  • Zu fetter Lehm. Reiner Ton schwindet beim Trocknen und reißt quer durch die Kuppel. Vor dem Magern die Schlämmprobe machen.
  • Zu schnelles Einfeuern. Ein großes Feuer im feuchten Lehm treibt Dampf nach außen und sprengt den Putz ab. Sieben Tage kleine Feuer sind das Minimum.
  • Türöffnung zu hoch. Über 65 Prozent der Innenhöhe zieht der Ofen nicht mehr sauber, der Rauch steht im Gesicht.

Before you start

Ring the Bauamt (the local building authority) of your municipality first. A free standing bread oven does not count as a building there but as a Feuerstätte, a fire installation, and for fire installations every Landesbauordnung (the building code of your federal state) names an output limit below which no application is needed. Ask for exactly that figure and take a simple site plan with the position and the distance to the boundary. Verfahrensfrei, exempt from procedure, only means that nobody checks beforehand. The Bebauungsplan (the local development plan) still applies, and in the Außenbereich (the open countryside outside the built-up area) an exempt structure quickly turns into an unlawful one. The real danger is the embers. The oven stays hot for hours, sparks travel a long way, and in dry spells many places ban open fires. Keep water and dry sand ready and check the Waldbrandgefahrenindex (the forest fire risk index) of the Deutscher Wetterdienst (the national weather service) beforehand.

What you need

  • 30 Schamotte firebricks 25 x 12 x 5 cm for roughly 0.8 m² of oven floor including the working edge, laid dry without mortar
  • 0.10 m³ Baulehm (raw building clay) from your own pit or from a pottery supplier, the dome shell takes 0.028 m³ and the insulating layer 0.045 m³, the rest is reserve for the settling test and for filling cracks
  • 0.20 m³ sharp sand 0/2 for leaning the clay and for the dome form, the sand form alone swallows around 0.10 m³ of it
  • 2 bales of straw, chopped to 10 cm for the insulating layer
  • 25 bags of concrete C25/30 at 25 kg and 1 reinforcing mesh Q188 for the foundation
  • 144 Kalksandstein blocks 24 x 11.5 x 11.3 cm (calcium silicate blocks) for the base, 4.74 m of circumference times 0.95 m of height is 4.5 m², and one square metre takes 32 blocks
  • 80 l Blähton 8/16 (expanded clay pellets) as insulation under the oven floor
  • 1 oven door in 5 mm steel, 40 x 25 cm with a frame and a handle
  • 2 bags of lime render at 25 kg as weather protection on the outside

Tools

Bricklaying trowel, spirit level, wheelbarrow, spade, angle grinder with a stone disc, bricklayer's line, preserving jar for the settling test

Step by step

  1. Test the clay. Two handfuls of clay into the preserving jar, water on top, shake it, let it stand for 24 hours. If a clay layer of 15 to 25 per cent settles out at the top, the material will do.
  2. Pour the foundation. Peg out 130 x 130 cm, dig out 40 cm, compact 25 cm of crushed stone 0/32, then 12 cm of concrete with the mesh in it. Three days to set.
  3. Lay the base. Build up to 95 cm, that is a comfortable working height. Fill the inside with crushed stone and pour a top slab of 8 cm concrete.
  4. Lay the oven floor. Bind 10 cm of Blähton with a thin clay slurry, 2 cm of fine sand on top, then set the firebricks tight against each other and level them in both directions. With the working edge the floor measures around 0.8 m², and 30 bricks cover that. At 5 cm thick it holds about 80 kg of storage mass and carries three batches of bread, at 3 cm it does not.
  5. Heap up the sand form. Shape a dome of damp sand, 65 cm across and 40 cm high, beat it firm until it holds itself, then cover it with wet newspaper.
  6. First clay layer. Mix clay and sand 1 to 2 with your feet. Set fist sized lumps on from the bottom upwards, the layer 10 cm thick all round.
  7. Cut the door opening. It ends up at 63 per cent of the inner height, so 25 cm, and 35 cm wide. Cut it out after two days and pull the sand out.
  8. Insulate, render, roof over. Mix clay and chopped straw 1 to 1, lay on 8 cm, dry for three weeks, close the cracks, then 1.5 cm of lime render. Over the top a pitched roof on four posts with a 60 cm overhang.
  9. Fire it slowly. The first fire the size of your palm, one hour. Build it up a little every day over seven days. Later you heat for two hours with 12 kg of wood and bake at 250 degrees.

Time and cost

Two to three people, two full days for foundation, base and dome, plus three weeks of drying. Materials 200 to 600 euros. Concrete, firebrick and roof are the expensive part, the clay usually comes off your own ground.

The three most common mistakes

  • Clay too fat. Pure clay shrinks as it dries and tears right across the dome. Do the settling test before you lean it with sand.
  • Firing it too fast. A big fire in damp clay drives steam outwards and blows the render off. Seven days of small fires is the minimum.
  • Door opening too high. Above 65 per cent of the inner height the oven stops drawing cleanly and the smoke stands in your face.

Worauf es ankommtWhat matters hereZu schnelles Einfeuern reißt die Kuppel. Die ersten Feuer klein halten, über mindestens eine Woche steigern.Firing it too fast tears the dome. Keep the first fires small and build them up over at least a week.

Raketenofen, Rocket stove
Ein WochenendeOne weekendEtwas ÜbungSome practice helps

RaketenofenRocket stove

2 Personen, Betonplatte etwa 30 kg, schweres Heben2 people, concrete slab about 30 kg, heavy lifting

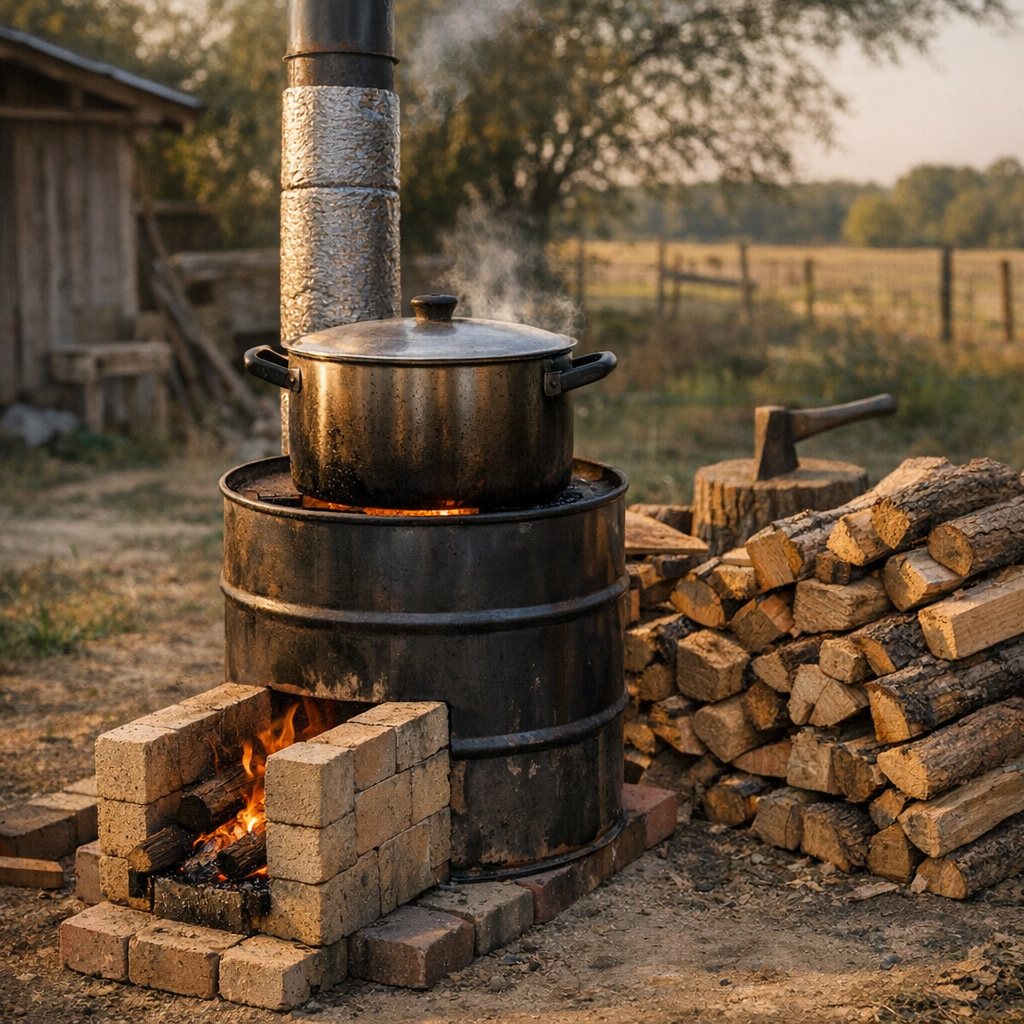
Ein Ofen, der mit Zweigen und Astwerk kocht, was sonst ein halber Holzscheit braucht. Die isolierte Brennkammer bringt das Holz zur vollständigen Verbrennung, deshalb fast kein Rauch und sehr wenig Asche.A stove that cooks on twigs and brushwood what would otherwise take half a log. The insulated burn chamber brings the wood to complete combustion, which is why there is almost no smoke and very little ash.

So wird gebautHow it is built
L-förmige Brennkammer aus Schamotte, dick isoliert mit Perlit oder Vermiculit, darüber der Topfaufsatz mit definiertem Spalt.An L shaped burn chamber in Schamotte firebrick, thickly insulated with perlite or vermiculite, and above it the pot rest with a defined gap.
KostenCost
80 bis 300 Euro80 to 300 euros
Erster SchrittFirst step
Die Zugverhältnisse verstehen, bevor ihr baut. Der senkrechte Kamin muss deutlich länger sein als der waagerechte Einschub.Understand how the draught works before you build. The vertical riser has to be clearly longer than the horizontal feed tunnel.
Schritt für SchrittStep by step
Raketenofen, SchnittSteigrohr 120Fass 60Schacht 451234561Einwurfschacht für Holzscheite2Brenntunnel, leicht ansteigend3Steigrohr, innen glatt4Dämmung aus Perlite oder Asche5Kochplatte aus Stahl6Abgasrohr, kühl beim AustrittNicht maßstäblich, Maße in cm
Bauskizze Raketenofen, am Handy seitlich wischenMeasured sketch of Rocket stove, swipe sideways on a phone

Bevor du anfängst

Wenn du auch nur überlegst, den Ofen in einen Innenraum zu stellen, ruf vorher deinen Bezirksschornsteinfeger an. Frag ihn, ob er ein selbst gebautes Fass ohne Nachweis über Bauart und Emissionen freigeben kann. Die Antwort ist nein, denn die Erste Verordnung zum Bundesimmissionsschutzgesetz verlangt für Einzelraumfeuerungsanlagen genau diesen Nachweis. Der Raketenofen gehört deshalb nach draußen oder unter ein Dach mit mindestens zwei offenen Seiten. Für Feuer im Freien gibt das Ordnungsamt Auskunft, viele Gemeinden haben eine eigene Satzung. Lebensgefährlich ist das Kohlenmonoxid. Es riecht nach nichts, auch wenn der Ofen sauber und rauchfrei brennt. Das Fass wird außen über 200 Grad heiß, Kinder halten Abstand.

Das brauchst du

  • 24 Schamottsteine 22 x 11 x 3 cm für Brennkammer und Steigrohr
  • 10 kg feuerfester Schamottmörtel für dünne Fugen von 3 mm
  • 1 Blechfass 60 l, Durchmesser 40 cm als Außenmantel
  • 60 l Perlit 0/6 oder Vermiculit als Dämmung im Ringspalt
  • 1 Betonplatte 50 x 50 x 5 cm als Standfläche
  • 4 m Winkelstahl 30 x 30 x 3 mm für Topfauflage und Rahmen
  • 1 Gussrost 12 x 12 cm als Auflage für das Holz im Einschub
  • 1 Blechstreifen 3 mm, 15 x 25 cm als Luftschieber
  • 1 Ofenrohr 100 mm, 30 cm lang als Mantel um den Topf

Werkzeug

Winkelschleifer mit Steinscheibe und Trennscheibe, Maurerkelle, Wasserwaage, Mörtelkübel, Blechschere, Bohrmaschine, starke Blechschrauben, Feuerhandschuhe

Schritt für Schritt

  1. Maße festlegen. Der Querschnitt bleibt überall 12 x 12 cm. Waagerechter Einschub 30 cm lang, senkrechtes Steigrohr 60 cm hoch, also doppelt so hoch wie der Einschub lang.
  2. Platte legen. Betonplatte auf verdichteten Splitt setzen und auswaagen. Ein schiefer Ofen zieht schlechter und der Topf rutscht.
  3. Brennkammer mauern. L-Form aus Schamotte aufmauern, Mörtel nur hauchdünn auftragen. Dicke Fugen platzen bei 900 Grad als Erstes ab.
  4. Steigrohr hochziehen. Sechzig Zentimeter senkrecht mauern, an zwei Seiten mit der Wasserwaage prüfen. Innen keine Vorsprünge, jede Kante bremst den Zug.
  5. Dämmen. Fass über das Steigrohr stülpen, Ringspalt 8 cm, Perlit einfüllen und nur leicht klopfen. Fest gestampfte Dämmung leitet Wärme, statt sie zu halten.
  6. Topfauflage bauen. Winkelstahl so setzen, dass der Topfboden 4 cm über der Steigrohrkante steht. Das Ofenrohr als Mantel lässt 1,2 cm Spalt, dort streichen die heißen Gase entlang.
  7. Luft führen. Rost in den Einschub, darunter 4 cm frei für Luft und Asche. Blechschieber davor, damit ihr die Luftmenge regeln könnt.
  8. Trocknen und einbrennen. Fünf Tage stehen lassen, dann drei kleine Feuer an drei Tagen. Erst danach voll heizen.
  9. Kochprobe. Fünf Liter Wasser kochen in 12 bis 15 Minuten, dafür reichen 1,5 kg fingerdicke Äste. Raucht der Einschub, ist das Steigrohr zu kurz oder die Luft zu knapp.

Zeit und Kosten

Zwei Personen, ein Wochenende für den Bau, dazu fünf Tage Trockenzeit. Material 80 bis 300 Euro, je nachdem ob ihr Schamotte neu kauft oder aus einem abgerissenen Ofen holt.

Die drei häufigsten Fehler

  • Springender Querschnitt. Wird der Kanal irgendwo enger oder weiter, bricht der Zug zusammen und der Ofen raucht. Überall 12 x 12 cm halten, auch in den Ecken.
  • Steigrohr zu kurz. Unter der doppelten Einschublänge entsteht kein Sog. Bau das Steigrohr gleich 60 cm hoch, nicht 40.
  • Nasse Dämmung. Perlit saugt Regen wie ein Schwamm. Deckel aufs Fass, Ofen überdacht stellen, sonst kühlt die Brennkammer aus und die Verbrennung wird schmutzig.

Before you start

If you are even thinking of putting the stove in a room indoors, ring your Bezirksschornsteinfeger (the district chimney sweep, who has to sign off on stoves) first. Ask him whether he can pass a home built drum with no documentation of its type and its emissions. The answer is no, because the Erste Verordnung zum Bundesimmissionsschutzgesetz (the first ordinance under the federal clean air act) demands exactly that documentation for single room heating appliances. So the rocket stove belongs outdoors, or under a roof with at least two open sides. For fires in the open the Ordnungsamt (the local public order office) will tell you what applies, and many municipalities have a bylaw of their own. The deadly part is the carbon monoxide. It smells of nothing, even when the stove burns clean and free of smoke. The drum gets hotter than 200 degrees on the outside, so children keep their distance.

What you need

  • 24 Schamotte firebricks 22 x 11 x 3 cm for the burn chamber and the riser
  • 10 kg refractory Schamotte mortar for thin joints of 3 mm
  • 1 steel drum 60 l, 40 cm across as the outer shell
  • 60 l perlite 0/6 or vermiculite as insulation in the ring gap
  • 1 concrete slab 50 x 50 x 5 cm to stand it on
  • 4 m angle steel 30 x 30 x 3 mm for the pot rest and the frame
  • 1 cast iron grate 12 x 12 cm to carry the wood in the feed tunnel
  • 1 steel strip 3 mm, 15 x 25 cm as an air slide
  • 1 flue pipe 100 mm, 30 cm long as a skirt around the pot

Tools

Angle grinder with a stone disc and a cutting disc, bricklaying trowel, spirit level, mortar tub, tin snips, drill, heavy sheet metal screws, fire gloves

Step by step

  1. Fix the dimensions. The cross section stays 12 x 12 cm everywhere. Horizontal feed tunnel 30 cm long, vertical riser 60 cm high, so twice as high as the tunnel is long.
  2. Lay the slab. Set the concrete slab on compacted grit and level it. A stove out of true draws worse and the pot slides.
  3. Build the burn chamber. Lay the L shape in firebrick and spread the mortar paper thin. Thick joints are the first thing to blow off at 900 degrees.
  4. Raise the riser. Sixty centimetres straight up, checked with the spirit level on two sides. No ledges on the inside, every edge slows the draught.
  5. Insulate. Drop the drum over the riser, ring gap 8 cm, pour the perlite in and tap it only lightly. Insulation rammed tight conducts heat instead of holding it.
  6. Build the pot rest. Set the angle steel so the bottom of the pot sits 4 cm above the top edge of the riser. The flue pipe as a skirt leaves a gap of 1.2 cm, and the hot gases sweep along it.
  7. Guide the air. Grate into the feed tunnel, 4 cm clear underneath for air and ash. Sheet steel slide in front of it, so you can regulate the amount of air.
  8. Dry it and burn it in. Let it stand for five days, then three small fires on three days. Only after that heat it fully.
  9. Cooking test. Five litres of water boil in 12 to 15 minutes, and 1.5 kg of finger thick branches is enough for that. If the feed tunnel smokes, the riser is too short or the air too tight.

Time and cost

Two people, one weekend for the build, plus five days of drying. Materials 80 to 300 euros, depending on whether you buy the firebrick new or take it out of a stove that has been ripped out.

The three most common mistakes

  • Cross section that jumps. If the channel narrows or widens anywhere, the draught collapses and the stove smokes. Hold 12 x 12 cm everywhere, in the corners too.
  • Riser too short. Below twice the length of the feed tunnel no suction builds up. Build the riser 60 cm high from the start, not 40.
  • Wet insulation. Perlite soaks up rain like a sponge. Lid on the drum, stove under a roof, otherwise the burn chamber cools down and the combustion turns dirty.

Worauf es ankommtWhat matters hereNur draußen oder in wirklich gut belüftetem Raum betreiben. Auch rauchfreie Verbrennung erzeugt Kohlenmonoxid.Run it outdoors only, or in a room that is genuinely well ventilated. Even smoke free combustion produces carbon monoxide.

Feuerplatz und Sitzkreis, Fire pit and seating circle
Ein WochenendeOne weekendEtwas ÜbungSome practice helps

Feuerplatz und SitzkreisFire pit and seating circle

4 Personen, Bruchsteine bis 40 cm, Hocker über 100 kg nur rollen, schweres Heben4 people, quarry stones up to 40 cm, stools over 100 kg only rolled, heavy lifting

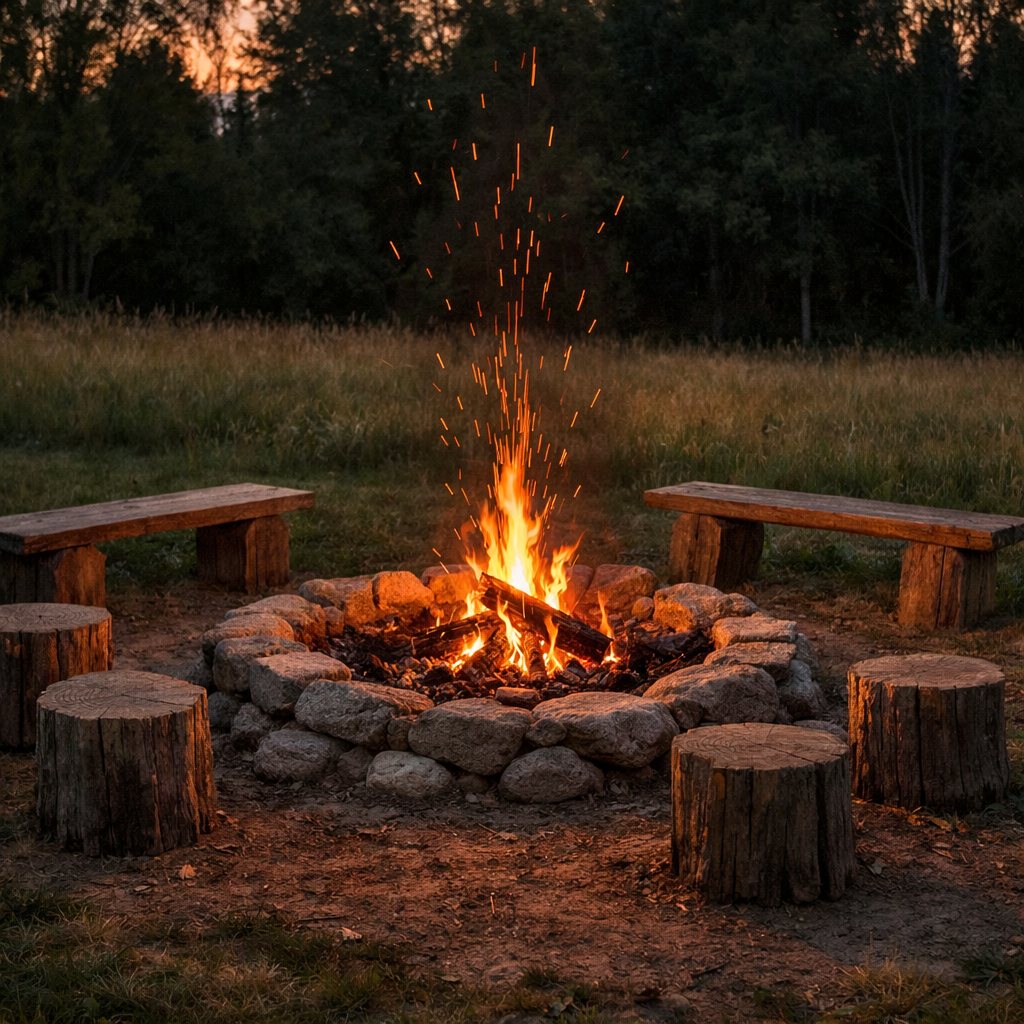
Das älteste Versammlungswerkzeug der Menschheit. Kein Raum, kein Bildschirm und keine Tagesordnung bringt Menschen so verlässlich ins ehrliche Gespräch wie ein Kreis um ein Feuer.The oldest tool for gathering that people have. No room, no screen and no agenda brings people into honest conversation as reliably as a circle round a fire.

So wird gebautHow it is built
Feuerstelle vertieft, ringsum Steinkranz, Sitzkreis aus Rundholzabschnitten oder einer Trockenmauer. Windschutz auf der Wetterseite, Wasser oder Sand griffbereit.Fire site sunk into the ground, a ring of stone round it, a seating circle of log rounds or a dry stone wall. Wind break on the weather side, water or sand within reach.
KostenCost
0 bis 400 Euro0 to 400 euros
Erster SchrittFirst step
Abstand zu Gebäuden und Bäumen prüfen und die örtliche Brandschutzsatzung lesen. Die Regeln sind kommunal verschieden.Check the distance to buildings and trees and read the local fire safety bylaw. The rules differ from one municipality to the next.
Schritt für SchrittStep by step
Feuerplatz und Sitzkreis, DraufsichtRing 100Sitzkreis 4205 m frei12341Feuerstelle aus Natursteinen2Sitzblöcke aus Stammabschnitten3Abstand zu Hecke und Gebäude4Kiesstreifen als FunkenschutzNicht maßstäblich, Maße in cm
Bauskizze Feuerplatz und Sitzkreis, am Handy seitlich wischenMeasured sketch of Fire pit and seating circle, swipe sideways on a phone

Bevor du anfängst

Ruf beim Ordnungsamt deiner Gemeinde an, bevor der erste Stein liegt. Frag, ob ein kleines Lagerfeuer aus naturbelassenem Holz auf eigenem Grund ohne Anzeige erlaubt ist und was für ein Osterfeuer oder ein Sonnwendfeuer gilt, denn solche Brauchtumsfeuer sind fast überall anzeigepflichtig. Eine bundesweite Größengrenze für Lagerfeuer gibt es nicht, das regelt jede Gemeinde in ihrer Satzung. Frag im selben Gespräch nach dem Abstand zum Wald, die Landeswaldgesetze verlangen meist 100 Meter. Wirklich gefährlich wird es beim Verlassen des Platzes, denn Glut hält sich unter Asche bis zum nächsten Tag. Eine Person bleibt wach, bis das letzte Nest abgelöscht ist.

Das brauchst du

  • 1,5 t Bruchsteine 20 bis 40 cm aus Granit oder Basalt für den Feuerkranz
  • 2,5 t Schotter 0/32 für den verdichteten Unterbau
  • 0,5 t Brechsand 0/5 als Ausgleichsschicht
  • 0,4 t Kies 8/16 für die Feuergrube
  • 8 Rundholzabschnitte Eiche, Ø 40 cm, 85 cm lang als Sitzhocker
  • 1 Sandkiste mit 100 l Löschsand und eine Schaufel daneben
  • 1 Gartenschlauch 25 m mit erreichbarem Wasseranschluss
  • 8 lfm Staketenzaun 160 cm als Windschutz auf der Wetterseite

Werkzeug

Spaten, Kreuzhacke, Schubkarre, Rüttelplatte aus dem Verleih, Wasserwaage, Maurerschnur mit Pflock, Vorschlaghammer, Motorsäge, Arbeitshandschuhe

Schritt für Schritt

  1. Standort wählen. Mindestens 10 m zu Gebäuden, Baumkronen und Holzstapeln, 100 m zum Waldrand. Nicht in die Hauptwindrichtung zur nächsten Wohnbebauung setzen.
  2. Kreis abstecken. Pflock in die Mitte, Schnur auf 50 cm für die Feuergrube, auf 250 cm für den Sitzkreis. Beide Kreise mit Sand markieren.
  3. Grube ausheben. 100 cm Durchmesser, 40 cm tief. Den Aushub zur Seite legen, ihr braucht ihn hinter dem Windschutz.
  4. Drainage einbauen. 25 cm Schotter einfüllen, in zwei Lagen mit der Rüttelplatte verdichten, darüber 10 cm Kies 8/16. So steht nach Regen kein Wasser in der Asche.
  5. Steinkranz setzen. Zwei Lagen Bruchstein rundum, Gesamthöhe 40 cm, die größten Steine nach unten. Trocken versetzen, kein Mörtel und kein Beton.
  6. Fläche befestigen. Ringsum 30 cm abschieben, 20 cm Schotter verdichten, 5 cm Brechsand abziehen, darauf Kies oder gesägte Natursteinplatten.
  7. Sitzhocker setzen. Rundhölzer 40 cm tief eingraben, 45 cm bleiben über dem Boden. Die Fußenden vorher zwei Tage in Leinöl stellen, das verdoppelt die Standzeit.
  8. Windschutz stellen. Auf der Wetterseite ein Bogen von 4 m Länge und 1,60 m Höhe. Der Kreis bleibt zu zwei Dritteln offen, sonst staut sich der Rauch.
  9. Löschmittel bereitstellen. Sandkiste, Schaufel, zwei volle Eimer und der Schlauch bleiben dauerhaft am Platz, nicht im Schuppen.

Zeit und Kosten

Vier Personen, zwei Tage. Aushub und Verdichten füllen den ersten Tag, am zweiten kommen Steine, Hocker und Windschutz. Material 0 bis 400 Euro. Wer Feldsteine vom eigenen Acker und Rundholz aus dem eigenen Bestand nimmt, zahlt nur die Rüttelplatte mit rund 45 Euro Tagesmiete.

Die drei häufigsten Fehler

  • Feuer unter Bäumen. Hitze trocknet die Krone aus, Funken fliegen bis 15 m hoch. Freie Fläche wählen, auch wenn der Schatten im Sommer verlockend ist.
  • Unverdichteter Unterbau. Ohne Rüttelplatte sacken Hocker und Steinkranz im ersten Winter schief. Immer in zwei Lagen von je 12 cm verdichten.
  • Falsche Steine. Runde Kiesel aus dem Bach und Betonreste enthalten Wasser und platzen bei Hitze ab. Nimm trocken gelagerten Bruchstein mit rauen Flächen.

Before you start

Ring the Ordnungsamt (the local public order office) of your municipality before the first stone goes down. Ask whether a small camp fire of untreated wood on your own land is allowed without notification, and what applies to an Osterfeuer or a Sonnwendfeuer, an Easter or midsummer bonfire, because those customary fires have to be notified almost everywhere. There is no nationwide size limit for camp fires, every municipality sets that in its own bylaw. In the same call ask about the distance to woodland, the Landeswaldgesetze (the forest laws of the federal states) usually require 100 metres. The genuinely dangerous moment is leaving the place, because embers hold under the ash until the next day. One person stays awake until the last hot pocket is out.

What you need

  • 1.5 t quarry stone 20 to 40 cm in granite or basalt for the fire ring
  • 2.5 t crushed stone 0/32 for the compacted sub base
  • 0.5 t crushed sand 0/5 as a levelling layer
  • 0.4 t gravel 8/16 for the fire pit
  • 8 oak log rounds, Ø 40 cm, 85 cm long as seating stools
  • 1 sand box with 100 l of dry sand and a shovel beside it
  • 1 garden hose 25 m with a water point you can reach
  • 8 linear metres of Staketenzaun 160 cm (a fence of vertical split palings) as a wind break on the weather side

Tools

Spade, pickaxe, wheelbarrow, hired plate compactor, spirit level, bricklayer's line with a peg, sledgehammer, chainsaw, work gloves

Step by step

  1. Choose the spot. At least 10 m to buildings, tree crowns and wood stacks, 100 m to the forest edge. Do not put it where the prevailing wind carries the smoke to the nearest houses.
  2. Peg out the circle. Peg in the middle, line at 50 cm for the fire pit, at 250 cm for the seating circle. Mark both circles with sand.
  3. Dig the pit. 100 cm across, 40 cm deep. Put the spoil to one side, you will want it behind the wind break.
  4. Build in drainage. Fill in 25 cm of crushed stone, compact it in two layers with the plate compactor, then 10 cm of gravel 8/16 on top. That way no water stands in the ash after rain.
  5. Set the ring of stone. Two courses of quarry stone all round, 40 cm high in total, the biggest stones at the bottom. Laid dry, no mortar and no concrete.
  6. Make up the surface. Take off 30 cm all round, compact 20 cm of crushed stone, screed off 5 cm of crushed sand, then gravel or sawn stone slabs on top.
  7. Set the stools. Bury the log rounds 40 cm deep, 45 cm stays above ground. Stand the foot ends in linseed oil for two days first, that doubles how long they last.
  8. Put up the wind break. On the weather side an arc 4 m long and 1.60 m high. Two thirds of the circle stays open, otherwise the smoke banks up.
  9. Keep the means to put it out. Sand box, shovel, two full buckets and the hose stay at the fire site permanently, not in the shed.

Time and cost

Four people, two days. Digging and compacting fill the first day, on the second the stones, stools and wind break go in. Materials 0 to 400 euros. If you take field stone off your own land and logs from your own trees, all you pay is the plate compactor at around 45 euros a day.

The three most common mistakes

  • Fire under trees. The heat dries the crown out and sparks fly up to 15 m high. Pick an open spot, however tempting the shade is in summer.
  • Sub base not compacted. Without a plate compactor the stools and the ring of stone settle out of true in the first winter. Always compact in two layers of 12 cm each.
  • Wrong stone. Round pebbles from the stream and lumps of old concrete hold water and burst off in the heat. Take dry stored quarry stone with rough faces.

Worauf es ankommtWhat matters hereBei längerer Trockenheit gilt in vielen Landkreisen ein Feuerverbot. Ein Blick auf den Waldbrandgefahrenindex vor jedem Feuer gehört dazu.In a long dry spell many districts ban fires altogether. A look at the Waldbrandgefahrenindex (the forest fire risk index) before every fire is part of the job.

Solarstrom für entlegene Ecken, Solar power for remote corners
Wochen bis MonateWeeks to monthsMit erfahrener HandNeeds an experienced hand

Solarstrom für entlegene EckenSolar power for remote corners

2 Personen, Module und Batterie je etwa 25 kg, schweres Heben2 people, modules and battery about 25 kg each, heavy lifting

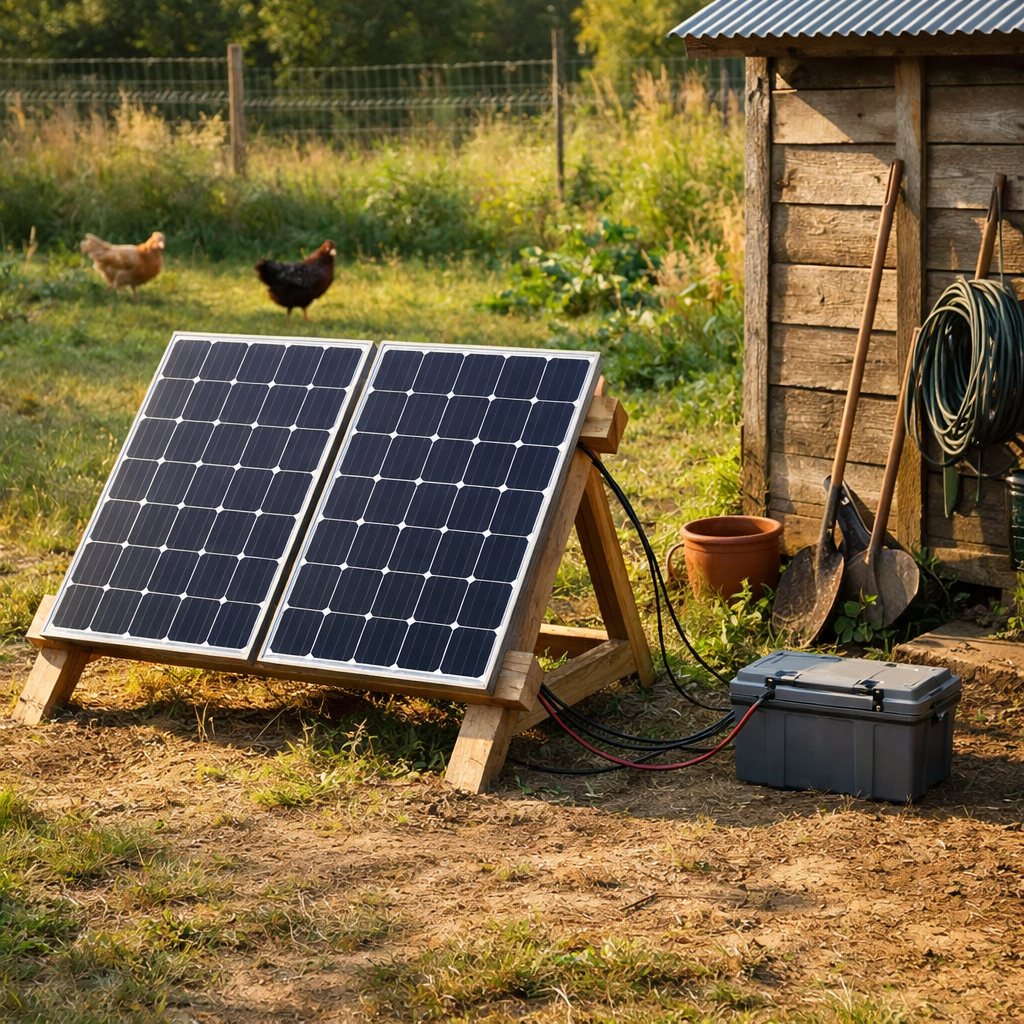
Werkstatt, Gewächshaus, Bauwagen und Gartenpumpe brauchen selten viel Strom, aber fast immer an Orten ohne Leitung. Eine kleine Inselanlage löst das ohne Graben und ohne Netzanschluss.Workshop, greenhouse, site caravan and garden pump rarely need much power, but they almost always sit where no cable runs. A small island system solves that without digging a trench and without a grid connection.

So wird gebautHow it is built
Modul, Laderegler, Batterie, Wechselrichter. Verbrauch ehrlich rechnen und die Batterie darauf auslegen, nicht umgekehrt.Module, charge controller, battery, inverter. Work your consumption out honestly and size the battery to it, not the other way round.
KostenCost
400 bis 3.000 Euro je nach Größe400 to 3,000 euros depending on size
Erster SchrittFirst step
Eine Woche lang aufschreiben, was tatsächlich Strom braucht und wie lange. Die meisten Anlagen werden zu groß geplant.Write down for a week what actually draws power and for how long. Most systems are planned too big.
Schritt für SchrittStep by step
Solarstrom für entlegene Ecken, SchemaLadereglerBatterie12 VVerbraucherLicht, PumpeFModul 100 x 170123451Solarmodul, 100 bis 200 Watt2Laderegler mit MPPT3Batterie, 12 Volt Kleinspannung4Sicherung dicht an der Batterie5Verbraucher, alles bei 12 VoltNicht maßstäblich, Maße in cm
Bauskizze Solarstrom für entlegene Ecken, am Handy seitlich wischenMeasured sketch of Solar power for remote corners, swipe sideways on a phone

Bevor du anfängst

Die Stelle, die du brauchst, ist ein eingetragener Elektrofachbetrieb. Frag ihn, wo bei eurem Aufbau die Grenze zwischen Inselanlage und Hausnetz verläuft, denn alles am Hausnetz mit 230 Volt gehört in seine Hand. Eine reine Inselanlage ohne jede Netzverbindung darfst du selbst bauen, sie muss auch nicht ins Marktstammdatenregister. Willst du ins Hausnetz, nimm ein Steckersolargerät mit höchstens 800 Voltampere Wechselrichterleistung und höchstens 2.000 Watt peak Modulleistung und melde es im Marktstammdatenregister an. Tödlich ist die Einspeisung über einen selbst gebauten Stecker, weil die Kontakte dann offen unter Spannung stehen. Die Batterie ist eine Brandlast und gehört in einen eigenen Blechschrank. Was ihr als Laien selbst machen dürft, ist die reine Gleichstromseite mit 12 oder 24 Volt. Die Grenze für Berührungssicherheit liegt bei 60 Volt Gleichspannung, nicht bei den 120 Volt, die manchmal als Kleinspannung genannt werden.

Das brauchst du

  • 2 PV-Module à 410 Wp, 172 x 113 cm in Reihe geschaltet
  • 1 MPPT-Laderegler 30 A für 12/24 V mit Eingang bis 100 V
  • 1 LiFePO4-Batterie 24 V, 100 Ah also 2,4 kWh Speicher
  • 1 Sinus-Wechselrichter 1.000 W, 24 V auf 230 V nur zusammen mit einer festgelegten Schutzmaßnahme, den 230-Volt-Teil baut eine Elektrofachkraft
  • 1 Kleinverteiler mit RCD 30 mA und Leitungsschutzschaltern dazu die Klemme für die N-PE-Verbindung des Inselnetzes
  • 20 m Solarkabel 6 mm² mit acht MC4-Steckern
  • 2 m Batteriekabel 25 mm² plus Lasttrennschalter und Sicherung 80 A träge als NH- oder MRBF-Sicherung, höchstens 30 cm vom Batteriepol entfernt
  • 1 Sicherung in der Leitung Batterie zu Laderegler, 1 Sicherung auf der PV-Seite Größe nach Herstellerangabe, eine einzige Sicherung für die ganze Anlage reicht nicht
  • 4 Alu-Montageschienen 2,10 m mit Mittelklemmen und Endklemmen
  • 1 Tiefenerder mindestens 2,5 m, besser gestückelt auf 4,5 m, 10 m Erdungskabel 6 mm² Ausbreitungswiderstand messen und aufschreiben, grüngelb bleibt nach DIN VDE 0100-510 dem Schutzleiter vorbehalten, eine reine Funktionserdung wird schwarz ausgeführt
  • 4 Kanthölzer KVH 12 x 12 cm, 250 cm fürs freistehende Gestell, dazu Diagonalen in der Modulebene und quer dazu, 8 x 8 cm liegen bei Windzone 2 mit 14,7 N/mm² am Anschlag
  • 4 H-Pfostenträger und 4 Punktfundamente 80 cm tief das Holz beginnt 15 cm über der Erde, nie im Beton
  • 1 Blechschrank 60 x 60 x 40 cm mit Lüftungsöffnungen oben und unten für Batterie und Regler, Trennschalter außen, bei Bleibatterien Lüftungsquerschnitt nach EN 62485-3 rechnen

Werkzeug

MC4-Crimpzange, Aderendhülsenzange, Multimeter, Zangenamperemeter, Akkuschrauber, Erdbohrer 20 cm, Energiekostenmessgerät

Schritt für Schritt

  1. Verbrauch messen. Eine Woche lang jeden Verbraucher erfassen. Werkstatt zum Beispiel: vier LED-Lampen mit 20 W über 4 Stunden ergeben 80 Wh, Tauchpumpe 400 W für 30 Minuten sind 200 Wh, Laptop 60 Wh. Summe 340 Wh am Tag.
  2. Batterie auslegen. Drei Tage ohne Sonne einplanen, bei Lithium 80 Prozent Entladetiefe: 340 mal 3 geteilt durch 0,8 sind 1.275 Wh. Die 2,4-kWh-Batterie reicht.
  3. Module auslegen. Im Dezember liefert ein Kilowatt Modulleistung nur 0,5 bis 0,8 kWh am Tag. 820 Wp bringen rund 500 Wh, im Juni das Sechsfache.
  4. Gestell bauen. Punktfundamente 80 cm tief setzen, darauf H-Pfostenträger, das Holz beginnt 15 cm über der Erde. Kein Pfosten wird einbetoniert, im Beton steht der Fuß dauerhaft nass und ist nach fünf Jahren durch, das steht in der Unterstandsanleitung als Fehler Nummer eins. Pfosten 12 x 12 cm, dazu Diagonalen in der Modulebene und quer dazu. Ausrichtung Süd, Neigung 60 Grad. Der steile Winkel bringt im Winter mehr und lässt Schnee abrutschen, er fängt aber auch den Wind: 3,9 m² Modulfläche ziehen in Windzone 2 rund 3,3 kN seitlich, und die muss die Verankerung aufnehmen, sonst liegt die Anlage im Februar auf der Wiese.
  5. Module montieren und erden. Schienen quer, Klemmen mit 15 Nm anziehen, Rahmen und Gestell mit 6 mm² auf den Tiefenerder legen. Steht ein Haus in der Nähe, setzt ihr keinen zweiten unverbundenen Erder, sondern nutzt den vorhandenen Fundamenterder über die Haupterdungsschiene mit, sonst habt ihr zwei Erder auf unterschiedlichem Potenzial. Leerlaufspannung messen: Zwei Module in Reihe ergeben bei 25 Grad etwa 74 V, ausgelegt wird aber immer mit der kalten Spannung, und die liegt bei minus 15 Grad bei rund 84 V. Die 100 V des Reglers sind ein absoluter Grenzwert und kein Betriebswert. Ein drittes Modul in Reihe wären 126 V, und der Regler ist tot.
  6. Batterieplatz einrichten. Blechschrank frostfrei und trocken aufstellen, Betriebstemperatur 5 bis 30 Grad. Lithium darf unter 0 Grad nicht geladen werden, also stellt im Laderegler wirklich das LiFePO4-Profil und die Ladesperre unter 0 Grad ein, sonst bleibt der Satz ein Wunsch. Wer trotzdem Blei nimmt, braucht einen Schrank mit Lüftungsöffnungen oben und unten und einen nach EN 62485-3 gerechneten Lüftungsquerschnitt, denn Blei gast beim Laden Wasserstoff aus und der zündet ab 4 Volumenprozent. Keine Funkenquelle im Schrank, Trennschalter außen.
  7. In der richtigen Reihenfolge anschließen. Zuerst Batterie an den Laderegler, dann die Module, zuletzt die Verbraucher. Andersherum stirbt der Regler sofort. Der 230-Volt-Teil kommt zuletzt und nicht von euch: Ein stationäres Inselnetz mit Steckdose ist eine elektrische Anlage nach DIN VDE 0100, egal ob der Strom aus dem Netz oder aus der Batterie kommt. Die Elektrofachkraft baut daraus entweder ein TN-S-Netz, verbindet also den Neutralleiter des Wechselrichters im Verteiler einmalig mit dem Schutzleiter, schließt den Erder an, setzt RCD 30 mA und Leitungsschutzschalter und prüft und protokolliert nach DIN VDE 0100-600, oder ein echtes IT-System mit Isolationsüberwachungsgerät. Ohne eine dieser beiden Lösungen bleibt beim ersten Körperschluss an der Tauchpumpe alles still, und der zweite Fehler bringt jemanden um.
  8. Eine Woche protokollieren. Ladestrom, Batteriespannung und Entnahme täglich notieren. Fällt die Spannung nachts unter 24,0 V, ist der Verbrauch zu hoch.

Zeit und Kosten

Zwei Personen, zwei bis drei Tage. Material 400 bis 3.000 Euro. Eine kleine Anlage mit einem 410-Wp-Modul und 12 V liegt bei rund 450 Euro, die oben beschriebene mit Lithium bei etwa 1.900 Euro. Nehmt LiFePO4 und nicht Blei: Blei gehört nur in einen belüfteten Schrank mit gerechnetem Lüftungsquerschnitt nach EN 62485-3, im geschlossenen Blechschrank sammelt sich Wasserstoff.

Die drei häufigsten Fehler

  • Kabel und Sicherung passen nicht zum Verbraucher. Bei 12 V fließen große Ströme, 20 m mit 2,5 mm² verlieren über 10 Prozent. Rechne den Querschnitt so, dass der Spannungsabfall unter 3 Prozent bleibt. Und leg die Sicherung auf den echten Strom aus: Ein 1.000-W-Wechselrichter zieht bei 24 V rund 47 A, bei leerer Batterie 56 A, beim Anlauf einer Pumpe kurz das Doppelte. Eine 40er fällt sofort, und wer dann eine 100er einsetzt, ohne das Kabel zu ändern, baut sich einen Kabelbrand.
  • Batterie tiefentladen. Blei stirbt nach wenigen vollständigen Entladungen. Laderegler auf Abschaltung bei 50 Prozent stellen oder gleich Lithium nehmen.
  • Anlage zu groß geplant. Miss eine Woche, bevor du bestellst, sonst kaufst du zu groß.

Before you start

The place you need is a registered Elektrofachbetrieb (a registered electrical contractor). Ask him where the line runs in your setup between the island system and the house wiring, because everything on the house wiring at 230 volts belongs in his hands. A pure island system with no grid connection at all you may build yourself, and it does not have to go into the Marktstammdatenregister (the national register of energy installations). If you want to feed the house wiring, take a Steckersolargerät (a plug-in solar unit) with no more than 800 volt amperes of inverter output and no more than 2,000 watts peak of module output, and register it in the Marktstammdatenregister. What kills people is feeding in through a home made plug, because the contacts then sit open and live. The battery is a fire load and belongs in a steel cabinet of its own. What you may do yourselves as laymen is the pure direct current side at 12 or 24 volts. The limit for touch safety is 60 volts direct current, not the 120 volts sometimes quoted as extra low voltage.

What you need

  • 2 PV modules at 410 Wp, 172 x 113 cm wired in series
  • 1 MPPT charge controller 30 A for 12/24 V with an input up to 100 V
  • 1 LiFePO4 battery 24 V, 100 Ah so 2.4 kWh of storage
  • 1 pure sine wave inverter 1,000 W, 24 V to 230 V only together with a defined protective measure, the 230 volt part is built by a qualified electrician
  • 1 small distribution board with a 30 mA RCD and miniature circuit breakers plus the terminal for the neutral to earth bond of the island network
  • 20 m solar cable 6 mm² with eight MC4 connectors
  • 2 m battery cable 25 mm² plus a load break switch and an 80 A slow blow fuse as an NH or MRBF type, no more than 30 cm from the battery terminal
  • 1 fuse in the line from battery to charge controller, 1 fuse on the PV side sized to the manufacturer's figures, one single fuse for the whole system is not enough
  • 4 aluminium mounting rails 2.10 m with mid clamps and end clamps
  • 1 earth rod of at least 2.5 m, better built up to 4.5 m, 10 m earthing cable 6 mm² measure the earth resistance and write it down, green and yellow stays reserved for the protective conductor under DIN VDE 0100-510, a purely functional earth is run in black
  • 4 posts KVH 12 x 12 cm, 250 cm (kiln dried graded structural timber) for the free standing frame, plus diagonals in the plane of the modules and across it, 8 x 8 cm is right at its limit in wind zone 2 at 14.7 N/mm²
  • 4 H-shaped post anchors and 4 pad foundations 80 cm deep the timber starts 15 cm above the ground, never in the concrete
  • 1 sheet steel cabinet 60 x 60 x 40 cm with vents at the top and the bottom for battery and controller, isolator on the outside, and with lead acid batteries work out the ventilation cross section to EN 62485-3

Tools

MC4 crimping tool, ferrule crimping pliers, multimeter, clamp meter, cordless driver, earth auger 20 cm, plug-in energy meter

Step by step

  1. Measure the consumption. Record every load for a week. A workshop for example: four LED lamps at 20 W over 4 hours make 80 Wh, a submersible pump at 400 W for 30 minutes is 200 Wh, laptop 60 Wh. Total 340 Wh a day.
  2. Size the battery. Plan for three days without sun, and with lithium a depth of discharge of 80 per cent: 340 times 3 divided by 0.8 is 1,275 Wh. The 2.4 kWh battery covers that.
  3. Size the modules. In December one kilowatt of module output gives only 0.5 to 0.8 kWh a day. So 820 Wp bring around 500 Wh, in June six times as much.
  4. Build the frame. Set pad foundations 80 cm deep, H-shaped post anchors on top, the timber starts 15 cm above the ground. No post gets set in concrete, because in concrete the foot stands permanently wet and is finished after five years, which is mistake number one in the instructions for the round timber shelter. Posts 12 x 12 cm, plus diagonals in the plane of the modules and across it. Facing south, pitch 60 degrees. The steep angle gives more in winter and lets snow slide off, but it also catches the wind: 3.9 m² of module area pulls around 3.3 kN sideways in wind zone 2, and the anchoring has to take that, otherwise the array is lying on the grass in February.
  5. Mount the modules and earth them. Rails across, clamps tightened to 15 Nm, frames and structure bonded to the earth rod with 6 mm². If there is a house nearby, do not drive a second unconnected rod but use the existing foundation earth through the main earthing terminal, otherwise you have two earths at different potentials. Measure the open circuit voltage: two modules in series give about 74 V at 25 degrees, but you size for the cold voltage, and at minus 15 degrees that is around 84 V. The 100 V of the controller is an absolute limit and not an operating value. A third module in series would be 126 V, and the controller is dead.
  6. Set up the battery place. Stand the sheet steel cabinet somewhere dry and free of frost, operating temperature 5 to 30 degrees. Lithium must not be charged below 0 degrees, so set the LiFePO4 profile and the charging block below 0 degrees in the controller, otherwise that sentence stays a wish. Anyone who takes lead acid anyway needs a cabinet with vents at the top and the bottom and a ventilation cross section calculated to EN 62485-3, because lead gases off hydrogen while charging and hydrogen ignites from 4 per cent by volume. No source of sparks in the cabinet, isolator on the outside.
  7. Connect in the right order. Battery to the charge controller first, then the modules, the loads last. The other way round the controller dies at once. The 230 volt part comes last, and not from you: a fixed island network with a socket is an electrical installation under DIN VDE 0100 (the German standard for low voltage installations), whether the power comes from the grid or from a battery. The qualified electrician turns it either into a TN-S system, bonding the neutral of the inverter to the protective conductor once in the board, connecting the earth, fitting a 30 mA RCD and circuit breakers and then testing and documenting to DIN VDE 0100-600, or into a genuine IT system with an insulation monitoring device. Without one of those two solutions the first earth fault on the submersible pump passes unnoticed, and the second fault kills someone.
  8. Log it for a week. Note the charging current, the battery voltage and the draw every day. If the voltage drops below 24.0 V overnight, the consumption is too high.

Time and cost

Two people, two to three days. Materials 400 to 3,000 euros. A small system with one 410 Wp module and 12 V comes to around 450 euros, the one described above with lithium to about 1,900 euros. Take LiFePO4 and not lead acid: lead belongs only in a vented cabinet with a ventilation cross section calculated to EN 62485-3, and in a closed steel cabinet the hydrogen collects.

The three most common mistakes

  • Cable and fuse do not match the load. At 12 V the currents are large, 20 m in 2.5 mm² loses more than 10 per cent. Work the cross section out so the voltage drop stays under 3 per cent. And size the fuse for the real current: a 1,000 W inverter draws around 47 A at 24 V, 56 A with a flat battery, and briefly twice that when a pump starts. A 40 A fuse blows straight away, and fitting a 100 A one without changing the cable builds you a cable fire.
  • Battery run flat. Lead acid dies after a few full discharges. Set the charge controller to cut off at 50 per cent, or take lithium from the start.
  • System planned too big. Measure for a week before you order, otherwise you buy too much.

Worauf es ankommtWhat matters hereFür netzgekoppelte Anlagen gelten Anmeldepflichten beim Netzbetreiber und im Marktstammdatenregister. Reine Inselanlagen sind davon frei.Grid connected systems have to be notified to the grid operator and entered in the Marktstammdatenregister (the national register of energy installations). Pure island systems are free of that.

Photovoltaik mit Speicher, Photovoltaics with battery storage
Wochen bis MonateWeeks to monthsMit erfahrener HandNeeds an experienced hand

Photovoltaik mit SpeicherPhotovoltaics with battery storage

4 Personen plus Elektrofachbetrieb, schweres Heben4 people plus a registered electrical contractor, heavy lifting

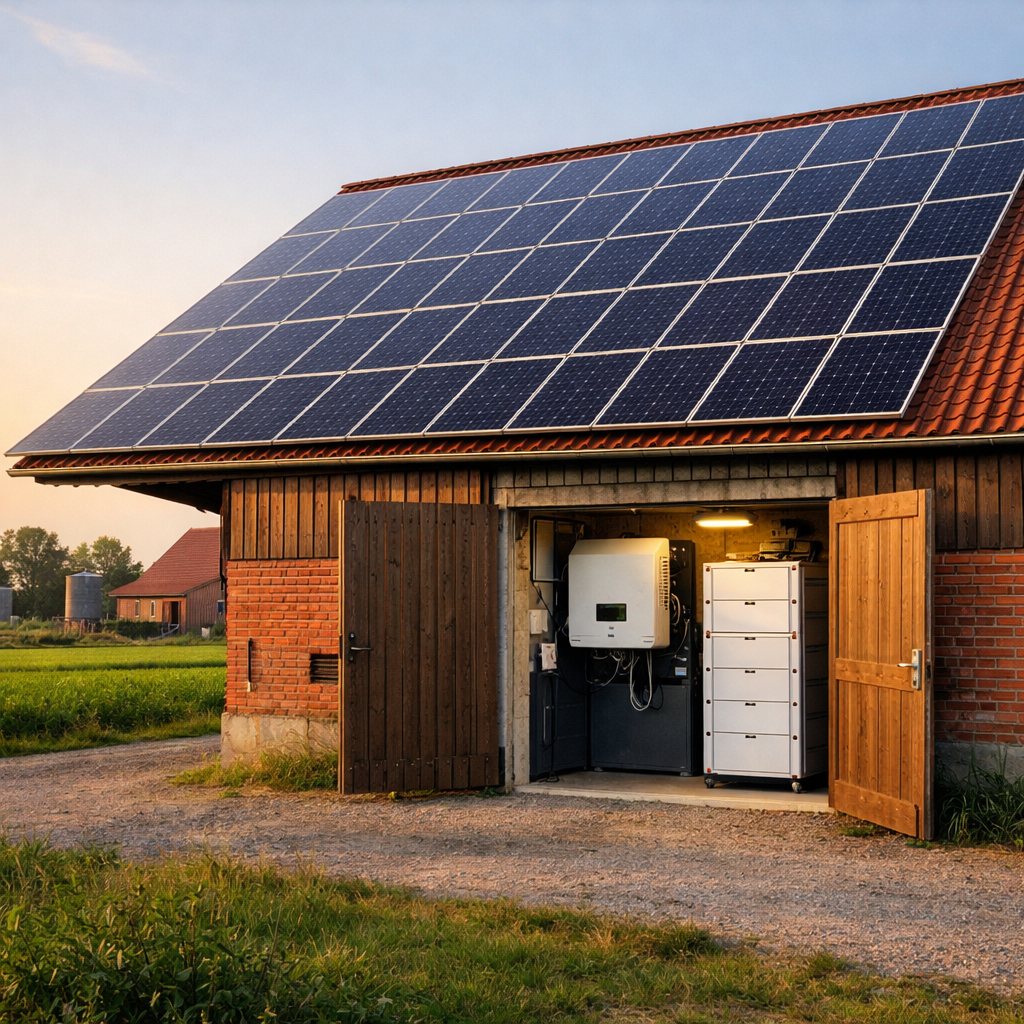
Die größte Dachfläche einer Gemeinschaft ist fast immer die Scheune. Eine Anlage darauf deckt tagsüber den Großteil des Verbrauchs, mit Speicher auch die Abende. Der Strom, den ihr selbst verbraucht, ist der wertvollste, weil ihr ihn nicht einkaufen müsst.The largest roof a community has is almost always the barn. An array on it covers most of the consumption during the day, and with a battery the evenings too. The power you use yourselves is the most valuable, because you do not have to buy it.

So wird gebautHow it is built
Faustzahl: ein Kilowatt Leistung braucht fünf bis sieben Quadratmeter Dach und liefert im Jahr rund 950 bis 1.050 Kilowattstunden. Den Speicher erst nach dem ersten vollen Jahr dimensionieren, wenn ihr euren echten Tagesverlauf kennt.Rule of thumb: one kilowatt of output needs five to seven square metres of roof and delivers around 950 to 1,050 kilowatt hours a year. Size the battery only after the first full year, once you know your real daily pattern.
KostenCost
etwa 1.000 bis 1.400 Euro pro Kilowatt, Speicher 600 bis 900 Euro pro Kilowattstundeabout 1,000 to 1,400 euros per kilowatt, battery 600 to 900 euros per kilowatt hour
Erster SchrittFirst step
Statik und Dachzustand prüfen lassen. Ein Dach, das in acht Jahren neu gedeckt werden muss, trägt keine Anlage für dreißig Jahre.Have the structure and the state of the roof checked. A roof that needs new tiles in eight years will not carry an array for thirty.
Schritt für SchrittStep by step
Photovoltaik mit Speicher, AnlagenschemaDachflächeselbst möglichnur FachbetriebWechsel-richterSpeicher5 bis 10 kWhZählerNetz20 Module, etwa 8 kWp123451Module auf dem Dach, DC-Seite2Wechselrichter, AC-Seite3Batteriespeicher im Technikraum4Zähler und Netzanschluss5Beim Netzbetreiber anmeldenNicht maßstäblich, Maße in cm
Bauskizze Photovoltaik mit Speicher, am Handy seitlich wischenMeasured sketch of Photovoltaics with battery storage, swipe sideways on a phone

Bevor du anfängst

Sucht euch früh einen eingetragenen Elektrofachbetrieb und fragt ihn, welche Arbeiten ihr selbst übernehmen dürft. Gerüst, Dachhaken, Module und die Gleichstromseite sind meist eure Sache, der Anschluss des Wechselrichters, jede Arbeit am Zählerschrank und die Anmeldung beim Netzbetreiber bleiben bei ihm. Wer daran selbst schraubt, verliert den Versicherungsschutz. Die Anlage tragt ihr innerhalb eines Monats ins Marktstammdatenregister ein. Für den kleinen Einstieg reicht ein Steckersolargerät mit höchstens 800 Voltampere Wechselrichterleistung und 2.000 Watt peak Modulleistung. Dass keine Baugenehmigung nötig ist, heißt nicht, dass alles erlaubt wäre. Bebauungsplan und Denkmalschutz gelten weiter, das klärt die Gemeinde. Auf dem Dach droht der Absturz, ab drei Metern gehört eine Sicherung dran.

Das brauchst du

  • 24 PV-Module à 440 Wp, 176 x 113 cm ergeben 10,56 kWp auf 48 m² Dach
  • 1 Hybrid-Wechselrichter 10 kW, dreiphasig mit Batterieanschluss
  • 1 Batteriespeicher 10 kWh LiFePO4 als Wandmodul oder Turm
  • 70 bis 80 Dachhaken für Ziegeldeckung mit je zwei Edelstahlschrauben A2 8 x 100 mm, immer in den Sparren und nie in die Dachlatte, mit 5 mm vorgebohrt, die genaue Zahl steht in der Belegungstabelle des Montagesystems für eure Schneelastzone
  • 100 m Alu-Montageschiene 40 x 40 mm plus Mittelklemmen und Endklemmen
  • 60 m Solarkabel 6 mm² und 20 MC4-Steckerpaare
  • 1 DC-Freischalter, Überspannungsableiter nach Ableiterkonzept auf der Gleichstromseite Typ 2 am Wechselrichter und ein zweiter am Generatoranschlusskasten auf dem Dach, weil 60 m Solarkabel die 10-Meter-Regel reißen, auf der Wechselstromseite bei vorhandener Blitzschutzanlage Typ 1 plus Typ 2 oder ein Kombiableiter im Zählerschrank
  • 15 m Leitung NYM-J 5 x 6 mm² vom Wechselrichter zum Zählerschrank
  • Erdung des Gestells nur nach Prüfung, dann 16 mm² Kupfer ohne äußere Blitzschutzanlage arbeitet die Gleichstromseite in Schutzklasse II und braucht keine Gestellerdung, mit Blitzschutzanlage und eingehaltenem Trennungsabstand darf das Gestell gerade nicht angebunden werden, ohne eingehaltenen Trennungsabstand muss der Anschluss blitzstromtragfähig mit mindestens 16 mm² und von einer Blitzschutzfachkraft ausgeführt werden

Werkzeug

Gerüst aus dem Verleih, Auffanggurt mit Anschlagpunkt, Akkuschrauber mit Drehmomentaufsatz, Winkelschleifer, MC4-Crimpzange, Multimeter

Schritt für Schritt

  1. Dach beurteilen. Alter der Deckung, Zustand der Lattung, Sparrenabstand messen, üblich sind 70 bis 90 cm. Die Anlage bringt rund 15 kg je m² zusätzlich aufs Dach. Der Zimmerer macht die Befundaufnahme mit einer Bauteilöffnung an mindestens zwei Sparrenköpfen und im Traufbereich und sucht Hausbock, Anobien und morsche Hölzer. Den Standsicherheitsnachweis für den Zustand mit Anlage rechnet ein Tragwerksplaner, ein Zimmerer bestätigt so etwas nicht. Beides gehört in die Kostenrechnung, denn 70 bis 80 Haken bedeuten rund 150 Bohrungen in Sparren, deren Zustand sonst niemand geprüft hat.
  2. Ertrag rechnen. Ein Kilowatt Leistung braucht mit heutigen Modulen 4,5 m² Dach, das zeigt die eigene Liste mit 24 Modulen auf 48 m². Der Ertrag hängt an der Ausrichtung: In Nordwestdeutschland liefert Süd bei 35 Grad Neigung rund 950 kWh je kWp im Jahr, eine Ost-West-Belegung rund 820. 10,5 kWp ergeben also 8.600 bis 10.000 kWh. Ohne Speicher nutzt ihr davon 15 bis 20 Prozent selbst, die oft genannten 30 Prozent gelten nur bei etwa 1 kWp je 1.000 kWh Jahresverbrauch.
  3. Anmelden lassen. Der Elektrofachbetrieb stellt beim Netzbetreiber den Antrag auf Netzanschluss. Rechne mit vier bis acht Wochen.
  4. Gerüst stellen und Dachhaken setzen. Ab 3 m Absturzhöhe ist Seitenschutz Pflicht, das Gerüst kostet 600 bis 1.200 Euro für zwei Wochen. Dann Ziegel ausheben, Haken auf die Sparren schrauben und den darüberliegenden Ziegel ausklinken.
  5. Schienen und Module. Schienen waagerecht ausrichten, Module von unten nach oben setzen, Klemmen mit 15 bis 20 Nm anziehen. Immer zu zweit tragen, ein Modul wiegt 22 kg.
  6. Strings verkabeln. Zwei Strings zu je zwölf Modulen, gleich lang und gleich verschattet. Bei minus 10 Grad steigt die Leerlaufspannung um 10 Prozent, sie muss unter 1.000 V bleiben.
  7. Elektriker übernimmt. Wechselrichter, Speicher, Leitung zum Zählerschrank und der NA-Schutz nach VDE-AR-N 4105. Danach setzt der Messstellenbetreiber den Zweirichtungszähler.
  8. Registrieren. Innerhalb eines Monats im Marktstammdatenregister eintragen, sonst drohen Bußgeld und Zahlungsstopp.
  9. Ein Jahr auswerten. Erst wenn ihr euren echten Tagesverlauf kennt, dimensioniert ihr den Speicher. Faustzahl: eine Kilowattstunde je 1.000 kWh Jahresverbrauch.

Zeit und Kosten

Vier Personen montieren in drei Tagen, der Elektrofachbetrieb braucht ein bis zwei Tage. Rechne 1.000 bis 1.400 Euro je Kilowatt, für 10,5 kWp also 10.500 bis 14.700 Euro. Der Speicher kostet 600 bis 900 Euro je Kilowattstunde. Rechnet den Zählerschrank mit ein: Auf einem Resthof aus den Sechzigern findet man oft klassische Nullung ohne Schutzleiter und keinen Platz für NA-Schutz und Ableiter, dann erzwingt die Einspeisung eine Erneuerung für 1.500 bis 3.500 Euro. Dazu kommen Befundaufnahme und Standsicherheitsnachweis fürs Dach.

Die drei häufigsten Fehler

  • Altes Dach. Eine Deckung, die in acht Jahren fällig wird, kostet später 3.000 Euro für Abbau und Neumontage. Erst decken, dann bauen.
  • Speicher zu groß. Zehn Kilowattstunden sind im Winter nie voll und im Sommer nie leer. Ein Jahr messen spart oft 4.000 Euro.
  • Verschattung übersehen. Ein Kamin oder ein Baum legt im Winter einen ganzen String lahm. Verschattete Module auf einen eigenen String legen.

Before you start

Find a registered Elektrofachbetrieb (a registered electrical contractor) early and ask him which work you may take on yourselves. Scaffolding, roof hooks, modules and the direct current side are usually yours, while connecting the inverter, any work at the meter cabinet and the application to the grid operator stay with him. Anyone who does that themselves loses their insurance cover. You enter the array in the Marktstammdatenregister (the national register of energy installations) within a month. For a small start a Steckersolargerät (a plug-in solar unit) with no more than 800 volt amperes of inverter output and 2,000 watts peak of module output is enough. That no building permission is needed does not mean everything is allowed. The Bebauungsplan (the local development plan) and the rules on listed buildings still apply, and the municipality will sort that out with you. On the roof the danger is falling, and above three metres a safety system belongs on you.

What you need

  • 24 PV modules at 440 Wp, 176 x 113 cm make 10.56 kWp on 48 m² of roof
  • 1 hybrid inverter 10 kW, three phase with a battery connection
  • 1 battery store 10 kWh LiFePO4 as a wall module or a tower
  • 70 to 80 roof hooks for tiled roofs with two stainless steel screws A2 8 x 100 mm each, always into the rafter and never into the batten, pre drilled at 5 mm, the exact number is in the layout table of the mounting system for your snow load zone
  • 100 m aluminium mounting rail 40 x 40 mm plus mid clamps and end clamps
  • 60 m solar cable 6 mm² and 20 pairs of MC4 connectors
  • 1 DC isolator, surge arresters to a proper protection design on the direct current side a type 2 at the inverter and a second one at the generator junction box on the roof, because 60 m of solar cable breaks the ten metre rule, on the alternating current side, where a lightning protection system exists, type 1 plus type 2 or a combined arrester in the meter cabinet
  • 15 m cable NYM-J 5 x 6 mm² from the inverter to the meter cabinet
  • Earthing of the frame only after it has been checked, then 16 mm² copper without an external lightning protection system the direct current side works in protection class II and needs no frame earthing, with a lightning protection system and the separation distance kept the frame must precisely not be bonded, and if the separation distance is not kept the connection has to carry lightning current with at least 16 mm² and be made by a qualified lightning protection installer

Tools

Hired scaffolding, fall arrest harness with an anchor point, cordless driver with a torque attachment, angle grinder, MC4 crimping tool, multimeter

Step by step

  1. Assess the roof. Age of the covering, condition of the battens, measure the rafter spacing, 70 to 90 cm is usual. The array puts around 15 kg per m² extra on the roof. The carpenter does the survey, opening the structure up at a minimum of two rafter ends and at the eaves, and looks for house longhorn beetle, woodworm and rotten timber. The structural check for the roof with the array on it is calculated by a structural engineer, a carpenter does not certify such a thing. Put both in the budget, because 70 to 80 hooks mean around 150 holes drilled into rafters whose condition nobody else has looked at.
  2. Work out the yield. One kilowatt of output needs 4.5 m² of roof with today's modules, and that is what your own list shows with 24 modules on 48 m². The yield hangs on the orientation: in north west Germany a south facing roof at 35 degrees gives around 950 kWh per kWp a year, an east and west layout around 820. So 10.5 kWp comes to 8,600 to 10,000 kWh. Without a battery you use 15 to 20 per cent of that yourselves, and the 30 per cent so often quoted only holds at roughly 1 kWp per 1,000 kWh of annual consumption.
  3. Have it registered. The electrical contractor applies to the grid operator for the connection. Reckon on four to eight weeks.
  4. Put up the scaffolding and set the roof hooks. From 3 m of fall height edge protection is compulsory, and the scaffolding costs 600 to 1,200 euros for two weeks. Then lift the tiles out, screw the hooks onto the rafters and notch the tile above.
  5. Rails and modules. Line the rails up level, set the modules from the bottom upwards, tighten the clamps to 15 to 20 Nm. Always carry in pairs, a module weighs 22 kg.
  6. Wire the strings. Two strings of twelve modules each, the same length and the same shading. At minus 10 degrees the open circuit voltage rises by 10 per cent, and it has to stay under 1,000 V.
  7. The electrician takes over. Inverter, battery, the cable to the meter cabinet and the NA-Schutz (the mains protection that disconnects the array if the grid fails) to VDE-AR-N 4105. After that the metering operator fits the two way meter.
  8. Register it. Enter it in the Marktstammdatenregister (the national register of energy installations) within a month, otherwise you risk a fine and a stop on payments.
  9. Evaluate a year. Only once you know your real daily pattern do you size the battery. Rule of thumb: one kilowatt hour per 1,000 kWh of annual consumption.

Time and cost

Four people fit it in three days, the electrical contractor needs one to two days. Reckon 1,000 to 1,400 euros per kilowatt, so 10,500 to 14,700 euros for 10.5 kWp. The battery costs 600 to 900 euros per kilowatt hour. Count the meter cabinet in: on a Resthof (a small former farmstead) from the sixties you often find klassische Nullung, old wiring with a combined neutral and earth and no separate protective conductor, and no room for mains protection and arresters, and then feeding in forces a renewal for 1,500 to 3,500 euros. On top of that come the roof survey and the structural check.

The three most common mistakes

  • Old roof. A covering that is due in eight years costs 3,000 euros later for taking the array off and putting it back. Re-tile first, then build.
  • Battery too big. Ten kilowatt hours is never full in winter and never empty in summer. Measuring for a year often saves 4,000 euros.
  • Shading overlooked. A chimney or a tree cripples a whole string in winter. Put shaded modules on a string of their own.

Worauf es ankommtWhat matters hereAnmeldung beim Netzbetreiber und im Marktstammdatenregister ist Pflicht, und zwar vor der Inbetriebnahme. Reine Inselanlagen ohne Netzverbindung sind davon frei.Notifying the grid operator and registering in the Marktstammdatenregister (the national register of energy installations) is compulsory, and it has to happen before you switch on. Pure island systems with no grid connection are free of that.

Kleinwindanlage, Small wind turbine
Längeres VorhabenA longer projectMit erfahrener HandNeeds an experienced hand

KleinwindanlageSmall wind turbine

4 Personen plus Baggerfahrer und Elektrofachbetrieb, schweres Heben4 people plus a digger operator and a registered electrical contractor, heavy lifting

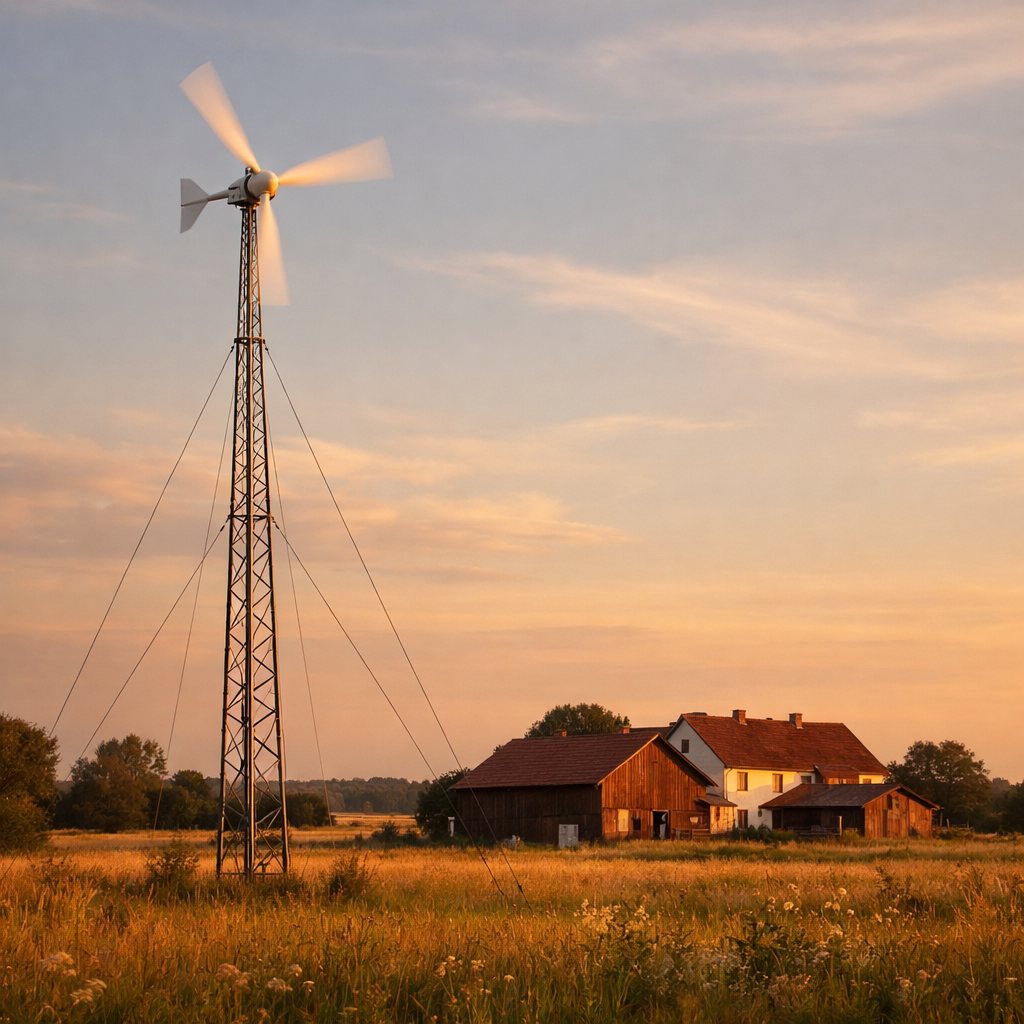
Wind weht nachts und vor allem im Winter, also genau dann, wenn die Sonne fehlt. Das macht ein Windrad zur idealen Ergänzung zur Photovoltaik. Aber nur an wirklich windigen Orten, und das sind deutlich weniger, als die meisten hoffen.Wind blows at night and above all in winter, so exactly when the sun is missing. That makes a turbine the ideal companion to photovoltaics. But only in genuinely windy places, and there are far fewer of those than most people hope.

So wird gebautHow it is built
Ein freistehender Mast bringt fast immer mehr als eine Dachmontage, weil Gebäude die Luft verwirbeln. Der Rotor sollte spürbar über allen Hindernissen im Umkreis stehen, sonst frisst die Verwirbelung den Ertrag.A free standing mast almost always gives more than a roof mounting, because buildings churn the air up. The rotor should stand noticeably above every obstacle around it, otherwise the turbulence eats the yield.
KostenCost
3.000 bis 8.000 Euro pro Kilowatt, eine Anlage mit gut fünf Kilowatt und zwanzig Meter Mast liegt bei rund 35.000 Euro3,000 to 8,000 euros per kilowatt, a turbine of a good five kilowatts on a twenty metre mast comes to around 35,000 euros
Erster SchrittFirst step
Erst die Windkarte des Deutschen Wetterdienstes anschauen, dann ein Jahr lang selbst messen. Unter 4,5 bis 5 Meter pro Sekunde im Jahresmittel rechnet sich nichts.Look at the wind map of the Deutscher Wetterdienst (the national weather service) first, then measure for a year yourselves. Below an annual mean of 4.5 to 5 metres per second nothing pays.
Schritt für SchrittStep by step
Kleinwindanlage, AnsichtNabenhöhe 900Abspannradius123451Rotor, 2 bis 3 m Durchmesser2Mast, abgespannt3Abspannseile, drei Richtungen4Betonfundament, frostfrei5Erdanker, Zug geprüftNicht maßstäblich, Maße in cm
Bauskizze Kleinwindanlage, am Handy seitlich wischenMeasured sketch of Small wind turbine, swipe sideways on a phone

Bevor du anfängst

Die untere Bauaufsichtsbehörde im Landratsamt ist eure erste Adresse. Frag dort nach der Höhengrenze, bis zu der bei euch keine Genehmigung nötig ist, denn mehrere Länder haben sie zuletzt angehoben. Bring die geplante Gesamthöhe, den Abstand zur Grenze und das Schallgutachten des Herstellers mit, im reinen Wohngebiet gilt nachts 35 dB(A) nach TA Lärm. Verfahrensfrei heißt nicht zulässig. Bebauungsplan, Abstandsflächen und der Artenschutz für Fledermäuse und Greifvögel gelten weiter, und im Außenbereich ist das die eigentliche Hürde. Ab 50 Metern Gesamthöhe läuft das Verfahren nach dem Bundesimmissionsschutzgesetz. Anschluss und Netzanmeldung macht ausschließlich ein Elektrofachbetrieb.

Das brauchst du

  • 1 Messmast 12 m mit Schalenanemometer und Datenlogger für das Messjahr
  • 1 Kleinwindanlage 5 kW, Rotordurchmesser 5 m mit Sturmsicherung
  • 1 kippbarer Rohrmast 20 m mit Fußlager und Aufrichthebel
  • 8 m³ Beton C25/30, 400 kg Betonstahl fürs Blockfundament
  • 1 Ankerkorb passend zum Mastfuß mit Schablone und Justierschrauben
  • 50 m Erdkabel NYY-J 5 x 10 mm² im Kabelgraben
  • 1 Lastwiderstand 6 kW als Bremse bei Netzausfall
  • 1 Netzeinspeise-Wechselrichter 5 kW oder Laderegler für Inselbetrieb
  • 30 m Banderder 30 x 3,5 mm als Ringerder unter dem Fundament
  • 1 Blitzschutzsatz mit Trennstelle und Ableiter Typ 1

Werkzeug

Minibagger aus dem Verleih, Rüttelflasche, Kettenzug 3 t mit Umlenkrolle, Drehmomentschlüssel bis 300 Nm, Nivelliergerät, Absturzsicherung, Funkgeräte

Schritt für Schritt

  1. Windkarte lesen. Auf der Windkarte des Deutschen Wetterdienstes den Jahresmittelwert für 20 m Höhe ablesen. Unter 4,5 m/s lohnt sich nichts, unter 5 m/s wird es knapp.
  2. Ein Jahr messen. Messmast aufstellen und 10-Minuten-Mittelwerte aufzeichnen. Nur eigene Daten zählen, weil Hecken, Kuppen und Gebäude den Wind örtlich stark verändern.
  3. Ertrag abschätzen. Die Leistung steigt mit der dritten Potenz der Windgeschwindigkeit. Doppelter Wind bedeutet achtfachen Ertrag, ein Fünftel weniger Wind halbiert ihn fast.
  4. Genehmigung klären. Bis 10 m Gesamthöhe ist eine Anlage in vielen Bundesländern verfahrensfrei, in Bayern bis 15 m. Darüber braucht ihr einen Bauantrag mit Standsicherheitsnachweis.
  5. Fundament gießen. Blockfundament 3,50 x 3,50 x 0,80 m, Bewehrung nach Statik, Ankerkorb auf 2 mm genau einmessen. 28 Tage aushärten lassen.
  6. Kabelgraben ziehen. 80 cm tief, Sandbett 10 cm, Kabel einlegen, Warnband 40 cm darüber. Leerrohr für die Steuerleitung mitlegen.
  7. Mast liegend bestücken. Generator, Rotorblätter und Windfahne am Boden montieren, alle Schrauben mit Drehmoment anziehen und mit Farbe markieren.
  8. Aufrichten. Mit Kettenzug und Umlenkung an einem Tag unter 3 m/s aufrichten. Vier Personen, feste Absperrung, niemand steht im Kippbereich.
  9. Anschließen und erden. Hier hört die Eigenleistung auf. Den Graben ziehen und das Banderder einlegen dürft ihr, anklemmen und den Ableiter setzen nicht: Erdungsanlage und Blitzschutz eines 20-Meter-Mastes sind Blitzschutzarbeiten nach DIN EN 62305, und Typ-1-Ableiter, Trennstelle und Trennungsabstand gehören einer Blitzschutzfachkraft. Der Ausbreitungswiderstand des Erders wird gemessen und dokumentiert. Danach übernimmt der Elektrofachbetrieb Wechselrichter, Netzanschluss und Anmeldung.
  10. Warten. Nach 50 Betriebsstunden alle Schrauben nachziehen, danach jährlich. Lager und Blattkanten mit dem Fernglas kontrollieren.

Zeit und Kosten

Ein volles Jahr Messung, danach drei bis fünf Tage Aufbau mit vier Personen plus Tiefbau und Elektrofachbetrieb. Rechne 3.000 bis 8.000 Euro je Kilowatt. Eine Anlage mit fünf Kilowatt und 20 m Mast landet mit allem bei etwa 35.000 Euro.

Die drei häufigsten Fehler

  • Montage aufs Dach. Gebäude verwirbeln die Luft, der Ertrag bricht ein und die Schwingungen wandern in den Dachstuhl. Immer ein freistehender Mast.
  • Ohne Messung gekauft. Herstellerangaben gelten bei 11 m/s, die stehen an den meisten Standorten keine 50 Stunden im Jahr an. Messt, bevor ihr kauft.
  • Mast zu kurz. Der Rotor muss deutlich über allen Hindernissen im Umkreis von 150 m stehen. Zehn Meter mehr Mast bringen oft 40 Prozent mehr Ertrag.

Before you start

The untere Bauaufsichtsbehörde (the lower building control authority) at the Landratsamt (the district administration) is your first address. Ask there for the height limit below which no permission is needed where you are, because several states have raised it recently. Bring the planned overall height, the distance to the boundary and the manufacturer's noise report, in a purely residential area 35 dB(A) applies at night under TA Lärm (the technical guidance on noise). Exempt from procedure does not mean permitted. The Bebauungsplan (the local development plan), the required distances to the boundary and species protection for bats and birds of prey all still apply, and in the Außenbereich (the open countryside outside the built-up area) that is the real hurdle. From 50 metres of overall height the procedure runs under the Bundesimmissionsschutzgesetz (the federal clean air act). The connection and the registration with the grid operator are done by an electrical contractor and by nobody else.

What you need

  • 1 measuring mast 12 m with a cup anemometer and a data logger for the year of measurement
  • 1 small wind turbine 5 kW, rotor 5 m across with storm protection
  • 1 tiltable tubular mast 20 m with a base bearing and a raising lever
  • 8 m³ concrete C25/30, 400 kg reinforcing steel for the block foundation
  • 1 anchor cage to match the mast base with a template and adjusting screws
  • 50 m underground cable NYY-J 5 x 10 mm² in the cable trench
  • 1 load resistor 6 kW as a brake if the grid fails
  • 1 grid feed inverter 5 kW or a charge controller for off grid running
  • 30 m earth tape 30 x 3.5 mm as a ring earth under the foundation
  • 1 lightning protection set with an isolating point and a type 1 arrester

Tools

Hired mini digger, poker vibrator, chain hoist 3 t with a pulley, torque wrench up to 300 Nm, levelling instrument, fall protection, two way radios

Step by step

  1. Read the wind map. Take the annual mean for a height of 20 m off the wind map of the Deutscher Wetterdienst (the national weather service). Below 4.5 m/s nothing pays, below 5 m/s it gets tight.
  2. Measure for a year. Put the measuring mast up and record ten minute means. Only your own data counts, because hedges, rises in the ground and buildings change the wind a great deal from place to place.
  3. Estimate the yield. The output rises with the cube of the wind speed. Twice the wind means eight times the yield, a fifth less wind almost halves it.
  4. Sort out the permission. Up to 10 m of overall height a turbine is verfahrensfrei, exempt from any application, in many federal states, in Bavaria up to 15 m. Above that you need a building application with structural calculations.
  5. Pour the foundation. Block foundation 3.50 x 3.50 x 0.80 m, reinforcement to the structural design, anchor cage set to within 2 mm. Let it cure for 28 days.
  6. Dig the cable trench. 80 cm deep, sand bed 10 cm, cable in, warning tape 40 cm above it. Lay a conduit for the control cable at the same time.
  7. Fit the mast out lying down. Mount the generator, the blades and the tail vane on the ground, tighten every bolt to torque and mark it with paint.
  8. Raise it. Bring it up with the chain hoist and a pulley on a day under 3 m/s. Four people, a firm barrier, nobody standing in the fall zone.
  9. Connect it and earth it. This is where your own work stops. Digging the trench and laying the earth tape you may do, connecting it and fitting the arrester you may not: the earthing system and the lightning protection of a 20 metre mast are lightning protection work under DIN EN 62305, and type 1 arresters, the isolating point and the separation distance belong to a qualified lightning protection installer. The earth resistance is measured and documented. After that the electrical contractor takes over the inverter, the grid connection and the registration.
  10. Maintain it. After 50 running hours go round every bolt again, then once a year. Check the bearings and the blade edges with binoculars.

Time and cost

A full year of measurement, then three to five days of assembly with four people plus groundworks and an electrical contractor. Reckon 3,000 to 8,000 euros per kilowatt. A turbine of five kilowatts on a 20 m mast lands at about 35,000 euros with everything in.

The three most common mistakes

  • Mounted on the roof. Buildings churn the air up, the yield collapses and the vibration travels into the roof structure. Always a free standing mast.
  • Bought without measuring. The manufacturer's figures apply at 11 m/s, and at most sites that does not blow for 50 hours in a year. Measure before you buy.
  • Mast too short. The rotor has to stand well clear of every obstacle within 150 m. Ten metres more mast often brings 40 per cent more yield.

Worauf es ankommtWhat matters hereBis zehn Meter Gesamthöhe ist eine Anlage in vielen Bundesländern verfahrensfrei, in Bayern bis fünfzehn. Darüber ist sie überall genehmigungspflichtig, ab dreißig Metern oft Sonderbau. Und ehrlich gerechnet ist Photovoltaik an den meisten Standorten die deutlich bessere Investition.Up to ten metres of overall height a turbine needs no application in many federal states, in Bavaria up to fifteen. Above that it needs permission everywhere, and from thirty metres it is often treated as a special structure. And honestly reckoned, photovoltaics is the far better investment at most sites.

Warmwasser aus Sonne, Hot water from the sun
Wochen bis MonateWeeks to monthsMit erfahrener HandNeeds an experienced hand

Warmwasser aus SonneHot water from the sun

2 Personen plus Heizungsbauer, Speicher über 100 kg, schweres Heben2 people plus a heating engineer, store over 100 kg, heavy lifting

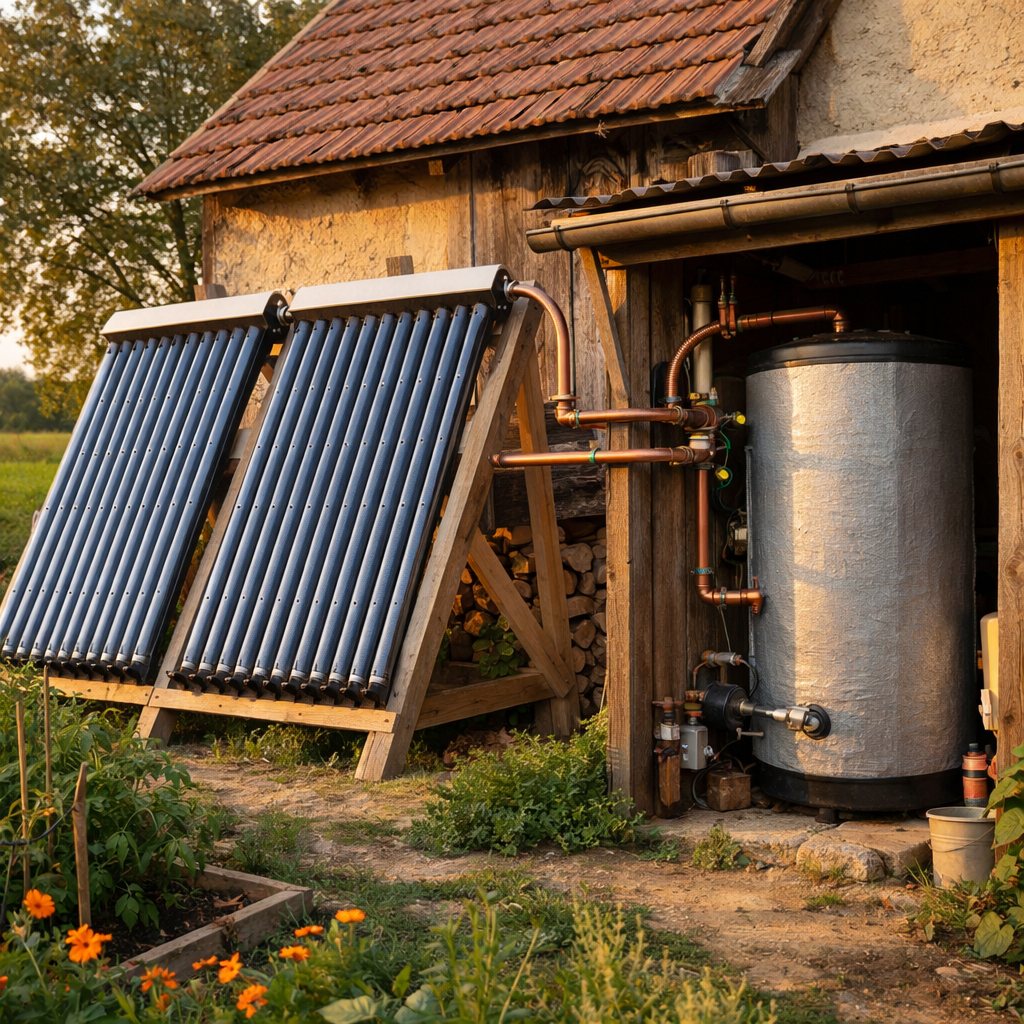
Für Warmwasser ist Solarthermie der direkteste Weg: Sonne rein, warmes Wasser raus, ohne Umweg über Strom. Von Mai bis September deckt eine gut ausgelegte Anlage den Warmwasserbedarf fast vollständig.For hot water, solar thermal is the most direct route: sun in, warm water out, with no detour through electricity. From May to September a well sized system covers almost all the hot water you need.

So wird gebautHow it is built
Flachkollektoren nach Süden, Neigung um vierzig Grad, dazu ein ausreichend großer Pufferspeicher. Faustzahl: ein bis anderthalb Quadratmeter Kollektor und rund fünfzig Liter Speicher pro Person.Flat plate collectors facing south, pitch around forty degrees, and a thermal store big enough to match. Rule of thumb: one to one and a half square metres of collector and around fifty litres of store per person.
KostenCost
4.000 bis 9.000 Euro für einen Mehrpersonenhaushalt4,000 to 9,000 euros for a household of several people
Erster SchrittFirst step
Zürst den echten Warmwasserverbrauch messen. Wer im Sommer draußen duscht, braucht deutlich weniger Kollektorfläche als jede Standardrechnung sagt.Measure the real hot water use first. If you shower outdoors in summer you need far less collector area than any standard calculation says.
Schritt für SchrittStep by step
Warmwasser aus Sonne, Schemaoben heißunten kaltPSpeicher 300 lKollektor 5 m²123451Kollektor nach Süden, 45 Grad2Vorlauf, warm zum Speicher3Pumpe mit Regler4Rücklauf, kalt zum Kollektor5Speicher mit zwei WärmetauschernNicht maßstäblich, Maße in cm
Bauskizze Warmwasser aus Sonne, am Handy seitlich wischenMeasured sketch of Hot water from the sun, swipe sideways on a phone

Bevor du anfängst

Den Anschluss an die Trinkwasserinstallation macht ein eingetragener Installationsbetrieb, und mit dem sprecht ihr zuerst. Fragt ihn, welchen Teil der Montage ihr selbst übernehmen dürft und wie er die Einbindung nach Trinkwasserverordnung protokolliert. Die Kollektoren aufs Dach zu setzen ist eure Arbeit, Pumpe und Regler klemmt eine Elektrofachkraft an. Wollt ihr Förderung, stellt den Antrag vor der Auftragsvergabe, eine Energieberatung sagt euch, welcher Topf gerade offen ist. Der Bezirksschornsteinfeger wird nur gebraucht, wenn ihr gleichzeitig am Heizkessel etwas ändert. Die größte Gefahr ist das Dach selbst. Ab drei Metern Absturzhöhe gehört eine Sicherung dran, auch wenn es nur eine Stunde dauern soll.

Das brauchst du

  • 6 Flachkollektoren à 2,5 m² ergeben 15 m² für acht bis zehn Personen
  • 1 Pufferspeicher 500 l mit zwei Wärmetauschern und Fühlerhülsen
  • 1 Solarstation mit Pumpe, Manometer, Sicherheitsventil 6 bar vormontiert
  • 1 Solarregler mit zwei Fühlern PT1000 für Kollektor und Speicherfuß
  • 1 Ausdehnungsgefäß 25 l solartauglich plus 5-l-Vorschaltgefäß
  • 60 l Solarflüssigkeit auf Propylenglykol mit Frostschutz bis minus 28 Grad
  • 30 m Edelstahl-Wellrohr DN 16 mit 19 mm EPDM-Dämmung, außen UV-fest
  • 12 Dachhaken und Aufständerung für 40 Grad Neigung
  • 1 thermostatischer Mischer fest auf 45 Grad eingestellt
  • 1 Luftabscheider mit Entlüfter am höchsten Punkt der Anlage

Werkzeug

Gerüst, Rohrzange, Schlüsselsatz für Überwurfmuttern, Spülstation zum Befüllen, Multimeter, Drehmomentschlüssel, Kabeleinziehband, Auffanggurt

Schritt für Schritt

  1. Verbrauch messen. Rechne 30 bis 50 l warmes Wasser je Person und Tag bei 45 Grad. Acht Personen brauchen also rund 300 l. Wer im Sommer draußen duscht, kommt mit weniger aus.
  2. Anlage auslegen. Ein bis anderthalb Quadratmeter Kollektor und 50 l Speicher je Person. Für acht Personen also 10 bis 12 m² und 400 bis 500 l Speicher.
  3. Speicher aufstellen. Kippmaß prüfen, ein 500-l-Speicher braucht 2,05 m Raumhöhe. Auf tragfähigem Boden aufstellen, gefüllt wiegt er 620 kg.
  4. Kollektoren montieren. Ausrichtung Süd bis Südwest, Neigung 40 Grad. Dachhaken auf die Sparren, Schienen ausrichten, Kollektoren einhängen und mit Klemmringverschraubungen verbinden.
  5. Leitungen verlegen. Führe die Leitungen kurz und durchgehend steigend, ohne Sackstellen. Die Dämmung auf dem Dach muss UV-fest und marderfest sein.
  6. Spülen und füllen. Mit der Spülstation 30 Minuten spülen und Luft austreiben. Dann Solarflüssigkeit einfüllen, Anlagendruck 2,5 bar, Vordruck im Ausdehnungsgefäß 1,5 bar.
  7. Regler einstellen. Einschaltdifferenz 7 Kelvin, Ausschaltdifferenz 3 Kelvin, Speichermaximum 85 Grad. Der Kollektorfühler sitzt im Vorlauf des obersten Kollektors.
  8. Stillstand abfangen. Ist der Speicher im Juli voll, steht die Anlage und der Kollektor kocht leer. Das Ausdehnungsgefäß muss den gesamten Kollektorinhalt aufnehmen können.
  9. Hygiene sichern. Einmal in der Woche den Speicher auf 60 Grad bringen, am Zapfhahn über den Mischer auf 45 Grad begrenzen.

Zeit und Kosten

Zwei Personen für Dach und Leitungen, dazu ein Heizungsbauer für Einbindung und Inbetriebnahme, zusammen drei bis vier Tage. Material und Montage liegen bei 4.000 bis 9.000 Euro, davon rund 1.800 Euro für den Speicher.

Die drei häufigsten Fehler

  • Zu große Kollektorfläche. Wer 20 m² für vier Personen baut, hat von Juni bis August Dauerstillstand. Das Glykol altert, wird sauer und frisst die Dichtungen.
  • Ausdehnungsgefäß zu klein. Ein 18-l-Gefäß an 15 m² Kollektorfläche bläst bei Stillstand ab, danach fehlt Flüssigkeit. Lieber eine Nummer größer wählen.
  • Fühler falsch gesetzt. Steckt der Kollektorfühler nicht in der Tauchhülse, misst er Blech statt Wasser. Die Pumpe taktet und der Ertrag sinkt um ein Viertel.

Before you start

The connection to the drinking water installation is made by a registered Installationsbetrieb (a registered plumbing firm), and that is who you talk to first. Ask him which part of the work you may take on yourselves and how he records the connection under the Trinkwasserverordnung (the drinking water regulations). Getting the collectors onto the roof is your job, the pump and the controller are wired in by a qualified electrician. If you want a grant, apply before you place the order, and an energy adviser will tell you which pot is open at the moment. The Bezirksschornsteinfeger (the district chimney sweep, who has to sign off on stoves) is only needed if you change something on the boiler at the same time. The biggest danger is the roof itself. Above three metres of fall height a safety system belongs on you, even if the job is only meant to take an hour.

What you need

  • 6 flat plate collectors at 2.5 m² make 15 m² for eight to ten people
  • 1 thermal store 500 l with two heat exchangers and sensor pockets
  • 1 solar pump station with pump, pressure gauge and safety valve 6 bar pre assembled
  • 1 solar controller with two sensors PT1000 for the collector and the foot of the store
  • 1 expansion vessel 25 l rated for solar plus a 5 l intermediate vessel
  • 60 l solar fluid on propylene glycol with frost protection down to minus 28 degrees
  • 30 m corrugated stainless steel pipe DN 16 with 19 mm EPDM insulation, resistant to sunlight outdoors
  • 12 roof hooks and a mounting frame for a pitch of 40 degrees
  • 1 thermostatic mixing valve set firmly to 45 degrees
  • 1 air separator with an automatic vent at the highest point of the system

Tools

Scaffolding, pipe wrench, spanner set for union nuts, filling station for charging the system, multimeter, torque wrench, cable pulling tape, fall arrest harness

Step by step

  1. Measure the demand. Reckon 30 to 50 l of hot water per person per day at 45 degrees. Eight people therefore need around 300 l. Anyone who showers outdoors in summer gets by with less.
  2. Size the system. One to one and a half square metres of collector and 50 l of store per person. For eight people that is 10 to 12 m² and 400 to 500 l of store.
  3. Stand the store up. Check the tilting height, a 500 l store needs 2.05 m of room height. Stand it on a floor that will carry it, because full it weighs 620 kg.
  4. Mount the collectors. Facing south to south west, pitch 40 degrees. Roof hooks onto the rafters, line the rails up, hook the collectors in and join them with compression fittings.
  5. Run the pipes. Keep the runs short and continuously rising, with no low pockets. The insulation on the roof has to hold up in sunlight and stand up to martens.
  6. Flush and fill. Flush for 30 minutes with the filling station and drive the air out. Then fill the solar fluid in, system pressure 2.5 bar, pre charge in the expansion vessel 1.5 bar.
  7. Set the controller. Switch on difference 7 kelvin, switch off difference 3 kelvin, store maximum 85 degrees. The collector sensor sits in the flow of the topmost collector.
  8. Catch the standstill. Once the store is full in July the system stops and the collector boils dry. The expansion vessel has to be able to take the whole content of the collectors.
  9. Keep it hygienic. Bring the store up to 60 degrees once a week and limit the taps to 45 degrees through the mixing valve.

Time and cost

Two people for the roof and the pipework, plus a heating engineer to tie it in and commission it, three to four days together. Materials and installation come to 4,000 to 9,000 euros, around 1,800 euros of that for the store.

The three most common mistakes

  • Collector area too large. Build 20 m² for four people and you have permanent standstill from June to August. The glycol ages, turns acid and eats the seals.
  • Expansion vessel too small. An 18 l vessel on 15 m² of collector blows off at standstill, and after that fluid is missing. Better to take one size up.
  • Sensor in the wrong place. If the collector sensor is not sitting in its pocket, it measures sheet metal instead of water. The pump short cycles and the yield drops by a quarter.

Worauf es ankommtWhat matters hereIm Hochsommer steht die Anlage still, sobald der Speicher voll ist. Das ist normal, muss aber technisch abgefangen werden, sonst altert die Anlage schnell.In high summer the system stands still as soon as the store is full. That is normal, but it has to be dealt with technically, otherwise the system ages fast.

Badezuber und Sauna, Hot tub and sauna
Wochen bis MonateWeeks to monthsEtwas ÜbungSome practice helps

Badezuber und SaunaHot tub and sauna

3 Personen, schweres Heben3 people, heavy lifting

Der Ort, an dem im Winter alle wieder zusammenkommen. Ein holzbefeuerter Zuber braucht drei bis vier Stunden Anheizzeit und hält danach einen ganzen Abend.The place where everyone comes back together in winter. A wood fired tub needs three to four hours to heat up and then holds for a whole evening.

So wird gebautHow it is built
Holzzuber mit Innen- oder Außenofen, Zulauf und Ablauf mit Gefälle, Ablaufwasser in eine Sickermulde oder aufs Grünland.Wooden tub with an internal or an external stove, inlet and outlet with a fall, waste water into a soakaway or out onto grassland.
KostenCost
1.500 bis 6.000 Euro1,500 to 6,000 euros
Erster SchrittFirst step
Standort so wählen, dass der Wasserablauf mit Gefälle funktioniert. Zweihundert Liter kalte Brühe wollt ihr nicht schöpfen.Pick the spot so the water runs out under gravity. You do not want to bail two hundred litres of cold water by hand.
Schritt für SchrittStep by step
Badezuber und Sauna, SchnittSaunaZuber 200Wasser 90Bank 901234561Zuberwand aus Lärchendauben2Wasserstand unter dem Rand3Außenofen, Wasser kreist von selbst4Rauchrohr über Kopfhöhe5Saunabänke, zwei Höhen6Saunaofen mit SteinenNicht maßstäblich, Maße in cm
Bauskizze Badezuber und Sauna, am Handy seitlich wischenMeasured sketch of Hot tub and sauna, swipe sideways on a phone

Bevor du anfängst

Sprich mit deinem Bezirksschornsteinfeger, bevor du etwas bestellst. Frag ihn, was er für die Abnahme braucht und ob der geplante Ofen zum Schornstein passt, denn ohne seine Bescheinigung darf die Sauna nicht in Betrieb gehen. Er sagt dir auch, wann das Bauamt dazukommt. Sobald eine Feuerstätte im Gebäude steht, fällt die Verfahrensfreiheit in den meisten Ländern weg, unabhängig von der Größe. Und verfahrensfrei hieße ohnehin nur, dass niemand vorher prüft, im Außenbereich scheitert so ein Bau meist ganz. Im Wasser zählt vor allem eines: niemand badet allein, und wer Alkohol getrunken hat, bleibt draußen. Bei 38 Grad ist nach zwanzig Minuten Schluss. Und halte den Unterschied auseinander: verfahrensfrei heißt nur, dass du keinen Antrag stellst. Zulässig ist das Vorhaben damit noch nicht, im Außenbereich liegt genau da die eigentliche Hürde.

Das brauchst du

  • 1 Holzzuber Ø 180 cm, 1.800 l aus Lärche oder Thermokiefer, 42 mm Dauben
  • 1 Außenofen 35 kW aus Edelstahl mit zwei Anschlüssen 2 Zoll
  • 3 m Ofenrohr 120 mm mit Funkenschutzhaube
  • 12 Betonplatten 40 x 40 x 4 cm, 3 t Schotter 0/32 als Standfläche
  • 1 Kugelhahn 1 Zoll, 10 m KG-Rohr DN 100 für den Ablauf
  • 2 m³ Kies 16/32 für die Sickermulde
  • 1 isolierter Deckel spart beim zweiten Bad Stunden
  • 1 Fasssauna 240 cm oder 6 m³ Blockbohlen 45 mm für die Sauna
  • 1 holzbefeuerter Saunaofen 8 kW mit 20 kg Olivin-Diabas
  • 1 Funkenschutzblech 100 x 50 cm vor die Ofentür

Werkzeug

Spaten, Schubkarre, Rüttelplatte, Wasserwaage 2 m, Rohrzange, Akkuschrauber, Handkreissäge, Thermometer bis 60 Grad

Schritt für Schritt

  1. Standort wählen. Ebene Fläche mit Gefälle vom Zuber weg, Wasseranschluss in Reichweite, Sickermulde mindestens 3 m entfernt.
  2. Unterbau bauen. 30 cm abschieben, 25 cm Schotter in zwei Lagen verdichten, Platten in Splitt verlegen und auswaagen. Voll und besetzt wiegt der Zuber über 2.200 kg.
  3. Zuber quellen lassen. Aufstellen, 20 cm Wasser einfüllen, 24 Stunden warten. Danach die Stahlreifen nachziehen, bis die Dauben dicht sind.
  4. Ofen anschließen. Außenofen 30 cm neben den Zuber stellen, Vorlauf oben, Rücklauf unten, beide Leitungen steigend. Der Umlauf läuft ohne Pumpe, die Höhen müssen stimmen. Rauchrohr 3 m hoch, mit Funkenschutzhaube und Abspannung.
  5. Ablauf legen. Kugelhahn am tiefsten Punkt, KG-Rohr mit 2 Prozent Gefälle in eine Sickermulde von 1,5 x 1,5 x 0,8 m, mit Kies gefüllt und Vlies abgedeckt.
  6. Erstes Anheizen. 1.800 l von 10 auf 38 Grad brauchen etwa 90 kWh. Mit dem 35-kW-Ofen sind das drei bis vier Stunden und rund 25 kg trockenes Hartholz.
  7. Sauna aufbauen. Fass oder Blockbohlen auf einen Rahmen aus 8 x 8 cm setzen, 15 cm über Boden. Ofen mit dem Abstand vom Typenschild stellen, Blech 50 cm vor die Tür.
  8. Pflegen. Wasser nach drei bis fünf Bädern wechseln, danach sofort wieder befüllen oder mit feuchtem Tuch abdecken. Ein leerer Zuber in der Sonne ist nach zwei Tagen undicht.

Zeit und Kosten

Drei Personen brauchen für Unterbau, Zuber und Ofen zwei Tage, eine Fasssauna vier bis sechs Tage. Der Zuber kostet 1.500 bis 6.000 Euro, eine Fasssauna ab 4.000 Euro, Selbstbau aus Blockbohlen ab 2.500 Euro.

Die drei häufigsten Fehler

  • Zuber leer stehen lassen. Die Dauben schwinden, die Reifen sitzen lose, beim nächsten Füllen läuft alles aus. Voll lassen oder feucht abdecken.
  • Ofen ohne Wasser befeuert. Der Edelstahl verzieht sich in wenigen Minuten dauerhaft. Vor dem Anzünden bis über den oberen Anschluss füllen.
  • Chlor im Wasser. Wer das Abwasser auf die Wiese leitet, darf kein Desinfektionsmittel verwenden. Stattdessen häufiger wechseln und filtern.

Before you start

Talk to your Bezirksschornsteinfeger (the district chimney sweep, who has to sign off on stoves) before you order anything. Ask him what he needs in order to pass it and whether the stove you have in mind suits the chimney, because without his certificate the sauna may not go into use. He will also tell you when the Bauamt (the local building authority) comes into it. As soon as a fire installation stands inside a building, the exemption from procedure falls away in most states, whatever the size. And exempt from procedure would in any case only mean that nobody checks beforehand, while in the Außenbereich (the open countryside outside the built-up area) a build like this usually fails outright. In the water one thing counts above all: nobody bathes alone, and anyone who has been drinking stays out. At 38 degrees twenty minutes is the end of it. And keep the difference clear: verfahrensfrei only means that you file no application. It does not make the project lawful, and in the Außenbereich that is exactly where the real hurdle lies.

What you need

  • 1 wooden hot tub Ø 180 cm, 1,800 l in larch or thermally treated pine, staves 42 mm
  • 1 external stove 35 kW in stainless steel with two connections in 2 inch
  • 3 m flue pipe 120 mm with a spark guard cowl
  • 12 concrete slabs 40 x 40 x 4 cm, 3 t crushed stone 0/32 as the standing area
  • 1 ball valve 1 inch, 10 m KG pipe DN 100 (orange plastic drainage pipe) for the outlet
  • 2 m³ gravel 16/32 for the soakaway
  • 1 insulated lid saves hours on the second bath
  • 1 barrel sauna 240 cm or 6 m³ Blockbohlen 45 mm (solid log wall planks) for the sauna
  • 1 wood fired sauna stove 8 kW with 20 kg of olivine diabase stones
  • 1 spark guard plate 100 x 50 cm in front of the stove door

Tools

Spade, wheelbarrow, plate compactor, spirit level 2 m, pipe wrench, cordless driver, circular saw, thermometer up to 60 degrees

Step by step

  1. Choose the spot. Level ground that falls away from the tub, a water point within reach, the soakaway at least 3 m away.
  2. Build the base. Take off 30 cm, compact 25 cm of crushed stone in two layers, lay the slabs in grit and level them. Full and occupied the tub weighs over 2,200 kg.
  3. Let the tub swell. Stand it up, fill 20 cm of water in, wait 24 hours. Then tighten the steel hoops until the staves are tight.
  4. Connect the stove. Stand the external stove 30 cm beside the tub, flow at the top, return at the bottom, both pipes rising. The circulation runs without a pump, so the heights have to be right. Flue 3 m high, with a spark guard cowl and guy wires.
  5. Lay the outlet. Ball valve at the lowest point, KG pipe with a fall of 2 per cent into a soakaway of 1.5 x 1.5 x 0.8 m, filled with gravel and covered with a geotextile.
  6. First heating. 1,800 l from 10 to 38 degrees takes about 90 kWh. With the 35 kW stove that is three to four hours and around 25 kg of dry hardwood.
  7. Build the sauna. Set the barrel or the log planks on a frame of 8 x 8 cm, 15 cm above the ground. Place the stove at the clearance given on its rating plate, plate 50 cm in front of the door.
  8. Look after it. Change the water after three to five baths, then fill it again straight away or cover it with a damp cloth. An empty tub in the sun is leaking after two days.

Time and cost

Three people need two days for the base, the tub and the stove, and four to six days for a barrel sauna. The tub costs 1,500 to 6,000 euros, a barrel sauna from 4,000 euros, building it yourself from log planks from 2,500 euros.

The three most common mistakes

  • Leaving the tub empty. The staves shrink, the hoops sit loose, and at the next filling everything runs out. Leave it full or cover it damp.
  • Firing the stove without water. The stainless steel warps permanently within minutes. Fill it above the upper connection before you light it.
  • Chlorine in the water. If the waste water goes onto the meadow, no disinfectant may be used. Change the water more often and filter it instead.

Worauf es ankommtWhat matters hereKein Chlor, wenn das Wasser auf die Wiese soll. Bei häufiger Nutzung stattdessen oft wechseln und filtern.No chlorine if the water is going onto the meadow. With frequent use, change it often and filter it instead.

Schwitzhütte, Sweat lodge
Wochen bis MonateWeeks to monthsMit erfahrener HandNeeds an experienced hand

SchwitzhütteSweat lodge

4 bis 6 Personen, glühende Steine 20 bis 25 cm, schweres Heben4 to 6 people, glowing stones 20 to 25 cm, heavy lifting

Ein niedriger Rundbau aus gebogenen Weidenruten, dicht mit Decken verhängt, in der Mitte eine Grube für glut heiße Steine. Draußen brennt das Feuer, drinnen sitzt die Gruppe im Dunkeln. Kaum etwas bringt Menschen so schnell und so tief in Kontakt.A low round frame of bent willow rods, hung tight with blankets, and in the middle a pit for stones glowing with heat. Outside the fire burns, inside the group sits in the dark. Almost nothing brings people into contact so quickly and so deeply.

So wird gebautHow it is built
Zwölf bis sechzehn Weidenruten im Kreis gesteckt und über Kreuz zur Kuppel gebunden, Steingrube in der Mitte, Feuerstelle einige Meter daneben. Abdeckung aus alten Wolldecken und Planen, absolut lichtdicht.Twelve to sixteen willow rods set in a circle and tied crosswise into a dome, a stone pit in the middle, the fire a few metres away. Cover of old wool blankets and tarpaulins, completely light tight.
KostenCost
200 bis 700 Euro200 to 700 euros
Erster SchrittFirst step
Beim ersten Mal jemanden dazu holen, der es kann. Aufbau und Ritual lassen sich lesen, das Gespür für Hitze und Menschen nicht.The first time, bring in someone who knows how. You can read up the building and the ritual, but not the feel for heat and for people.
Schritt für SchrittStep by step
Schwitzhütte, SchnittHöhe 150Durchmesser 360Innenraum123451Gerüst aus Weidenruten2Decken und Plane, dicht3Steingrube in der Mitte4Bodenspalt, Luft muss nachströmen5Feuerhüter bleibt draußenNicht maßstäblich, Maße in cm
Bauskizze Schwitzhütte, am Handy seitlich wischenMeasured sketch of Sweat lodge, swipe sideways on a phone

Bevor du anfängst

Für das Feuer draußen ist das Ordnungsamt eurer Gemeinde zuständig, dort fragt ihr nach der Satzung und nach dem Abstand zum Wald. Wichtiger ist, was drinnen passiert. Glimmende Reste an den Steinen, hereingetragene Glut und aufgelegte Kräuter setzen Kohlenmonoxid frei, und das riecht man nicht. Eine Vergiftung fühlt sich zuerst wie Kreislaufschwäche oder Hitze an, deshalb merkt sie drinnen niemand. Gebt nur völlig durchgeglühte Steine ohne anhaftende Asche herein, haltet zwei Bodenspalte offen und hängt einen batteriebetriebenen Kohlenmonoxidmelder nach EN 50291 an die Wand. Bei Kopfschmerz oder Übelkeit geht ihr sofort hinaus und lasst die Tür offen. Mehr als acht Personen gehören nicht hinein.

Das brauchst du

  • 16 Weidenruten 4 m lang, Fußstärke 3 bis 4 cm frisch geschnitten
  • 60 m Naturhanfschnur 4 mm zum Binden der Kreuzungen
  • 12 Wolldecken 150 x 200 cm als erste, dämmende Lage
  • 2 Planen 4 x 6 m lichtdicht, als äußere Lage
  • 25 Steine Ø 20 bis 25 cm aus Basalt oder Granit nie aus dem Bachbett
  • 40 kg trockenes Hartholz je Runde plus Anfeuerholz
  • 1 Steinzange oder Mistgabel für die glühenden Steine
  • 2 Wasserkanister 20 l mit Schöpfkelle zum Aufgießen und Trinken
  • 1 Erste-Hilfe-Set mit Brandwundauflagen und eine Rettungsdecke

Werkzeug

Astschere, Brechstange für Löcher von 5 cm, Spaten, Zollstock, Feuerhandschuhe, Eimer, Taschenlampe, Uhr

Schritt für Schritt

  1. Platz herrichten. Ebene Fläche von 8 x 8 m, 10 m Abstand zu Bäumen. Feuerstelle 6 m vor dem Eingang, Wasser in Reichweite.
  2. Kreis stecken. Durchmesser 300 cm für acht Personen. Alle 55 cm ein Loch von 40 cm Tiefe, insgesamt 16 Stück.
  3. Gerüst biegen. Ruten einsetzen, gegenüberliegende Paare zur Mitte biegen und über Kreuz binden. Scheitelhöhe 130 cm, drinnen wird gesessen.
  4. Ringe binden. Drei waagerechte Ruten auf 40, 80 und 110 cm rundum einflechten und an jeder Kreuzung festbinden. Erst dadurch wird die Kuppel stabil.
  5. Grube ausheben. Mittig 60 cm Durchmesser, 40 cm tief. Den Aushub als Wall vor den Eingang setzen.
  6. Eingang und Hülle. Öffnung 70 cm breit nach Osten. Erst Decken auflegen, dann Planen, unten rundum mit Erde beschweren. Innen muss es völlig dunkel sein.
  7. Bodenspalt freilassen. An zwei gegenüberliegenden Stellen bleibt am Boden eine Handbreit offen. Ohne diesen Luftweg sinkt der Sauerstoff schnell ab.
  8. Feuer machen. Steine auf ein Holzgerüst schichten und zwei bis drei Stunden durchglühen lassen, bis sie dunkelrot sind. Ein nüchterner Feuerhüter bleibt die ganze Zeit draußen.
  9. Runden führen und abschließen. Je Runde fünf bis sieben Steine hereingeben und sparsam aufgießen. Nach höchstens 20 Minuten öffnet sich die Tür, alle trinken, dann geht es weiter oder eben nicht. Am Ende die Feuerstelle durchnässen.

Zeit und Kosten

Vier bis sechs Personen bauen die Hütte an einem Tag. Jede Nutzung dauert fünf Stunden, davon drei Stunden Feuer, und braucht zwei Menschen nur für Feuer und Steine. Material 200 bis 700 Euro.

Die drei häufigsten Fehler

  • Falsches Gestein. Runde Steine aus Bach und Kiesgrube enthalten Wasser und zerplatzen in der Grube. Nur trockener Basalt oder Granit, vorher zwei Wochen unter Dach.
  • Rundum dicht abgedeckt. Wer die Hülle bis auf den Boden abdichtet, nimmt der Gruppe die Luft. Zwei Bodenspalte bleiben offen.
  • Kein Feuerhüter. Drinnen merkt niemand, wenn es jemandem schlecht geht. Eine nüchterne Person bleibt außen, zählt die Leute und öffnet auf Zuruf sofort.

Before you start

For the fire outside the Ordnungsamt (the local public order office) of your municipality is in charge, and that is where you ask about the bylaw and about the distance to woodland. What happens inside matters more. Smouldering remains on the stones, embers carried in and herbs laid on all release carbon monoxide, and you cannot smell it. The poisoning feels at first like faintness or heat, so nobody inside notices it. Pass in only stones that have glowed right through, with no ash sticking to them, keep two gaps open at ground level and hang a battery powered carbon monoxide alarm to EN 50291 on the wall. At the first headache or nausea you go straight out and leave the door open. More than eight people do not belong inside.

What you need

  • 16 willow rods 4 m long, 3 to 4 cm thick at the butt freshly cut
  • 60 m natural hemp cord 4 mm for tying the crossings
  • 12 wool blankets 150 x 200 cm as the first, insulating layer
  • 2 tarpaulins 4 x 6 m light tight, as the outer layer
  • 25 stones Ø 20 to 25 cm in basalt or granite never out of a stream bed
  • 40 kg dry hardwood per round plus kindling
  • 1 pair of stone tongs or a dung fork for the glowing stones
  • 2 water canisters 20 l with a ladle for pouring and for drinking
  • 1 first aid kit with burn dressings and a foil survival blanket

Tools

Loppers, crowbar for holes of 5 cm, spade, folding rule, fire gloves, bucket, torch, clock

Step by step

  1. Prepare the place. Level ground of 8 x 8 m, 10 m clear of trees. Fire 6 m in front of the entrance, water within reach.
  2. Peg the circle. 300 cm across for eight people. A hole every 55 cm, 40 cm deep, sixteen in all.
  3. Bend the frame. Set the rods in, bend opposite pairs towards the middle and tie them crosswise. Height at the crown 130 cm, everyone sits inside.
  4. Tie in the rings. Weave three horizontal rods in all round at 40, 80 and 110 cm and tie them at every crossing. Only then does the dome become stable.
  5. Dig the pit. In the middle, 60 cm across, 40 cm deep. Set the spoil as a low bank in front of the entrance.
  6. Entrance and cover. Opening 70 cm wide facing east. Blankets on first, then the tarpaulins, weighted down all round at the bottom with earth. Inside it has to be completely dark.
  7. Leave a gap at the ground. At two opposite points a hand's width stays open at ground level. Without that air path the oxygen drops away quickly.
  8. Make the fire. Stack the stones on a timber crib and let them glow right through for two to three hours, until they are dark red. A sober fire keeper stays outside the whole time.
  9. Lead the rounds and close. Pass in five to seven stones per round and pour sparingly. After twenty minutes at the most the door opens, everyone drinks, then it goes on or it does not. At the end soak the fire site through.

Time and cost

Four to six people build the lodge in a day. Each use takes five hours, three of them fire, and needs two people for the fire and the stones alone. Materials 200 to 700 euros.

The three most common mistakes

  • Wrong stone. Round stones from a stream or a gravel pit hold water and burst in the pit. Only dry basalt or granite, kept under a roof for two weeks beforehand.
  • Covered tight all round. Seal the cover down to the ground and you take the group's air away. Two gaps at ground level stay open.
  • No fire keeper. Inside, nobody notices when someone is in trouble. One sober person stays outside, counts the people and opens the moment anyone calls.

Worauf es ankommtWhat matters hereHier geht es um Gesundheit, nicht um Gemütlichkeit. Feste Regeln sind Pflicht: niemand allein, jederzeit raus dürfen, kein Alkohol, viel trinken davor, Menschen mit Herz- oder Kreislaufproblemen bleiben draußen. Und respektiert die Herkunft: das ist ein Ritual indigener Völker, kein Wellnessangebot.This is about health, not about a cosy evening. Firm rules are compulsory: nobody alone, everyone free to leave at any moment, no alcohol, plenty to drink beforehand, and people with heart or circulation trouble stay outside. And respect where it comes from: this is a ritual of indigenous peoples, not a wellness offer.

Kamin und Grundofen, Wood stove and masonry heater
Wochen bis MonateWeeks to monthsMit erfahrener HandNeeds an experienced hand

Kamin und GrundofenWood stove and masonry heater

2 Personen plus Schornsteinfeger und Ofenbauer, schweres Heben2 people plus the chimney sweep and a stove builder, heavy lifting

Der Unterschied zwischen einem Kaminofen und einem gemauerten Grundofen sind zwölf Stunden. Der eine wärmt, solange er brennt, der andere speichert die Hitze in Schamotte und Lehm und gibt sie den ganzen Tag ab.The difference between a steel wood stove and a masonry heater built on site is twelve hours. One warms the room as long as it burns, the other stores the heat in firebrick and clay and gives it back all day.

So wird gebautHow it is built
Kaminofen ist Handwerksarbeit von der Stange plus Schornsteinanschluss. Ein Grundofen wird gemauert, meist von einem Ofenbauer, und kann als Sitzbank oder Wand mitten im Raum stehen.A Kaminofen (a free standing steel stove) is off the shelf work plus a chimney connection. A Grundofen is built on site, usually by a stove builder, and can stand in the middle of the room as a bench or a wall.
KostenCost
800 bis 3.000 Euro Kaminofen, 6.000 bis 15.000 Euro Grundofen800 to 3,000 euros for a steel stove, 6,000 to 15,000 euros for a masonry heater
Erster SchrittFirst step
Vor dem Kauf mit dem Bezirksschornsteinfeger sprechen. Er muss die Anlage ohnehin abnehmen, und er sagt euch vorher, was überhaupt geht.Talk to the Bezirksschornsteinfeger (the district chimney sweep, who has to sign off on stoves) before you buy. He has to pass the installation anyway, and he tells you beforehand what is possible at all.
Schritt für SchrittStep by step
Kamin und Grundofen, SchnittHöhe 190Breite 12524123451Brennraum mit Schamotte2Züge, geben Wärme an die Masse3Speichermasse, 24 cm stark4Rauchrohr zum Schornstein5Fundament, tragfähig prüfenNicht maßstäblich, Maße in cm
Bauskizze Kamin und Grundofen, am Handy seitlich wischenMeasured sketch of Wood stove and masonry heater, swipe sideways on a phone

Bevor du anfängst

Der bevollmächtigte Bezirksschornsteinfeger entscheidet hier, und mit ihm redet ihr, bevor ihr kauft. Frag ihn, ob Schornstein und geplantes Gerät zusammenpassen, und leg das Datenblatt des Ofens dazu. Er nimmt die Anlage ab, führt die Feuerstättenschau durch und stellt den Feuerstättenbescheid aus. Ohne seine Bescheinigung darf nicht geheizt werden, und die Gebäudeversicherung zahlt im Schadensfall nicht. Der Ofen muss die zweite Stufe der Ersten Verordnung zum Bundesimmissionsschutzgesetz einhalten, also 0,04 Gramm Staub und 1,25 Gramm Kohlenmonoxid je Kubikmeter. Genau dieses Kohlenmonoxid ist die Gefahr im Raum, etwa bei schlechtem Zug oder zu früh geschlossener Klappe. Häng einen Melder nach EN 50291 auf.

Das brauchst du

  • 1 Kaminofen 3 bis 4 kW mit Speicherhaube nach Stufe 2 der 1. BImSchV mit Typprüfung, passend zu 30 m² gut gedämmtem Raum
  • 1 Edelstahlschornstein doppelwandig DN 150, 8 m oder Sanierung des alten Zugs
  • 1,5 m Rauchrohr 150 mm mit Drosselklappe und Wandfutter
  • 1 Bodenplatte aus Glas, 100 x 120 cm als Funkenschutz
  • 6 m Zuluftrohr DN 125 mit Außengitter und Klappe
  • 1 Kohlenmonoxidmelder nach EN 50291 für den Raum
  • 400 Schamottsteine 25 x 12 x 6,4 cm für einen Grundofen
  • 200 kg Schamottmörtel, 300 kg Ofenlehm für Brennraum und Züge
  • 1 gusseiserne Ofentür 40 x 40 cm mit Sichtscheibe

Werkzeug

Bohrhammer mit Dosenbohrer 160 mm, Winkelschleifer, Wasserwaage, Maurerkelle, Gummihammer, Mörtelkübel, Sackkarre, Schutzbrille, Staubmaske FFP2

Schritt für Schritt

  1. Schornsteinfeger anrufen. Vor dem Kauf einen Ortstermin mit dem Bezirksschornsteinfeger machen. Er prüft Querschnitt, Höhe und Zug und sagt euch, welche Leistung der Schornstein verträgt.
  2. Leistung und Aufstellort. Ein gut gedämmter Raum braucht 40 bis 60 W je m², für 30 m² also 1,8 kW. Den Widerspruch zum Angebot löst ihr über die Speichermasse und nicht über die Leistung: Ein Kaminofen mit 3 bis 4 kW und Speicherhaube oder ein Grundofen mit rund 1.500 kg Masse und einem Abbrand am Tag gibt die Wärme über 8 bis 12 Stunden ab, ein 5-kW-Ofen gibt sie in 90 Minuten ab und verschwelt danach gedrosselt vor sich hin. Die Nennwärmeleistung ist der Wert bei Volllast und kein Betriebswert, und wer die Leistung über die Luftzufuhr drosselt, verlässt die Typprüfung. Weniger Holz einlegen statt Luft zudrehen. Abstände nach Typenschild, üblich 20 cm seitlich, 40 cm hinten, 80 cm nach vorn, Bodenplatte 50 cm vor der Öffnung.
  3. Durchbruch und Schornstein. Prüft zuerst, was in der Wand steckt. Geht der Durchbruch durch Fachwerk, eine Holzständerwand oder eine Deckenlage, reicht ein eingemauertes Wandfutter nicht: Die Musterfeuerungsverordnung verlangt für Verbindungsstücke 40 cm Abstand zu brennbaren Bauteilen, mit mindestens 20 cm nichtbrennbarer Dämmung ringsum genügen 10 cm. Praktisch heißt das ein Futterrohr mit Dämmschale und ein Durchbruch von 55 bis 60 cm Durchmesser oder ein zugelassenes Wanddurchführungsset mit Prüfzeugnis, abgenommen vom Bezirksschornsteinfeger. Ein 160er Loch für ein 150er Rohr in einer Fachwerkwand hat null Abstand zum Holz, und das ist der häufigste Brandanlass beim Ofeneinbau im Altbau. In massivem Mauerwerk mit dem Dosenbohrer 160 mm bohren, Wandfutter einmauern, Rauchrohr mit 5 Grad Anstieg anschließen. Das doppelwandige Rohr außen mit Konsole und Haltern alle 2 m.
  4. Verbrennungsluft sichern. In dichten Häusern einen raumluftunabhängigen Ofen mit DIBt-Zulassung wählen und die Luft über DN 125 von außen holen. Sonst zieht die Dunstabzugshaube Rauch herein.
  5. Grundofen mauern. Rechnet mit 2 bis 3 Tonnen, nicht mit 1.200 kg: Allein die 400 Schamottsteine wiegen rund 1.500 kg, dazu kommen 200 kg Schamottmörtel, 300 kg Ofenlehm, Tür, Kacheln und Putz. Diese Last steht als Einzellast auf 1 bis 1,5 m², das sind 1.600 bis 2.400 kg je m². Auf einer Holzbalkendecke im Resthof heißt das fast immer Verstärkung oder ein eigenes Fundament durch die Decke bis in den Keller, mit Nachweis. Kein Grundofen auf eine Bestandsdecke ohne Statiker. Der Ofenbauer setzt Brennraum und Nachheizzüge aus Schamotte, Dehnfugen von 5 mm, außen Lehmputz oder Kacheln. Trocknung drei Wochen.
  6. Abnehmen und einfahren. Der Bezirksschornsteinfeger misst und stellt die Bescheinigung aus, erst danach darf geheizt werden. Die Schornsteinhöhe legt ihr aber schon vor dem Kauf mit ihm fest, und zwar schriftlich: Paragraf 19 der 1. BImSchV lässt zwei Möglichkeiten zu, 40 cm über First oder 1 m Abstand von der Dachfläche, bei Flachdächern gilt der Meter. Für Festbrennstoffanlagen ab Baujahr 2022 kommt dazu, dass die Mündung Fenster, Türen und Lüftungsöffnungen im Umkreis von 15 m um mindestens 1 m überragen muss, und auf einem Hof mit Scheune, Anbau und Gaube bestimmt dieser Satz die Höhe. Wer zu kurz baut, rüstet später mit Gerüst nach. Ein Grundofen bekommt in der ersten Woche nur 2 kg Holz je Feuer.
  7. Richtig heizen. Holz unter 20 Prozent Restfeuchte, von oben anzünden, 2 bis 3 kg je Abbrand, Luft in den ersten Minuten voll offen. Asche erst kalt entnehmen.

Zeit und Kosten

Ein Kaminofen ist an einem Tag zu zweit gesetzt, wenn der Schornstein steht. Er kostet 800 bis 3.000 Euro, ein neuer Edelstahlschornstein 2.000 bis 4.000 Euro. Ein Grundofen liegt bei 6.000 bis 15.000 Euro und braucht fünf bis acht Tage vom Ofenbauer.

Die drei häufigsten Fehler

  • Ofen zu groß. Wer 8 kW in 30 m² stellt, drosselt ständig die Luft. Dann schwelt es, die Scheibe wird schwarz, der Zug verrußt.
  • Feuchtes Holz. Über 20 Prozent Restfeuchte geht die halbe Energie ins Verdampfen. Zwei Jahre trocknen, vor dem Einlegen an frischer Bruchfläche messen.
  • Ohne Schornsteinfeger gekauft. Passt der Ofen nicht zum Zug, bleibt er kalt und das Geld ist weg. Der Ortstermin kostet unter 100 Euro.

Before you start

The authorised Bezirksschornsteinfeger (the district chimney sweep, who has to sign off on stoves) is the one who decides here, and you talk to him before you buy. Ask him whether the chimney and the appliance you have in mind go together, and put the data sheet of the stove in front of him. He passes the installation, carries out the Feuerstättenschau (the statutory inspection of every fire installation in the house) and issues the Feuerstättenbescheid (the notice that lists the sweeping and inspection dates you have to keep). Without his certificate you may not light it, and the buildings insurer will not pay if there is a fire. The stove has to meet the second stage of the Erste Verordnung zum Bundesimmissionsschutzgesetz (the first ordinance under the federal clean air act), so 0.04 grams of dust and 1.25 grams of carbon monoxide per cubic metre. That carbon monoxide is exactly the danger in the room, for instance with a poor draught or a damper closed too early. Hang an alarm to EN 50291 up.

What you need

  • 1 Kaminofen 3 to 4 kW with a storage top, to stage 2 of the 1. BImSchV a free standing steel wood stove with type approval under the first ordinance on clean air, matched to a well insulated room of 30 m²
  • 1 twin wall stainless steel chimney DN 150, 8 m or a liner in the old flue
  • 1.5 m flue pipe 150 mm with a damper and a wall sleeve
  • 1 floor plate in glass, 100 x 120 cm as a spark guard
  • 6 m air supply duct DN 125 with an outside grille and a flap
  • 1 carbon monoxide alarm to EN 50291 for the room
  • 400 Schamotte firebricks 25 x 12 x 6.4 cm for a Grundofen, a masonry heater built on site
  • 200 kg Schamotte mortar, 300 kg Ofenlehm (stove clay) for the firebox and the flue passages
  • 1 cast iron stove door 40 x 40 cm with a glass panel

Tools

Rotary hammer with a core bit 160 mm, angle grinder, spirit level, bricklaying trowel, rubber mallet, mortar tub, sack trolley, safety glasses, dust mask FFP2

Step by step

  1. Ring the chimney sweep. Arrange a site visit with the Bezirksschornsteinfeger (the district chimney sweep, who has to sign off on stoves) before you buy. He checks the cross section, the height and the draught and tells you what output the chimney will take.
  2. Output and position. A well insulated room needs 40 to 60 W per m², so 1.8 kW for 30 m². You resolve the contradiction with the stove on offer through storage mass and not through output: a Kaminofen of 3 to 4 kW with a storage top, or a Grundofen with around 1,500 kg of mass and one burn a day, gives the heat out over 8 to 12 hours, while a 5 kW stove gives it out in 90 minutes and then smoulders away on a throttled air setting. The nominal heat output is the figure at full load and not an operating value, and anyone who throttles the output through the air supply leaves the type approval behind. Put less wood in instead of closing the air down. Clearances to the rating plate, usually 20 cm at the sides, 40 cm behind, 80 cm in front, floor plate 50 cm in front of the opening.
  3. Wall opening and chimney. Check first what is inside the wall. If the opening goes through Fachwerk (a timber framed wall), a timber stud wall or a floor structure, a wall sleeve mortared in is not enough: the Musterfeuerungsverordnung (the model ordinance on heating appliances that the federal states adopt) requires 40 cm from connecting flue pipes to combustible components, and with at least 20 cm of non combustible insulation all round, 10 cm is enough. In practice that means a sleeve pipe with an insulating shell and an opening of 55 to 60 cm across, or an approved wall penetration kit with a test certificate, signed off by the Bezirksschornsteinfeger. A 160 mm hole for a 150 mm pipe in a timber framed wall has no clearance at all to the wood, and that is the most common cause of fire when a stove goes into an old building. In solid masonry drill with the 160 mm core bit, mortar the sleeve in and connect the flue pipe rising at 5 degrees. The twin wall pipe runs outside on a bracket with supports every 2 m.
  4. Secure the combustion air. In airtight houses choose a room sealed stove with DIBt approval (approval from the German institute for building technology) and take the air from outside through DN 125. Otherwise the extractor hood pulls smoke into the room.
  5. Build the masonry heater. Reckon with 2 to 3 tonnes, not with 1,200 kg: the 400 firebricks alone weigh around 1,500 kg, and on top come 200 kg of firebrick mortar, 300 kg of stove clay, the door, the tiles and the plaster. That load stands as a point load on 1 to 1.5 m², which is 1,600 to 2,400 kg per m². On a timber joist floor in an old farmhouse it almost always means strengthening the floor or a foundation of its own carried through it down into the cellar, with calculations to prove it. No masonry heater on an existing floor without a structural engineer. The stove builder sets the firebox and the heat exchange flues in firebrick, with expansion joints of 5 mm, and clay plaster or tiles outside. Three weeks of drying.
  6. Sign off and run in. The Bezirksschornsteinfeger measures and issues the certificate, and only after that may you light it. But you settle the chimney height with him before you buy, and in writing: Section 19 of the 1. BImSchV allows two options, 40 cm above the ridge or 1 m clear of the roof surface, and on flat roofs the metre applies. For solid fuel appliances built from 2022 there is more to it, because the flue outlet has to stand at least 1 m above windows, doors and ventilation openings within 15 m, and on a farmyard with a barn, an extension and a dormer that one sentence decides the height. Build it too short and you are back later with scaffolding. A masonry heater gets only 2 kg of wood per fire in the first week.
  7. Heat it properly. Wood under 20 per cent residual moisture, lit from the top, 2 to 3 kg per burn, air fully open for the first few minutes. Take the ash out only when it is cold.

Time and cost

Two people set a Kaminofen in a day, once the chimney stands. It costs 800 to 3,000 euros, a new stainless steel chimney 2,000 to 4,000 euros. A Grundofen comes to 6,000 to 15,000 euros and takes the stove builder five to eight days.

The three most common mistakes

  • Stove too big. Put 8 kW into 30 m² and you throttle the air the whole time. Then it smoulders, the glass goes black and the flue furs up with soot.
  • Wet wood. Above 20 per cent residual moisture half the energy goes into evaporating water. Two years of drying, and measure on a freshly split face before you load it.
  • Bought without the chimney sweep. If the stove does not suit the flue it stays cold and the money is gone. The site visit costs under 100 euros.

Worauf es ankommtWhat matters hereDie Bundes-Immissionsschutzverordnung setzt Grenzwerte für Feinstaub, alte Öfen mussten nachgerüstet oder stillgelegt werden. Kauft nur, was die aktülle Stufe erfüllt.The Bundes-Immissionsschutzverordnung (the federal ordinance on clean air) sets limits for fine dust, and old stoves had to be upgraded or taken out of use. Buy only what meets the current stage.

Holzlager, Firewood store
Ein WochenendeOne weekendEtwas ÜbungSome practice helps

HolzlagerFirewood store

2 Personen, Balken bis 35 kg, schweres Heben2 people, beams up to 35 kg, heavy lifting

Zwei Jahre Trocknung sind der Unterschied zwischen einem sauberen Ofen und einem verrußten Kamin, und aus derselben Menge Holz holt ihr dabei gut ein Drittel mehr Wärme.Two years of drying is the difference between a clean stove and a flue furred up with soot, and out of the same quantity of wood you get a good third more heat.

So wird gebautHow it is built
Überdacht, an der Wetterseite offen, Stapel mit Luft dazwischen, mindestens zehn Zentimeter über dem Boden auf Kanthölzern.Roofed over, open on the weather side, stacks with air between them, at least ten centimetres above the ground on bearers.
KostenCost
200 bis 1.200 Euro200 to 1,200 euros
Erster SchrittFirst step
Für zwei volle Jahresmengen planen, nicht für eine. Sonst brennt ihr jedes Jahr das Holz vom letzten Winter.Plan for two full years' supply, not one. Otherwise you burn last winter's wood every year.
Schritt für SchrittStep by step
Holzlager, AnsichtTraufe 190Dach 400 breitLuft 30Scheite quer stapeln123451Pultdach mit Überstand2Pfosten in Bodenhülsen3Lagerrost, Luft von unten4Stapel höchstens 100 tief5Seiten offen für WindNicht maßstäblich, Maße in cm
Bauskizze Holzlager, am Handy seitlich wischenMeasured sketch of Firewood store, swipe sideways on a phone

Bevor du anfängst

Ruf beim Bauamt an und frag, bis zu welchem Rauminhalt ein offener, überdachter Unterstand bei euch ohne Antrag gebaut werden darf und was im Außenbereich gilt. Die Werte gehen zwischen den Ländern weit auseinander, deshalb bringt der Anruf mehr als jede Faustregel. Nimm die geplanten Maße und einen Lageplan mit dem Abstand zur Grenze mit. Verfahrensfrei heißt dabei nur, dass niemand vorher prüft. Bebauungsplan und Abstandsflächen gelten weiter, und im Außenbereich scheitern solche Bauten oft schon daran. Zwanzig Raummeter Holz sind eine erhebliche Brandlast. Halte mindestens fünf Meter zu Wohngebäuden und zu jeder Feuerstelle und melde das Lager der Gebäudeversicherung. Und halte den Unterschied auseinander: verfahrensfrei heißt nur, dass du keinen Antrag stellst. Zulässig ist das Vorhaben damit noch nicht, im Außenbereich liegt genau da die eigentliche Hürde.

Das brauchst du

  • 6 Pfosten KVH 12 x 12 cm, 250 cm aus Lärche oder Douglasie
  • 6 H-Anker 121 mm feuerverzinkt, zum Einbetonieren
  • 18 Sack Beton à 25 kg für sechs Punktfundamente
  • 4 Pfetten 8 x 16 cm, 500 cm als Auflager der Sparren
  • 12 Sparren 6 x 12 cm, 300 cm im Abstand von 80 cm
  • 32 m² Trapezblech und 120 Kalottenschrauben 4,8 x 35 mm
  • 40 Vollgewindeschrauben 8 x 200 mm für die Holzverbindungen
  • 8 Kanthölzer 10 x 10 cm, 400 cm als Unterlage der Stapel
  • 60 lfm Dachlatte 24 x 48 mm für die offene Rückwand
  • 1 Holzfeuchtemessgerät für die Kontrolle

Werkzeug

Erdbohrer 30 cm, Spaten, Wasserwaage 2 m, Maurerschnur, Handkreissäge, Akkuschrauber mit Steckschlüsselaufsatz, Leiter, Blechschere

Schritt für Schritt

  1. Menge rechnen. Ein Raummeter Buche mit 20 Prozent Restfeuchte liefert etwa 1.900 kWh. Wer 15.000 kWh Wärme braucht, verbrennt rund 10 Raummeter im Jahr.
  2. Für zwei Jahre planen. Weil Holz zwei Jahre trocknet, braucht ihr Platz für 20 Raummeter. Bei 1 m Tiefe und 2 m Höhe sind das 10 m Länge.
  3. Ausrichtung wählen. Die lange offene Seite nach Süden oder Westen, dorthin, wo Sonne und Wind herkommen. Rückwand als Lattung mit 2 cm Fugen, nicht dicht schließen.
  4. Fundamente setzen. Sechs Löcher mit 30 cm Durchmesser und 80 cm Tiefe bohren, das ist frostfrei. H-Anker einbetonieren, mit Schnur fluchten, drei Tage abbinden.
  5. Pfosten stellen. In die Anker setzen, lotrecht ausrichten, mit Schrauben 10 x 80 fixieren. Vorne 250 cm, hinten 190 cm, das ergibt 15 Grad Dachneigung.
  6. Pfetten, Sparren, Dach. Pfetten mit Vollgewindeschrauben verbinden, Sparren im Abstand von 80 cm mit Sparrenpfettenankern sichern. Bleche überlappend verlegen, Kalottenschrauben in den Wellenberg, vorne 40 cm Überstand.
  7. Unterbau und Stapel. Kanthölzer quer im Abstand von 80 cm auf Schotter legen, so bleibt der Stapel 10 cm über der Erde. Reihen mit 3 cm Luft, an den Enden gekreuzte Scheite als Stütze, Rinde nach oben.
  8. Kontrollieren. Nach 18 Monaten ein Scheit spalten und an der frischen Fläche messen. Unter 20 Prozent ist es ofenfertig, sonst wartet ihr noch einen Sommer.

Zeit und Kosten

Zwei Personen, zwei Tage. Fundamente und Pfosten brauchen den ersten Tag, Dach und Unterbau den zweiten. Material 200 bis 1.200 Euro, je nachdem ob ihr eigenes Rundholz sägt oder alles im Baustoffhandel kauft.

Die drei häufigsten Fehler

  • An die Hauswand gestapelt. Dahinter zirkuliert keine Luft, die Wand bleibt feucht und der Holzwurm zieht mit ein. Besser ein freistehendes Lager.
  • Komplett eingepackt. Eine Plane rundum hält die Feuchte im Stapel. Nur das Dach schließen, alle Seiten offen lassen.
  • Ungespalten gelagert. Rundlinge mit Rinde trocknen kaum. Alles über 10 cm Durchmesser spalten, dann fällt die Feuchte in zwei Jahren von 55 auf 18 Prozent.

Before you start

Ring the Bauamt (the local building authority) and ask up to what volume an open, roofed shelter may be built where you are without an application, and what applies in the Außenbereich (the open countryside outside the built-up area). The figures differ widely between the states, so the phone call is worth more than any rule of thumb. Take the planned dimensions and a site plan with the distance to the boundary. Verfahrensfrei only means that nobody checks beforehand. The Bebauungsplan (the local development plan) and the required distances to the boundary still apply, and in the Außenbereich buildings like this often fail on that alone. Twenty Raummeter of wood is a considerable fire load. Keep at least five metres to dwellings and to any open fire and tell your buildings insurer about the store. And keep the difference clear: verfahrensfrei only means that you file no application. It does not make the project lawful, and in the Außenbereich that is exactly where the real hurdle lies.

What you need

  • 6 posts KVH 12 x 12 cm, 250 cm in larch or Douglas fir, KVH is kiln dried graded structural timber
  • 6 H-shaped post anchors 121 mm hot dip galvanised, for setting in concrete
  • 18 bags of concrete at 25 kg for six pad foundations
  • 4 purlins 8 x 16 cm, 500 cm to carry the rafters
  • 12 rafters 6 x 12 cm, 300 cm at 80 cm centres
  • 32 m² trapezoidal steel sheeting and 120 roofing screws with domed washers 4.8 x 35 mm
  • 40 fully threaded timber screws 8 x 200 mm for the timber joints
  • 8 bearers 10 x 10 cm, 400 cm to stand the stacks on
  • 60 linear metres of roofing batten 24 x 48 mm for the open back wall
  • 1 moisture meter for checking

Tools

Earth auger 30 cm, spade, spirit level 2 m, bricklayer's line, circular saw, cordless driver with a socket bit, ladder, tin snips

Step by step

  1. Work out the quantity. A Raummeter of beech, a stacked cubic metre of split logs, at 20 per cent residual moisture gives about 1,900 kWh. If you need 15,000 kWh of heat, you burn around 10 Raummeter a year.
  2. Plan for two years. Because wood takes two years to dry, you need room for 20 Raummeter. At 1 m deep and 2 m high that is 10 m of length.
  3. Choose the orientation. The long open side facing south or west, towards the sun and the wind. Back wall as battens with gaps of 2 cm, not closed tight.
  4. Set the foundations. Bore six holes 30 cm across and 80 cm deep, which is below the frost line. Set the H anchors in concrete, line them up on a string, three days to cure.
  5. Stand the posts. Set them in the anchors, plumb them up, fix them with screws 10 x 80. 250 cm at the front, 190 cm at the back, which gives a roof pitch of 15 degrees.
  6. Purlins, rafters, roof. Join the purlins with fully threaded screws, secure the rafters at 80 cm centres with rafter to purlin anchors. Lay the sheets overlapping, roofing screws through the crown of the profile, 40 cm overhang at the front.
  7. Base and stacks. Lay the bearers across at 80 cm centres on crushed stone, and the stack stands 10 cm above the ground. Rows with 3 cm of air, crossed logs at the ends as a buttress, bark facing up.
  8. Check it. After 18 months split a log and measure on the fresh face. Under 20 per cent it is ready for the stove, otherwise you wait another summer.

Time and cost

Two people, two days. Foundations and posts take the first day, roof and base the second. Materials 200 to 1,200 euros, depending on whether you saw your own logs or buy everything at the builders' merchant.

The three most common mistakes

  • Stacked against the house wall. No air circulates behind it, the wall stays damp and woodworm moves in with the logs. Better a free standing store.
  • Wrapped up completely. A tarpaulin all round holds the damp in the stack. Close the roof only, leave every side open.
  • Stored unsplit. Round logs with the bark on barely dry out. Split everything over 10 cm across, then the moisture falls from 55 to 18 per cent in two years.

Worauf es ankommtWhat matters hereNie direkt an die Hauswand stapeln. Dahinter bleibt es feucht, und der Holzwurm zieht mit ein.Never stack straight against the house wall. It stays damp behind the stack, and woodworm moves in with the logs.

Wörterbuch, 99 Begriffe vom Bau erklärtDictionary, 99 building terms explainedDictionary, 99 building terms explained
SiebdruckplatteWasserfest verleimtes Sperrholz mit einer rauen, dunkelbraunen Oberfläche, das jahrelang draußen aushält. Aus einer 18 Millimeter dicken Platte baust du zum Beispiel den Kasten einer Trockentoilette.Im Baumarkt: Siebdruckplatte 18 mm im Holzhandel, dort schneiden sie dir die Platte auf dein Maß, meist für ein bis zwei Euro je Schnitt.
Siebdruckplatte (birch plywood with a resin coated surface)Plywood glued with waterproof adhesive, with a rough dark brown surface that lasts for years outdoors. From an 18 millimetre sheet you build the box of a dry toilet, for example.At the hardware store: Siebdruckplatte 18 mm at a timber merchant, where they cut the sheet to your measurements, usually for one to two euros per cut.
SpaxDer bekannteste Markenname für Holzschrauben, deshalb sagen im Laden alle Spax, egal welche Marke in der Kiste liegt. Im Kopf sitzt eine sternförmige Vertiefung, und die Schraube zieht sich ohne Vorbohren ins Holz.Im Baumarkt: Holzschrauben mit Sternkopf in der Größe aus der Liste, also zum Beispiel 4 x 45 mm, der passende Aufsatz für den Akkuschrauber liegt oft bei.
Spax (the best known brand of wood screw, used as a generic name)The best known brand name for wood screws, which is why everyone in the shop says Spax, whatever make is actually in the box. The head has a star shaped recess, and the screw pulls itself into the wood without a pilot hole.At the hardware store: wood screws with a star head in the size from the list, so 4 x 45 mm for example. The matching bit for the cordless driver often comes with them.
KantholzEin gerade gesägter Balken mit rechteckiger Form. Die Angabe 8 x 8 cm heißt acht Zentimeter breit und acht Zentimeter hoch, die Länge sagst du extra dazu.Im Baumarkt: Kantholz 8 x 8 cm in der gewünschten Länge, Fichte ist billig, Lärche und Douglasie halten draußen viel länger.
Kantholz (squared timber, sawn straight on all four sides)A straight sawn beam with a rectangular shape. The figure 8 x 8 cm means eight centimetres wide and eight centimetres high, and you state the length separately.At the hardware store: Kantholz 8 x 8 cm in the length you want. Spruce is cheap, while larch and Douglas fir last far longer outdoors.
KVH oder KonstruktionsvollholzBauholz, das getrocknet und gehobelt wurde und bei dem große Äste ausgeschnitten sind. Es kostet mehr als einfaches Bauholz und bleibt dafür gerade, statt sich beim Trocknen zu verdrehen.Im Baumarkt: KVH in der Größe aus der Liste, im Holzhandel oder Baustoffhandel, im Baumarkt gibt es meist nur wenige Maße.
KVH oder Konstruktionsvollholz (kiln dried and planed structural timber)Structural timber that has been dried and planed, with the larger knots cut out. It costs more than plain structural timber and stays straight instead of twisting as it dries.At the hardware store: KVH in the size from the list, at a timber or builders merchant. A DIY store usually keeps only a few sizes.
RauspundDicke Bretter für Böden und Dächer, die an den Längskanten ineinandergreifen. Eine Seite ist glatt gehobelt, die andere bleibt rau, daher der Name.Im Baumarkt: Rauspund 28 mm, wird nach Quadratmeter verkauft.
Rauspund (thick tongue and groove boarding, planed on one face)Thick boards for floors and roofs that interlock along their long edges. One face is planed smooth, the other stays rough, and that is where the name comes from.At the hardware store: Rauspund 28 mm, sold by the square metre.
Nut und FederAn der einen Längskante eines Bretts ist eine Rille eingefräst, an der anderen eine passende Leiste. Steckst du die Bretter zusammen, entsteht eine geschlossene Fläche ohne Ritzen.Im Baumarkt: Profilbretter mit Nut und Feder, sag dazu, ob sie nach innen oder nach außen kommen.
Nut und Feder (tongue and groove)One long edge of a board has a groove milled into it, the other a matching tongue. Push the boards together and you get a closed surface with no gaps.At the hardware store: profiled boards with tongue and groove. Say whether they are going inside or outside.
BohleEin besonders dickes Brett ab etwa drei Zentimetern. Für ein Hochbeet nimmt man Bohlen, weil dünne Bretter sich unter dem Druck der feuchten Erde nach außen wölben.Im Baumarkt: Bohle 20 x 4 cm aus Lärche oder Douglasie.
Bohle (a plank, from about three centimetres thick)A particularly thick board, from around three centimetres up. For a raised bed you take planks, because thin boards bow outwards under the pressure of the damp soil.At the hardware store: Bohle 20 x 4 cm in larch or Douglas fir.
Sperrholz und MultiplexDünne Holzlagen, die kreuzweise übereinander verleimt sind. Dadurch ist die Platte in beide Richtungen fest, Multiplex ist die dickere Ausführung mit besonders vielen Lagen.Im Baumarkt: Sperrholz 12 mm oder Multiplex 18 mm, für draußen ausdrücklich nach wasserfester Verleimung fragen.
Sperrholz und Multiplex (plywood and thick multi layer plywood)Thin layers of wood glued crosswise on top of each other. That makes the sheet firm in both directions, and Multiplex is the thicker version with a great many layers.At the hardware store: Sperrholz 12 mm or Multiplex 18 mm. For anything outdoors, ask explicitly for waterproof glue.
OSB-PlatteEine Platte aus großen, flach gepressten Holzspänen, gut erkennbar an der grob gemusterten Oberfläche. Sie ist billig und wird als Beplankung von Wänden und Böden genutzt.Im Baumarkt: OSB 15 mm oder 25 mm, für Böden die Variante mit Nut und Feder.
OSB-Platte (oriented strand board)A board of large wood chips pressed flat, easy to recognise by the coarsely patterned surface. It is cheap and gets used to sheathe walls and floors.At the hardware store: OSB 15 mm or 25 mm, and for floors the version with tongue and groove.
KonterlattungEine zweite Lage Latten, quer über die erste geschraubt. Dadurch bleibt hinter der Holzverkleidung ein Luftspalt, in dem Feuchtigkeit abtrocknen kann, statt die Wand zu durchnässen.Im Baumarkt: Latte 30 x 50 mm.
Konterlattung (counter battens)A second layer of battens screwed across the first. That leaves an air gap behind the timber cladding where damp can dry out, instead of soaking the wall.At the hardware store: batten 30 x 50 mm.
HirnholzDie Schnittfläche am Ende eines Balkens, dort wo man die Jahresringe sieht. Sie saugt Wasser wie ein Strohhalm, deshalb darf sie nie nach oben zeigen und nie auf nassem Boden stehen.
Hirnholz (end grain)The cut face at the end of a beam, where you can see the annual rings. It draws water like a straw, so it must never point upwards and never stand on wet ground.
FuchsschwanzEine ganz gewöhnliche Handsäge mit breitem Blatt und einem Griff, benannt nach der Form des Blattes. Damit sägst du Bretter und Latten ohne Strom, es dauert nur länger als mit der Maschine.Im Baumarkt: Handsäge oder Fuchsschwanz, etwa 15 Euro, für Bauholz eine mit groben Zähnen nehmen.
Fuchsschwanz (a plain hand saw, literally fox tail)An ordinary hand saw with a wide blade and one handle, named after the shape of the blade. You cut boards and battens with it without electricity, it only takes longer than with a machine.At the hardware store: hand saw or Fuchsschwanz, about 15 euros. For structural timber take one with coarse teeth.
HandkreissägeEine Maschine mit rundem Sägeblatt, die du über das Brett schiebst. Legst du eine Führungsschiene auf, werden die Schnitte gerade, freihändig laufen sie schnell schief.Im Baumarkt: Handkreissäge mit Führungsschiene, ohne Schiene lohnt sie kaum.
Handkreissäge (circular saw)A machine with a round blade that you push along the board. Lay a guide rail on top and the cuts come out straight. Freehand they run off line quickly.At the hardware store: circular saw with a guide rail. Without the rail it is hardly worth having.
LochsägeEin runder Sägekranz, den du in die Bohrmaschine spannst. Damit schneidest du saubere runde Löcher, etwa 80 Millimeter für ein Lüftungsrohr.Im Baumarkt: Lochsäge 80 mm mit Aufnahme und Zentrierbohrer.
Lochsäge (hole saw)A round ring of saw teeth that you clamp into the drill. With it you cut clean round holes, say 80 millimetres for a ventilation pipe.At the hardware store: hole saw 80 mm with an arbor and a centring bit.
SchlangenbohrerEin langer Bohrer mit grober Spirale für dicke Balken. Er zieht sich selbst ins Holz und schafft auch zwanzig Zentimeter tiefe Löcher.Im Baumarkt: Schlangenbohrer in der Stärke der Schraube, meist 10 oder 12 mm.
Schlangenbohrer (auger bit)A long bit with a coarse spiral for thick beams. It pulls itself into the wood and manages holes twenty centimetres deep.At the hardware store: auger bit in the thickness of the screw, usually 10 or 12 mm.
Ratsche und SW 17Eine Ratsche ist ein Schraubenschlüssel mit Sperrklinke, der beim Zurückschwenken leer mitläuft. SW 17 heißt Schlüsselweite 17 Millimeter, also der Abstand zwischen zwei gegenüberliegenden Flächen der Mutter, und genau diese Zahl muss auf dem Aufsatz stehen.Im Baumarkt: Ratschenkasten mit Nüssen von 8 bis 22 mm, damit deckst du fast alles ab.
Ratsche und SW 17 (a ratchet, and Schlüsselweite 17, meaning a spanner size of 17 millimetres)A ratchet is a spanner with a pawl that runs free on the back swing. SW 17 means a spanner size of 17 millimetres, so the distance between two opposite faces of the nut, and exactly that number has to be on the socket.At the hardware store: a ratchet set with sockets from 8 to 22 mm, which covers almost everything.
Bohrhammer und SchlagbohrmaschineBeide bohren in Stein, der Bohrhammer klopft dabei viel kräftiger und geht auch durch Beton. Für ein paar Löcher in Ziegel reicht die Schlagbohrmaschine.Im Baumarkt: Bohrhammer mit SDS-Aufnahme, dazu Steinbohrer 8 und 10 mm.
Bohrhammer und Schlagbohrmaschine (rotary hammer and impact drill)Both drill into stone. The rotary hammer strikes far harder and goes through concrete as well. For a few holes in brick the impact drill is enough.At the hardware store: rotary hammer with an SDS chuck, plus masonry bits of 8 and 10 mm.
WinkelschleiferEine Maschine mit schnell drehender Scheibe, im Laden oft Flex genannt, zum Trennen von Stein und Metall. Sie ist das gefährlichste Gerät in dieser Sammlung und will Schutzbrille und beide Hände.Im Baumarkt: Winkelschleifer 125 mm, dazu je eine Trennscheibe für Stein und für Metall.
Winkelschleifer (angle grinder)A machine with a fast spinning disc, often called a Flex in the shop, for cutting stone and metal. It is the most dangerous tool in this collection and wants safety glasses and both hands on it.At the hardware store: angle grinder 125 mm, plus one cutting disc for stone and one for metal.
Multitool mit BimetallblattEine kleine Maschine, deren Sägeblatt schnell hin und her schwingt. Damit sägst du die Nägel in einer Palette durch, ohne das Holz kaputt zu reißen.Im Baumarkt: Multifunktionswerkzeug mit Sägeblättern für Holz mit Nägeln.
Multitool mit Bimetallblatt (oscillating multi tool with a bi metal blade)A small machine whose blade swings quickly back and forth. With it you cut through the nails in a pallet without tearing the wood apart.At the hardware store: oscillating multi tool with blades for wood that has nails in it.
RüttelplatteEine schwere Maschine mit vibrierender Bodenplatte, die Schotter und Sand so festklopft, dass später nichts nachsackt. Sie wiegt 60 bis 100 Kilo und geht nur zu zweit ins Auto.Im Baumarkt: Rüttelplatte im Baumaschinenverleih, etwa 45 Euro am Tag.
Rüttelplatte (plate compactor)A heavy machine with a vibrating base plate that packs gravel and sand down so firmly that nothing settles later. It weighs 60 to 100 kilos and takes two people to get into a car.At the hardware store: plate compactor from a plant hire yard, about 45 euros a day.
HandstampferEine schwere Metallplatte an einem Stiel, mit der du kleine Flächen von Hand festklopfst. Für ein paar Quadratmeter reicht das, darüber leihst du besser die Maschine.
Handstampfer (hand tamper)A heavy metal plate on a handle that you pack small areas down with by hand. For a few square metres that will do, above that you are better off hiring the machine.
RotationslaserEin Gerät auf einem Stativ, das einen Lichtstrahl im Kreis herumdreht. Damit findest du auf einer großen Fläche überall genau dieselbe Höhe, wofür die Wasserwaage viel zu kurz ist.Im Baumarkt: Rotationslaser mit Empfänger und Messlatte, im Verleih 25 bis 40 Euro am Tag.
Rotationslaser (rotating laser level)A device on a tripod that turns a beam of light in a circle. With it you find exactly the same height anywhere on a large area, which a spirit level is far too short for.At the hardware store: rotating laser with a receiver and a levelling staff, 25 to 40 euros a day from a hire shop.
MaurerschnurEine dünne reißfeste Schnur, die zwischen zwei Pflöcken straff gespannt wird. Sie zeigt dir die gerade Linie und die richtige Höhe, an der entlang du baust.Im Baumarkt: Maurerschnur 50 m und ein paar Holzpflöcke, zusammen unter zehn Euro.
Maurerschnur (builders line)A thin line that will not tear, pulled tight between two pegs. It shows you the straight line and the right height to build along.At the hardware store: builders line 50 m and a few wooden pegs, under ten euros together.
SchnurgerüstEin Rahmen aus Pfosten und Brettern rund um die Baustelle, an dem die Schnüre festgemacht werden. So bleiben deine Maße erhalten, auch wenn du mittendrin die Erde ausgräbst.
Schnurgerüst (profile boards set up around the site to carry the string lines)A frame of posts and boards around the site that the lines are tied to. That way your measurements survive even when you dig the soil out in the middle.
RichtlatteEine sehr gerade Latte, meist zwei Meter lang. Damit prüfst du, ob eine Fläche eben ist, und ziehst frischen Beton glatt.Im Baumarkt: Richtlatte oder Abziehlatte aus Aluminium, 200 cm, Holz verzieht sich.
Richtlatte (a straight edge, also used as a screed board)A very straight batten, usually two metres long. With it you check whether a surface is level, and you pull fresh concrete smooth.At the hardware store: straight edge or screed board in aluminium, 200 cm. Wood warps.
im Lot und auswaagenIm Lot heißt genau senkrecht, auswaagen heißt genau waagerecht ausrichten. Beides prüfst du mit der Wasserwaage, wenn die Luftblase zwischen den beiden Strichen steht, passt es.
im Lot und auswaagen (plumb, and setting something level)Plumb means exactly vertical, and auswaagen means setting something exactly horizontal. You check both with the spirit level, and when the bubble sits between the two lines it is right.
SilikonpistoleEin Handgerät, in das die Kartusche mit Dichtmasse eingespannt wird. Der Hebel schiebt die Masse gleichmäßig heraus, von Hand geht das nicht.Im Baumarkt: Kartuschenpresse für Standardkartuschen, etwa zehn Euro.
Silikonpistole (sealant gun)A hand tool that the cartridge of sealant is clamped into. The lever pushes the mass out evenly, which you cannot manage by hand.At the hardware store: cartridge gun for standard cartridges, about ten euros.
Körnung wie 0/32Die beiden Zahlen sind die Korngrößen in Millimetern. 0/32 heißt, es ist alles von Staub bis 32 Millimeter enthalten, und gerade der feine Staub sorgt dafür, dass sich das Material festklopfen lässt und später nichts nachsackt.Im Baumarkt: Schotter 0/32 im Baustoffhandel, Verkauf nach Tonne. Eine Tonne passt nicht ins Auto, frag gleich nach Lieferung oder nach einem Anhänger.
Körnung wie 0/32 (a grading such as 0/32, meaning the range of particle sizes)The two numbers are the grain sizes in millimetres. 0/32 means everything from dust up to 32 millimetres is in there, and it is the fine dust that lets the material be packed down so that nothing settles later.At the hardware store: crushed stone 0/32 at a builders merchant, sold by the tonne. A tonne will not go in a car, so ask about delivery or a trailer straight away.
Kies und Splitt mit zwei ähnlichen ZahlenBei 8/16 oder 16/32 fehlen die feinen Anteile, alle Steinchen sind ungefähr gleich groß. Solches Material bleibt locker und lässt Wasser durch, deshalb nimmt man es überall dort, wo etwas versickern soll.Im Baumarkt: Kies 16/32 oder Splitt 8/16, im Sack oder lose.
Kies und Splitt mit zwei ähnlichen Zahlen (gravel and chippings with two similar numbers)With 8/16 or 16/32 the fine material is missing, so all the stones are roughly the same size. Material like that stays loose and lets water through, which is why it goes wherever something has to soak away.At the hardware store: gravel 16/32 or chippings 8/16, in bags or loose.
Beton C25/30Die Zahlen sagen, wie viel Druck der ausgehärtete Beton aushält, C25/30 ist der übliche Beton für Fundamente. Kleine Mengen mischst du aus dem Sack, ab etwa einem Kubikmeter lohnt der Fahrmischer.Im Baumarkt: Sackbeton 25 kg für wenige Löcher, sonst Transportbeton C25/30 bestellen und dabei sagen, wie weit der Wagen fahren kann.
Beton C25/30 (concrete of strength class C25/30)The numbers say how much pressure the hardened concrete takes, and C25/30 is the usual concrete for foundations. Small amounts you mix from the bag, and from about a cubic metre a ready mix lorry is worth it.At the hardware store: bagged concrete 25 kg for a few holes, otherwise order ready mixed C25/30 and say how close the lorry can get.
Füllbeton C20/25Ein etwas schwächerer und dünnflüssiger Beton, mit dem hohle Steine ausgegossen werden. Er muss fließen können, damit keine Luftlöcher in der Wand bleiben.
Füllbeton C20/25 (a wetter infill concrete of class C20/25 for filling hollow blocks)A slightly weaker and more fluid concrete that hollow blocks are filled with. It has to be able to flow, so that no air pockets are left in the wall.
abbindenBeton trocknet nicht, er bindet ab, das heißt er verbindet sich chemisch mit dem Wasser und wird dabei hart. Deshalb muss er feucht gehalten werden und braucht mehrere Tage Ruhe, bevor Last darauf darf.
abbinden (to cure, said of concrete)Concrete does not dry, it cures, which means it combines chemically with the water and goes hard in the process. That is why it has to be kept damp and needs several days of rest before any load goes on it.
Baustahlmatte Q188Ein Gitter aus Stahlstäben, das in den Beton eingelegt wird, damit er nicht reißt. Q188 ist die übliche Größe für Bodenplatten.Im Baumarkt: Baustahlmatte Q188, die Standardmatte misst 5 x 2,15 m und passt nur auf einen Anhänger.
Baustahlmatte Q188 (Q188 steel reinforcing mesh)A grid of steel bars laid into the concrete so that it does not crack. Q188 is the usual size for floor slabs.At the hardware store: Baustahlmatte Q188. The standard sheet measures 5 x 2.15 m and will only go on a trailer.
SchalungssteinEin hohler Betonstein, der ohne Mörtel aufeinandergesetzt und danach mit flüssigem Beton gefüllt wird. So entsteht eine tragende Wand, ohne dass jemand mauern können muss.Im Baumarkt: Schalungsstein 25 x 25 x 50 cm, einer wiegt etwa 20 Kilo.
Schalungsstein (a hollow concrete block, laid dry and then filled with concrete)A hollow concrete block that is stacked without mortar and then filled with liquid concrete. That gives you a load-bearing wall without anyone needing to know how to lay bricks.At the hardware store: Schalungsstein 25 x 25 x 50 cm. One block weighs about 20 kilos.
SchamotteEin hitzefester Stein aus gebranntem Ton, der die Flamme direkt aushält, ohne zu zerspringen. Er sitzt in Backöfen und Kaminen überall dort, wo das Feuer hinkommt.Im Baumarkt: Schamottstein und dazu passender Schamottmörtel, im Kaminfachhandel oder beim Ofenbauer.
Schamotte (fire clay, as in firebrick)A heat-resistant brick of fired clay that takes the flame directly without cracking apart. It sits in bread ovens and fireplaces wherever the fire reaches.At the hardware store: firebrick and the fire clay mortar that goes with it, at a stove supplier or at a stove builder.
BlähtonKleine leichte Tonkugeln, die bei großer Hitze aufgepoppt sind wie Popcorn. Sie sind innen voller Luft und dämmen deshalb gut, Wasser läuft ohne Weiteres hindurch.Im Baumarkt: Blähton 8/16 im Sack, im Gartenmarkt oder im Baustoffhandel.
Blähton (expanded clay pebbles)Small light clay balls that have popped open under great heat, the way popcorn does. They are full of air inside and insulate well, and water runs straight through them.At the hardware store: Blähton 8/16 in bags, at a garden centre or a builders merchant.
Perlit und VermiculitAufgeblähtes Vulkangestein in weißen oder goldenen Krümeln. Es ist federleicht und brennt nicht, deshalb schüttet man es als Dämmung in den Zwischenraum von Öfen.Im Baumarkt: Perlit oder Vermiculit im Ofenbedarf, im Gartenhandel heißt es oft Pflanzperlit.
Perlit und Vermiculit (perlite and vermiculite)Expanded volcanic rock in white or golden crumbs. It weighs almost nothing and does not burn, so it gets poured into the cavity of a stove as insulation.At the hardware store: perlite or vermiculite at a stove supplier. In garden shops it is often sold as Pflanzperlit.
magern und abmagernFetten Lehm oder fette Erde mit Sand mischen. Reiner Lehm schrumpft beim Trocknen und reißt, mit Sand gemischt bleibt er in Form.
magern und abmagern (to lean a clay mix down by adding sand)Mixing fatty clay or fatty soil with sand. Pure clay shrinks as it dries and cracks, and mixed with sand it holds its shape.
Punktfundament und frostfrei gründenStatt einer durchgehenden Platte gießt man unter jeden Pfosten einen eigenen Betonklotz. Frostfrei heißt, dass er mindestens achtzig Zentimeter tief reicht, damit der Frost ihn im Winter nicht anhebt.
Punktfundament und frostfrei gründen (pad foundations, and founding below the frost line)Instead of one continuous slab you pour a separate block of concrete under each post. Frost free means it reaches at least eighty centimetres down, so that the frost cannot lift it in winter.
verdichtenSchotter oder Sand so lange klopfen oder rütteln, bis sich die Körner ineinanderschieben und nichts mehr nachgibt. Wer das auslässt, hat nach dem ersten Winter Mulden in der Fläche.
verdichten (to compact)Tamping or vibrating gravel or sand until the grains slide into each other and nothing gives way. Leave it out and you have hollows in the surface after the first winter.
StänderwerkDas Gerippe einer Wand aus senkrechten Hölzern in gleichmäßigem Abstand. Dazwischen kommt später die Dämmung, außen und innen werden Platten oder Bretter darauf befestigt.
Ständerwerk (stud framing)The skeleton of a wall made of vertical timbers at even spacing. The insulation goes between them, and boards or sheets are fixed on the outside and the inside.
PfetteEin waagerechter Balken, der oben auf den Pfosten liegt und die schrägen Dachbalken trägt. Bei einem Unterstand sind es meist zwei, einer vorn und einer hinten.
Pfette (purlin)A horizontal beam that lies on top of the posts and carries the sloping roof timbers. On a shelter there are usually two, one at the front and one at the back.
SparrenDie schrägen Balken, die über das Dach von oben nach unten laufen. Auf ihnen liegt die Dachhaut, also zum Beispiel Blech oder Ziegel.
Sparren (rafters)The sloping beams that run down the roof from top to bottom. The roof covering lies on them, so sheet metal or tiles for example.
FirstDie oberste waagerechte Kante eines Dachs, dort wo zwei Dachflächen zusammenstoßen. Bei einem Dach mit nur einer Fläche ist es einfach die hohe Kante.
First (the ridge of a roof)The top horizontal edge of a roof, where two roof surfaces meet. On a roof with only one surface it is simply the high edge.
TraufeDie untere Kante des Dachs, an der das Wasser abläuft und die Rinne hängt. Von First bis Traufe geht es also von ganz oben bis ganz unten.
Traufe (the eaves)The bottom edge of the roof, where the water runs off and the gutter hangs. From ridge to eaves therefore means from the very top to the very bottom.
PultdachEin Dach mit nur einer geneigten Fläche, wie ein schräg gestelltes Pult. Es ist die einfachste Dachform und braucht keinen Grat in der Mitte.
Pultdach (a mono pitch roof)A roof with only one sloping surface, like a lectern set at an angle. It is the simplest roof shape and needs no ridge in the middle.
AussteifungAllesAll, was ein Gerippe gegen Verschieben sichert, meist schräge Streben oder eine fest verschraubte Platte. Ohne sie kippt ein rechteckiger Rahmen seitlich weg.
Aussteifung (bracing)Anything that stops a frame from racking, usually diagonal struts or a firmly screwed sheet. Without it a rectangular frame folds over sideways.
RingankerEin umlaufendes Band aus Gurten, Stahl oder Beton, das die Wände rundum zusammenhält. Es fängt den Druck ab, der die Wände nach außen schieben will.
Ringanker (a ring beam, a tie running right round the building)A band of webbing straps, steel or concrete that runs right round the building and holds the walls together. It takes up the pressure that wants to push the walls outwards.
ZugbandEin Seil, Gurt oder Stab, der zwei Bauteile gegen das Auseinanderdrücken zusammenhält. Bei der Jurte hält es die Wand, die das Dach sonst nach außen schieben würde.
Zugband (a tension tie)A rope, strap or rod that holds two parts together against being pushed apart. On a yurt it holds the wall that the roof would otherwise push outwards.
BalkenschuhEin Blechteil in U-Form, in das ein Balken hineingestellt und dann festgeschraubt wird. So hängt ein Balken sicher am anderen, ohne dass jemand Zapfen schnitzen muss.Im Baumarkt: Balkenschuh mit dem Innenmaß deines Balkens, dazu die kurzen dicken Ankernägel.
Balkenschuh (joist hanger)A U-shaped steel part that a beam is set into and then screwed tight. That way one beam hangs safely from the next, without anyone having to cut a joint.At the hardware store: joist hanger to the inside dimension of your beam, plus the short thick anchor nails.
H-AnkerEin Metallteil in Form eines H, unten ein Blech zum Einbetonieren, oben eine Gabel für den Holzpfosten. Der Pfosten steht damit ein paar Zentimeter über dem Boden und fault nicht von unten weg.Im Baumarkt: H-Anker 91 mm oder 121 mm, die Zahl ist die Breite deines Pfostens.
H-Anker (an H shaped post base, set in concrete)A metal part in the shape of an H, with a plate at the bottom to set in concrete and a fork at the top for the timber post. The post then stands a few centimetres above the ground and does not rot away from below.At the hardware store: H-Anker 91 mm or 121 mm, and the number is the width of your post.
ErdankerEin Stab oder Rohr, meist sechzig Zentimeter lang, das mit dem Vorschlaghammer in den Boden getrieben wird und dort das Fundament ersetzt. Achtzehn Stück einzuschlagen dauert einen halben Tag und macht die Arme müde.Im Baumarkt: Erdanker oder Bodenhülse aus Rohr 32 mm, im Zaunbedarf oder im Gartenmarkt.
Erdanker (a ground anchor driven into the soil)A rod or tube, usually sixty centimetres long, that is driven into the ground with a sledgehammer and takes the place of a foundation. Driving eighteen of them in takes half a day and makes your arms tired.At the hardware store: ground anchor or ground socket from 32 mm tube, in the fencing section or at a garden centre.
VollgewindeschraubeEine lange Holzschraube, deren Gewinde bis unter den Kopf durchläuft. Sie zieht zwei Balken fest zusammen und ersetzt heute viele der alten Holzverbindungen.Im Baumarkt: Vollgewindeschraube 8 x 200 mm mit dem passenden Aufsatz, im Baustoffhandel billiger als im Baumarkt.
Vollgewindeschraube (a fully threaded structural timber screw)A long wood screw whose thread runs all the way up to the head. It pulls two beams tightly together and today it takes the place of many old timber joints.At the hardware store: Vollgewindeschraube 8 x 200 mm with the matching bit, cheaper at a builders merchant than at a DIY store.
KarosseriescheibeEine besonders große dünne Unterlegscheibe. Sie verteilt den Druck der Schraube auf eine breite Fläche, damit der Kopf nicht ins weiche Holz einsinkt.Im Baumarkt: Karosseriescheiben in der Größe der Schraube, also M10 für eine Schraube mit zehn Millimetern.
Karosseriescheibe (a large thin washer, a penny washer)A particularly large thin washer. It spreads the pressure of the screw over a wide area, so that the head does not sink into soft wood.At the hardware store: penny washers in the size of the screw, so M10 for a screw of ten millimetres.
Binder und BindersteineLange Steine, die quer durch die ganze Mauer reichen und beide Seiten miteinander verzahnen. Ohne sie fällt eine Trockenmauer nach ein paar Jahren in zwei Hälften auseinander.
Binder und Bindersteine (through stones that tie both faces of a wall together)Long stones that reach right through the wall and lock both faces together. Without them a dry stone wall falls apart into two halves after a few years.
AnlaufDie leichte Rückneigung einer Mauer gegen den Hang, meist zehn bis fünfzehn Prozent. Dadurch drückt der Berg die Mauer in sich hinein statt nach vorn um.
Anlauf (the batter, the backward lean of a wall)The slight backward lean of a wall into the slope, usually ten to fifteen per cent. That makes the hill press the wall into itself, rather than push it over forwards.
im VerbandSteine so setzen, dass die Fugen nicht übereinanderliegen, sondern immer versetzt sind, wie bei einer Ziegelwand. Eine durchgehende senkrechte Fuge ist die Stelle, an der die Mauer später aufreißt.
im Verband (in bond, with the joints staggered)Setting stones so that the joints do not sit above each other but are always offset, as in a brick wall. A continuous vertical joint is the place where the wall will crack open later.
Vlies und GeotextilEin Stoff aus verfilzten Fasern, der aussieht wie sehr dicker Filz. Er hält Erde zurück und lässt Wasser durch, deshalb liegt er als Trennschicht zwischen Erde und Kies.Im Baumarkt: Geotextil oder Unkrautvlies, die Angabe in Gramm je Quadratmeter ist das Gewicht, 150 g ist der übliche Wert.
Vlies und Geotextil (geotextile fleece)A fabric of matted fibres that looks like very thick felt. It holds soil back and lets water through, so it goes in as a separating layer between soil and gravel.At the hardware store: geotextile or weed fabric. The figure in grams per square metre is the weight, and 150 g is the usual value.
EPDMEine dicke schwarze Gummifolie, die in einem einzigen Stück geliefert wird und Jahrzehnte hält. Man nimmt sie für Teiche und flache Dächer, weil sie ohne Klebenähte auskommt.Im Baumarkt: EPDM-Folie 1,14 mm für Teiche oder 1,5 mm für Dächer, als Zuschnitt nach Maß bestellen.
EPDM (EPDM rubber sheeting)A thick black rubber sheet that comes in one single piece and lasts for decades. It gets used for ponds and flat roofs, because it needs no glued seams.At the hardware store: EPDM sheet 1.14 mm for ponds or 1.5 mm for roofs, ordered cut to size.
Noppenfolie und NoppenbahnEine Kunststoffbahn voller kleiner Höcker, die aussieht wie eine harte Luftpolsterfolie. Die Noppen halten Abstand zur Wand, damit Wasser dort nach unten ablaufen kann.
Noppenfolie und Noppenbahn (dimpled membrane for walls below ground)A plastic sheet covered in small bumps that looks like hard bubble wrap. The dimples keep a gap to the wall, so that water can run down there.
BitumenschweißbahnEine dicke Dachpappe, die mit einem Gasbrenner angeschmolzen und dadurch aufgeklebt wird. Sie dichtet Bauteile ab, die in der Erde liegen.
Bitumenschweißbahn (torch on bitumen membrane)A thick roofing felt that is melted with a gas torch and sticks down as it goes. It seals the parts of a building that sit in the soil.
DampfbremseEine Folie auf der warmen Innenseite einer gedämmten Wand. Sie hält die feuchte Zimmerluft davon ab, in die Dämmung zu ziehen und dort zu Wasser zu werden, und der aufgedruckte sd-Wert sagt, wie dicht sie ist, wobei die kleine Zahl nach außen und die große nach innen gehört.Im Baumarkt: Dampfbremse und das dazu passende Klebeband am besten von einer Marke kaufen, sonst hält die Verklebung nicht.
Dampfbremse (vapour control layer)A membrane on the warm inside face of an insulated wall. It keeps the damp room air from moving into the insulation and turning to water there, and the printed sd value says how tight it is, where the small number belongs on the outside and the large one on the inside.At the hardware store: vapour control layer and the tape that goes with it, best bought from one brand, because otherwise the bond does not hold.
my bei FolieDie Abkürzung für Mikrometer, also ein Tausendstel Millimeter. Eine Gewächshausfolie mit 200 my ist 0,2 Millimeter dick und damit deutlich fester als eine gewöhnliche Baufolie.Im Baumarkt: Gewächshausfolie 200 my, UV-stabil, sonst wird sie nach einem Sommer brüchig.
my bei Folie (my, meaning micron, on plastic sheeting)The abbreviation for micrometre, so a thousandth of a millimetre. A greenhouse film of 200 my is 0.2 millimetres thick and therefore much tougher than ordinary building film.At the hardware store: greenhouse film 200 my, UV stabilised, because otherwise it goes brittle after one summer.
KapillarsperreErde neben einem Teich saugt das Wasser über den Folienrand hinweg, so wie ein Zuckerwürfel den Kaffee hochzieht. Deshalb ziehst du die Folie am Ufer senkrecht hoch und legst eine Kiesrinne dahinter, damit diese Verbindung unterbrochen ist.
Kapillarsperre (capillary break)Soil next to a pond draws the water up over the edge of the liner, the way a sugar cube pulls up coffee. So you take the liner up vertically at the bank and lay a gravel channel behind it, which breaks that connection.
UferwallmatteEin rauer Stoffstreifen, den man über den senkrecht hochgezogenen Folienrand legt. Er lässt sich mit Erde füllen und bepflanzen, sodass der Rand verschwindet.
Uferwallmatte (bank matting for the edge of a pond)A rough strip of fabric laid over the vertical edge of the liner. It can be filled with soil and planted, so that the edge disappears.
QuelltonTongranulat, das mit Wasser aufquillt und dabei dicht wird. Man schüttet es rund um ein Brunnenrohr, damit oben kein Schmutzwasser nach unten sickert.Im Baumarkt: Quellton oder Bentonit, im Brunnenbedarf.
Quellton (bentonite clay granules that swell when wet)Clay granules that swell up with water and seal as they do it. You pour them around a well pipe, so that no dirty water seeps down from above.At the hardware store: Quellton or bentonite, at a well drilling supplier.
HT-RohrDas graue Abwasserrohr für innen, dünnwandig und hitzefest bis etwa neunzig Grad. Die Teile stecken mit Gummidichtungen ineinander, ohne Kleber.Im Baumarkt: HT-Rohr DN 75 und dazu Bögen mit 87 Grad, alles aus derselben Reihe.
HT-Rohr (the grey indoor waste pipe)The grey waste pipe for indoors, thin walled and heat-resistant to about ninety degrees. The parts push into each other with rubber seals, without glue.At the hardware store: HT-Rohr DN 75 and bends of 87 degrees to match, all from the same range.
KG-RohrDas orangebraune Abwasserrohr für draußen und für die Erde, viel dicker und stabiler als das graue. Es hält den Druck des Erdreichs aus.Im Baumarkt: KG-Rohr DN 100 und Bögen mit 45 Grad, dazu etwas Gleitmittel für die Dichtungen.
KG-Rohr (the orange brown underground drainage pipe)The orange brown waste pipe for outdoors and for burying, much thicker and stronger than the grey one. It takes the pressure of the soil.At the hardware store: KG-Rohr DN 100 and bends of 45 degrees, plus a little lubricant for the seals.
DNDN steht für den Nenndurchmesser in Millimetern, also die grobe Weite eines Rohrs. DN 100 heißt Rohr von rund zehn Zentimetern, und alle Teile mit derselben Zahl passen zusammen.
DN (Nenndurchmesser, the nominal diameter in millimetres)DN stands for the nominal diameter in millimetres, so the rough width of a pipe. DN 100 means a pipe of around ten centimetres, and all parts carrying the same number fit together.
Zoll bei GewindenEin altes Maß für Wasserleitungen, das nichts mit dem sichtbaren Durchmesser zu tun hat. Wichtig ist nur, dass beide Teile dieselbe Zahl tragen, also 1/2 Zoll auf 1/2 Zoll.Im Baumarkt: Sag im Laden dazu, ob du ein Innengewinde oder ein Außengewinde brauchst und was drangeschraubt wird.
Zoll bei Gewinden (inch sizes on pipe threads)An old measure for water pipes that has nothing to do with the visible diameter. All that counts is that both parts carry the same number, so 1/2 inch onto 1/2 inch.At the hardware store: say in the shop whether you need a female or a male thread and what is going to be screwed on.
KugelhahnEin Absperrhahn mit Hebel, in dem eine durchbohrte Kugel sitzt. Hebel in Rohrrichtung heißt offen, Hebel quer heißt zu, das erkennst du von weitem.
Kugelhahn (ball valve)A shut-off valve with a lever and a drilled ball inside. Lever in line with the pipe means open, lever across means shut, and you can see that from a distance.
Hanf und DichtpasteFeine Hanffasern, die man mit einer Paste um ein Rohrgewinde wickelt, bevor man es zuschraubt. Der Hanf quillt an und dichtet die Verbindung dauerhaft ab.Im Baumarkt: Dichthanf und Dichtpaste, zusammen unter zehn Euro, im Sanitärregal.
Hanf und Dichtpaste (hemp and jointing paste for pipe threads)Fine hemp fibres that you wind around a pipe thread with a paste before you screw it up. The hemp swells and seals the joint for good.At the hardware store: sealing hemp and jointing paste, under ten euros together, on the plumbing shelf.
RammfilterrohrEin Rohr mit geschlitztem Ende, das in den Boden geschlagen wird und durch die Schlitze Wasser aufnimmt. Das ist die einfachste Art, an Grundwasser zu kommen.
Rammfilterrohr (a driven well point, a slotted pipe hammered into the ground)A pipe with a slotted end that is driven into the ground and takes water in through the slots. It is the simplest way to reach groundwater.
DrainageEin gelochtes Rohr in einer Packung aus grobem Kies, das Wasser sammelt und wegleitet. Es liegt überall dort, wo Wasser sonst am Bauwerk stehen bliebe.
Drainage (a land drain)A perforated pipe in a packing of coarse gravel that collects water and leads it away. It goes wherever water would otherwise stand against the building.
SchwallbeschickerEin Behälter, der sich langsam füllt und dann auf einen Schlag leerläuft. Dadurch kommt das Abwasser stoßweise auf das Filterbeet und verteilt sich gleichmäßig, statt immer an derselben Stelle einzusickern.
Schwallbeschicker (a dosing siphon that releases waste water in surges)A vessel that fills slowly and then empties all at once. That way the waste water reaches the filter bed in surges and spreads evenly, instead of always soaking in at the same spot.
SparduschkopfEin Duschkopf, der Luft ins Wasser mischt. Es fühlt sich an wie eine normale Dusche und verbraucht ungefähr die Hälfte.
Sparduschkopf (a low flow shower head)A shower head that mixes air into the water. It feels like a normal shower and uses roughly half as much.
Gefälle in ProzentZwei Prozent Gefälle heißen zwei Zentimeter Höhenunterschied auf einen Meter Länge. Bei Abwasserrohren ist das die Regel, damit alles abläuft und nichts liegen bleibt.
Gefälle in Prozent (fall stated as a percentage)Two per cent of fall means two centimetres of height difference over one metre of length. On waste pipes that is the rule, so that everything runs away and nothing is left lying.
lichte Weite und lichter AbstandDas Maß im Inneren einer Öffnung, also von Kante zu Kante der Lücke, ohne die Bauteile selbst. Elf Zentimeter lichter Abstand am Geländer heißt elf Zentimeter Luft zwischen zwei Stäben.
lichte Weite und lichter Abstand (clear width and clear spacing)The measurement inside an opening, so from edge to edge of the gap, without the parts themselves. Eleven centimetres of clear spacing on a railing means eleven centimetres of air between two bars.
AchsmaßDer Abstand von Mitte zu Mitte, zum Beispiel von einem Wandständer zum nächsten. Gemessen wird nie die Lücke, sondern immer Mitte zu Mitte, sonst passen die Platten am Ende nicht auf.
Achsmaß (centre to centre spacing)The distance from middle to middle, for example from one wall stud to the next. You never measure the gap, always middle to middle, or the sheets will not line up at the end.
laufender Meter oder lfmDie reine Länge in Metern, ganz ohne Breite und Dicke. Zehn laufende Meter Brett sind schlicht zehn Meter Brett hintereinandergelegt.
laufender Meter oder lfm (linear metre)Plain length in metres, with no width and no thickness. Ten linear metres of board are simply ten metres of board laid end to end.
KubikmeterEin Würfel von einem Meter Kantenlänge, also tausend Liter. Eine Schubkarre fasst rund achtzig Liter, ein Kubikmeter sind also etwa zwölf volle Karren.
Kubikmeter (cubic metre)A cube one metre along each edge, so a thousand litres. A wheelbarrow holds around eighty litres, which makes a cubic metre about twelve full barrows.
daNDekanewton, eine Einheit für Kraft. Ein daN entspricht ungefähr einem Kilo Zugkraft, 2.000 daN sind also rund zwei Tonnen Haltekraft.
daN (decanewton, a unit of force)Decanewton, a unit of force. One daN is roughly one kilo of pull, so 2,000 daN is around two tonnes of holding force.
bindiger BodenErde mit viel Ton und Lehm, die klebt und sich zu einer Wurst rollen lässt. Sie hält eine Grubenwand länger als Sand, wird bei Regen aber schmierig.
bindiger Boden (cohesive soil)Soil with a lot of clay and loam in it, which sticks and can be rolled into a sausage. It holds the wall of a pit longer than sand does, but it turns greasy in rain.
BöschungEine schräg abgeflachte Grubenwand statt einer senkrechten. Die Schräge sorgt dafür, dass die Wand nicht abbricht und jemanden verschüttet.
Böschung (a battered slope on the side of a pit)A pit wall cut back at an angle instead of standing vertical. The slope keeps the wall from breaking away and burying somebody.
VerbauEine Abstützung der Grubenwand mit Platten und Spindeln, wenn du nicht schräg abgraben kannst. Ab 1,25 Meter Tiefe ist eins von beiden Pflicht.
Verbau (trench shoring)Propping the wall of a pit with panels and struts, for when you cannot dig back at an angle. From 1.25 metres of depth, one of the two is required.
AuflastklasseEine Angabe, wie viel Gewicht von oben auf ein Bauteil in der Erde drücken darf. Sie entscheidet, ob über einem Erdkeller nur Wiese liegen darf oder auch ein Auto fahren.
Auflastklasse (the load class for a buried structure)A figure for how much weight may press down from above on a part that sits in the ground. It decides whether only grass may lie over an earth cellar or a car may drive across it.
Grasnarbe und RasensodenDie oberste Schicht aus Gras samt verfilzten Wurzeln. Sticht man sie in Platten ab, heißen diese Soden, und kopfüber gelegt sind sie eine gute unterste Lage im Hochbeet.
Grasnarbe und Rasensoden (turf, and turves cut from it)The top layer of grass together with its matted roots. Cut into slabs they are called turves, and laid upside down they make a good bottom layer in a raised bed.
SohleDer Boden einer Grube, also die tiefste Fläche. Von der Sohle aus rechnet man die Höhe aller Schichten nach oben.
Sohle (the formation level, the bottom of a pit)The floor of a pit, so the lowest surface. From this level you count the height of all the layers upwards.
DGUVDie Deutsche Gesetzliche Unfallversicherung, die die Sicherheitsregeln für Arbeit aufschreibt. Ihre Regeln zu Gruben und Absturz gelten auch für Helfer auf dem eigenen Grundstück.
DGUV (Deutsche Gesetzliche Unfallversicherung, the German statutory accident insurance body)The Deutsche Gesetzliche Unfallversicherung, which writes down the safety rules for work. Its rules on pits and on falling apply to helpers on your own land as well.
DIN EN 1177Die Norm für den Boden unter Spielgeräten. Sie legt fest, wie dick Rindenmulch oder Sand sein muss, damit ein Sturz aus einer bestimmten Höhe glimpflich ausgeht.
DIN EN 1177 (the standard for impact absorbing ground under play equipment)The standard for the ground under play equipment. It lays down how thick bark mulch or sand has to be, so that a fall from a given height ends lightly.
DWA-A 262Das Regelwerk für Pflanzenkläranlagen. Danach rechnet ein Ingenieurbüro aus, wie groß euer Filterbeet sein muss.
DWA-A 262 (the German code of practice for reed bed treatment plants)The set of rules for reed bed treatment plants. An engineering office works out from it how large your filter bed has to be.
EinwohnerwertDie Rechengröße für Abwasser, ein Einwohnerwert entspricht dem Schmutz eines Menschen an einem Tag. Eine Anlage für zehn Einwohnerwerte reicht für zehn dauerhaft anwesende Personen.
Einwohnerwert (population equivalent, the design unit for waste water)The calculation unit for waste water, where one population equivalent is the dirt of one person in one day. A plant for ten population equivalents is enough for ten people living there permanently.
verfahrensfreiEin Bauvorhaben, für das du keinen Bauantrag stellen musst. Alle anderen Regeln zu Abstand, Naturschutz und Brandschutz gelten trotzdem weiter.
verfahrensfrei (exempt from a building application)A building project that you do not have to submit a building application for. All the other rules on distance to the boundary, on nature protection and on fire safety still apply.
FI-SchutzschalterEin Schalter im Sicherungskasten, der den Strom in Sekundenbruchteilen abschaltet, sobald er einen falschen Weg nimmt, zum Beispiel durch einen Menschen. In Werkstatt und Außenbereich ist er Pflicht.
FI-Schutzschalter (a residual current device, an RCD)A switch in the fuse box that cuts the power within a fraction of a second, as soon as it takes a wrong path, through a person for example. In a workshop and outdoors it is required.
EPAL und Stempel HTDer ovale Stempel seitlich auf dem Eckklotz einer Europalette. HT heißt mit Hitze behandelt und damit unbedenklich, MB stünde für eine Begasung mit Chemie und gehört nicht ins Haus.Im Baumarkt: Nach Europaletten mit HT-Stempel fragen, Getränkemärkte und Baustoffhändler geben oft welche ab.
EPAL und Stempel HT (the EPAL mark and the HT stamp on a pallet)The oval stamp on the side of the corner block of a Euro pallet. HT means heat treated and therefore harmless, while MB would stand for fumigation with chemicals and has no place indoors.At the hardware store: ask for Euro pallets with the HT stamp. Drinks shops and builders merchants often give some away.
Gärtopf und GärspundEin Gärtopf ist ein Steinzeugtopf mit einer Wasserrinne im Deckelrand, ein Gärspund ist ein kleiner Wasserverschluss zum Aufstecken auf ein Glas. Beide lassen das Gas der Gärung heraus und keine Luft herein.
Gärtopf und Gärspund (fermentation crock and airlock)A Gärtopf is a stoneware crock with a water channel in the rim of the lid, and a Gärspund is a small water trap that pushes onto the top of a jar. Both let the gas of fermentation out and no air in.
Spannschiene mit FederdrahtEine Aluminiumschiene mit einem Schlitz und dazu ein gewellter Draht. Du legst die Folie über die Schiene und drückst den Draht hinein, dann sitzt die Folie bombenfest und reißt nicht aus.Im Baumarkt: Spannschiene mit Federdraht, wird nach Metern verkauft, im Gewächshausbedarf.
Spannschiene mit Federdraht (film fixing channel with a spring wire)An aluminium channel with a slot, and a wavy wire to go with it. You lay the film over the channel and press the wire in, and then the film sits rock solid and does not tear out.At the hardware store: film fixing channel with spring wire, sold by the metre, at a greenhouse supplier.
FolienflanschEin zweiteiliger Ring, mit dem ein Rohr dicht durch eine Folie geführt wird. Die Folie wird zwischen die beiden Hälften geklemmt und mit einem Kranz Schrauben zusammengepresst.
Folienflansch (a liner flange for taking a pipe through sheeting)A ring in two halves that takes a pipe through a liner without a leak. The liner is clamped between the two halves and pressed together with a ring of screws.
SchlämmkornDie allerfeinsten Teilchen im Kies, feiner als Sand und praktisch Staub. Für ein Filterbeet wird der Kies gewaschen geliefert, weil dieser Staub sonst die Zwischenräume zusetzt und kein Wasser mehr durchläuft.Im Baumarkt: Gewaschenen Filterkies 2/8 bestellen und dabei ausdrücklich gewaschen sagen.
Schlämmkorn (the finest silt fraction in gravel)The very finest particles in gravel, finer than sand and effectively dust. For a filter bed the gravel comes washed, because otherwise this dust clogs the gaps and no more water runs through.At the hardware store: order washed filter gravel 2/8 and say the word washed out loud.
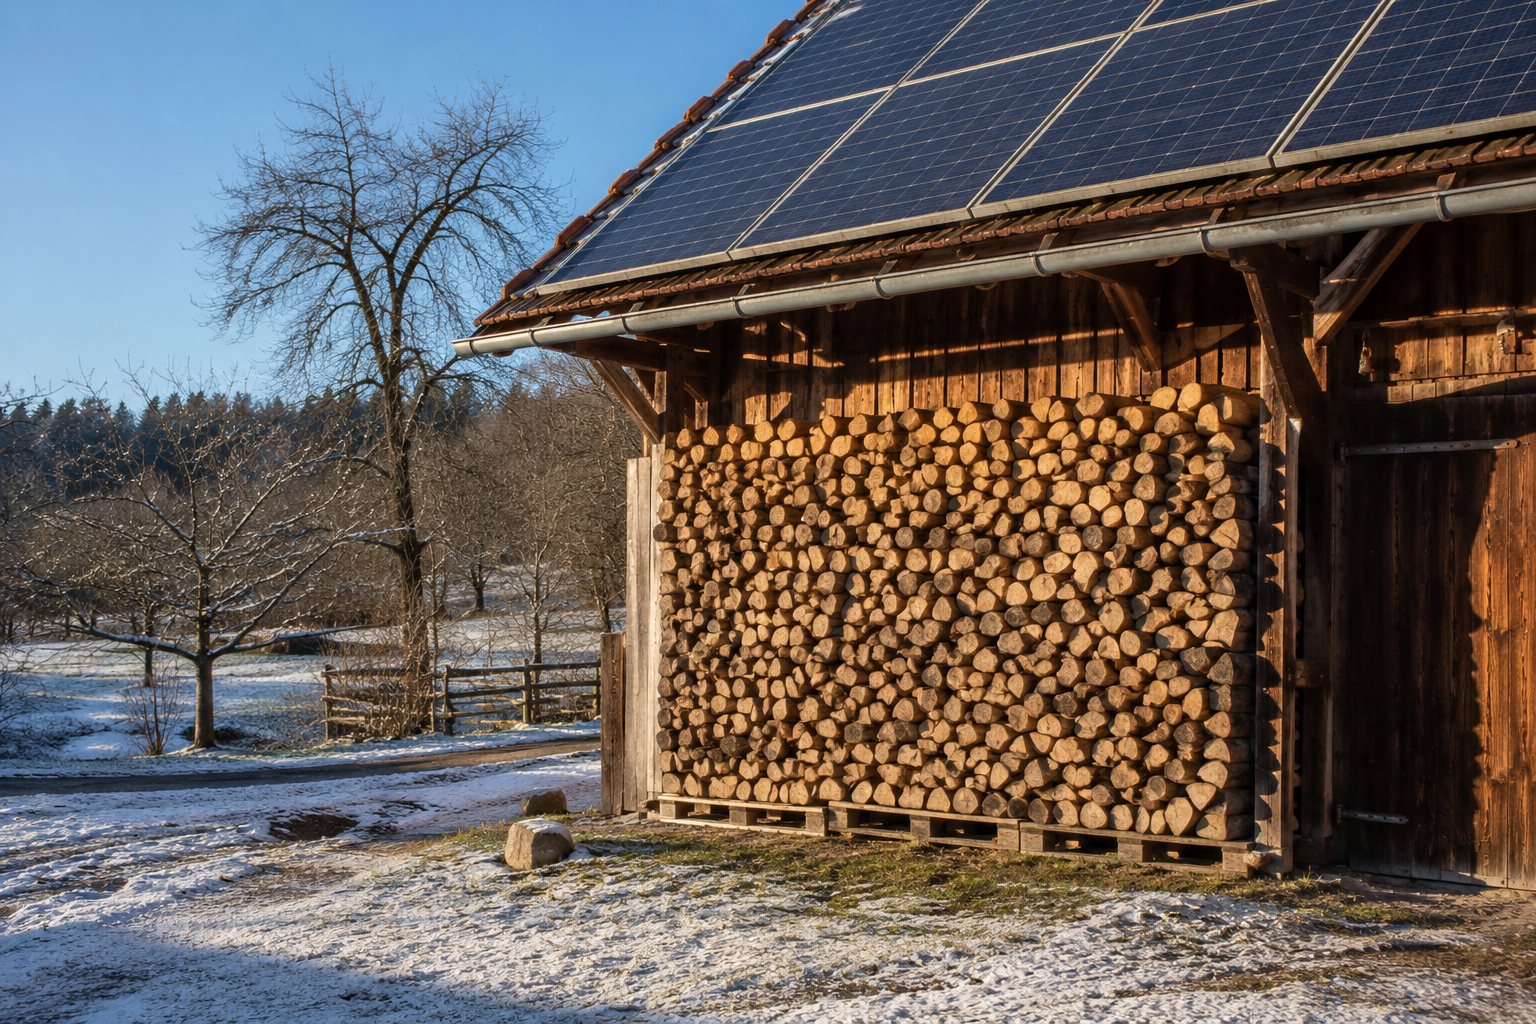
Womit ihr anfangt, die erste WerkzeugkisteWhat to start with, your first tool kitWhat to start with, your first tool kit

Werbung. Die Produktlinks in diesem Abschnitt sind Partnerlinks zu Amazon. Kaufst du darüber, bekommt diese Seite eine kleine Provision, für dich bleibt der Preis gleich. Als Amazon-Partner verdiene ich an qualifizierten Verkäufen. Verlinkt ist jeweils ein Gerät, mit dem man gut arbeiten kann, keine Kaufempfehlung im Sinne eines Tests. Die aktuellen Preise stehen bei Amazon, die Spannen hier sind eigene Schätzungen. Falls ein Modell ausläuft, führt der Zusatzlink zu vergleichbaren Geräten.

Advertising. The product links in this section are affiliate links to Amazon. If you buy through them, this site gets a small commission, and the price stays the same for you. As an Amazon Associate I earn from qualifying purchases. What is linked is a tool you can work with well, not a buying recommendation in the sense of a test. The current prices are at Amazon, and the ranges here are estimates of my own. If a model is discontinued, the extra link leads to comparable tools.

Zuerst, rund 300 EuroStart here, around 300 euros

Akkuschrauber 18 Volt mit zwei Akkus und einem Satz Bits80 bis 110 Euro, gebraucht in 28 von 61 Anleitungen
Cordless drill driver, 18 volt, with two batteries and a set of bits80 to 110 euros, used in 28 of 61 guides
Bei Amazon:At Amazon: Bosch EasyDrill 18V-40, 2 Akkus · Bosch Bit-Satz, 43 Teile · weitere Modellemore models
Wasserwaage 60 cm und 120 cm25 Euro, gebraucht in 39 von 61 Anleitungen
Spirit levels of 60 cm and 120 cm25 euros, used in 39 of 61 guides
Bei Amazon:At Amazon: Stabila 60 cm, Type 80 AS-2 · Stabila 120 cm, Type 70 · weitere Modellemore models
Spaten und Schaufel40 Euro, gebraucht in 28 von 61 Anleitungen
Spade and shovel40 euros, used in 28 of 61 guides
Bei Amazon:At Amazon: Fiskars Gartenspaten, spitz · Fiskars Schaufel, 23,5 cm · weitere Modellemore models
Schubkarre 100 Liter mit Luftrad55 Euro, gebraucht in 22 von 61 Anleitungen
Wheelbarrow, 100 litres, with a pneumatic wheel55 euros, used in 22 of 61 guides
Bei Amazon:At Amazon: Schubkarre 100 l, 250 kg · weitere Modellemore models
Zollstock und Maßband 30 m15 Euro, gebraucht in 18 von 61 Anleitungen
Folding rule and a 30 m tape measure15 euros, used in 18 of 61 guides
Bei Amazon:At Amazon: Stanley Gliedermaßstab, 2 m · Rollbandmaß 30 m, Glasfaser · weitere Modellemore models
Maurerschnur 50 m mit Holzpflöcken10 Euro, gebraucht in 15 von 61 Anleitungen
Builders line, 50 m, with wooden pegs10 euros, used in 15 of 61 guides
Bei Amazon:At Amazon: Maurerschnur 50 m · Holzpflöcke, 15 Stück, 40 cm · weitere Modellemore models
Handsäge, dazu Arbeitshandschuhe und Schutzbrille40 Euro, gebraucht in 16 von 61 Anleitungen
Hand saw, plus work gloves and safety glasses40 euros, used in 16 of 61 guides
Bei Amazon:At Amazon: Bahco Handsäge Superior · Leder-Arbeitshandschuhe, 4 Paar · Uvex Schutzbrille i-Works · weitere Modellemore models

Wenn ihr weitermacht, rund 800 EuroIf you carry on, around 800 euros

Handkreissäge mit Führungsschiene150 bis 200 Euro, gebraucht in 14 von 61 Anleitungen
Circular saw with a guide rail150 to 200 euros, used in 14 of 61 guides
Bei Amazon:At Amazon: Bosch GKS 190 · Bosch Führungsschiene FSN RA · weitere Modellemore models
Bohrhammer mit Steinbohrern von 6 bis 12 mm100 bis 110 Euro, gebraucht in 15 von 61 Anleitungen
Rotary hammer with masonry bits from 6 to 12 mm100 to 110 euros, used in 15 of 61 guides
Bei Amazon:At Amazon: Bosch GBH 2-21, SDS plus · SDS-plus Bohrer-Satz, 5 bis 12 mm · weitere Modellemore models
Stichsäge mit Blättern für Holz60 bis 70 Euro, gebraucht in 7 von 61 Anleitungen
Jigsaw with blades for wood60 to 70 euros, used in 7 of 61 guides
Bei Amazon:At Amazon: Bosch PST 650 · Stichsägeblätter für Holz, Satz · weitere Modellemore models
Vorschlaghammer 5 kg und Fäustel 1 kg40 bis 45 Euro, gebraucht in 10 von 61 Anleitungen
Sledgehammer of 5 kg and a club hammer of 1 kg40 to 45 euros, used in 10 of 61 guides
Bei Amazon:At Amazon: Vorschlaghammer, Fiberglasstiel · Fäustel 1 kg, Fiberglasstiel · weitere Modellemore models
Wasserwaage 200 cm40 bis 45 Euro, gebraucht in 10 von 61 Anleitungen
Spirit level, 200 cm40 to 45 euros, used in 10 of 61 guides
Bei Amazon:At Amazon: Wasserwaage 200 cm, Alu · weitere Modellemore models
Ratschenkasten mit Nüssen 8 bis 22 mm und zwei Rohrzangen90 bis 100 Euro, gebraucht in 12 von 61 Anleitungen
Ratchet set with sockets from 8 to 22 mm and two pipe wrenches90 to 100 euros, used in 12 of 61 guides
Bei Amazon:At Amazon: KS Tools Steckschlüsselsatz · Wasserpumpenzangen, Satz · weitere Modellemore models
Kappsäge und vier Schraubzwingen180 bis 200 Euro, gebraucht in 5 von 61 Anleitungen
Mitre saw and four clamps180 to 200 euros, used in 5 of 61 guides
Bei Amazon:At Amazon: Einhell Zug-Kapp-Gehrungssäge · Schraubzwingen, 4 Stück · weitere Modellemore models

Besser leihen als kaufenBetter hired than bought

Diese Geräte stehen bewusst ohne Kauflink. Ihr braucht sie an ein oder zwei Tagen, und Leihen kostet einen Bruchteil. Baumarkt, Maschinenring oder der Nachbar mit Hof.These machines are deliberately listed without a link to buy. You need them on one or two days, and hiring costs a fraction of the price. Ask at the DIY store, at the Maschinenring (a regional co-operative that shares farm machinery) or at the neighbour with a farmyard.

RüttelplatteKommt in sieben Anleitungen vor, kostet etwa 45 Euro am Tag, wiegt 60 bis 100 Kilo und passt in keinen Kofferraum.
Plate compactorIt turns up in seven guides, costs about 45 euros a day, weighs 60 to 100 kilos and fits in no car boot.
Minibagger 5 Tonnen mit Anhänger200 bis 350 Euro am Tag plus Transport, ihr braucht ihn an zwei Tagen im Jahr, und Abstellplatz und Wartung hat niemand.
Mini excavator of 5 tonnes with a trailer200 to 350 euros a day plus transport. You need it on two days in the year, and nobody has the space to park it or the time to service it.
Betonmischer 140 Liter40 bis 60 Euro am Tag, danach steht er zwei Jahre in der Ecke und rostet fest.
Concrete mixer, 140 litres40 to 60 euros a day, and after that it stands in the corner for two years and rusts solid.
Rotationslaser mit Empfänger25 bis 40 Euro am Tag statt ab 400 Euro Kauf, gebraucht wird er nur beim Abstecken großer Flächen.
Rotating laser with a receiver25 to 40 euros a day instead of 400 euros and up to buy, and it is only wanted when you set out a large area.
Gerüst mit AuffanggurtWird mit Aufbauplan geliefert, lagert im eigenen Bestand schlecht und ist ohne Einweisung gefährlich.
Scaffolding with a safety harnessIt comes with an assembly plan, it stores badly in your own shed, and without instruction it is dangerous.
Motorsäge mit Schnittschutzhose und HelmHolt euch lieber jemanden mit Motorsägenschein, die Schutzausrüstung allein kostet 300 Euro und die Übung fehlt trotzdem.
Chainsaw with cut-protection trousers and helmetBetter to fetch somebody who holds a Motorsägenschein (the German chainsaw certificate). The protective kit alone costs 300 euros, and the practice is still missing.
Kernbohrer 150 bis 160 mm50 bis 80 Euro am Tag, für zwei Löcher im ganzen Leben lohnt der Kauf nie.
Core drill, 150 to 160 mm50 to 80 euros a day, and for two holes in a whole lifetime buying never pays.
Anhänger 750 kg20 bis 40 Euro am Tag im Baumarkt, denn eine Tonne Schotter oder eine Baustahlmatte von 5 Metern geht in keinen Pkw.
Trailer, 750 kg20 to 40 euros a day at the DIY store, because a tonne of crushed stone or a steel reinforcing mesh of 5 metres goes in no car.

Bitte lies das einmal.Please read this once. Diese Anleitungen sind nach bestem Wissen zusammengetragen und ersetzen weder eine Planung noch eine Fachfirma. Bauordnung, Wasserrecht und Naturschutz sind in jedem Bundesland und oft in jeder Gemeinde anders geregelt, und sie ändern sich. Frag vor dem ersten Spatenstich bei deiner Bauaufsicht, deiner unteren Wasserbehörde oder deinem Bezirksschornsteinfeger nach, was bei dir gilt. AllesAll, was mit Statik, Feuer, Strom oder Trinkwasser zu tun hat, gehört in die Hände von Menschen, die dafür ausgebildet sind. Wir übernehmen keine Haftung für Schäden, die beim Nachbauen entstehen.These guides have been put together to the best of our knowledge, and they replace neither proper planning nor a specialist firm. Building law, water law and nature protection are regulated differently in every federal state and often in every municipality, and they change. Before the first spade goes into the ground, ask your Bauaufsicht (the local building control office), your untere Wasserbehörde (the lower water authority of your district) or your Bezirksschornsteinfeger (the district chimney sweep) what applies where you live. Everything to do with structure, fire, electricity or drinking water belongs in the hands of people who are trained for it. We accept no liability for damage that arises when you build these projects.

Please read this once. These guides have been put together to the best of our knowledge, and they replace neither proper planning nor a specialist firm. Building law, water law and nature protection are regulated differently in every federal state and often in every municipality, and they change. Before the first spade goes into the ground, ask your Bauaufsicht (the local building control office), your untere Wasserbehörde (the lower water authority of your district) or your Bezirksschornsteinfeger (the district chimney sweep) what applies where you live. Everything to do with structure, fire, electricity or drinking water belongs in the hands of people who are trained for it. We accept no liability for damage that arises when you build these projects.